MichaelD16
New member
- May 14, 2013
- 18
- 0
- Thread starter
- #21
Michael,
When you have some time, click the link below and read through the thread, don't scan through it, as I share the techniques for using your hand/fingers to remove scratches out of small areas in confined areas. Not sure if this will apply to your situation but the information is strewn throughout the thread.
How to Remove Hair line scratches on Wood Trim?
And here are the before and after pictures showing what can be done using the right techniques...
Burled Walnut after Scratch X 2.0:
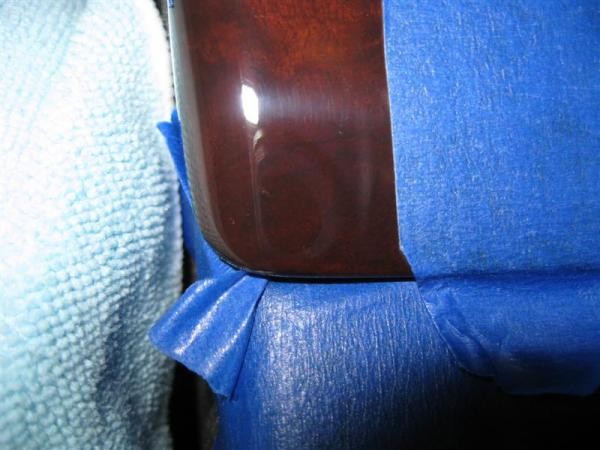
After M205 50/50
reflection

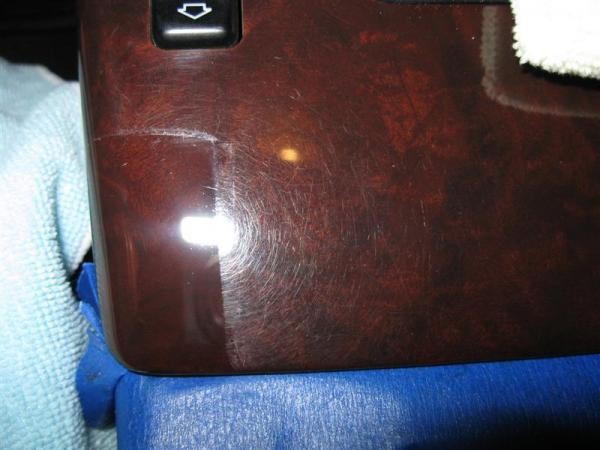
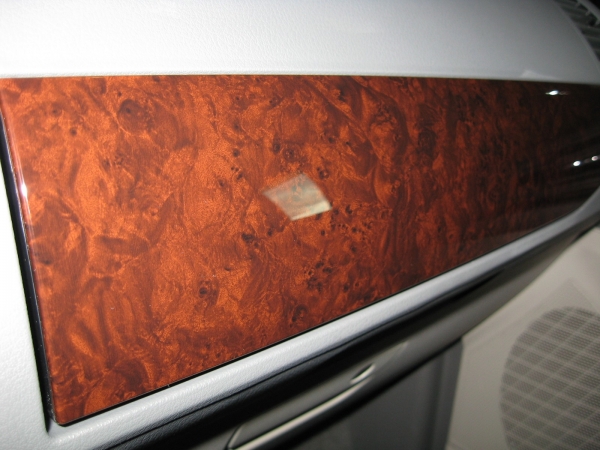
Second type of wood trim, simulated wood.
Before
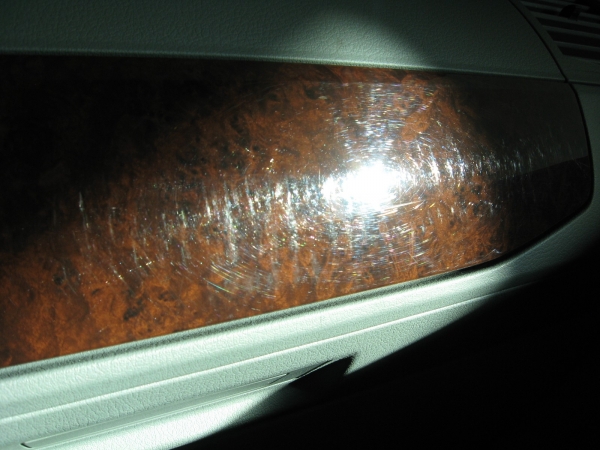
After Scratch X 2.0
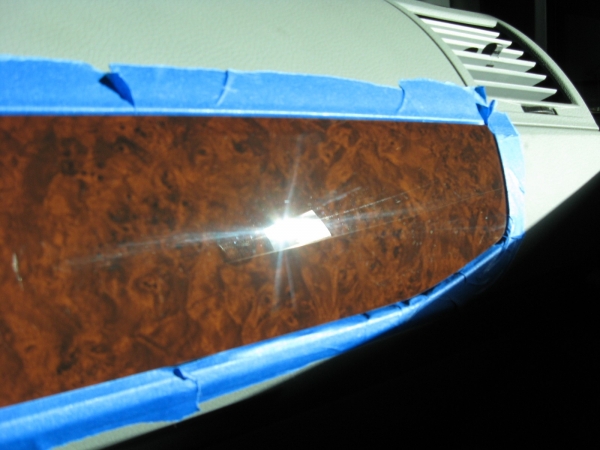
After M205 and M21
The forum member that did this is named WestEnd, not sure if I've seen him online in a while. I think the above pictures were originally hosted on either PhotoPost or some other picture hosting site and because they were too good and too important to the thread, I personally downloaded them from wherever they were at and placed them on the Autogeek Gallery to insure they would always show up instead of red-x's.
I don't know that they would have disappeared but when people do delete their pictures on cheapie and free image hosting sites to make room for new pictures it takes all the value out of a thread like the one above.
I can't encourage people enough to learn how to take advantage of their free gallery here. As long as AG is in business your pictures will show up here and anywhere else on the Internet and it won't cost you anything.
If you're going to be a "Forum Person" on ANY forum, help yourself by learning how to work with picture on the Internet
Photobucket and Missing Pictures
")
Mike, read through the thread you just posted and it's loaded with great info. A few things I took from it...definitely need to work on technique, I was not applying nearly enough pressure and my hand motions were way too slow. I was also applying the product using a terry cloth towel which I'm assuming is not abrasive enough, I'll pick up a cutting pad later this afternoon. There will definitely be some passion behind the pad later the next time I work on this project.
Really happy I joined the forum as everyone has been extremely helpful...and patient with my inquiries. Thank you for making this noob feel very welcome.
The Sport wheels are arguably one of the best looking wheels Honda has ever made for a front wheel drive vehicle. I want to get some as well, but they're about as much as the 19" HFP wheels, and more expensive than aftermarket wheels. Interestingly, the Canadian Accord Touring comes with the same wheels as the Sport, but painted a little differently. I also want to get the aero kit and the deck lid spoiler like the Sport has.
I'm actually using the CarPro denim pads to remove the orange peel on my Touring, BUT, I know the risks and I am willing to accept them because it bothers me. I have also invested in a paint thickness gauge. On your silver, the orange peel probably wouldn't bother me as much. I'll eventually write an article on the process, but it has just consumed a ton of time lately. It certainly isn't for the faint of heart, but the results so far are amazing!! Distinction of image is just off the chart!
I learned first-hand this past weekend that compound on a hand applicator is a powerful tool. Mike had a video about polishing curved areas, and in it he mentioned using a hand applicator for removing scratches behind the door handle. I tried this with some Menzerna FG 400 on my Dad's 2009 Accord, which had some of the worst fingernail scratches I'd ever seen, and they all came out! I couldn't believe my eyes!! That being said, it might be worth trying on your cup holder scratches.
I thought about the HFPs but I had bad luck with 19s driving in the city in the past...lots of blow outs. I'm there's stil a risk with the 18s but it is not as dramatic a jump as it would have been 17 to 19. The HFPs are very nice though...can't go wrong either way.
After looking at your before and after pictures I can now see that I too have orange peel issues. Not as apparent dealing with a silver car but now that I know what to look for I can definitely see it. No idea how to attack this and am worried I might make a mess of the whole car.
