Swirls marks - beginners question

pxc132

New member
Joined
Jul 27, 2013
Messages
7
Reaction score
0
Hi,

My name is Patrick and I looked on the internet for ways to remove scratches on my 2008 toyota tundra. Tried several things but in the end I saw a professional using 3m products so I went to a car parts store and bought 3m Super duty rubbing compound (05928) and finishing compound(05954). I`m usinf a Simoniz orbital polisher. I was able to remove quite big scratches on my blabk Tundra. Looks like new in the shades but in the sun you see swirl marks like crazy on the paint. What should I do now ? I saw a 3m product for removing swirl marks but I was wondering if my finishing compound should not have worked for that matter ? anyway I did many passes of rubbing and finishing compound and it always come back the same ... with lots of swirl marks ? what am I doing wrong ? did I burn the paint ? how would I know ? again the truck looks great in the shade ...

Thanks for your help
Patrick
Gatineau Quebec Canada
 
You need a DA polisher. What you're using is a wax spreader and all you're really doing is just rubbing compound around. Not really working it.

Also you should clay? Did you clay? It's a viral step before polishing.
 
Do you want yo tackle this yourself or have a Detailer correct the paint and you just maintain it from there?
 
You've got the right idea in wanting to make your truck look better, but it'll take a lot more than getting some compound. As another member said, you'll def want and probably need a DA polisher. There's a thread covering the most cost effective one to get, from Harbor Freight. There's many much better, but that's your budget option. Once you start doing this kind of correction work yourself, the dollars start adding up. FAST. On the same token, its exceptionally rewarding and relaxing (if you've got the patience). Do your homework on here, all the answers are available. You always want to start with the least aggressive approach and evaluate from there, so put the 3M compound on the shelf for now and see if there is an AutoGeek in your area. Unless of course you want to start spending the money like most of us have! My saving grace was a local Meguiar's store that sells their professional and detailer lines. That allowed me to get more, or less aggressive products almost immediately instead of having to wait on shipping. I don't say any of this to discourage, because I think the world needs more guys like us, but it does add up quick and can be very frustrating when you think things will go one way and they end up another.
 
Can claying be skipped if you chemically dissolve contaminants using Trix/IronX?
No, it does help remove many contaminants beforehand, but it's not going to remove all embedded contaminants. I personally would IronX then clay.
 
Why would the da be better than the orbital after all the detailer i saw was using an orbital ? Would the 3m swirl remover be any help ? Money is not an object I'd like to do it myself, I have seral cars to do...
 
Why would the da be better than the orbital after all the detailer i saw was using an orbital ? Would the 3m swirl remover be any help ? Money is not an object I'd like to do it myself, I have seral cars to do...

Do you mean Rotary? It is a bad idea for a beginner to start off on a rotary- hence the recommendation for a DA. It takes time and practice to master a rotary and there is a learning curve. DA's, unless you drop the tool on your car you won't hurt your paint. And the new DA's like the Griot's Garage are pretty powerful and will allow you to correct the paint to a high degree with no risk. Which is the whole idea in the first place.

I'd recommend getting a DA and some decent products, (Pinnacle, Wolfgang, Chemical Guy's V-Series, M105/205) and some Lake Country or Hexlogic pads, and go from there. Also go to AG's YouTube Channel and watch some of Mike's vids on how to properly use the tools and products. Have fun and be sure to post your results!!:xyxthumbs:
 
Hi,

My name is Patrick and I looked on the internet for ways to remove scratches on my 2008 toyota tundra. Tried several things but in the end I saw a professional using 3m products so I went to a car parts store and bought 3m Super duty rubbing compound (05928) and finishing compound(05954).

I`m usinf a Simoniz orbital polisher. I was able to remove quite big scratches on my blabk Tundra.

Wrong tool for the job and wrong tool for the products you're using.


Looks like new in the shades but in the sun you see swirl marks like crazy on the paint.


Thanks for your help
Patrick
Gatineau Quebec Canada


3M makes great body shop compounds and polishes but if you look at the label for any of their Pro Line products they state they are all for use with rotary buffers. Nothing wrong with this but what I've seen is when you try to use abrasive technology targeted at one direction, direct drive rotating tools they tend not to work as well with dual action polishers.


Take a moment and read the directions on the label for the 3M products, I'm pretty confident they will say for use with a rotary buffer.


You need to get a dual action polisher, some quality foam pads and some quality polishes that will remove swirls without leaving swirls behind.


Watch this video, it's very complete and thorough and will show you what you want to do...


How to remove shallow RIDS and how to machine
apply both a paint sealant and a finishing wax
[video=youtube_share;3xJH_MGgbLw&hd=1"]How to remove shallow RIDS and how to machine...[/video]​


This how-to video also covers,

  • RIDS - Random Isolated Deeper Scratches
  • Removing watches and any jewelery
  • Using a DA Polisher without the handle
  • Placing cord over shoulder
  • Priming the pad on a DA Polisher
  • Speed settings for removing isolated defects
  • Downward pressure needed for removing isolated defects
  • How to clean a pad on the fly
  • Where and why to mark your backing plate with a black mark
  • Rotating the body of the tool to keep the pad flat to a panel
  • Why to allow the pad to stop spinning before lifting the pad off the paint
  • How to swap backing plates from a 3.5" to a 5"
  • Machine waxing using 5.5" Hydro-Tech Crimson Finishing pads with Menzerna Power Lock
  • The "Kissing the Finish" Technique
  • How to do the Swipe Test to check if a wax or paint sealant is dry
  • How to remove dried paint sealant using a microfiber bonnet on a dry pad on a DA Polisher
  • How to clean a microfiber bonnet on the fly with your fingernails
  • How to apply a paste wax by machine - Souveran Paste Wax
  • How to carefully wipe a WOWO wax off by hand using Microfiber Gloves and plush Microfiber Towels
  • How and why to fold a microfiber towel 4-ways to wipe wax off
  • How to break-open a coat of wax and then creep out to carefully wipe off a coating of wax
  • How to do the "Final Wipe"
:xyxthumbs:


:)
 
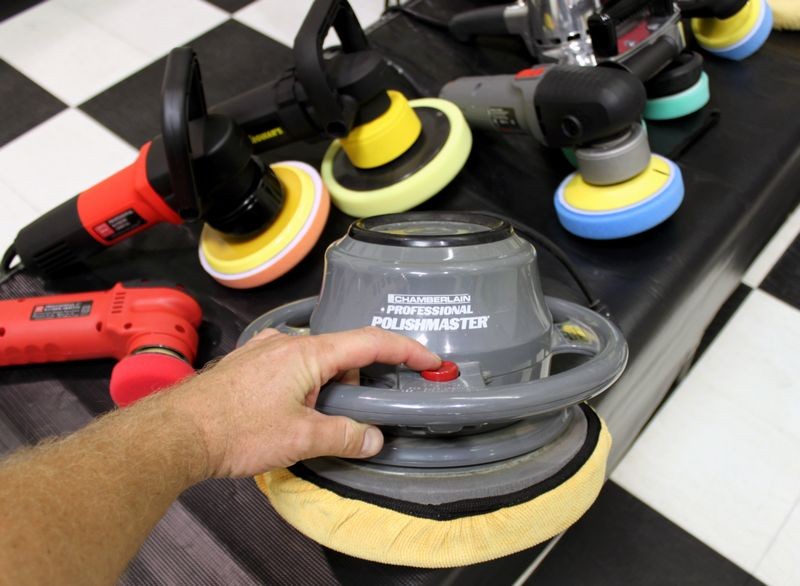
By the way, the polisher you're using is pretty much only good for spreading out wax on a car that already has great paint.

See this article,


The Traditional Orbital Buffer aka The Wax Spreader

Copyright ©PBMA - AutogeekOnline.net® All Rights Reserved


WaxSpreader02.jpg


:)
 
Thanks for your advice, really appreciate it. I will buy a DA online tonight. I already bought the ebook The Art of detailing last night...

I hope I'll get the proper technique eventually. :xyxthumbs:
 
Thanks for your advice, really appreciate it. I will buy a DA online tonight. I already bought the ebook The Art of detailing last night...

I hope I'll get the proper technique eventually. :xyxthumbs:

If there were a God of Detailing, Mike would be him. Between him and Larry Kosilla, not only has my passion for detailing been reignited, I've learned a ton along he way. If you watch their vids and mimic their technique and example you will have no problem fixing your paint.
 
Thanks for your advice, really appreciate it. I will buy a DA online tonight. I already bought the ebook The Art of detailing last night...

I hope I'll get the proper technique eventually.


You'll get it, with the plethora of videos out there now days and all the help you get on forums like this one.

It's really pretty easy, years ago I wrote a troubleshooting guide that lists the most common mistakes or problems when using a dual action polisher and then shares the remedy for each one. I always recommend people new to the Porter Cable style dual action polisher to read the troubleshooting guide FIRST as it's also a guide on how to use the tool correctly. Kind of a dual purpose article. This is also in my how-to book both the paperback and the e-book.


DA Polisher Trouble Shooting Guide


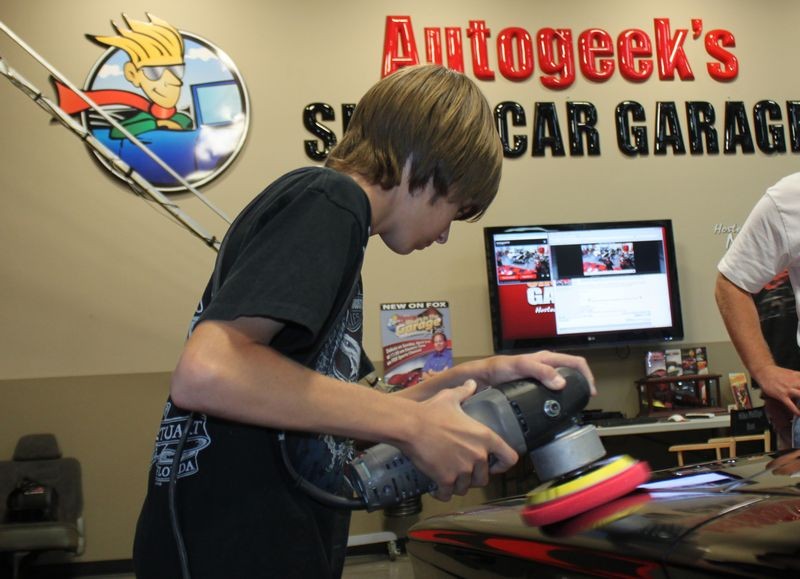
Tyler, age 15 removing swirls using a Porter Cable 7424XP Dual Action Polisher
1965Plymouth035.jpg


When you're first starting out machine polishing and learning to use a DA Polisher it's common to have questions about your results and your results are directly tied to your technique.

Here's a list of the most common problems,
1. Trying to work too large of an area at one time.

2. Moving the polisher too fast over the surface.

3. Using too low of speed setting for removing swirls.

4. Using too little downward pressure on the head of the polisher.

5. Using too much downward pressure on the head of the polisher so the pad quits rotating.

6. Not holding the polisher in a way to keep the pad flat while working your compound or polish.

7. Using too much product or using too little product.

8. Not cleaning the pad often enough.
Here's a list of the solutions in matching order,

1. Trying to work too large of an area at one time.
Shrink the size of your work area down. You can't tackle to large of an area at one time. The average size work area should be around 20" by 20". Most generic recommendations say to work an area 2' by 2' but for the correction step, that's too large. You have to do some experimenting, (called a Test Spot), to find out how easy or how hard the defects are coming out of your car's paint system and then adjust your work area to the results of your Test Spot. The harder the paint the smaller the area you want to work.


2. Moving the polisher too fast over the surface.
For removing defects out of the paint you want to use what we call a Slow Arm Speed. It's easy and actually natural for most people new to machine polishing to move the polisher quickly over the paint but that's the wrong technique. One reason I think people move the polisher too quickly over the paint is because they hear the sound of the motor spinning fast and this has psychological effect which causes them to match their arm movement to the perceived fast speed of the polisher's motor.

Another reason people move the polisher too quickly over the paint is because they think like this,

"If I move the polisher quickly, I'll get done faster"

But it doesn't work that way. Anytime you're trying to remove swirls, scratches, water spots or oxidation using a DA Polisher you need to move the polisher s-l-o-w-l-y over the paint.


3. Using too low of speed setting for removing swirls.
When first starting out many people are scared of burning or swirling their paint, so they take the safe route of running the polisher at too low of a speed setting but this won't work. The action of the polisher is already g-e-n-t-l-e, you need the speed and specifically the pad oscillating and rotating over the paint as well as the combination of time, (slow arm speed), together with the abrasives, the pad aggressiveness, and the downward pressure to remove small particles of paint which is how your remove below surface defects like swirls or scratches.

Removing below surface defects is a leveling process where you need the abrasives to take little bites out of the paint and to get the abrasives to take these little bites with a tool that uses a Free Floating Spindle Bearing Assembly you need all of the above factors working for you including a high speed setting.


4. Using too little downward pressure on the head of the polisher.
For the same reason as stated in #3, people are scared, or perhaps a better word is apprehensive, to apply too much downward pressure to the polisher and the result of too little pressure is no paint is removed thus no swirls are removed.


5. Using too much downward pressure on the head of the polisher so the pad quits rotating.
If you push too hard you will slow down the rotating movement of the pad and the abrasives won't be effectively worked against the paint. You need to apply firm pressure to engage the abrasives against the paint but no so much that the pad is barely rotating. This is where it's a good idea to use a permanent black marker to make a mark on the back of your backing plate so your eyes can easily see if the pad is rotating or not and this will help you to adjust your downward pressure accordingly.

Correct technique means finding a balance of applying enough downward pressure to remove defects but not too much downward pressure as to stop the rotating movement of the pad.

This balance is affected by a lot of factors like the lubricity of the product you're using, some compounds and polishes provide more lubrication than others and this makes it easier to maintain pad rotation under pressure.

Another factor that can affect pad rotation are raised body lines, edges and curved surfaces as anytime you have uneven pressure on just a portion of the face of the pad it can slow or stop pad rotation. This is where experience comes into play and experience comes from time spent behind the polisher.


6. Not holding the polisher in a way to keep the pad flat while working your compound or polish.
Applying pressure in such a way as to put too much pressure to one edge of the pad will cause it to stop rotating and thus decrease abrading ability.


7. Using too much product or using too little product.
Too much product hyper-lubricates the surface and the result is that abrasives won't effectively bite into the paint but instead will tend to skim over the surface. Overusing product will also accelerate pad saturation as well increase the potential for slinging splatter onto adjacent panels.

Too little product will means too little lubrication and this can interfere with pad rotation.

Again there needs to be a balance between too much product and too little product and finding this balance comes from reading articles like this one, watching videos an most important, going out into the garage and putting in time behind the polisher and as you're buffing with specific product and pad combinations, pay attention to pad rotation.


8. Not cleaning the pad often enough.
Most people simply don't clean their pad often enough to maximize the effectiveness of their DA Polisher. Anytime you're abrading the paint you have two things building up on the face of your buffing pad,
  • Removed paint
  • Spent product
As these to things build up on the face of the pad they become gummy and this has a negative affect on pad rotating plus makes wiping the leftover residue on the paint more difficult. To maintain good pad rotation you want to clean your pad often and always wipe-off any leftover product residue off the paint after working a section. Never add fresh product to your pad and work a section that still has leftover product residue on it.


Pad Cleaning Articles

Why it's important to clean your pads often...

How to clean your foam pad on the fly

How to use the Grit Guard Universal Pad Washer


Tyler, age 15 machine applying a paste wax using a Porter Cable 7424XP Dual Action Polisher

1965Plymouth067.jpg


1965Plymouth071.jpg


:)
 
If there were a God of Detailing, Mike would be him. Between him and Larry Kosilla, not only has my passion for detailing been reignited, I've learned a ton along he way. If you watch their vids and mimic their technique and example you will have no problem fixing your paint.


Wow Bruce... that's a really nice compliment and thank you but I'm real uncomfortable with compliments like that...

I'm really a blue collar, working class dog like most people in the world and I've always been a car guy, I can thank my dad for that. I actually like wrenching on cars, that is the nuts and bolts side, like going from this...

Project78PavementPounder032.jpg


To this....

Project78PavementPounder044.jpg


To this....

Project78PavementPounder048.JPG


I trust my work and historically, once I rebuild something I don't have to rebuild it again unless it wears out naturally.


Besides doing my own wrenching, I have two passions in the car world...


  • I like to make cars shiny
  • I like to show others how to make cars shiny

I take the above and mix it with this...


"You can have everything in life that you want if you will just help enough other people get what they want"

-Zig Ziglar


And each day I wake up and I'm breathing I try to help as many people as I can.


Thank you for the compliment though and I've met Larry a few times, once at SEMA and he sat through all my classes at last years Mobil Tech Expo and took veracious notes, reminds me of me as I'm a veracious note taker too.


:)
 
Totally off topic...Mike what is that on the trailer brakes? Leftover Mt Saint Helen's ash?

Bill
 
Wow Bruce... that's a really nice compliment and thank you but I'm real uncomfortable with compliments like that...

I'm really a blue collar, working class dog like most people in the world and I've always been a car guy, I can thank my dad for that. I actually like wrenching on cars, that is the nuts and bolts side, like going from this...

Project78PavementPounder032.jpg


To this....

Project78PavementPounder044.jpg


To this....

Project78PavementPounder048.JPG


I trust my work and historically, once I rebuild something I don't have to rebuild it again unless it wears out naturally.


Besides doing my own wrenching, I have two passions in the car world...


  • I like to make cars shiny
  • I like to show others how to make cars shiny

I take the above and mix it with this...


"You can have everything in life that you want if you will just help enough other people get what they want"

-Zig Ziglar


And each day I wake up and I'm breathing I try to help as many people as I can.


Thank you for the compliment though and I've met Larry a few times, once at SEMA and he sat through all my classes at last years Mobil Tech Expo and took veracious notes, reminds me of me as I'm a veracious note taker too.


:)

My bride and I are actually in business together and we do the majority of wrenching on our cars too (she's a certified mechanic) blue collar all the way!! We are just so appreciative of your work ethic and the example you set. The way you explain things in your vids it's like you're talking to a friend. Makes it so easy to get things right. We have learned so much from you we've launched our business over here in Japan. We owe you a bunch. We will be back next spring and are hoping to attend detailsfest and boot camp next year. Can't wait to shake your hand:xyxthumbs:

Larry and I have corresponded pretty regularly- he's another one I can't wait to meet and shake his hand.

I can't think of 2 better mentors to have in the world of detailing.

Thanks for everything.

Sorry to threadjack OP. Just listen to Mike and you won't go wrong.
 
Back
Top