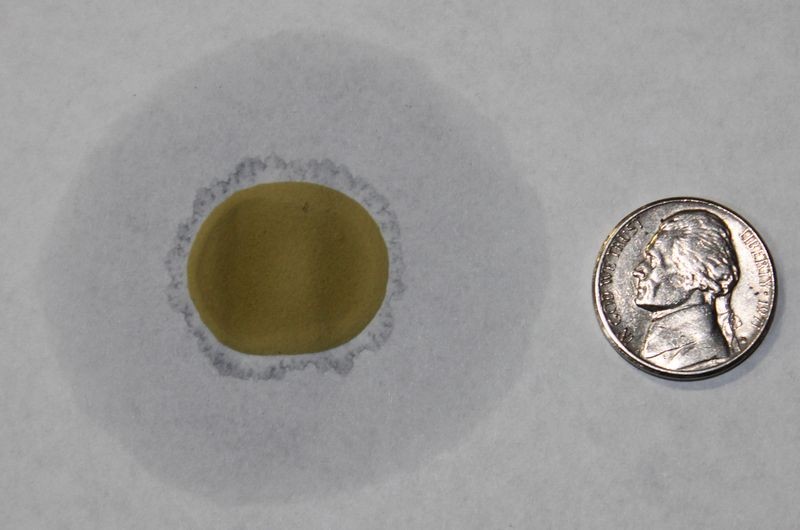
1968 Cadillac Original Paint Detailing Class - September 2020

  • Thread starter Thread starter Mike Phillips
  • Start date Start date
M

Mike Phillips

Guest
1968 Cadillac Original Paint Detailing Class - September 2020


After results

800_1968_Cadillac_054.JPG


We hold our BIG 3-day Detailing Bootcamp Class here at Autogeek 3 times a year.

  1. February
  2. May
  3. September


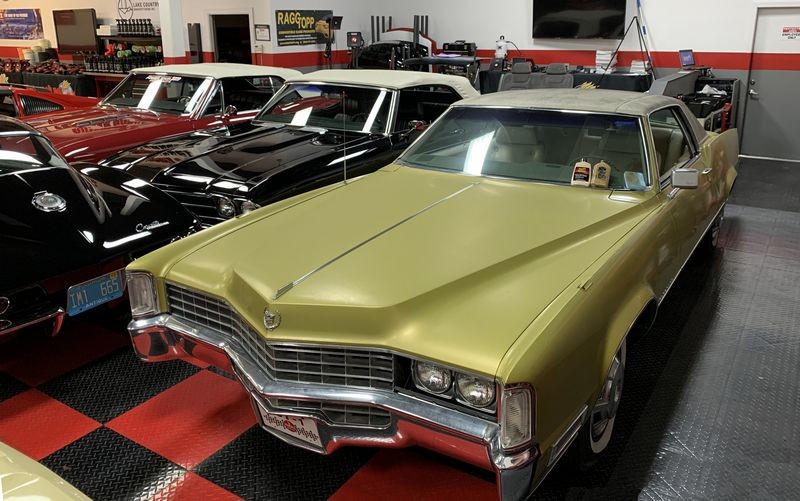
This last September we broke a number of class records, one of which, the class detailed 17 cars in 3 days. Two of the cars for this class had the original single stage paint, these were a 1968 Cadillac Eldorado and a 1974 Plymouth Duster. The Cadillac had been stored for decades and over time and from neglect, the paint turned dull and chalky with oxidation. So I used this car to teach a number of techniques that you simply won't get to learn at any other class.

1: The Comet Technique - for both the paint and to remove mold from the vinyl top.

2: The Number #7 Rub Down Technique

3: How to do high quality one-step Production Detailing


Here's the pictures from this ONE car out of the 17 detailed over the course of 3 days. The machine polishing portion took place on Saturday during the part of the class I call,

Free-for-All

Free-for-All is the point in the class where YOU have already used all of the other major tools. So for this portion of the class you can choose whichever tool you want to revisit or spend more time with - OR - you can use multiple tools. Previously, the class learns the dedicated brands and dedicated paint polishing systems, for example, The RUPES and Griot's tools and paint polishing systems. For Free-for-All, we use a high quality one-step cleaner/wax or AIO for the product and then each person can now spend more time with ANY of the tools used over the last day and a half. I find this a very effective way for each person to drill-down and really isolate the tools they like best.


First - Here's a short video I made when the car arrived, and then right before it left.

Watch the video on my Facebook Page

Watch the video on my Instagram Page


BEFORE

Here's a few pictures that show the condition of the paint before the class.
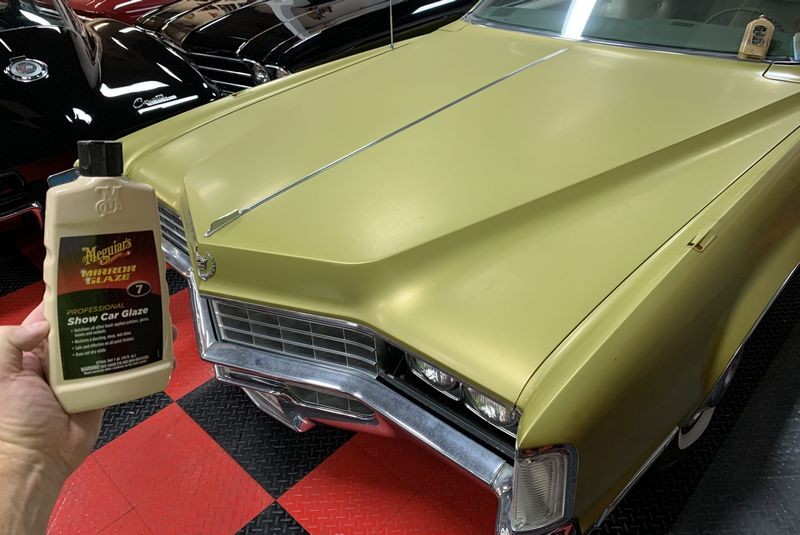

800_1968_Cadillac_000.JPG


Outside Sunlight

I took these of the paint on the trunk lid while the car was parked outside. There is ZERO reflection in the paint.
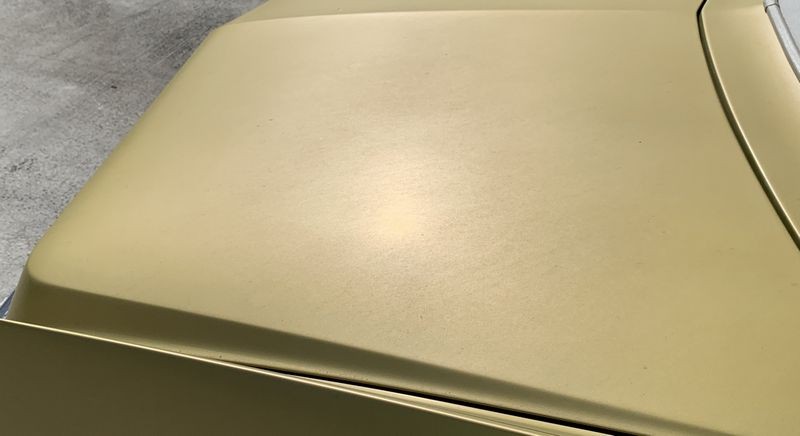
800_1968_Cadillac_001.JPG


800_1968_Cadillac_001c.JPG


The paint is so oxidized, it actually has TEXTURE
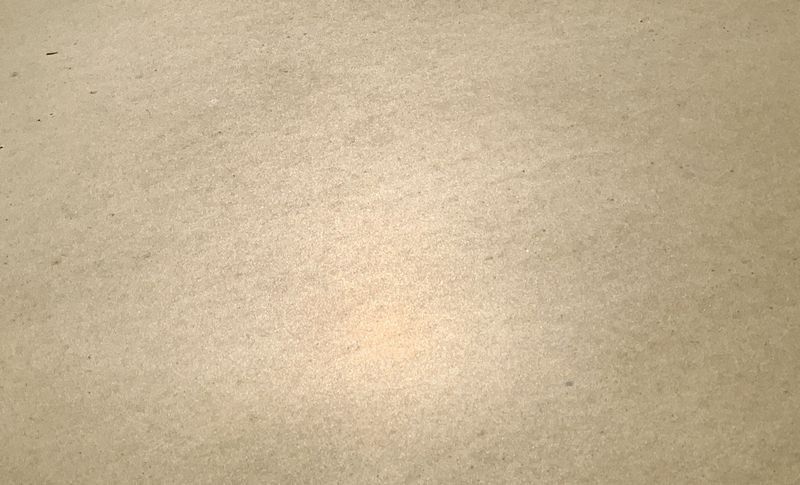
800_1968_Cadillac_002.JPG


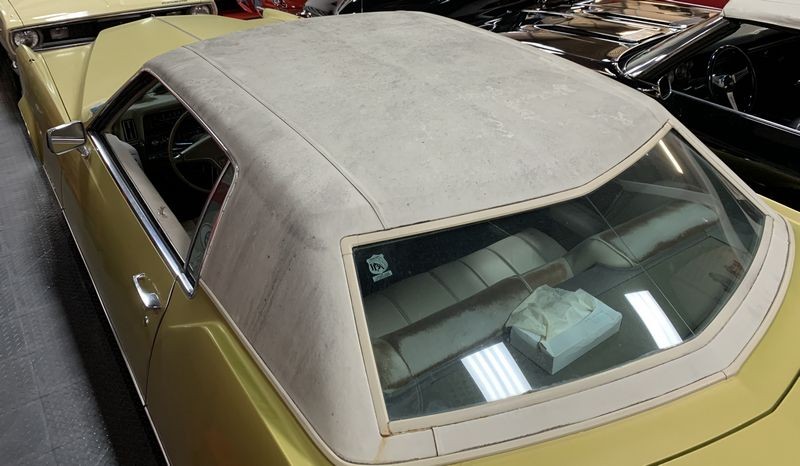
Mold and Mildew

The vinyl top was covered with mold and mildew. You can also see the 1974 Plymouth Duster in front of the Cadillac as well as more cars being parked and staged for the class.

800_1968_Cadillac_003.JPG


800_1968_Cadillac_003c.JPG


800_1968_Cadillac_004.JPG


800_1968_Cadillac_005.JPG


800_1968_Cadillac_006.JPG


800_1968_Cadillac_007.JPG


Zero Gloss - Zero Reflectivity

800_1968_Cadillac_008.JPG


800_1968_Cadillac_009.JPG


:)
 
Re: 1968 Cadillac Original Paint Detailing Class September 2020

Just to note....


I'm building or "writing" this thread in real-time.

So feel free to read and look at the pictures as it evolves but I've closed the thread until I'm done.

This means you cannot post to it for a few minutes.

questions and comments are welcome - but give me a few minutes to put it together.


:)
 
Re: 1968 Cadillac Original Paint Detailing Class September 2020

Continued...


The Comet Technique

First thing we need to wash the car. She's dirty after being stored for years. I'm taking this car or this opportunity to share the Comet Technique with this class. My guess is - this is the first and only formal car detailing class where this technique has ever been taught.

NOTE: It's very important that everyone understands - the Comet Technique is ONLY for OLD oxidized single stage paint. Basically what it is - instead of filling up your buffing pads with dead paint, you remove most of the dead, chalky oxidized paint during the washing technique using old school Comet and a wash mitt. You will be surprised at how well this works. Do not try this on a car with a clearcoat paint finish.

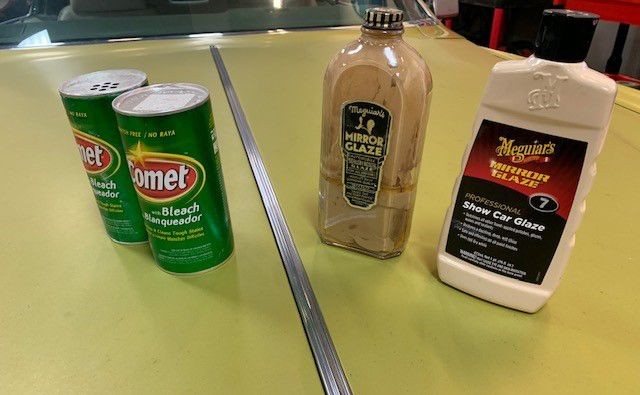
Comet contains BLEACH

Comet contains a little bleach, not a lot but enough to kill germs and disinfect. Perfect for a vinyl top with visible mold and mildew. So like a normal wash, we'll start at the top and then work our way down.


First we sprayed the top down with water.

Next we sprinkled Comet over the top.

To demonstrate the POWER of machine polishing over hand scrubbing, I asked fro a volunteer from the class. Dillard volunteered. I handed him a conventional scrub brush like you can find at any store, while I used the FLEX cordless PE15 with a 1 1/2" brush attached to the backing plate.

800_1968_Cadillac_010.JPG


Here's Dillard scrubbing by hand - for sure this works and he's doing a GREAT job.

800_1968_Cadillac_011.JPG


Here's me letting the machine do all the work. The machine ALWAYS does a better job faster. I show machine scrubbing pretty much everything in my classes. If it can be machine scrubbed - it is machine scrubbed.

800_1968_Cadillac_012.JPG


Here's the vinyl top rinsed off, look how nice it looks!

800_1968_Cadillac_013.JPG


Next - we wash the paint with Comet

First we wet the car down, because it's severely oxidized the paint is actually TEXTURED and this actually helps to keep water on the car. Perfect for the Comet Technique.

Here's yours truly sprinkling Comet onto the hood.

800_1968_Cadillac_014.JPG


Next I gently wash this panel with a clean, microfiber chenille wash mitt.

800_1968_Cadillac_015.JPG


It's also perfectly safe and smart to wash the glass and all the brightwork on the car including the hubcaps, chrome bumpers, trim, etc.

800_1968_Cadillac_016.JPG


Now the class takes over... HANDS-ON Training. Do you see any chairs? What does my Power Point Look Like?

800_1968_Cadillac_017.JPG


800_1968_Cadillac_018.JPG


800_1968_Cadillac_019.JPG


800_1968_Cadillac_020.JPG


Here's the car after washing and rinsing - she's always looking brighter and shinier!

800_1968_Cadillac_021.JPG


And for those interested, here's my original article on this topic,

The COMET Technique by Mike Phillips - 1965 Cadillac - Original Single Stage Paint - Slam job by Mike Phillips


The COMET Technique for oxidized single stage paint

1965_Caddy_018.JPG


:)
 
Re: 1968 Cadillac Original Paint Detailing Class September 2020

Continued...


The Number #7 Rub Down Technique

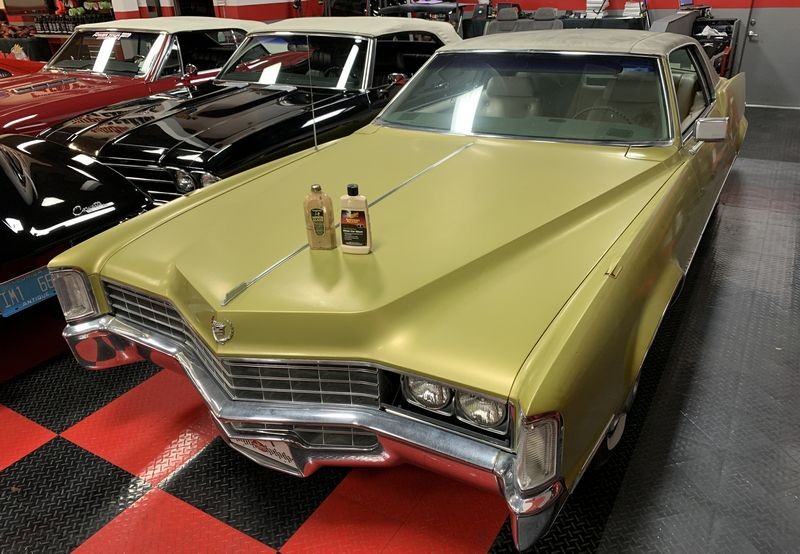
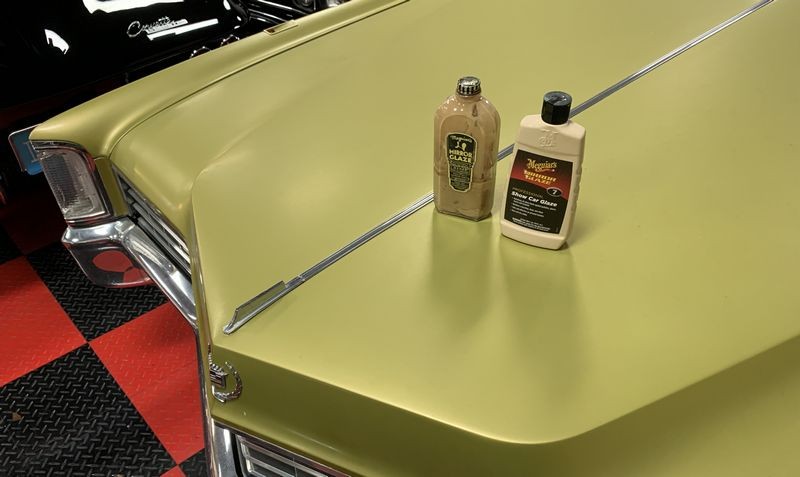
Next we apply and work-in-well, a HEAVY application of the Meguair's #7 Show Car Glaze. This is the only product on the market today that was around at the time of the Ford Model T. Or another way to say this, this is the only product around today, that was around at the time single stage car paint was invented.


Big Picture?

Rub in a HEAVY or WET application and let it soak overnight. Then the next day, remove it. If you're doing this for real on your own project, you would normally repeat this step 2-3 times. Each time you apply, work-in and then wipe-off, the paint will look better and better as you gently remove years of oxidation while the TS Oils bring out the full richness of color in the pigments.


800_1968_Cadillac_022.JPG


800_1968_Cadillac_023.JPG


800_1968_Cadillac_024.JPG


800_1968_Cadillac_025.JPG


800_1968_Cadillac_026.JPG


800_1968_Cadillac_027a.JPG


800_1968_Cadillac_028.JPG


800_1968_Cadillac_029.JPG


800_1968_Cadillac_030.JPG


800_1968_Cadillac_031.JPG


800_1968_Cadillac_032.JPG


800_1968_Cadillac_033.JPG


800_1968_Cadillac_034.JPG


Meguiar's Number #7 Show Car Glaze - a non-abrasive pure polish for single stage paint restoration

800_1968_Cadillac_035.JPG


This is what a heavy or wet application looks like

You want to see a layer of oil on the paint. Then overnight, the oils will migrate into the paint via capillary action.

800_1968_Cadillac_036.JPG


Ha ha - Kirby took this picture :D

800_1968_Cadillac_037.JPG


#7 Wipe-off

Here's the class removing the first application of #7. The oil is, well it's oily so this also means it's a tick sticky. The Number #7 Rub Down Technique is not for the faint-of-heart.

800_1968_Cadillac_038.JPG


800_1968_Cadillac_039.JPG


Here you can see the color, depth and shine being restored simply from #7 and some old school Elbow Grease.

800_1968_Cadillac_040.JPG


:)
 
Re: 1968 Cadillac Original Paint Detailing Class September 2020

Continued....


This is where the class really gets fun as you see such a mishmash of different tools and pads being used by everyone. Again - at this stage of the class, usually sometime Saturday afternoon, you get to choose any tool you want to re-visit or spend more time with. By this time on Saturday, you've already went through these classes,

  1. Short Stroke Polishers - 3 cars detailed
  2. RUPES Tools and Paint Polishing System - 3 cars detailed
  3. Griot's BOSS Tools and System - 2 cars detailed
  4. FLEX Tools - 2 cars detailed

If you were in this class, by the time we got to this 1968 Cadillac, the 1974 Plymouth Duster and on the other side of the Duster is a black BMW, you would have already detailed a total of 10 cars. You're working on training cars numbers #11, 12 and #13 and after these two cars next is the ROTARY POLISHER class where you're going to buff out 2 more cars. That's a total of 15 cars the first two days of class. No chairs. No sitting. 100% hands-on learning and training.


800_1968_Cadillac_041.JPG


On the hood I see LC Power Tools UDOS, Griot's G9 and FLEX Supa BEAST

800_1968_Cadillac_042.JPG


I bring in BIG CARS so there's LOTS of real-estate and this means LOTS of ROOM for everyone to get plenty of hands-on time.


Now we have a BEAST on the hood!

800_1968_Cadillac_043.JPG


800_1968_Cadillac_044.JPG


800_1968_Cadillac_045.JPG


Keep in mind, while half of the class is working on the Caddy, the other half is doing Free-For-All on the 1974 Plymouth and on the other side of the Plymouth is a BMW.


800_1968_Cadillac_046.JPG


800_1968_Cadillac_047.JPG


I love Chris's intensity as he runs the Supa BEAST down a concave curved body line on the hood of the Caddy.

800_1968_Cadillac_048.JPG


800_1968_Cadillac_049.JPG


800_1968_Cadillac_050.JPG


:)
 
Re: 1968 Cadillac Original Paint Detailing Class September 2020

Continued....

Here's the final results...

HandsOnDetailClass_0038.JPG


HandsOnDetailClass_0039.JPG


HandsOnDetailClass_0040.JPG


HandsOnDetailClass_0041.JPG


A couple of week later, I hit the hood with a rotary polisher, wool pad and compound, then re-polished using a foam pad on an orbital.

800_1968_Cadillac_051.JPG


800_1968_Cadillac_052.JPG


800_1968_Cadillac_053.JPG


800_1968_Cadillac_054.JPG


800_1968_Cadillac_055.JPG


800_1968_Cadillac_056.JPG


800_1968_Cadillac_057.JPG


800_1968_Cadillac_058.JPG


800_1968_Cadillac_059.JPG


Remember, here's where we started...

800_1968_Cadillac_007.JPG


Zero Gloss - Zero Reflectivity

800_1968_Cadillac_008.JPG


She's gone....

800_1968_Cadillac_060.JPG


Great job everyone. The Cadillac came out looking great, just like all of the cars. Best of all, we we're able to go over multiple techniques that if you're ever in a situation where you're asked to save the paint on a Barn Find - there won't be any guessing on your part as to what to do?

You'll know exactly what to do. This is called confidence learned by real-world hands-on experience.


On Autogeek.com


:)
 
Re: 1968 Cadillac Original Paint Detailing Class September 2020

Continued...

The Comet Technique

First thing we need to wash the car.

She's dirty after being stored for years.
I'm taking this car or this opportunity to
share the Comet Technique with this class.
My guess is - this is the first and only formal
car detailing class where this technique has
ever been taught.


Comet contains BLEACH
Comet contains a little bleach, not a
lot but enough to kill germs and disinfect.
Perfect for a vinyl top with visible mold
and mildew.

So like a normal wash, we'll start at the
top and then work our way down.


Next - we wash the paint with Comet
RE: Comet/SS paint
Thanks for such a thorough write-up. :props:


It's also perfectly safe and smart
to wash the class


and all the brightwork on the car including
the hubcaps, chrome bumpers, trim, etc.

:)

And, thanks also...
For one of the best mistypes. Ever. :xyxthumbs:


Bob


Edit:
@Mike: Saw your correction
after I’d already posted.
 
Re: 1968 Cadillac Original Paint Detailing Class September 2020

Thanks for such a thorough write-up. :props:


Thanks. It's a lost art.

Our real-world society has changed as has our online society. Everything is brief, short, video. No one reads anymore and even fewer will take the time to type as in comment. People take their thumb and click "like" or "heart" and that's as far as their they'll allow themselves to be involved. You can train a Chimpanzee to click "like". :laughing:


Here's what an article looks like on Instagram and Facebook. These short attention span GUI interfaces simply don't work. My guess is by design. It's a path that leads to the type of future world depicted in the movie Idiocracy.


What an article looks like on Instagram

What an article looks like on Facebook


3 pictures and a dozen words is brevity but online - it's as long as the novel War & Peace.


:dunno:


Mike Phillips said:
It's also perfectly safe and smart to wash the class and all the brightwork on the car including the hubcaps, chrome bumpers, trim, etc.


And, thanks also...

For one of the best mistypes. Ever. :xyxthumbs:


Bob


Ha ha... good catch. I fixed the original but it is funny. And "no" I'm not washing the class.


:laughing:
 
Mike,

If you're only working on oxidized paint, would Barkeeper's Friend work the same/as well as the Comet ?
 
Hey Mike - thanks for another world class write up. You bring such great value to this forum.

Regarding the use of comet on old SS paint, is there a rule of thumb when you're not sure the old paint can handle it, or do you have to use a PTG to determine?
 
Incredible write-up/how-to on a lost art Mike.

Maybe Yancy can "Wash the Class"? :laughing:
 
Ric...are you going to this, look at THAT ELDO

Sent from my SM-G950U using Tapatalk
 
Mike,

If you're only working on oxidized paint, would Barkeeper's Friend work the same/as well as the Comet ?


My guess is yes. The big idea is a a pulverized abrasive that gently exfoliates the loose, dead oxidized paint via the washing process.

Bon Ami would work too.


I use Comet simply because it's very easy to find at just about any store and has better name recognition than Bark Keeper's Friend and even Bon Ami with the unwashed masses.

Keep in mind, while I'm not good at it - I do take into consideration how Skynet will index my articles and then display them in search results. At the time I'm typing this, I have 670 how-to articles and 270 product reviews, (which are also how-to articles), so sometimes the products I choose come into play when creating content.


I've never used Bar Keeper's Friend, and rarely used Bon Ami for the reasons listed above, so I don't know that they do or don't contain bleach. But the bleach component was important when it came to removing the blackish mold and mildew on the vinyl top and restoring a BRIGHT clean appearance.

800_1968_Cadillac_003c.JPG


:)
 
Hey Mike - thanks for another world class write up. You bring such great value to this forum.

Ahh.... thank you for the kind words. :xyxthumbs: I guess there's value if someone reads it and it helps them.


Regarding the use of comet on old SS paint, is there a rule of thumb when you're not sure the old paint can handle it,


Good question.

Here's the deal, I would say "you" but I always look at the bigger audience, so "we all" when in the position to restore the paint on a car like you see in this thread, need to take inventory of these things,


What is the goal? Preserve the original paint?

Keep in mind, some people don't care or it's not a factor. For example, some people may find an barn find with original paint and after cutting a deal, send the car out to be restored, including a re-paint. So they wouldn't care less about preserving the original paint.


How far gone is the paint in it's current condition?

Does it already have thin spots? If so, the time saved by a Comet Wash versus doing 100% of everything you can do to be uber careful might be a whole lot of work for nothing. Just Comet Wash it and move to the next step.


If it's old, in most cases, the paint is already thin

So a Comet Wash is only going to remove what you're going to remove anyways just via a different method. The Comet Wash removes the loose stuff in the wash process. You can do the same thing by hand or machine and simply load up your applicator pads or buffing pads.


I've never said the Comet Wash is the BEST technique, in fact, just the opposite, it's the down and dirty, quick and fast technique.

If a person want's to be SUPER or UBER careful, then we made a video showing the most careful process.


LIVE Detailing Class - Restoring original paint with Meguiar's #7 Show Car Glaze


I hand rubbed this sucker down THREE TIMES with Number #7 and the results were nothing less than phenomenal. Different kind of car. Much older original paint. Different kind of owner.


BEFORE

The_Number_7_Rub_Down_Technique_002.JPG


AFTER

The_Number_7_Rub_Down_Technique_058.JPG


The full write-up for the above car is one of the most thorough I've ever written.

LIVE Detailing Class - Restoring original paint with Meguiar's #7 Show Car Glaze


And the video is the only one like it in the world. Considering how long the product's been around, why didn't anyone at Meguair's or anywhere in the world do this before I was born? The answer is simple, I actually have a enough passion to share this type of information (and do the work, rubbing, pictures, typing).


:)
 
I wanted to answer the below question in a separate reply.


or do you have to use a PTG to determine?

First - I love Paint Thickness Gauges, they're a very cool tool. That said, I did and do about 99.9% of my work without using this tool.

Why?

Because I already practice "best practices"


  1. Inspect the car and the paint.
  2. Determine the goal
  3. Do a Test Spot - dial-in the LEAST AGGRESSIVE APPROACH
  4. Do my best work


For the last 30+ years, the above practices seem to work and be working.


I'm the guy that coined the term,

Big Picture Indicator

I now see "others" using this term and God bless them. But I coined the term so I'm qualified to explain what it means.

A PTG is helpful to get the BIG PICTURE - that is, is the paint super thin or safe to work on. That's it. It's that simple. There are no hard rules when it comes to thickness of paint, you have be on a forum like this, do a lot of reading and educate yourself.

Here's my take, if the paint is thinner than 4 mils - I consider this thin UNLESS it's a brand new car and no one has ever worked on the paint. If this is the case then I know at least 2 mils are the top coat or the clearcoat and I would feel safe or comfortable to compound it.

But my first question would be - why does a brand new car need compounding?


So you see, a PTG is a great tool to keep you from being to aggressive to a car's paint but only in context of the car and the paint. So it's a BIG PICTURE INDICATOR.


It's also a great marketing tool. And to me, what I see is more people using a PTG for show and marketing than to keep themselves safe and there's nothing wrong with this use of a PTG - in fact - I teach and recommend this practice in my classes. Even made a video about it recently.


When it comes to a car like the 1968 Cadillac, it is what it is. Paint Thickness Gauge or no Paint Thickness Gauge, after I took in all the different factors and considerations including what the OWNER wanted, (he wanted clean shiny paint), my decision was to exactly what the class did and what you see in the pictures.


  1. Comet Wash
  2. #7 Rub Down Technique
  3. Production Detailing


And BOOM! We somehow went from this,

1968_Cadillac_062.JPG


To this,

800_1968_Cadillac_055.JPG


If nothing else, my experience is good for something. :D


My advice and recommendation to anyone reading this into the future, (I always type for the future never the present), if you're reading this actual write-up and have gone so deep into this article as to read everything I wrote in this reply - IF you have a car like the one in this write-up and you have ANY QUESTIONS as to how to tackle it.

It's real simple. Join this forum, start a thread. Share a picture and ask for help. Assuming I'm still here, (I could be dead), I know I'll personally do my best to guide you as to how to best tackle the car you've been asked to detail.


Click here to register with our forum


:cheers:
 
Wow Mike - not only was your post super informative, your follow-up responses to my question was a full narrative itself on a related topic. thanks again!
 
Incredible write-up/how-to on a lost art Mike.

Thanks Paul.

Someday I'll be dead, hopefully the info I've shared on this forum over the last decade will live-on...


Maybe Yancy can "Wash the Class"? :laughing:


I'd be happy if he would simply wash my car. :D


Wow Mike - not only was your post super informative, your follow-up responses to my question was a full narrative itself on a related topic. thanks again!


That's what I do and thank you.


:dblthumb2:
 
Mike...

This post is timely!

I've always done the rub outs. Anywhere between 4 to 7 applications 24 hours apart.

Now...

I have an 87 Buick Grand National coming to me soon. Been left outside and is very oxidized. This is the "Factory Lacquer Paint". This paint big big issue when they came out. Most of the GN got repainted by Co.

On fence re strategy.

1. Do the rub outs over course of several days with #7. Then maybe very light polish with a one step and/or pure wax. (long process and safe)

2. Do comet, apply one application of #7. Let it sit for 24 hours, then remove. Inspect. See if paint is "still" thirsty for more oils, apply second rub out of # 7. If paint looks good---Then to one step polish. And then Blackfire sealant. Last step witt Blackfire midnight wax. This is what I believe is called, "Blackfire Wet Ice over Fire".

Side note: I am tempted to try Dr Beasley Z1 on this GN. After the wash/comet, Hit with NSP 45 and then lay down Z1...!!!! What you think??? (I will not use if paint still porous).

Tom
 
Back
Top