2007 Highlander/Cquartz

DARK HORSE

Active member
Joined
Sep 14, 2009
Messages
2,537
Reaction score
0
It's been awhile since I’ve posted any of my work here, or even been real active, but I thought it would be fun to start posting a little more often again. This job came to me as a referral from a new car prep package I did on a 2011 Toyota Highlander a while ago.

Upon arrival it doesn’t look to bad; from a distance… uh?:
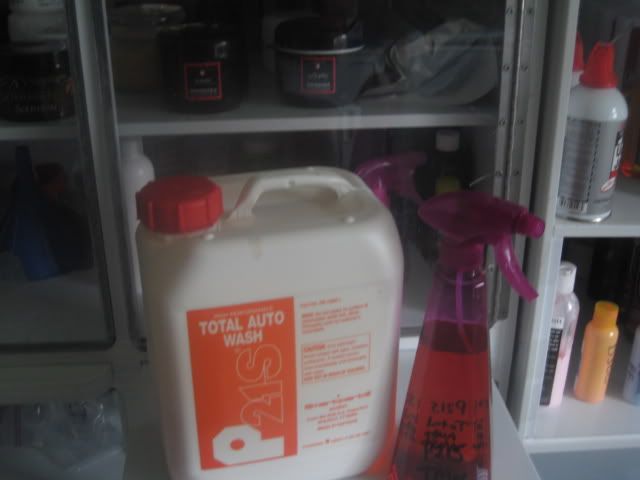
IMG_3149.jpg

IMG_3206.jpg


First Wash:
Rinsed with water and presoaked with P21S TAW. Let the TAW dwell for about 5 minutes. Then washed (via 2bm) with CG Citrus Wash & Gloss.
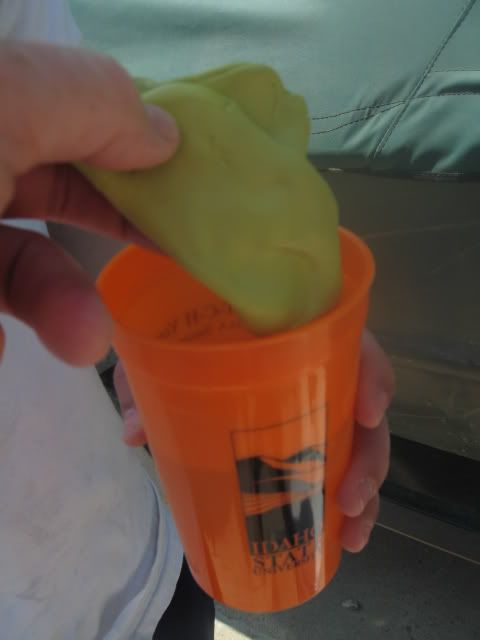
IMG_2791.jpg


Clay:
Clayed the vehicle with Riccardo Yellow, using ONR mixed at 1:32 with distilled water for clay lube.

IMG_3644.jpg


Tip for sharing
Dropping the clay into a cup of hot water helps to keep it pliable.

IMG_2917.jpg


IMG_3173.jpg


IMG_3407.jpg


Paint Correction:
Spot polished (some spots) with Flex3401/m105/Cyan HT pads
Spot polished (some spots) with PCxp/Megs D300/MF Cutting Disks
Polished all paint with Flex3401/m205/Tangerine HT pads
Wiped down paint with 90/10 IPA/Dawn
(Used PakShak microfiber “Ultra edgeless white towels” for polish removal and PakShak ultra plush towels for IPA wipe downs).

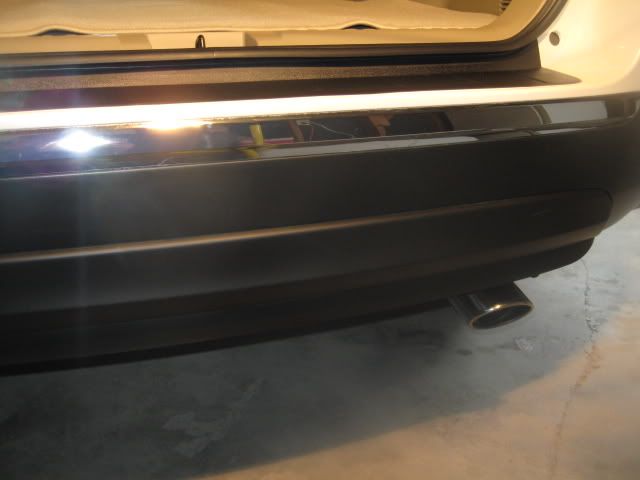
Here are some shots before, during, and after the polishing stages:

IMG_3288.jpg


Looks like there’s plenty to work with…

IMG_3284.jpg


Sorry for the lack of correction shots. It was very hard to capture the defects, but here's the few I was able to get...

102.jpg

IMG_0085.jpg

IMG_2565.jpg

IMG_3365.jpg

IMG_2567.jpg

IMG_0142.jpg

IMG_3249.jpg
IMG_3558.jpg

IMG_3168.jpg

IMG_3421.jpg

IMG_3234.jpg

IMG_3582.jpg


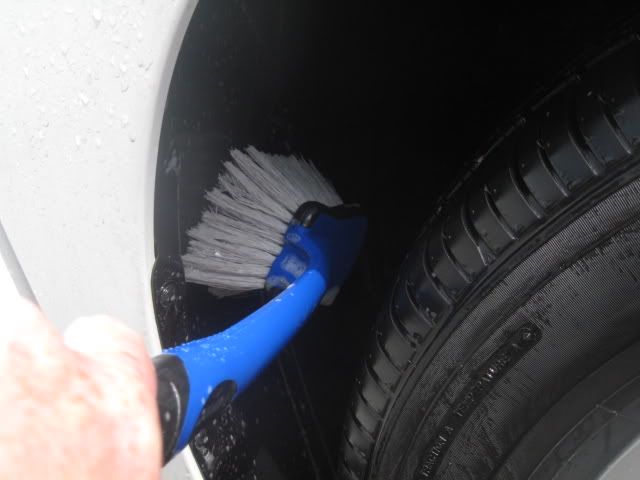
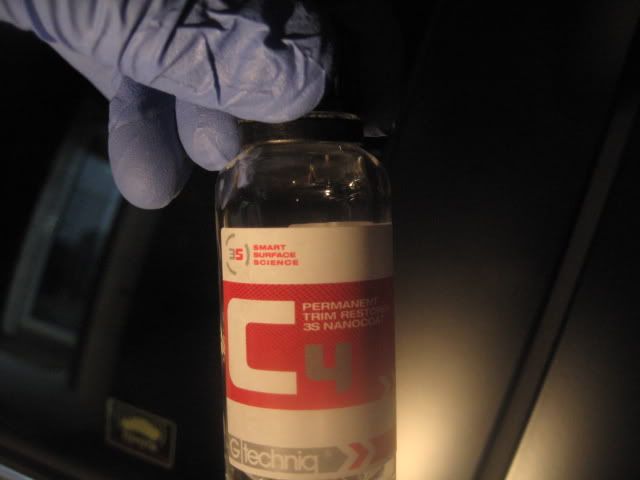
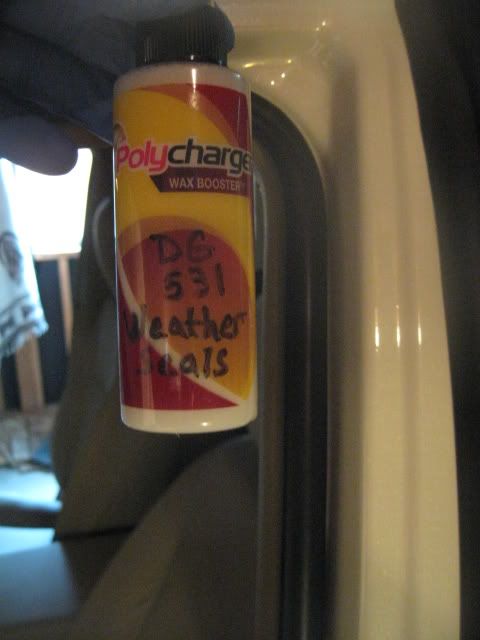
Wheel wells, Wheels, Tires, and Exterior Trim:
All cleaned with Megs APC+ and various brushes

IMG_2867.jpg


Wheel wells (fabric) protected with 303 AP Fabric Guard
Wheel wells (plastic) dressed with CG Barebones

IMG_3169.jpg

IMG_3057.jpg


Wheels polished with m105/m205 and sealed with CarPro Cquartz
Tires dressed with DP Tire Gel


IMG_3171.jpg

IMG_3400.jpg


Exterior Trim protected with G|Techniq C4

IMG_3052.jpg

IMG_3197.jpg

IMG_3506.jpg

IMG_3179.jpg

IMG_3447-1.jpg

IMG_3194.jpg

IMG_3398.jpg

IMG_3095.jpg


Door jambs, weather seals, and glass:
Door jambs were polished with Klasse AIO, and sealed with Klasse HGSG
Weather seals were cleaned with Ultima WW, and sealed with poly charged DG531
Glass polished with m105/cyan HT pad, cleaned with IPA/ Stoners, and sealed with CarPro Cquartz


IMG_3069.jpg

IMG_3192.jpg

IMG_3556.jpg


Headlights:
Wet sanded with 800, 1500 and 3000 grit, and then polished with m105/m205. Sealed with CarPro Cquartz


IMG_3247.jpg

IMG_3534.jpg

IMG_3256.jpg


Second wash:
After completing the correction stages the vehicle was washed again. This time it was rinsed with water and presoaked with P21S TAW, then washed with Megs Gold Class and Dawn dish soap. Rinsed with CR Spotless, and dried with Metro Master Blaster.


IMG_2878.jpg

IMG_3317.jpg


LSP:
CarPro Cquartz
Topped with CarPro Reload 10 hours later


IMG_2537.jpg


Here are a few shots after LSP:


IMG_3571.jpg

IMG_3319.jpg

IMG_3324.jpg

IMG_3582.jpg

IMG_3550.jpg
 
Glad to see you posting over here Tadman!! Phenomenal work, as usual for you! I'm glad to see that you have been using Cquartz like crazy!!! Keep up the good work buddy!
 

Interior:
Leather cleaned with Leather Masters light and protected with G|Techniq L1
Dash, door panels, etc, cleaned with UISP and protected with UIGP
Carpets vacuumed, steamed, and protected with 303 Fabric Guard

Leather before…


IMG_3189.jpg

IMG_3182.jpg

IMG_3216.jpg

IMG_3217.jpg

IMG_3218.jpg


Leather after…

IMG_3440.jpg

IMG_3441.jpg

IMG_3443.jpg

IMG_3444.jpg


Dash, door panels, etc before/afters…

IMG_3186.jpg

IMG_3492.jpg

IMG_3187.jpg

IMG_3494.jpg

IMG_3188.jpg

IMG_3425.jpg

IMG_3212.jpg

IMG_3432.jpg

IMG_3213.jpg

IMG_3426.jpg


Carpet before/afters…

IMG_3175.jpg

IMG_3449.jpg

IMG_3211.jpg

IMG_3438.jpg


Tip for sharing:
Here’s a trick for repairing cigarette burns in carpet: Go up under the seats where the carpet can’t be seen with a pair of scissors or carpet knife and cut some fibers out. Then put a little bit of super glue in the burn hole. Put the fibers into the hole. Repeat this process 2-3 times, slowly building up the burn hole up.


IMG_3389-1.jpg

IMG_3391.jpg
 
Here are a few more shots of the final project:

IMG_3558.jpg

IMG_3328.jpg

IMG_3554.jpg

IMG_3324.jpg

IMG_3587.jpg

IMG_3422.jpg

IMG_3342.jpg

IMG_3319.jpg

IMG_3581.jpg

IMG_3375.jpg

IMG_3552.jpg


Thanks for looking…
Tad


.
 
The difference is unbelievable!!! The shine on such a light colored car is great! I think you did a phenomenal job!

I love the before/after shots of the wheels! Looks completely different.
 
TADMAN!!!!! Im the MAN Im the MAN Im the MAN

Its great to see you here buddy :) Of course it goes without saying when you touch a car but..... Incredible work my friend!! :dblthumb2: :dblthumb2: With your skills I bet you could talk to the paint and convince it to stop looking ugly! :props:

I love all the pics of the tools you put to use and of course the cigarette burn trick you taught me.
 
Up to your phenomanal standards. I hope you are liking the Boosted DG 531 for weather seals.
 
SPECTACULAR TADMAN!!! :buffing:

I wanted to ask - why some spots using the D300/MF Cutting Disc and some with Cyan HT/105? Would one or the other not do the trick every time?

Good tip on the cigarette burns. I have been lucky enough a time or two to find a ball of fibers that was left behind under the seats (on fairly new vehicles). Fortunately enough though, I have only had to repair a burn in one vehicle. Another though I had to remove some carpet fibers when something nasty sticky had been ground in for a long time. Same principle works there too.


Thank you for sharing. I really enjoyed seeing your use of the diverse range of [high-end and high quality] products you have in your arsenal. I remember seeing sparkie use the DG531 (I think), but I am curious as to how well the 531+PC does?

Again - fantastic work. If I ever move to Idaho, I will hire you as my detailer. :D

DLB
 
Tad,

You work is very, very, very good!!! Love the write-up and seeing the end result. You are truly talented my friend! :props:
 
Very nice!

You seem to have your process down and know exactly what you like to use and where to use it!
 
Tad great see your back into the swing of things . Awesome write up and thanks for sharing
 
Pretty sweet Tad! Looks like you're Riccardo stash is growing :xyxthumbs:. Nice to see more of your work buddy.
 
Glad to see you posting over here Tadman!! Phenomenal work, as usual for you! I'm glad to see that you have been using Cquartz like crazy!!! Keep up the good work buddy!

Thanks for the kind words my friend! Always a pleasure to see you around Davey...:props:

The difference is unbelievable!!! The shine on such a light colored car is great! I think you did a phenomenal job!

I love the before/after shots of the wheels! Looks completely different.

Thank you Marc, your kind words are very much appreciated! I agree with you about the wheels, they turned out better than I expected. I used a PC, a Mothers Power Ball, and my hands with pieces of torn up cyan ht pads, along with m105 and m205. It took a lot of elbow grease and time.

TADMAN!!!!! Im the MAN Im the MAN Im the MAN

Its great to see you here buddy :) Of course it goes without saying when you touch a car but..... Incredible work my friend!! :dblthumb2: :dblthumb2: With your skills I bet you could talk to the paint and convince it to stop looking ugly! :props:

I love all the pics of the tools you put to use and of course the cigarette burn trick you taught me.

Thank you my friend, your kind words mean a lot to me. Im the MAN
BTW you really crack me up with the "convince the paint to stop looking ugly" talk. However I believe that you are truly the "Paint Whisperer"...:buffing:

Excellent work Tad!!!

Thank you Troy!

Up to your phenomanal standards. I hope you are liking the Boosted DG 531 for weather seals.

Thanks so much Big Jim! And yes I am very much enjoying the Boosted DG531. That is still the original bottle that you sent me this winter (a little goes a long ways). Thanks again for sharing it with me buddy!

SPECTACULAR TADMAN!!! :buffing:

I wanted to ask - why some spots using the D300/MF Cutting Disc and some with Cyan HT/105? Would one or the other not do the trick every time?

Good tip on the cigarette burns. I have been lucky enough a time or two to find a ball of fibers that was left behind under the seats (on fairly new vehicles). Fortunately enough though, I have only had to repair a burn in one vehicle. Another though I had to remove some carpet fibers when something nasty sticky had been ground in for a long time. Same principle works there too.


Thank you for sharing. I really enjoyed seeing your use of the diverse range of [high-end and high quality] products you have in your arsenal. I remember seeing sparkie use the DG531 (I think), but I am curious as to how well the 531+PC does?

Again - fantastic work. If I ever move to Idaho, I will hire you as my detailer. :D

DLB

Hey Dalton!! Thanks so much for the kind words buddy, I appreciate it very much! As far as using both the Flex/m105/HT pads and the PCxp/D300/MF disks; it was only because I was experimenting with the D300/MF disks. I started out with the Flex/m105/cyan HT, but about 1/2 way through I decided that I wanted to play around with the MF system. Either combo made short work of the defects, and worked very well with this paint. The souped up DG531 is awesome:props: Big Jim turned me onto it last winter. From the first time I used it, I never looked back.

Tad,

You work is very, very, very good!!! Love the write-up and seeing the end result. You are truly talented my friend! :props:

Thank you for your kind words brotha!!!:urtheman:


Very nice!

You seem to have your process down and know exactly what you like to use and where to use it!

Thank you, I really enjoy the process and definitely have my favorite products and tools!

Nice save... and nice write-up that will help others to follow your successful techniques...


:xyxthumbs:

Thank you Mike, very kind of you!

Tad great see your back into the swing of things . Awesome write up and thanks for sharing

Thanks buddy!

Pretty sweet Tad! Looks like you're Riccardo stash is growing :xyxthumbs:. Nice to see more of your work buddy.

Thank you my friend! LMAO about the Riccardo, I owe you for that little fetish;)
I can't wait to meet up with you for dinner next week, Donna will be making us something nummy...Im the MAN
 
Great job! The difference is amazing and I like the tip for the burn in the carpet.

If you need to unload some of that Riccardo clay I'll be more than happy to help!
 
Great job! The difference is amazing and I like the tip for the burn in the carpet.

If you need to unload some of that Riccardo clay I'll be more than happy to help!

Thank you for your kind words. I'm glad you liked the carpet repair tip. Thanks for the offer to help me unload some Riccardo...:props:
 
Back
Top