BobbyG
New member
- Dec 29, 2009
- 13,211
- 0
For the most part we all enjoy automotive detailing either as a hobby or as a profession whether part-time or full-time. Every once in a while I get to work on something that is exciting………at least to me!
Monday I had the opportunity to detail a 2013 Audi A6. Audi really hit a homerun with the current design combining style, performance, and elegance all rolled into one amazing package they called the A6.
The Audi A6 possesses the finest in interior luxury. The A6 uses soft quality leather throughout and the seats feel like they were designed just for me. Amenities abound throughout and there’s ample legroom for taller drivers. The seats adjust in every conceivable position making the interior one of the most comfortable I’ve ever experienced.
From the drivers perspective everything one could hope for is there at your fingertips. The contrast in colors is easy in the eyes and makes owning this car that much more rewardable.
The Interior
The interior was lightly soiled and while it received a thorough cleaning I felt concentrating the majority of my efforts on the exterior would result in a home run for certain.

Products Used
Wash - Duragloss #901
Clay - Meguiar's
1-Step - Blackfire Total Polish & Seal
Sealant - Blackfire Crystal Paint Sealant
Tire Cleaner - Meguiar's Super Degreaser
Wheel Cleaner - IronX
Tire Treatment - CarPro PERL
Wheel Protectant - Optimum Opti-Coat 2.0
Trim Protectant - CarPro DLux
All Purpose Cleaner - Optimum Power Clean
Glass Cleaner - Meguiar's Glass Cleaner
Glass Treatment - Aquapel
Interior Protectant - Meguiar's M40
The cars owner, Linda, loves this car and wanted me to really restore its true beauty. Linda loves the wheels but over the past year they've become soiled by nothing more than driving it and with a car like this who wouldn't want to drive it!
Drive it like you stole it is my motto! rops:
rops:
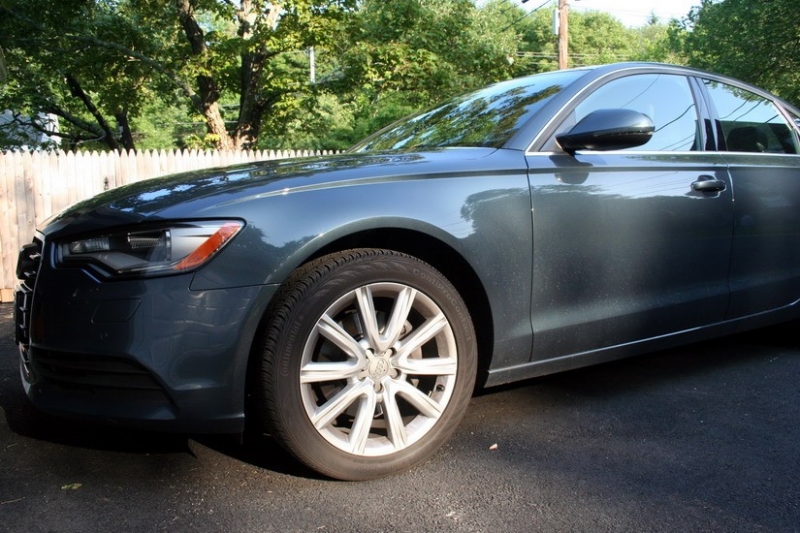
I took a series of before photos and although the lines of the A6 are legendary, you can see in the photos below some TLC and the right products are needed to restore it to it's rightful place...
Before

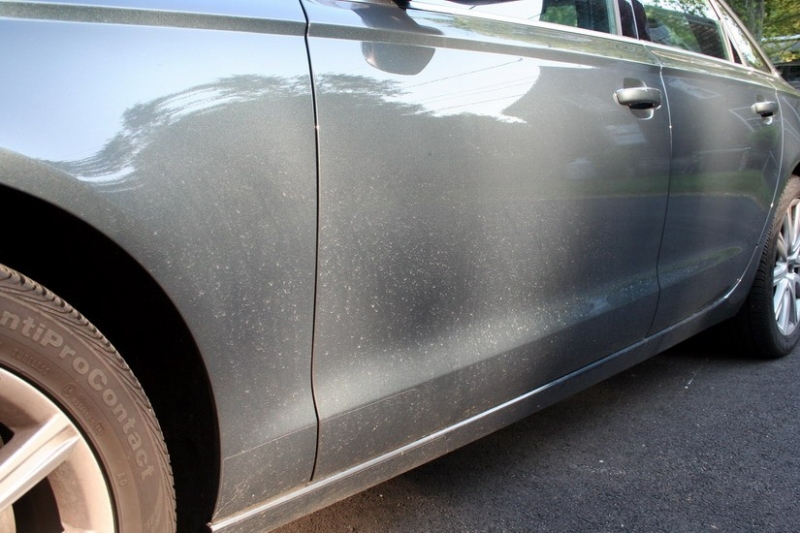
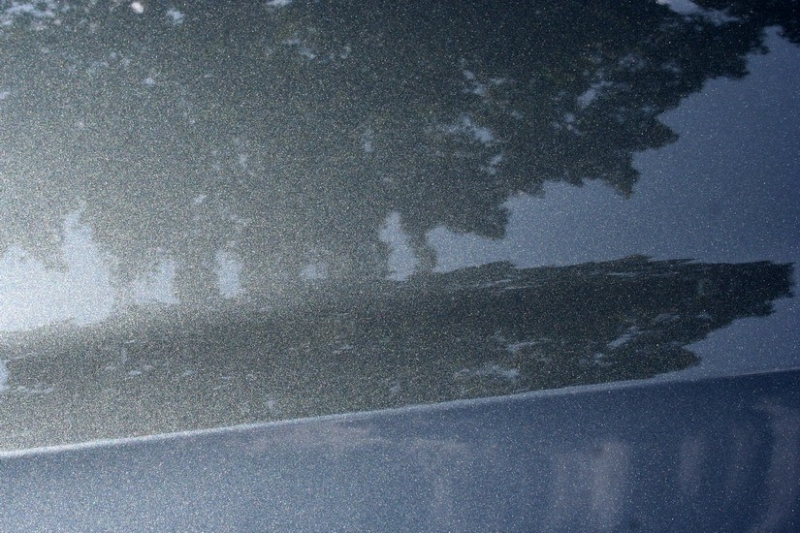
Bug Spatter

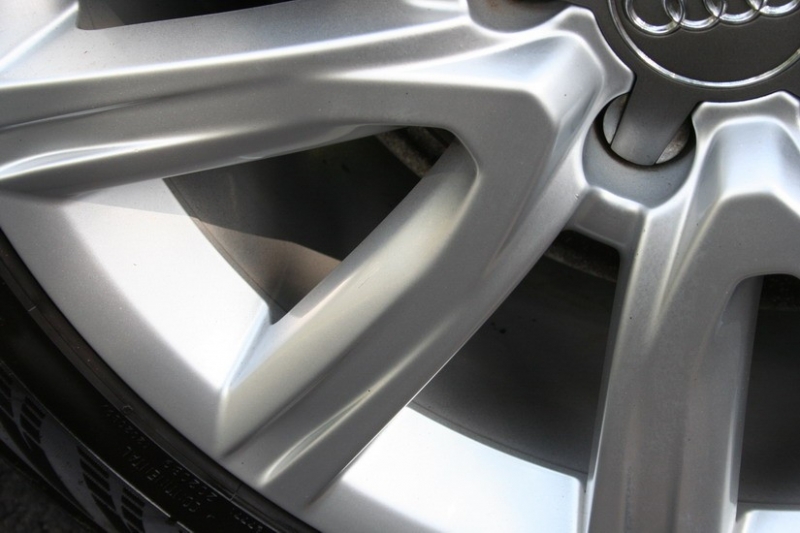
Wheels

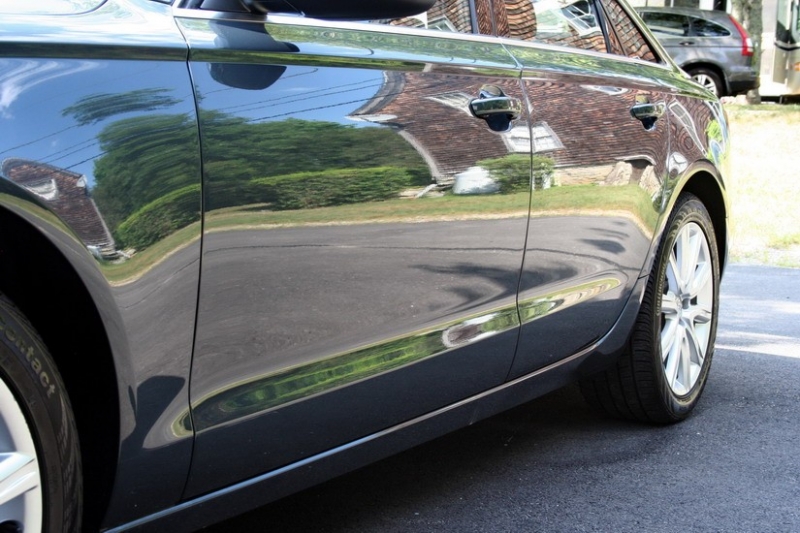
Normal Use
Drivers Rear Quarter

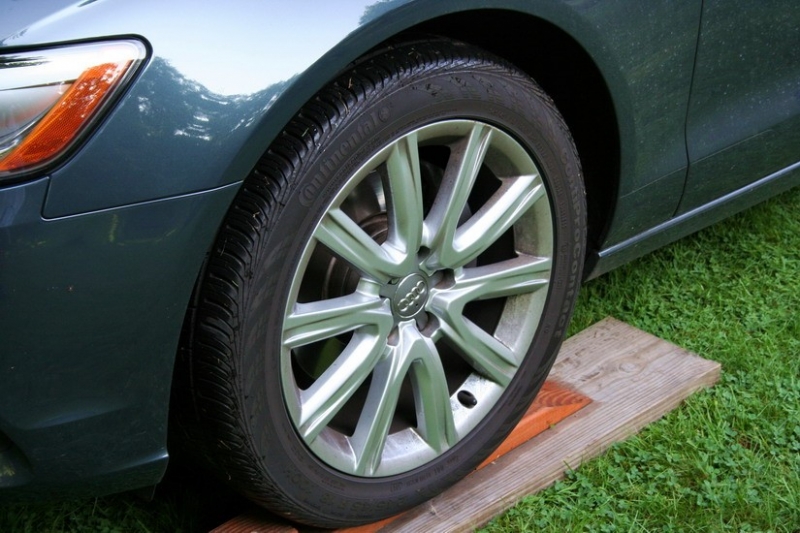
When I can I like working outdoors. I have all the room in the world, fresh air, and the lighting out there is the best!
I always use my blocks so that I can truly address the entire tire.


Wheels First
Generally, I'll wash the wheel and tire first THEN use Car-Pro Iron X letting it search and destroy any residual grime and brake dust. Today I spent some additional time going right to the Iron X first and these are my results.

CarPro Iron X
Without question, Iron X does work.

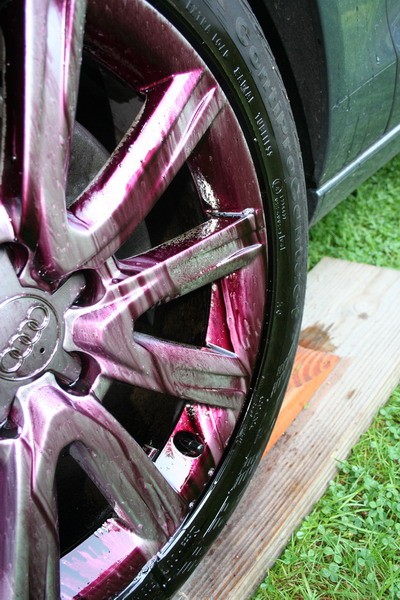
After some scrubbing with my Daytona brush, I rinsed then sprayed the wheel again with Iron X and look what happened....more grime and debris!

Barrels
Initially, I thought the wheel barrels were powder coated black in an attempt to "hide" the brake dust but a little scrubbing told me they were silver like the rest of the wheel.
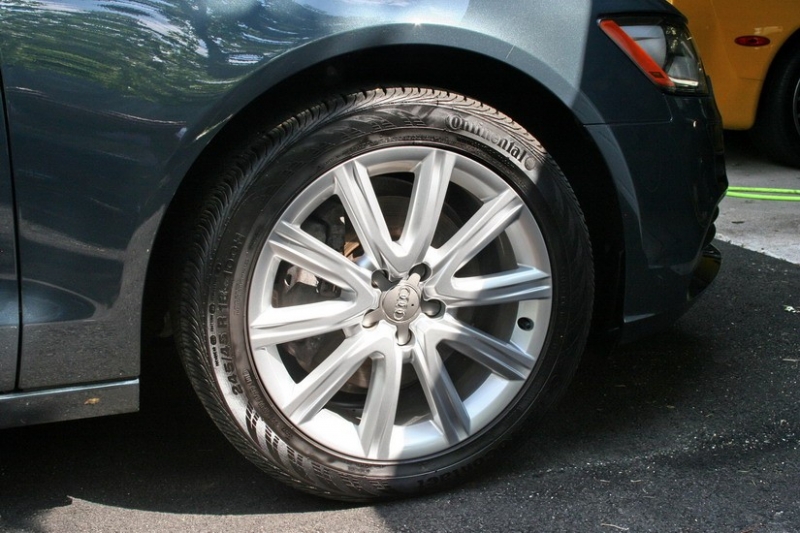
Quite a difference as you can see!

Thoroughly Cleaned


For the rest of the wheels I scrubbed them using Meguiar's Super Degreaser. I can't give enough kudos to this product as it's never failed me even on the toughest of grease, grime, and tires.

I spray it on, scrub the wheel and tire with the appropriate brushes then rinse. Whether it's needed, I dry the wheel then apply the Iron X.
My thought is it's a waste of time and product using it on a completely soiled wheel. I want Iron X to address the grime and dust I missed or couldn't see.....and it does so with surgical precision!


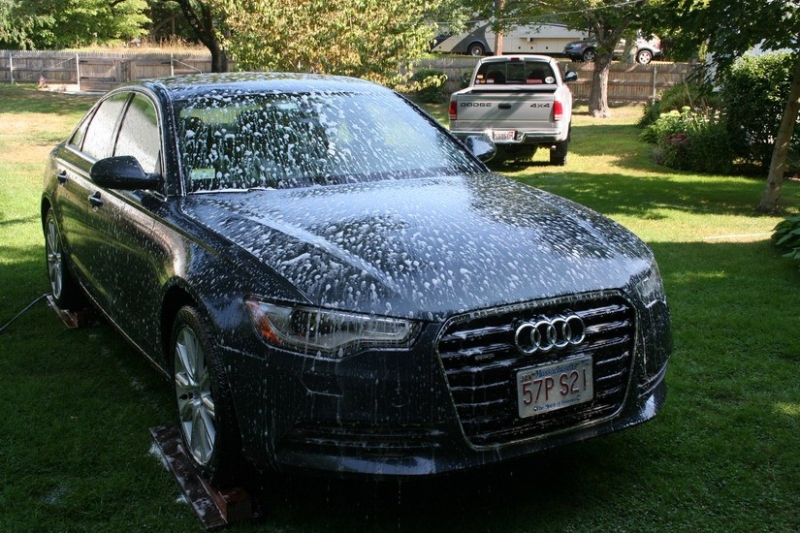
Foam Gun
I like to soak the finish using my foam gun. I use Pinnacles XMT Gel Shampoo and water in my gun. On the 2nd hole it produces an ample froth covering the car.

Wash
I always wash by hand. I really like Duragloss #901 combined with a Gold Plush Micro-Chenille Wash Mitt it allows me to clean the finish without scratching. I settled in this combination some time ago and when something works I like to stick with it.
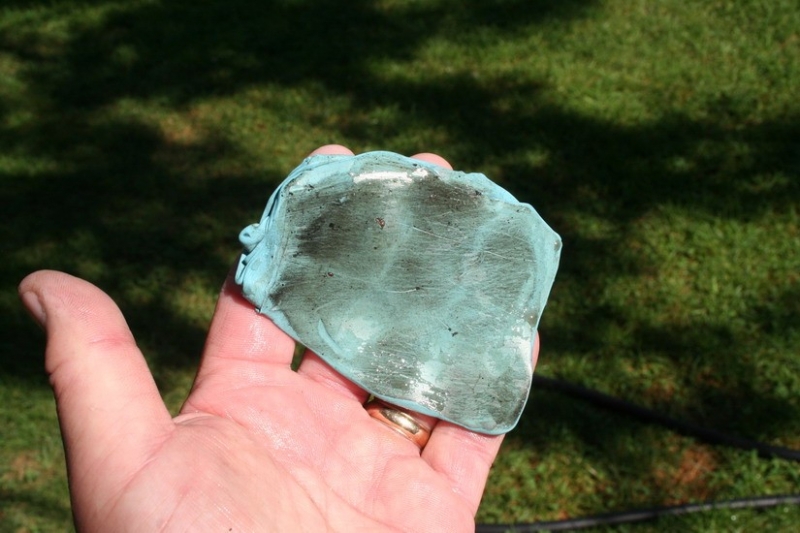
Clay
Naturally claying the finish was the next step and I was sort of surprised how dirty the paint really was. This was from just the hood.
Imagine if I went straight to the buffer WITHOUT claying.....:doh:

Top and middle doors

Lower doors and rear quarter
Needless to say I no longer have this clay....
Once the paint was clayed it was very smooth. Knowing I'd be polishing the finish I opted to dry each panel using a Cobra Guzzler drying towel. These towels are exceptionally soft and absorbent.
Polishing
I won't bore you with a panel by panel photo showing the machine and pad over and over so I'll touch on them lightly here and move on.
Machines
Typical results during the buffing phase

Final Results


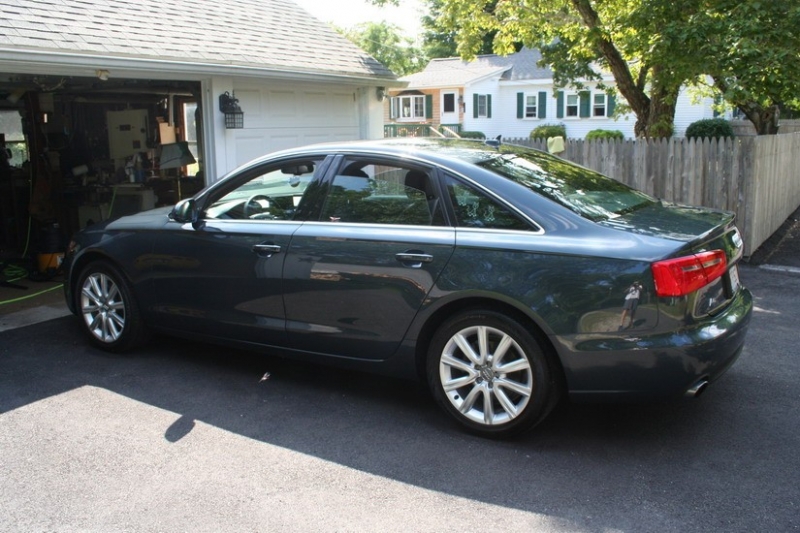


All in all, Linda was very pleased with the results and so was I.....:dblthumb2:
Thank you for looking!
Monday I had the opportunity to detail a 2013 Audi A6. Audi really hit a homerun with the current design combining style, performance, and elegance all rolled into one amazing package they called the A6.
The Audi A6 possesses the finest in interior luxury. The A6 uses soft quality leather throughout and the seats feel like they were designed just for me. Amenities abound throughout and there’s ample legroom for taller drivers. The seats adjust in every conceivable position making the interior one of the most comfortable I’ve ever experienced.
From the drivers perspective everything one could hope for is there at your fingertips. The contrast in colors is easy in the eyes and makes owning this car that much more rewardable.
The Interior
The interior was lightly soiled and while it received a thorough cleaning I felt concentrating the majority of my efforts on the exterior would result in a home run for certain.
Products Used
Wash - Duragloss #901
Clay - Meguiar's
1-Step - Blackfire Total Polish & Seal
Sealant - Blackfire Crystal Paint Sealant
Tire Cleaner - Meguiar's Super Degreaser
Wheel Cleaner - IronX
Tire Treatment - CarPro PERL
Wheel Protectant - Optimum Opti-Coat 2.0
Trim Protectant - CarPro DLux
All Purpose Cleaner - Optimum Power Clean
Glass Cleaner - Meguiar's Glass Cleaner
Glass Treatment - Aquapel
Interior Protectant - Meguiar's M40
The cars owner, Linda, loves this car and wanted me to really restore its true beauty. Linda loves the wheels but over the past year they've become soiled by nothing more than driving it and with a car like this who wouldn't want to drive it!
Drive it like you stole it is my motto!
rops: I took a series of before photos and although the lines of the A6 are legendary, you can see in the photos below some TLC and the right products are needed to restore it to it's rightful place...
Before
Bug Spatter
Wheels
Normal Use
Drivers Rear Quarter
When I can I like working outdoors. I have all the room in the world, fresh air, and the lighting out there is the best!
I always use my blocks so that I can truly address the entire tire.
Wheels First
Generally, I'll wash the wheel and tire first THEN use Car-Pro Iron X letting it search and destroy any residual grime and brake dust. Today I spent some additional time going right to the Iron X first and these are my results.
CarPro Iron X
Without question, Iron X does work.
After some scrubbing with my Daytona brush, I rinsed then sprayed the wheel again with Iron X and look what happened....more grime and debris!
Barrels
Initially, I thought the wheel barrels were powder coated black in an attempt to "hide" the brake dust but a little scrubbing told me they were silver like the rest of the wheel.
Quite a difference as you can see!
Thoroughly Cleaned
For the rest of the wheels I scrubbed them using Meguiar's Super Degreaser. I can't give enough kudos to this product as it's never failed me even on the toughest of grease, grime, and tires.
I spray it on, scrub the wheel and tire with the appropriate brushes then rinse. Whether it's needed, I dry the wheel then apply the Iron X.
My thought is it's a waste of time and product using it on a completely soiled wheel. I want Iron X to address the grime and dust I missed or couldn't see.....and it does so with surgical precision!
Foam Gun
I like to soak the finish using my foam gun. I use Pinnacles XMT Gel Shampoo and water in my gun. On the 2nd hole it produces an ample froth covering the car.
Wash
I always wash by hand. I really like Duragloss #901 combined with a Gold Plush Micro-Chenille Wash Mitt it allows me to clean the finish without scratching. I settled in this combination some time ago and when something works I like to stick with it.
Clay
Naturally claying the finish was the next step and I was sort of surprised how dirty the paint really was. This was from just the hood.
Imagine if I went straight to the buffer WITHOUT claying.....:doh:
Top and middle doors
Lower doors and rear quarter
Needless to say I no longer have this clay....
Once the paint was clayed it was very smooth. Knowing I'd be polishing the finish I opted to dry each panel using a Cobra Guzzler drying towel. These towels are exceptionally soft and absorbent.
Polishing
I won't bore you with a panel by panel photo showing the machine and pad over and over so I'll touch on them lightly here and move on.
Machines
- Flex PE14 rotary + Orange Kompressor
- Flex 3401 + White foam
- Porter Cable 7424xp + White Foam
Typical results during the buffing phase
Final Results
All in all, Linda was very pleased with the results and so was I.....:dblthumb2:
Thank you for looking!
")