What does the above highlighted mean (keep in mind I'm a noob) I have heard a few people say this.
Does it mean use the blue if the blue does not do the job use white then use blue again? If thats the case, it seems like a lot of work?
Let me take a stab at explaining the process and then I'll tie it into Ron's answer
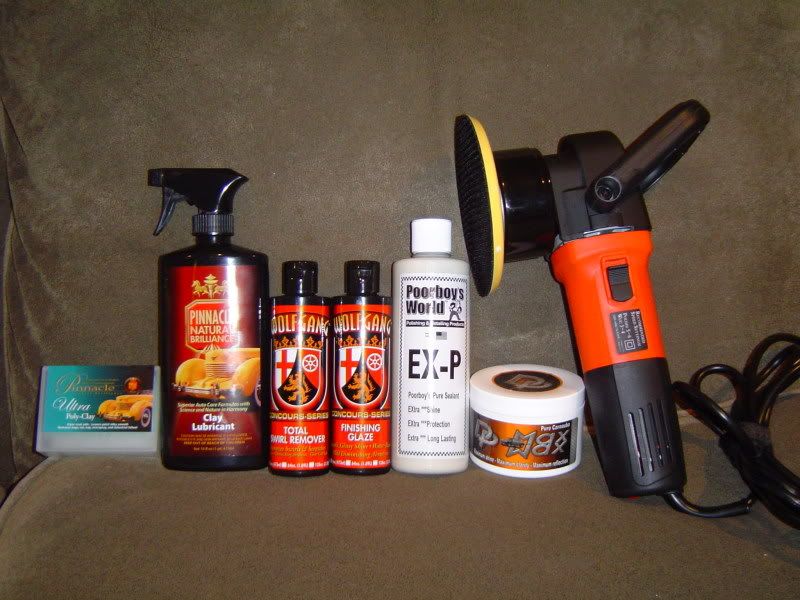
I'm assuming that since you bought this kit you're trying to remove swirls and the polish the paint on your car to a high gloss and then seal the paint to protect it.
This being true the goal is to remove the swirls using the least aggressive method possible because by doing this you leave the most amount of paint on the car to last over the service life of the car.
So to remove the swirls and use the least aggressive product when we look at your products you have one swirl remover, (chemical), and multiple pads which offer different levels of aggressiveness, this is where your Test Spot comes into play.
Let me go through your questions one by one and then I'll outline how to do your test spot and this will help you dial in a process with the product you have to get a show car shine.
Going to be used on a brand new 2009 Honda Accord, Bold Beige Metallic. From what I can see paint appears to be in excellent condition...
Being brand new it should be flawless and in my opinion I think Honda's have nice paint, at least when they are new and most of the Honda paint systems I've worked on have been easy to work on so you have that going for you.
The best way to inspect for swirls is to pull the car into bright sunlight when the sun is overhead and place the sun down on the hood as this will expose any swirls.
The other way is to use a
Swirl Finder Light and these come in real hand on cloudy days. Of course it's harder to see swirls on light colored cars like silver and beige so that does make your car more challenging to see the swirls but it also means if it does have swirls the won't show up as easy.
Using a Brinkman Swirl Finder Light to inspect for swirls
Hopefully the paint on your car doesn't have DISO
DISO = Dealer Installed Swirl Option
That's when a dealership lets their in-house detailer buff the car out with a rotary buffer and poor quality products and in the process instills buffers swirls, or if the car has just been washed a lot by the "Lot Boy" with poor quality products and bad technique and filled the paint with Cobweb swirls.
You say the paint looks good so you're probably one of the lucky ones and there's probably little to no swirls to remove.
Again, the best way to find out is to move the car into bright sunlight or use a
Swirl Finder Light to expose them. This is kind of key to your process because you need to know if you even have a problem that needs to be fixed?
If the car has little to no swirls then theoretically you could wash and dry the car, clay the paint if needed and then apply the paint sealant.
So see if you can determine if the car has swirls or not and I'll go ahead and continue as though it has at least light swirls.
Even if it doesn't it won't hurt to machine clean and polish the paint using the WG TSR 3.0 because it's a very nice SMR and leaves a very clear, clean finish perfect for final polishing and even going straight to your LSP
TSR... Which pad? and what speed 5-6?
Which Pad
Going by your description, you should be able to use a
White Polishing Pad as you say the car is brand new and appears to be in excellent condition.
Going to be used on a brand new 2009 Honda Accord, Bold Beige Metallic. From what I can see paint appears to be in excellent condition...
This is where your Test Spot comes into play and I'll add that in the next post.
Which Speed Setting
Plan on using the 5.0 Speed Setting.
To remove swirls with just about any SMR or Swirl Mark Remover, and just about any quality dual action polisher, you typically need to be at the 5.0 speed range and up to the 6.0 speed range.
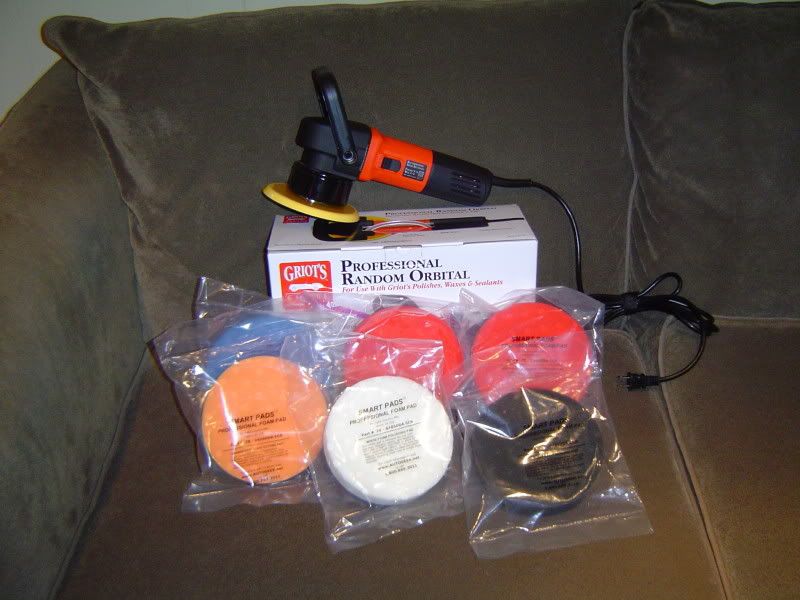
I've used the GG ROP and from my personal experience, it has the most usable power out of the 3 current dual action polishers we carry that use a free rotating spindle assembly.
I'm not making a value judgment on either the PC 7424XP or the new Meguiar's G110v2, just stating a fact as I see it and as the technical specifications for the tools are compared to one another. This also is not an endorsement of the Griot's Garage Random Orbital Polisher, it's just my observation.
That said, running the GG ROP at the 6.0 speed setting is like using a rotary buffer as long as you're holding the pad flat and for your car I don't think you're going to need to use the 6.0 Speed Setting, so
plan on using the 5.0 Speed Setting.
Glaze... Which pad? and what speed 3-4?
Which Pad
When applying a light cleaner/polish, in this case the Wolfgang Finishing Glaze, you generally are trying to build on the results from your first step product the swirl remover and as such you want to use a less aggressive pad than you used with the swirl mark remover.
Since you'll likely be using the White Polishing pad for the WG TSR 3.0 you can use either the Gray or the Blue pads. The Gray Finishing pad is pretty soft and should work great but to be honest, at this point of the process and of the soft pads could be used, only some testing and inspecting with good eyes would be able to determine if there's a different result being obtained and black paint would be the best way to determine this. If anyone wants to get real AR over this then the best way to test would be to test using a car that has the exact same clear paint system on his Beige Honda on a car with a black basecoat so you could easily see exactly what's going on. Now that's for the Extreme AR Enthusiast.
The fact that this is a beige Honda and likely a daily driver then at some point just the act of machine polishing the paint first with the TSR 3.0 and now following that with the Finishing Glaze, seriously, at this point any of the soft pads would work but I'd probably go with the gray foam finishing pad because it will tend to move over the paint better than the red and blue foam pads as they are both very soft and when applying finishing glazes they tend to be a little too smooshy for my taste. Feel free to experiment and see what you like best, my input here is just recommendations that you can follow or ignore.
Which Speed Setting
For a light cleaner/polish, in this case the Wolfgang Finishing Glaze, but this hold true for just about any finishing polish when you've already removed the swirls, you will want to be around the 4.0 to 5.0 speed setting. Higher speeds for removing defects, lower speeds for jeweling the paint if the defects, (swirls or micro-marring from the first step), are already removed or non-existent.
Because the Wolfgang TSR 3.0 finishes out crystal clear on most paint systems you can probably pick a speed of 4.0 to 5.0 and get the same results. If you find the 4.0 Speed Setting to be easier to use and more enjoyable then apply the WG FG on the 4.0 Speed Setting.
Sealant... Which pad? and what speed 3-4?
Either the blue or the red, again these are both so soft that at this point in the process it's not going to be a huge factor as to the final results. If you want to dedicated one pad for your sealant then pick the red one as you can lock the color blue in as your sealant pad.
Use the GG ROP on the 3.0 Speed Setting
Wax... Red pad? 3-4 speed?
If you use the blue pad for your sealant then dedicate your red pad for your Max Wax.
Use the GG ROP on the 3.0 Speed Setting
And after all this, should I even bother applying the XMT QD?
If by XMT QD you mean,
XMT Final Finish Instant Detailer, then generally speaking, after you apply your last protection product and then wipe-off the residue, at this point the process is over and now you want to leave the finish alone and let the protection ingredients fully set-up.
You can if you see a smear, mist a light spray of of the XMT Final Finish Instant Detailer and this will help you to wipe away any streaks, smears or residues, but note that every time you
"touch" a freshly applied coating of wax or paint sealant before it's fully set-up you're disrupting the coating.
So wipe off the wax and stand back and admire the shine and save your XMT Final Finish Instant Detailer for removing light dust, fingerprints in a day or two.
Note that most waxes and paint sealants do well with a 24 hour
window of time to fully set-up. It doesn't take 24 hours for all the protection ingredients to fully set-up, the 24 number is just a part of the window of time. Don't make things more complicated than they have to be.
Now after you've done all these step, don't take the car through a car wash but instead take ownership of the car wash process and use the highest quality car washing products and tools to wash and dry your car's paint.
")