Wills.WindowsAndWheels
New member
- Oct 31, 2009
- 1,682
- 0
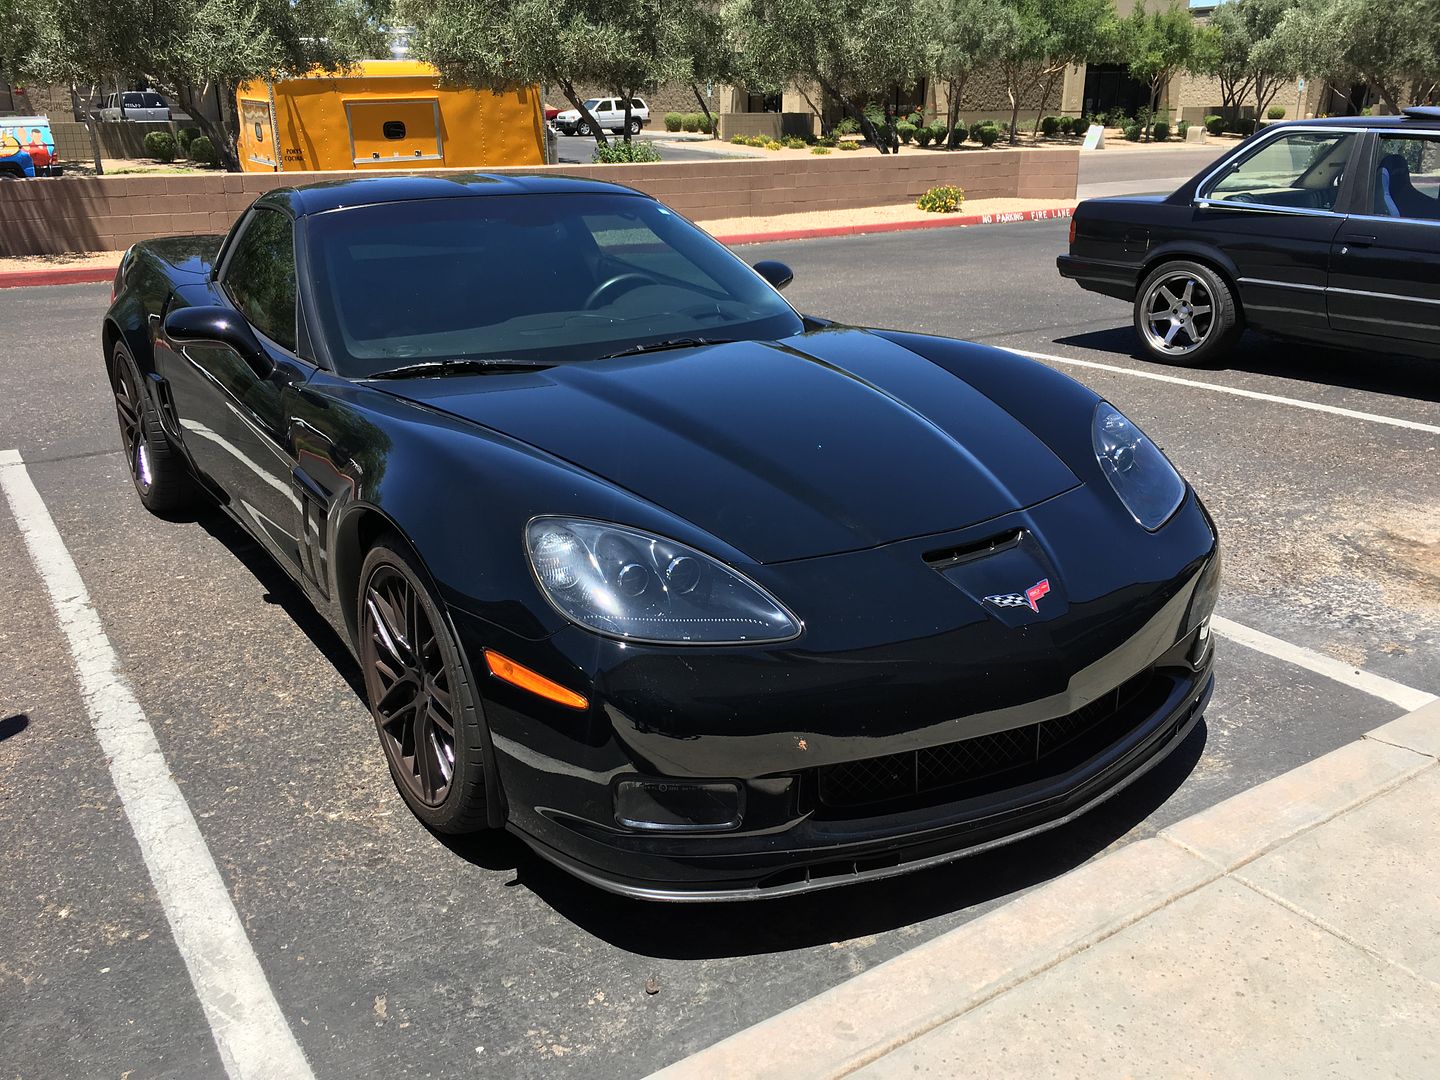
Black....Corvette.....C6. Oh yes, this felt like the old days here!
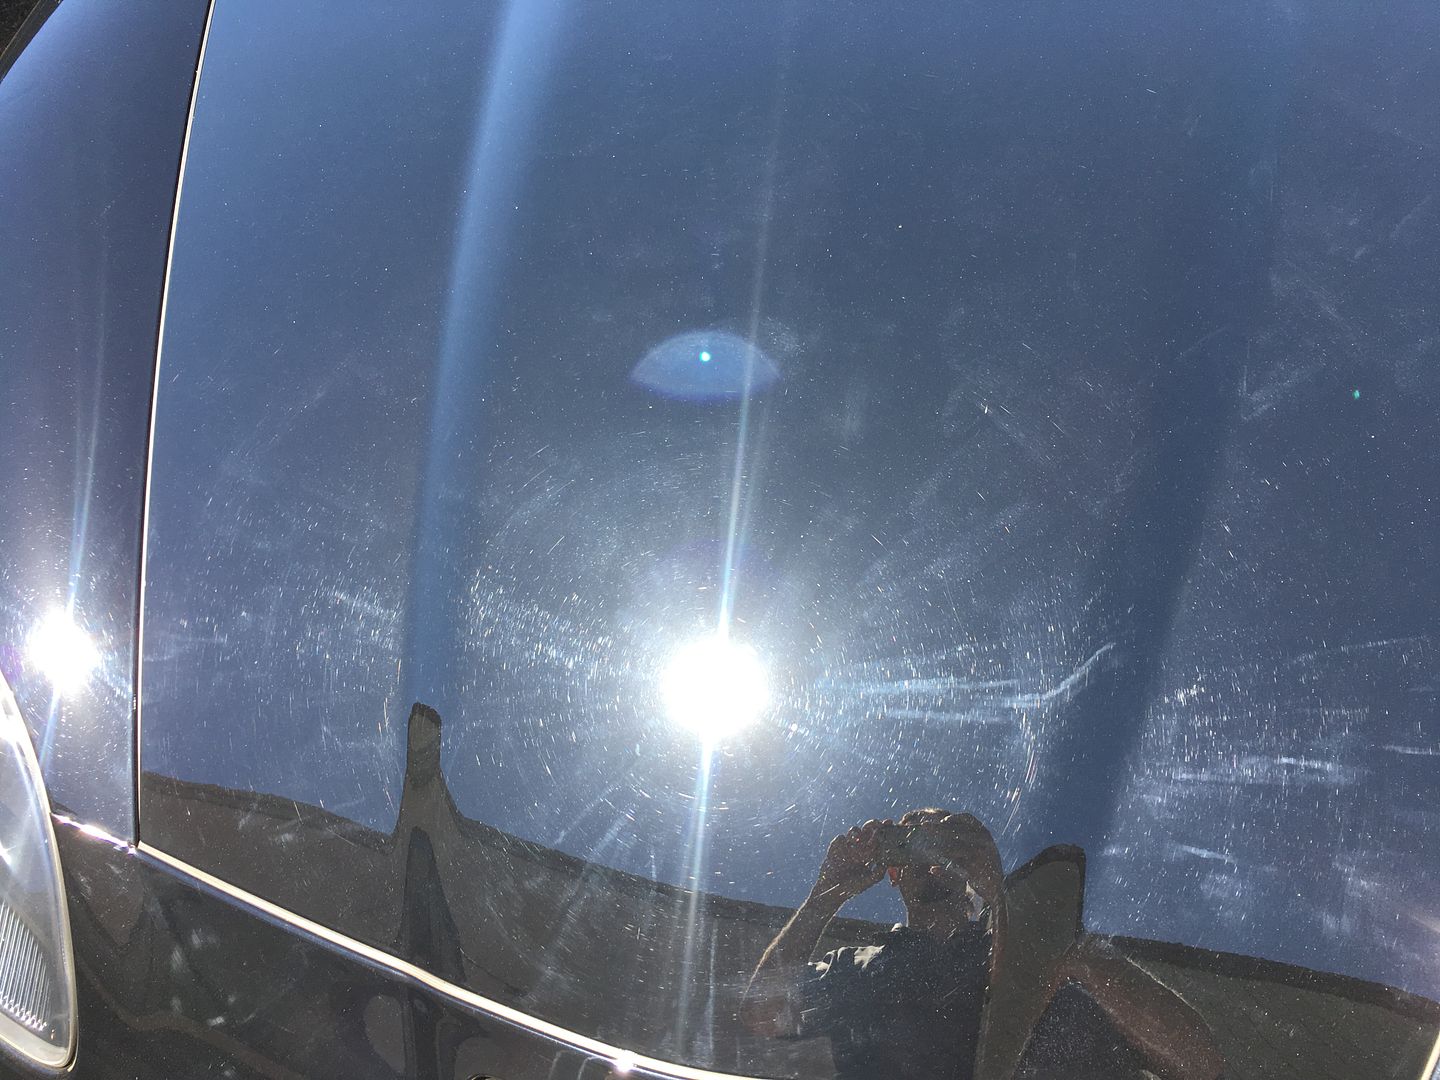
Oh yeah, swirled like a Dairy Queen ice cream cone as well....you know it.
Our attitude...lets do it! (Later followed by...lets kill ourselves, what did we get into!)
This was the last year the C6 Grand Sports were made (2013) - and while she had very low mileage and was kept very clean, the paint was definitely in need of some serious reconditioning.
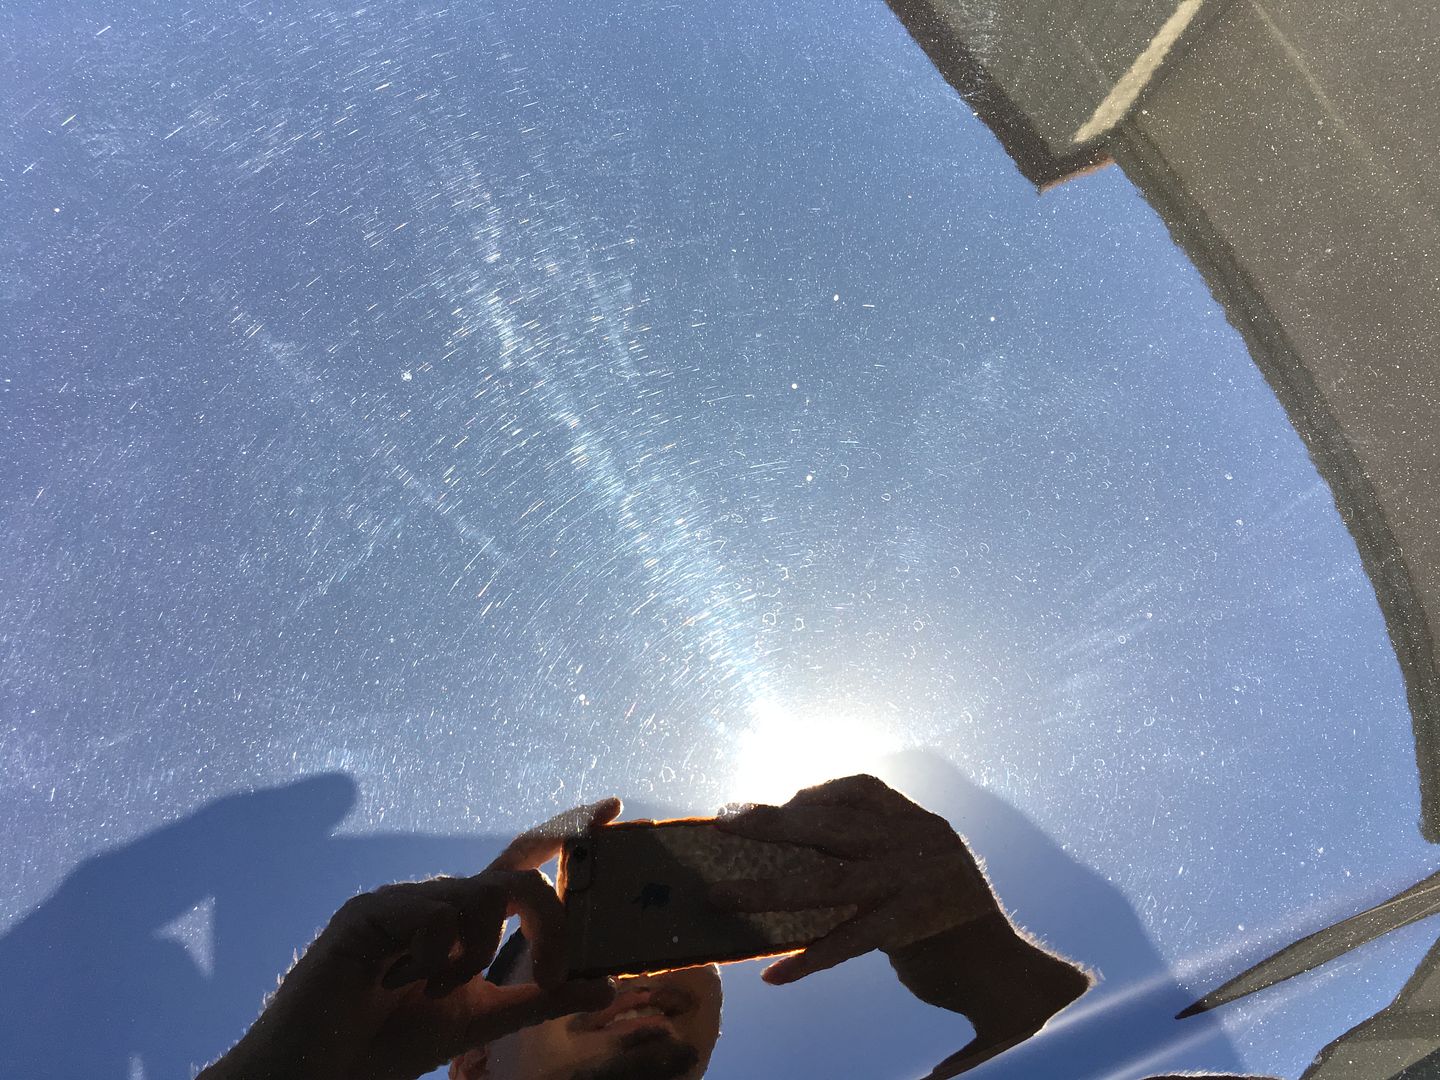
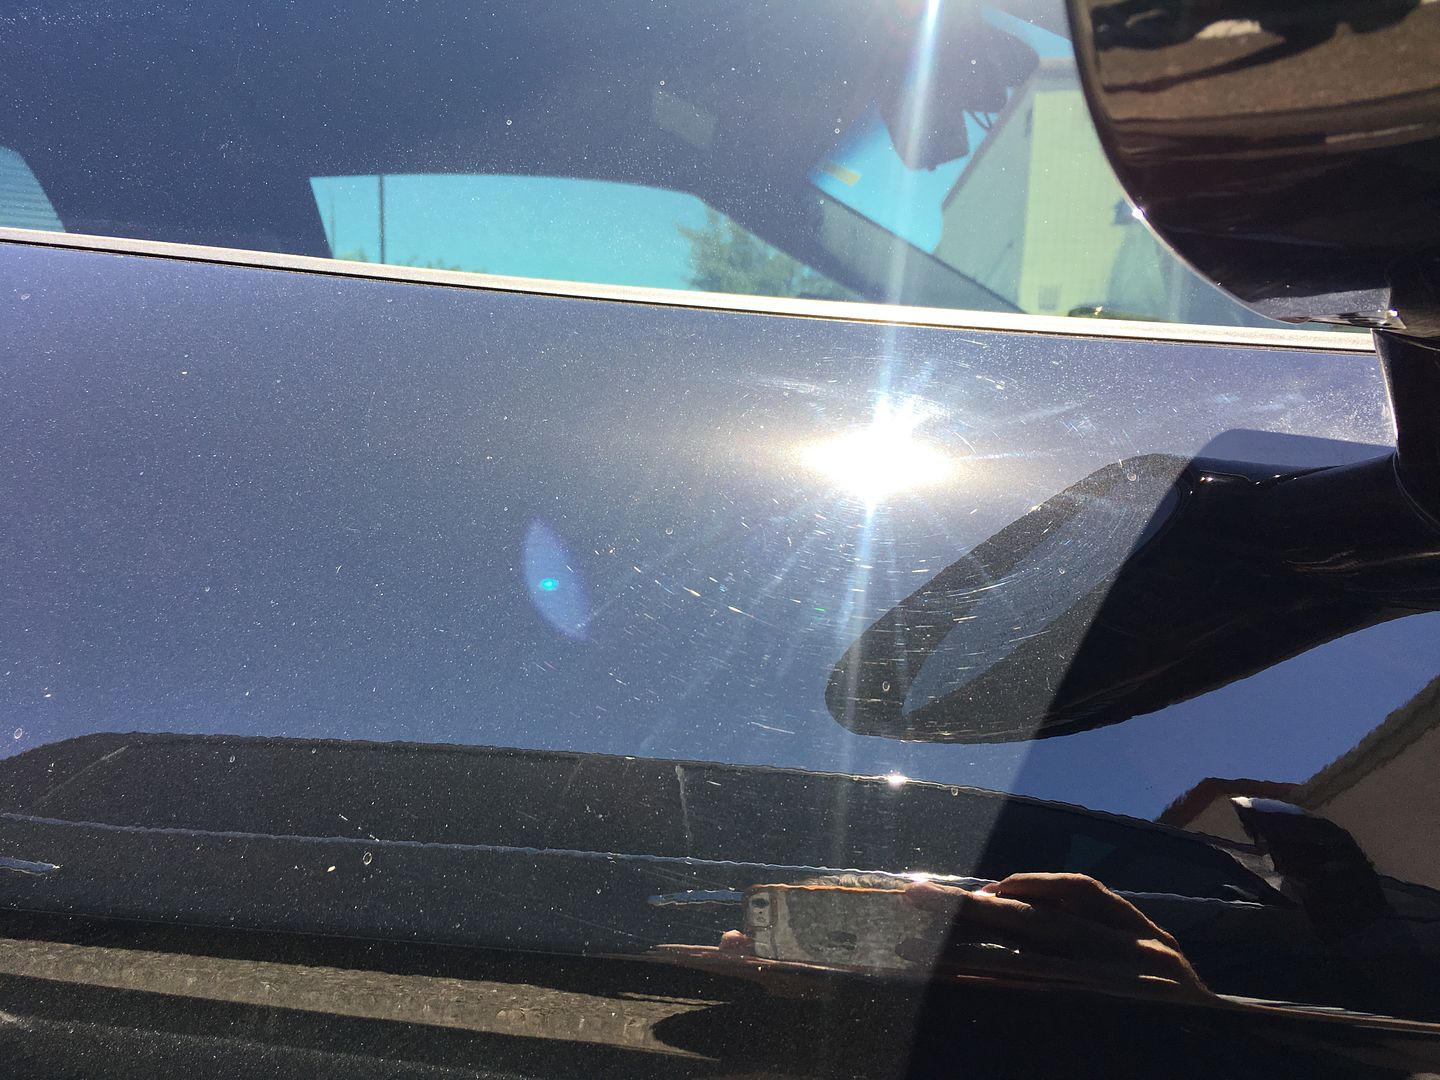
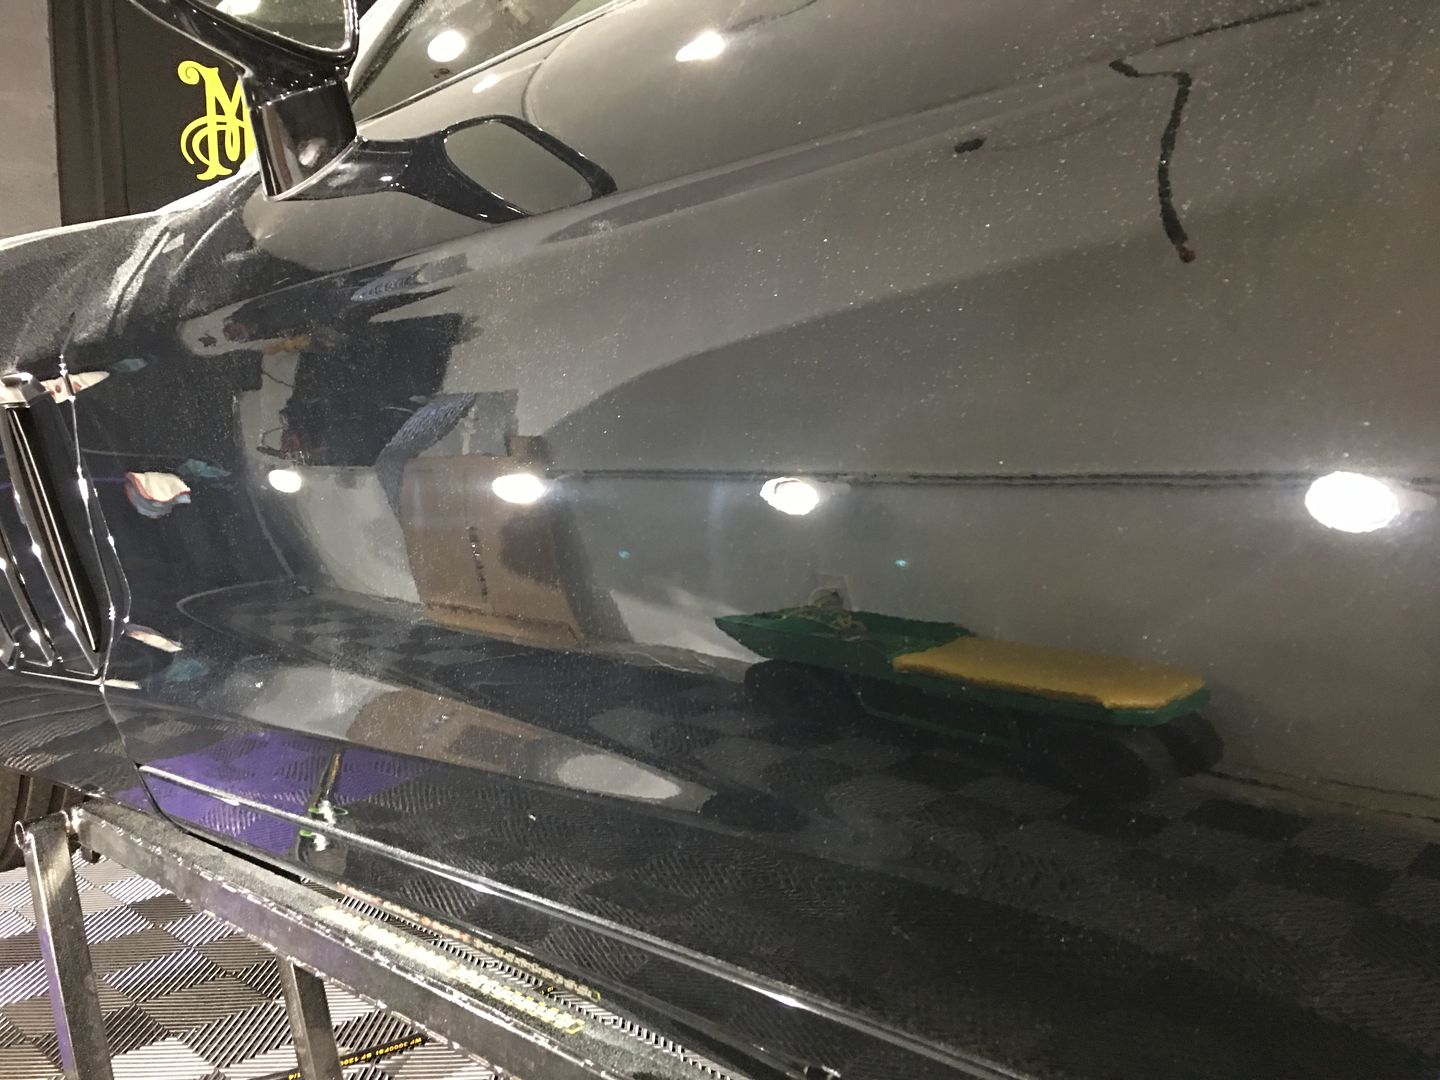
When the owner came in for a consultation, we did a full walk around and pretty much every panel looked the same.
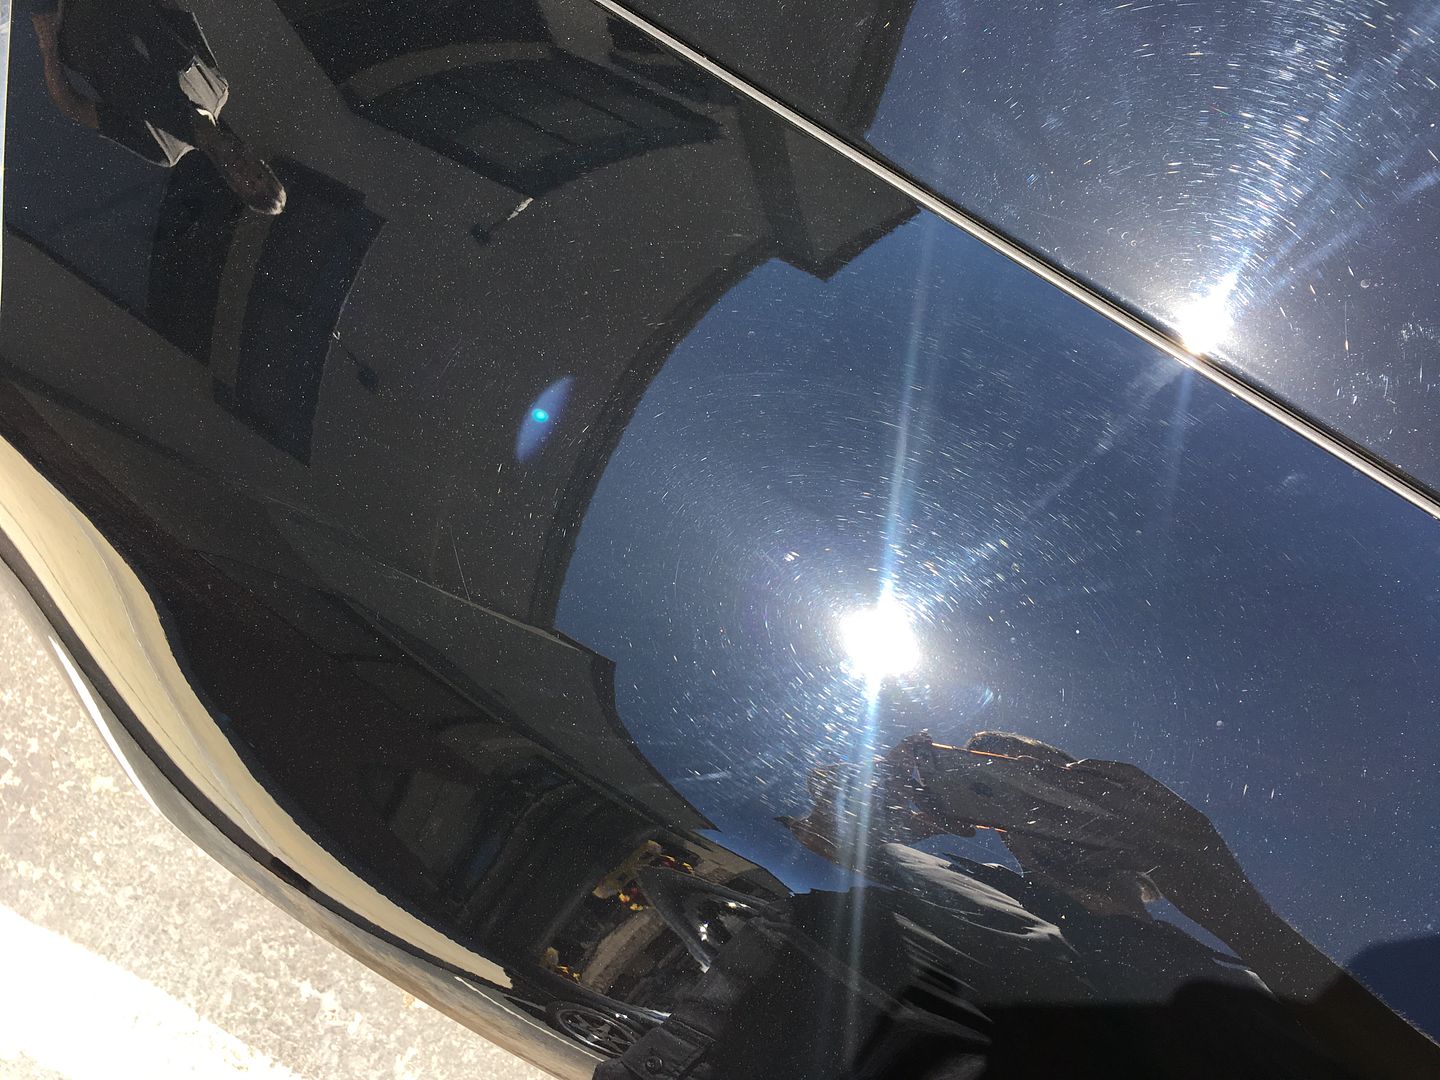
Ouch right?
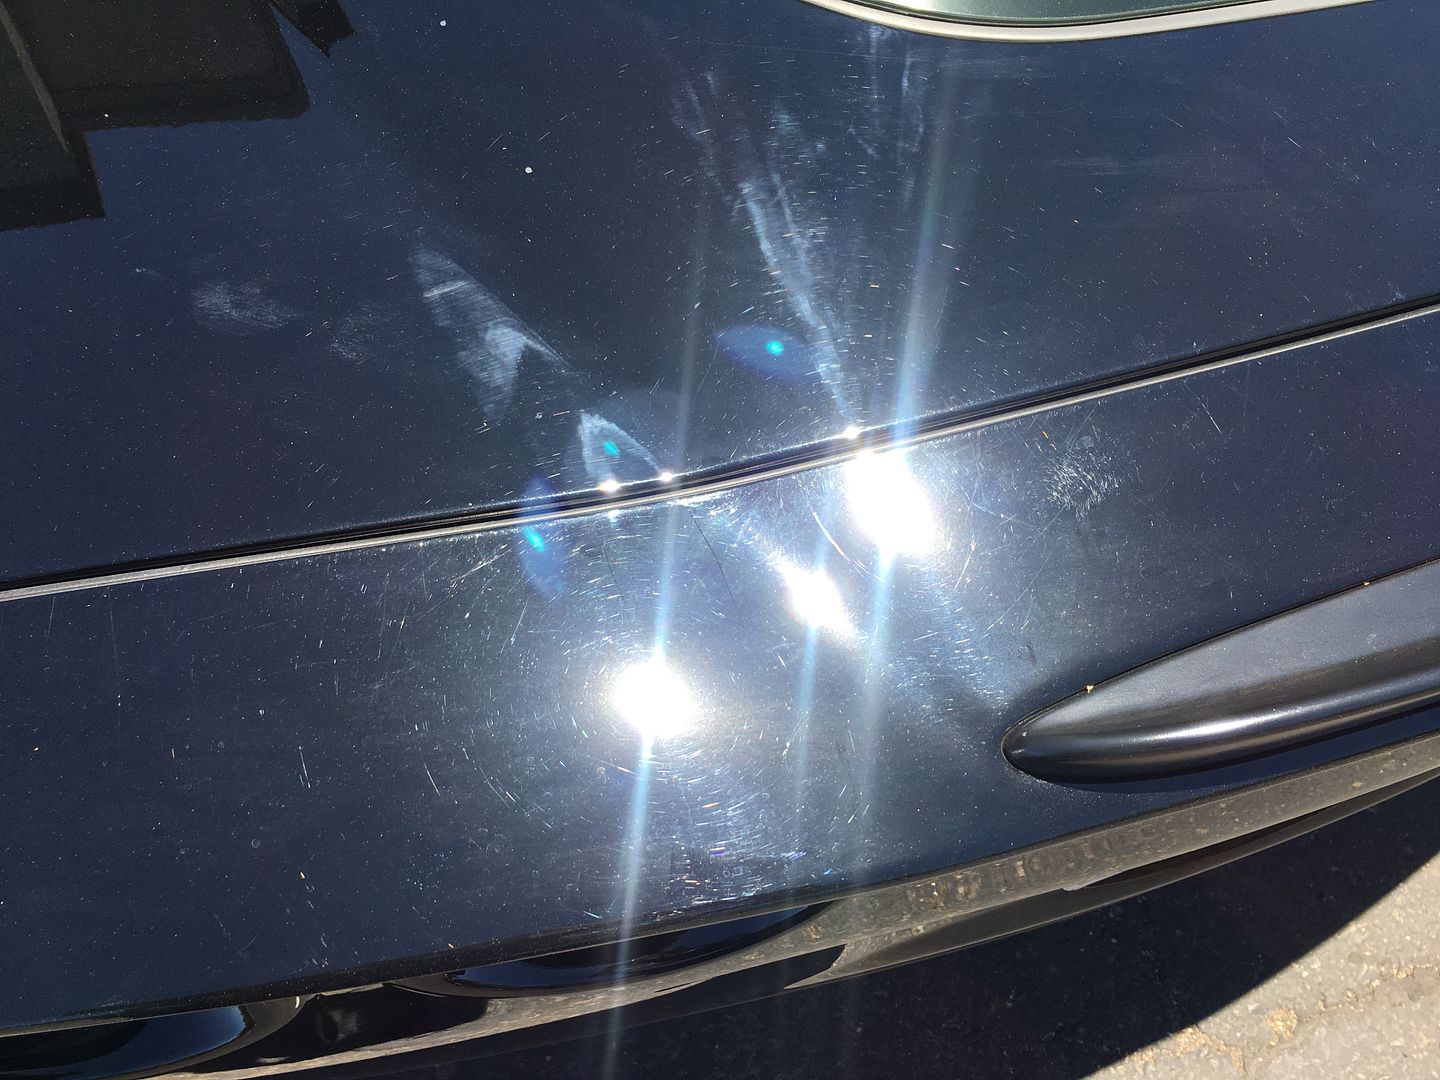
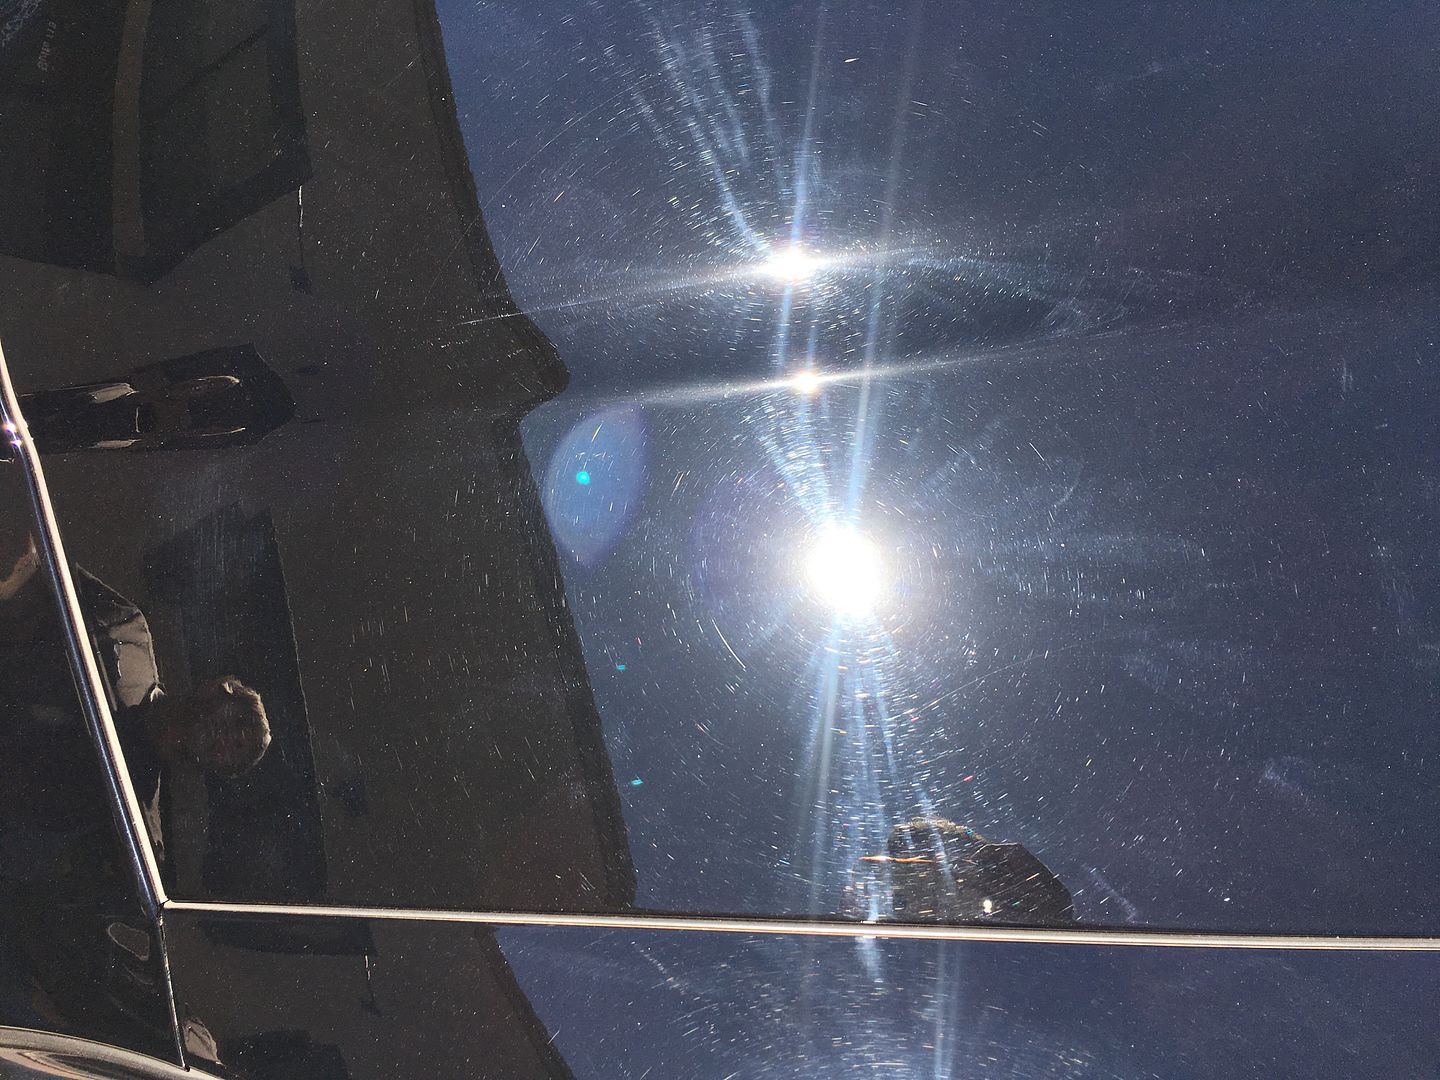
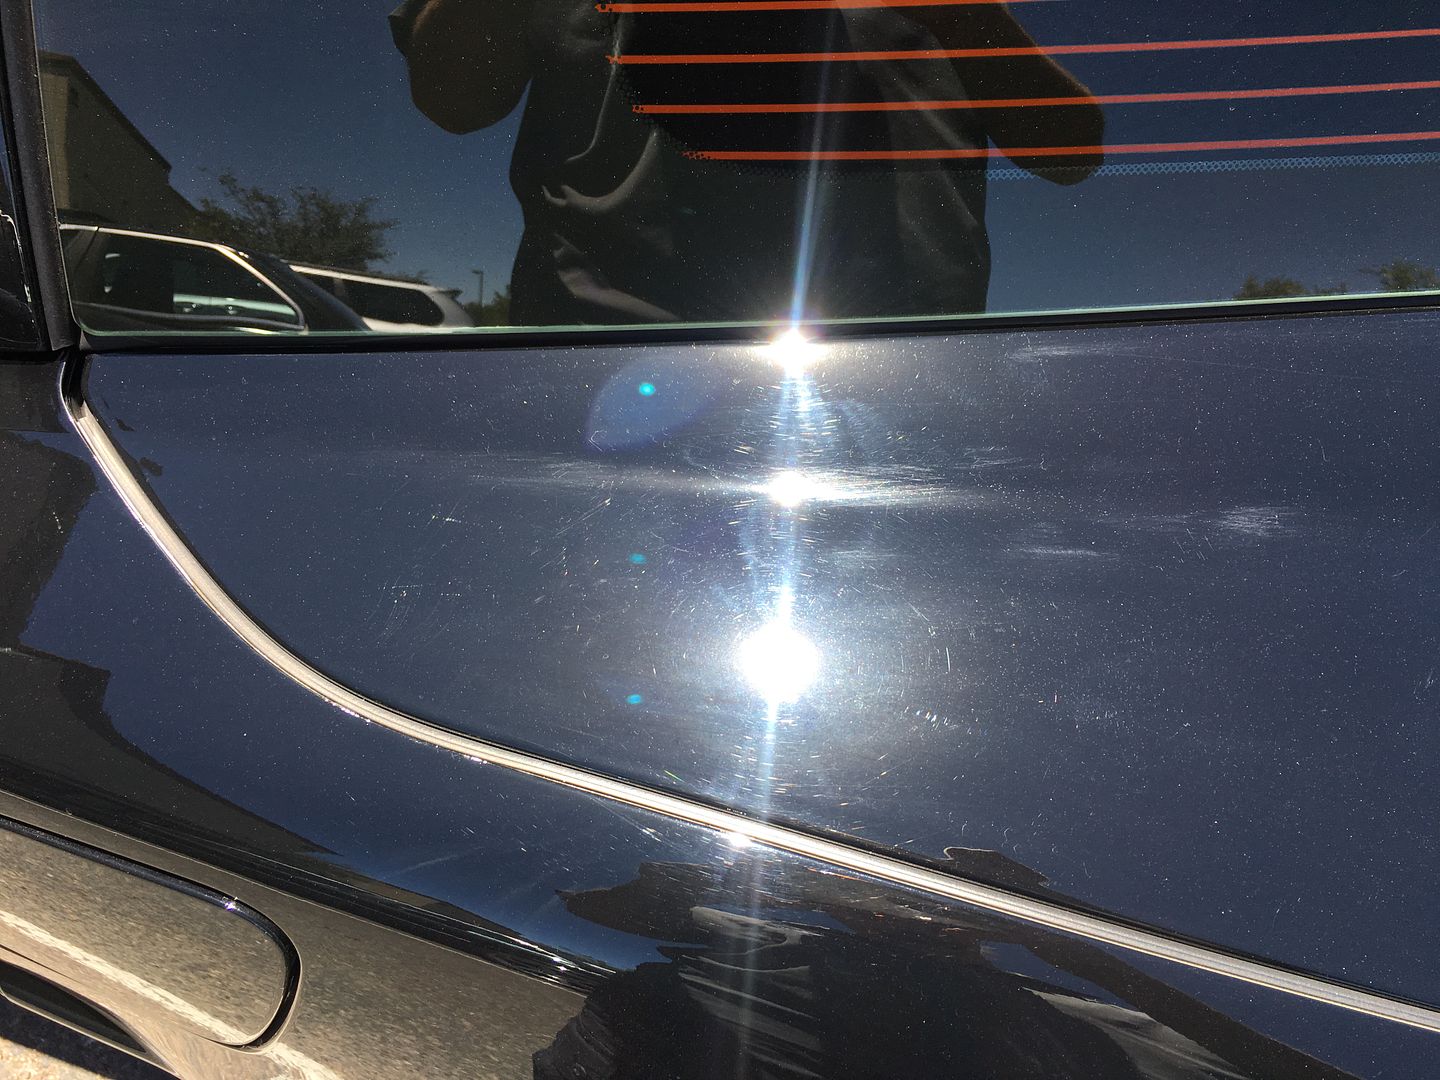
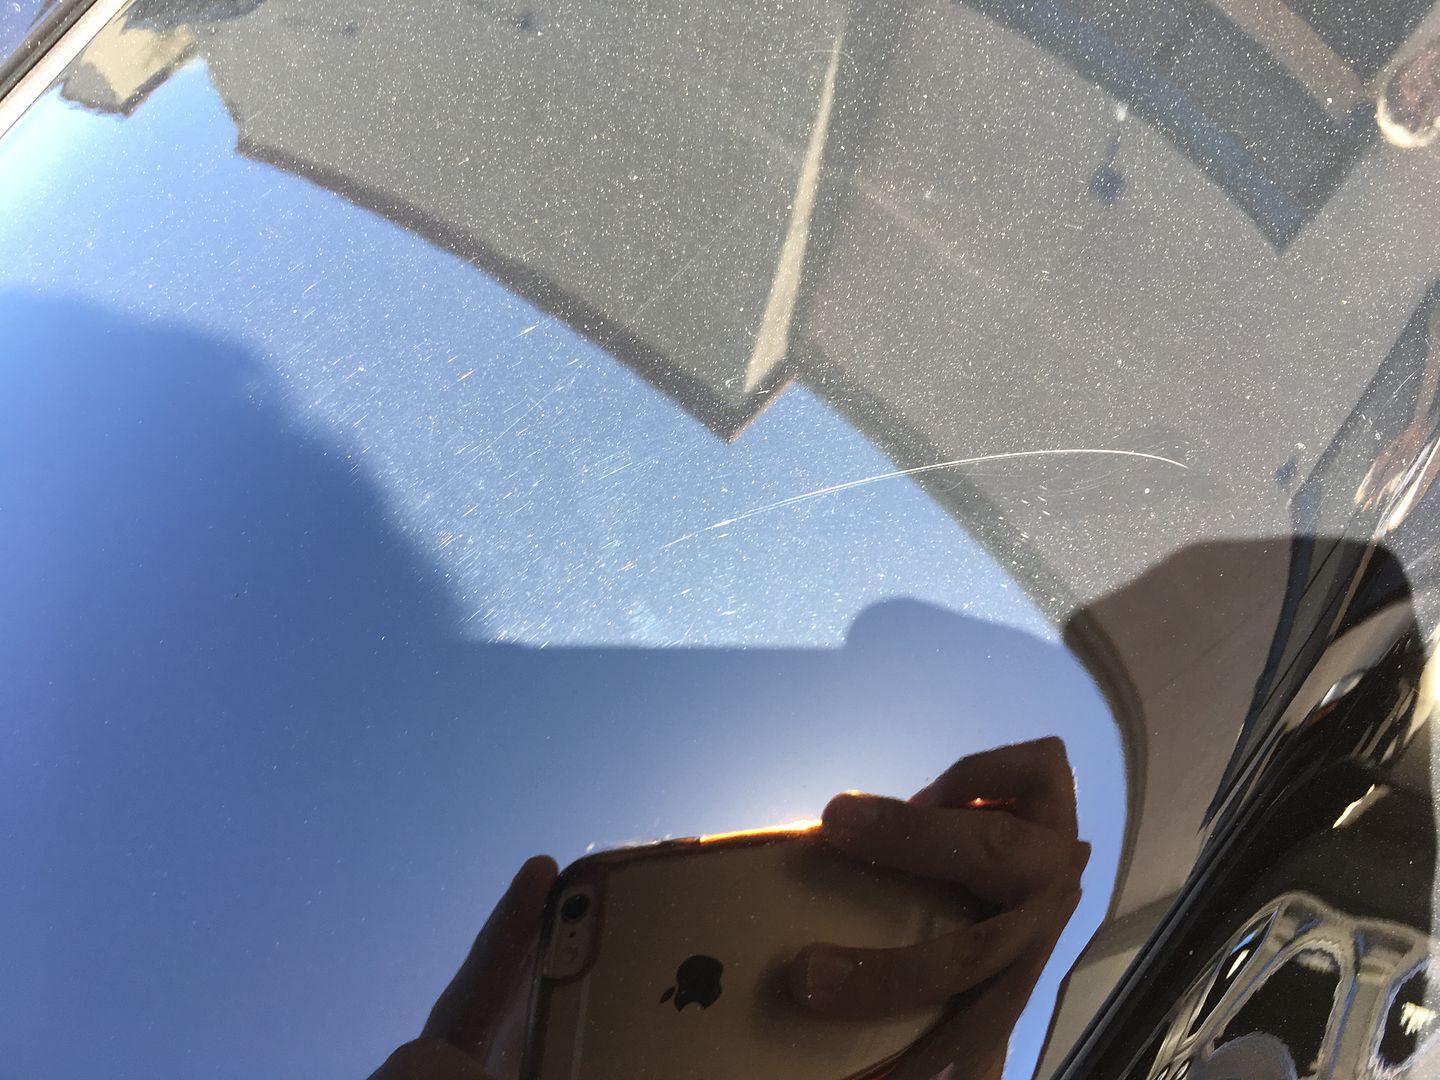
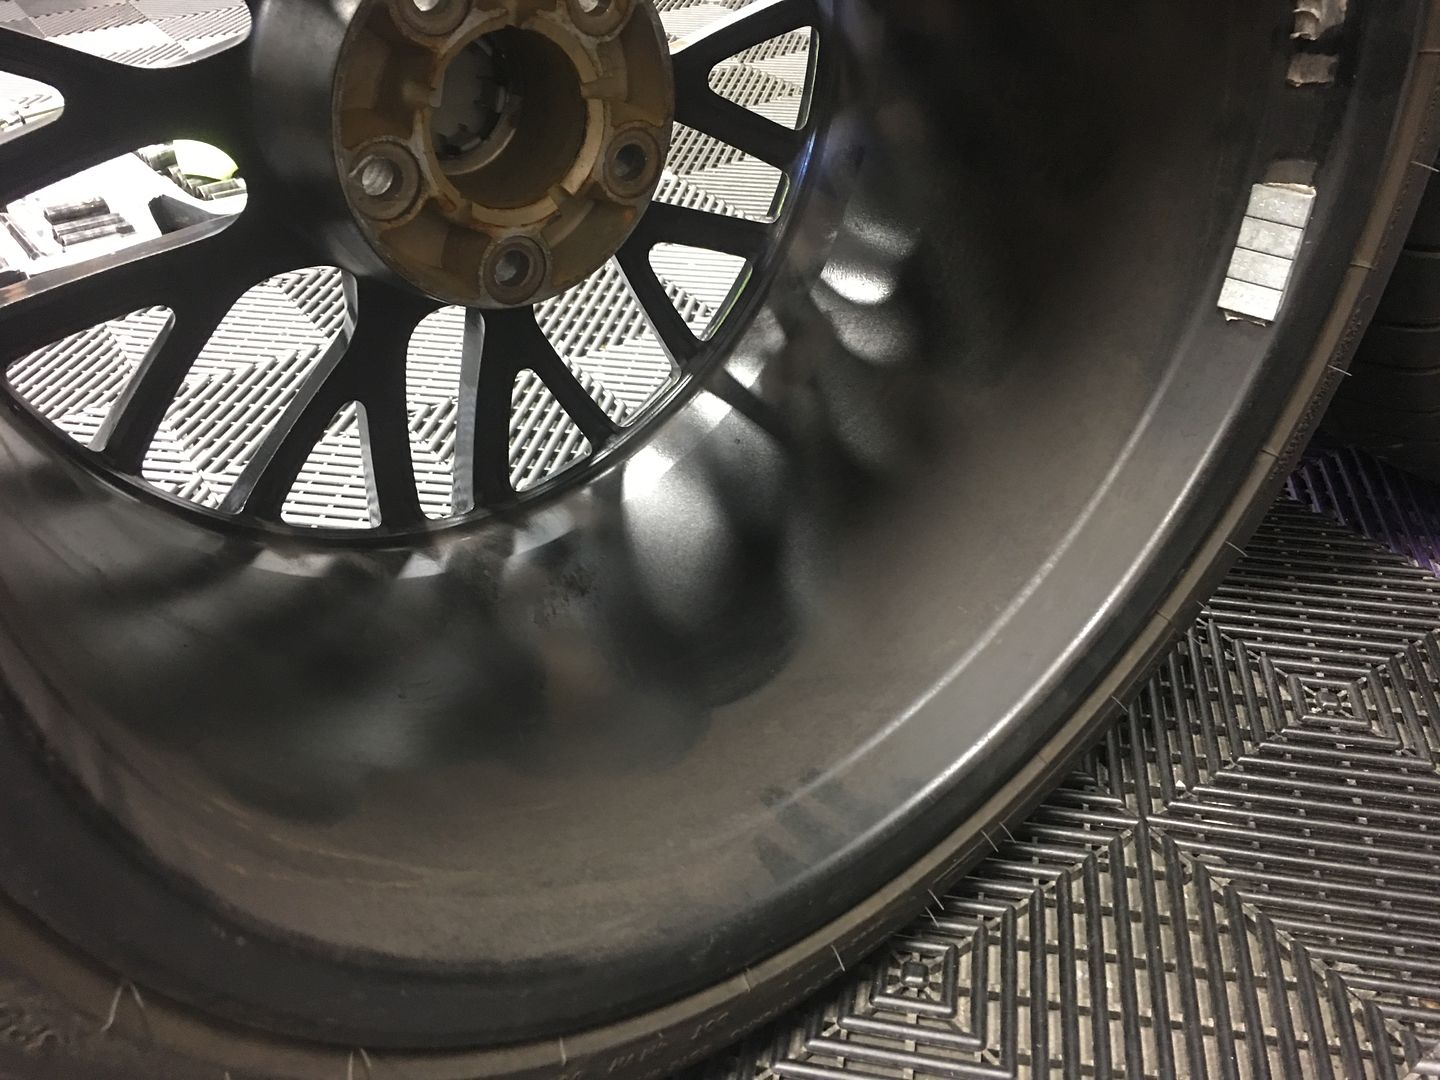
Typical heavy wear area....no matter how careful you are this area always seems to get damaged from loading and unloading.
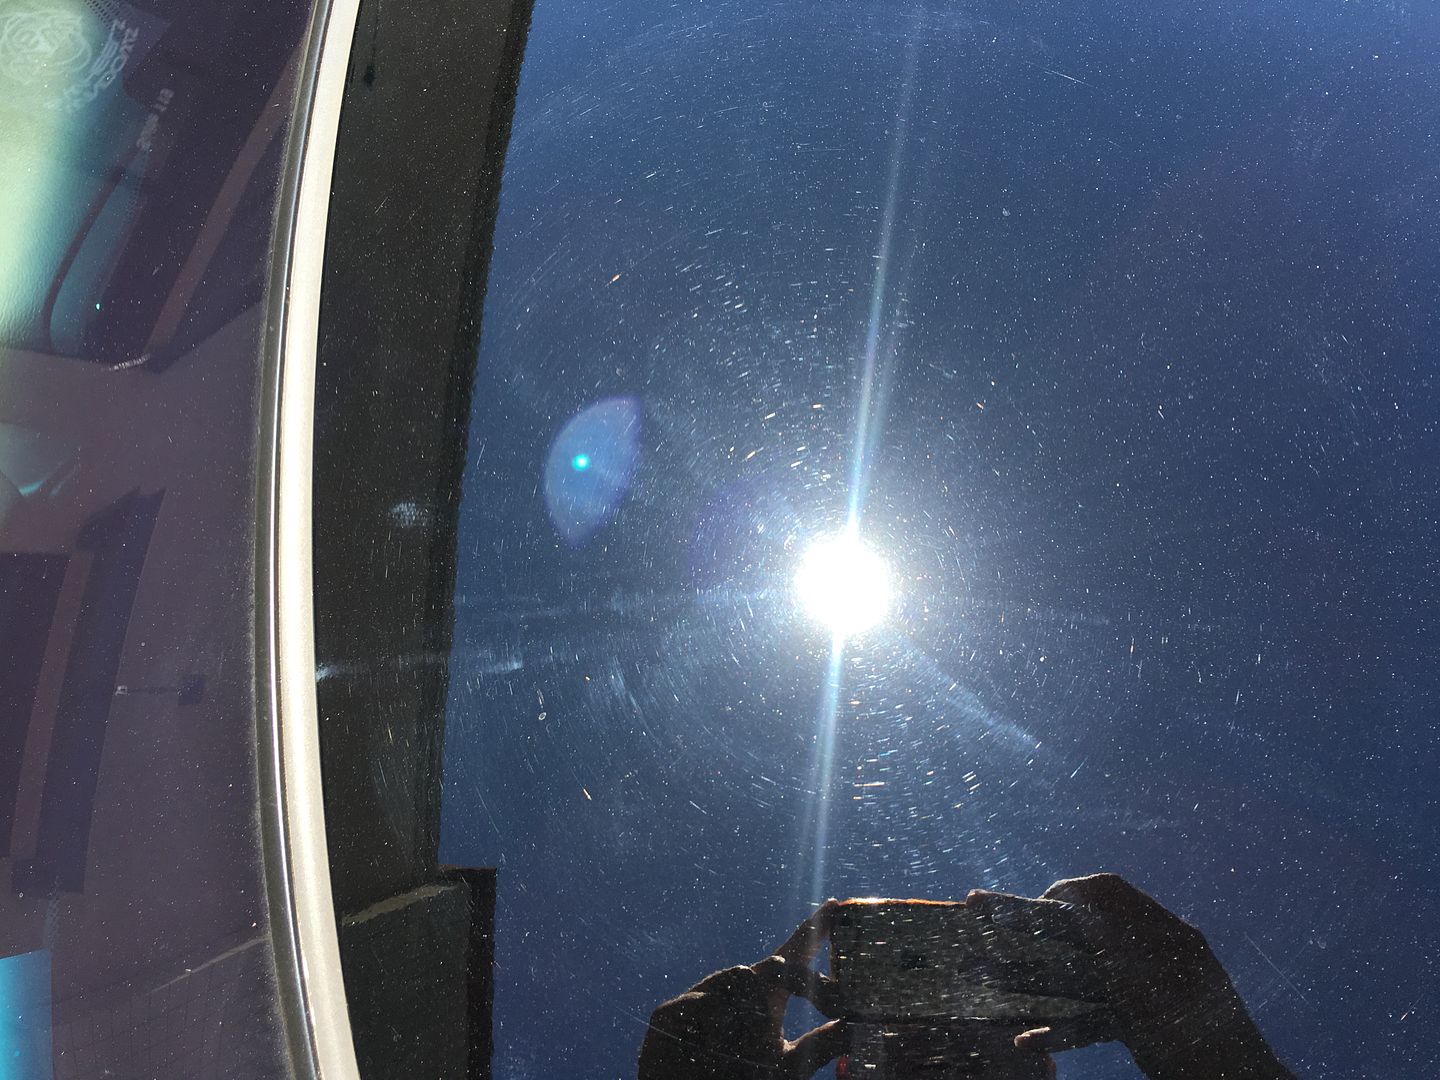
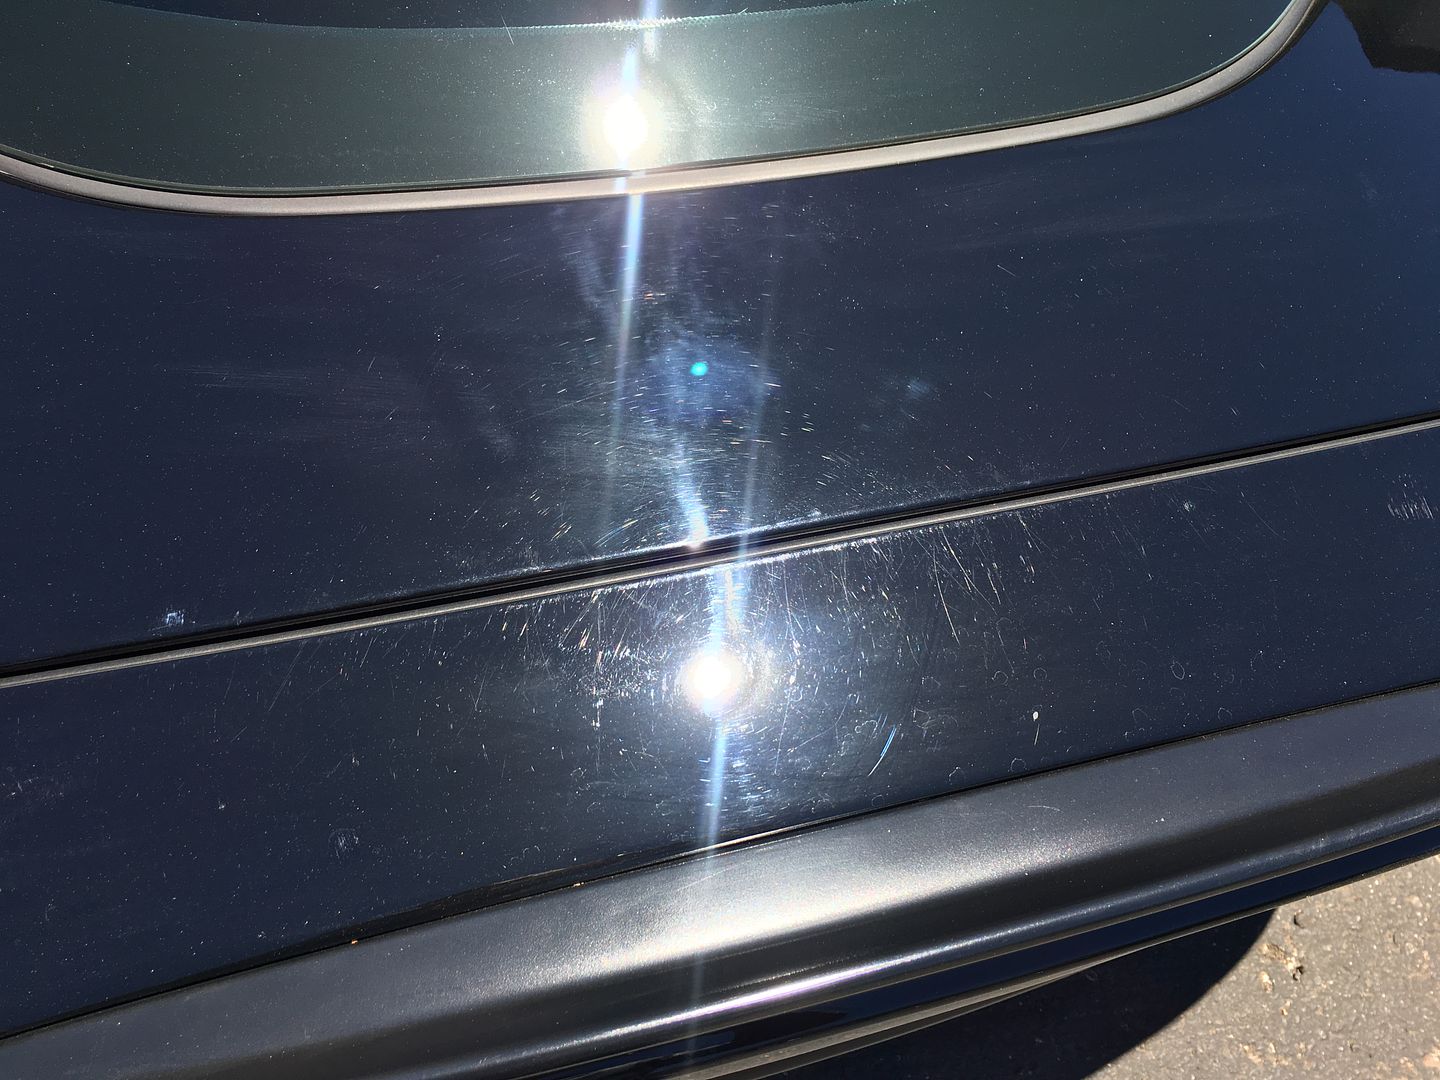
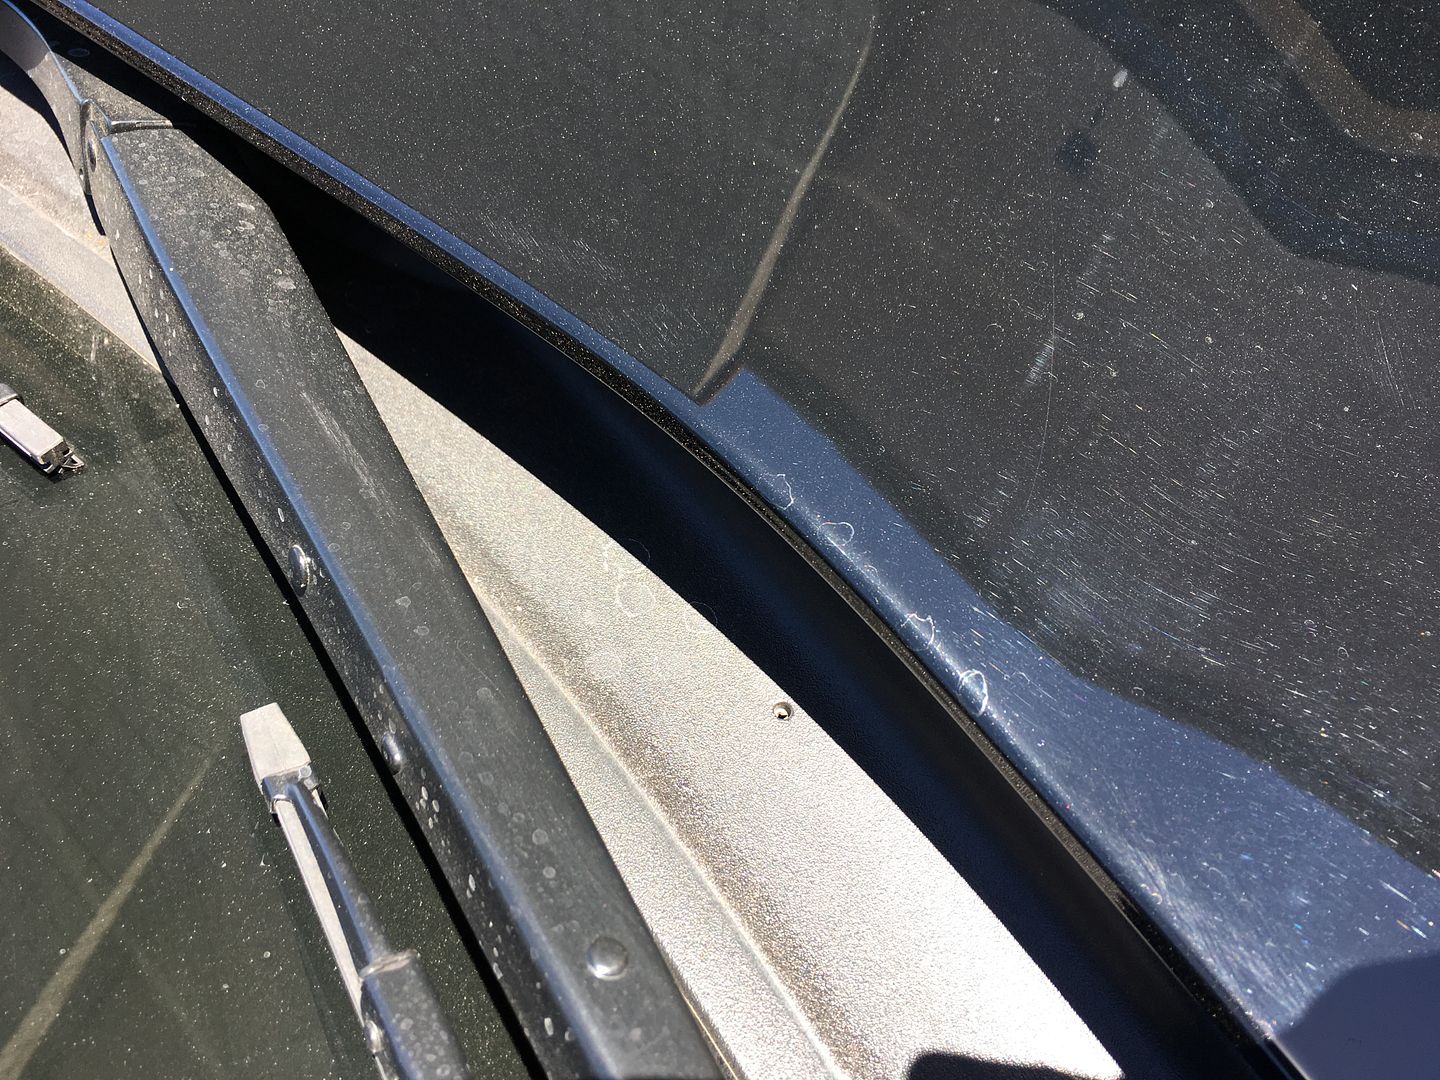
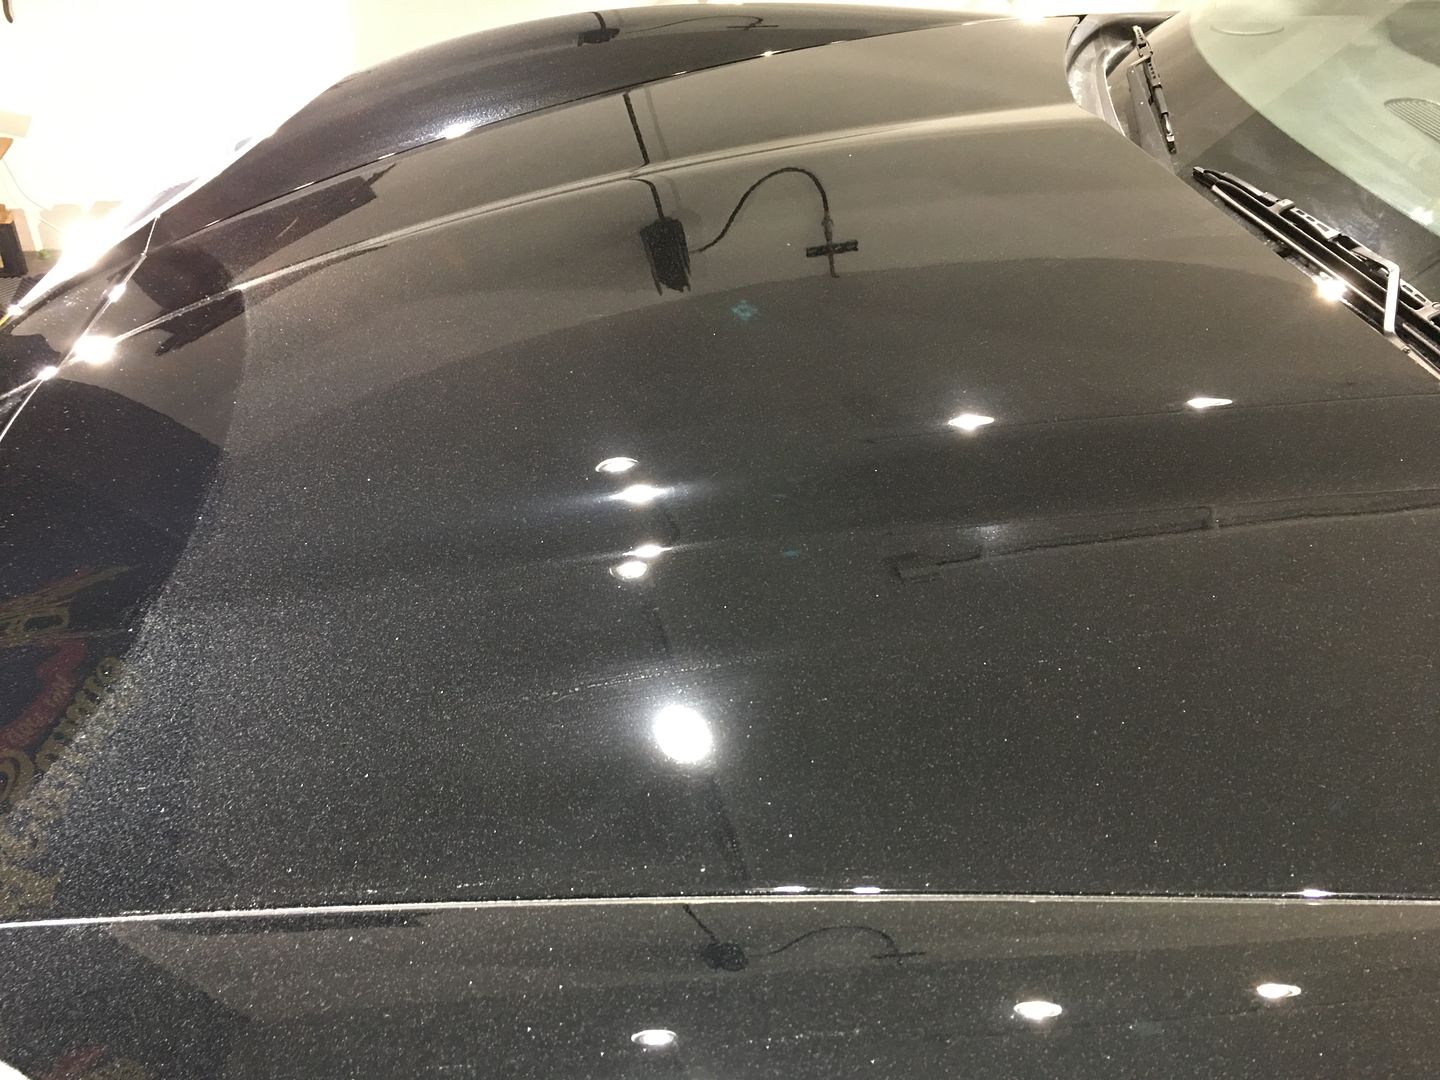
Some light water spots were also sprinkled in with all the swirls:
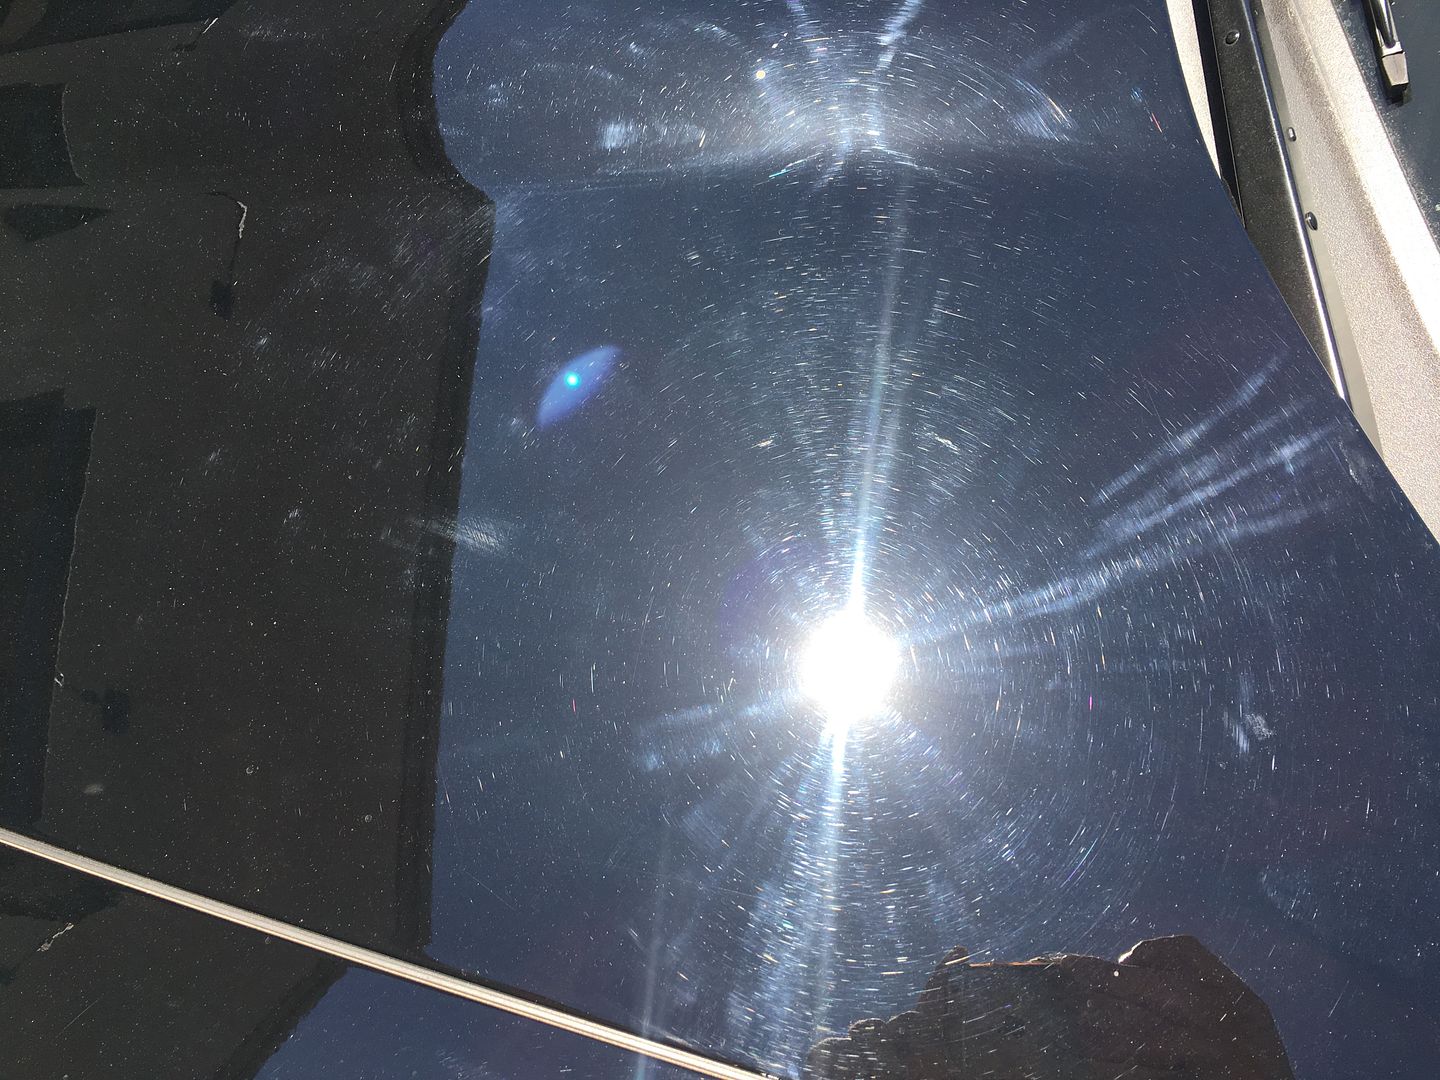
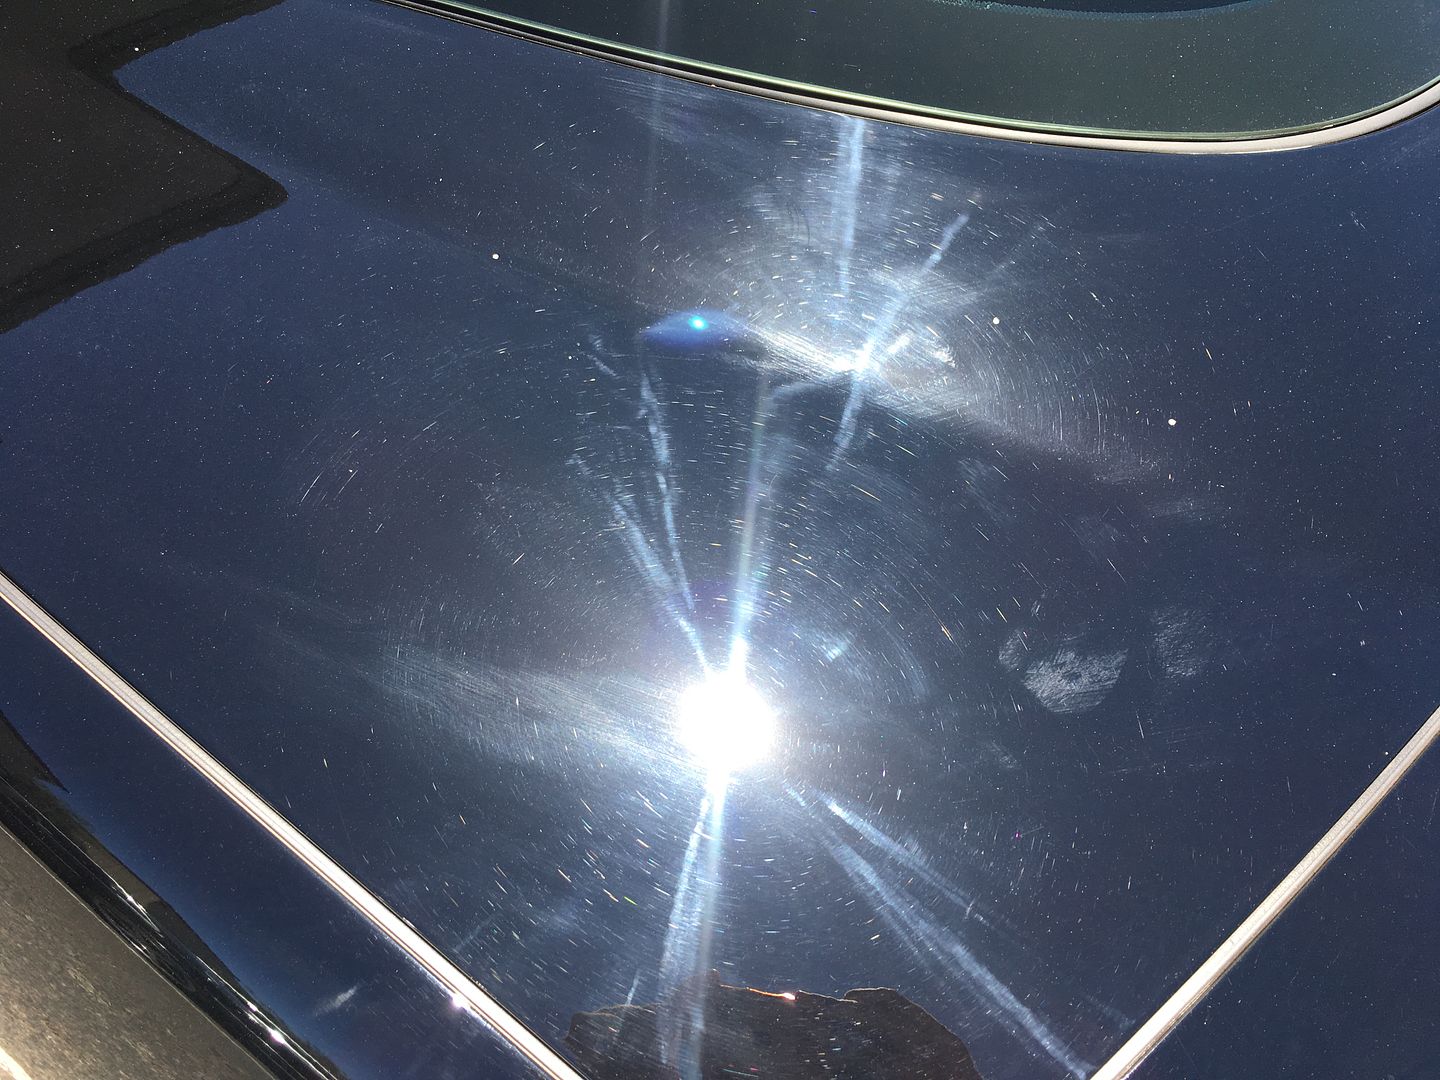
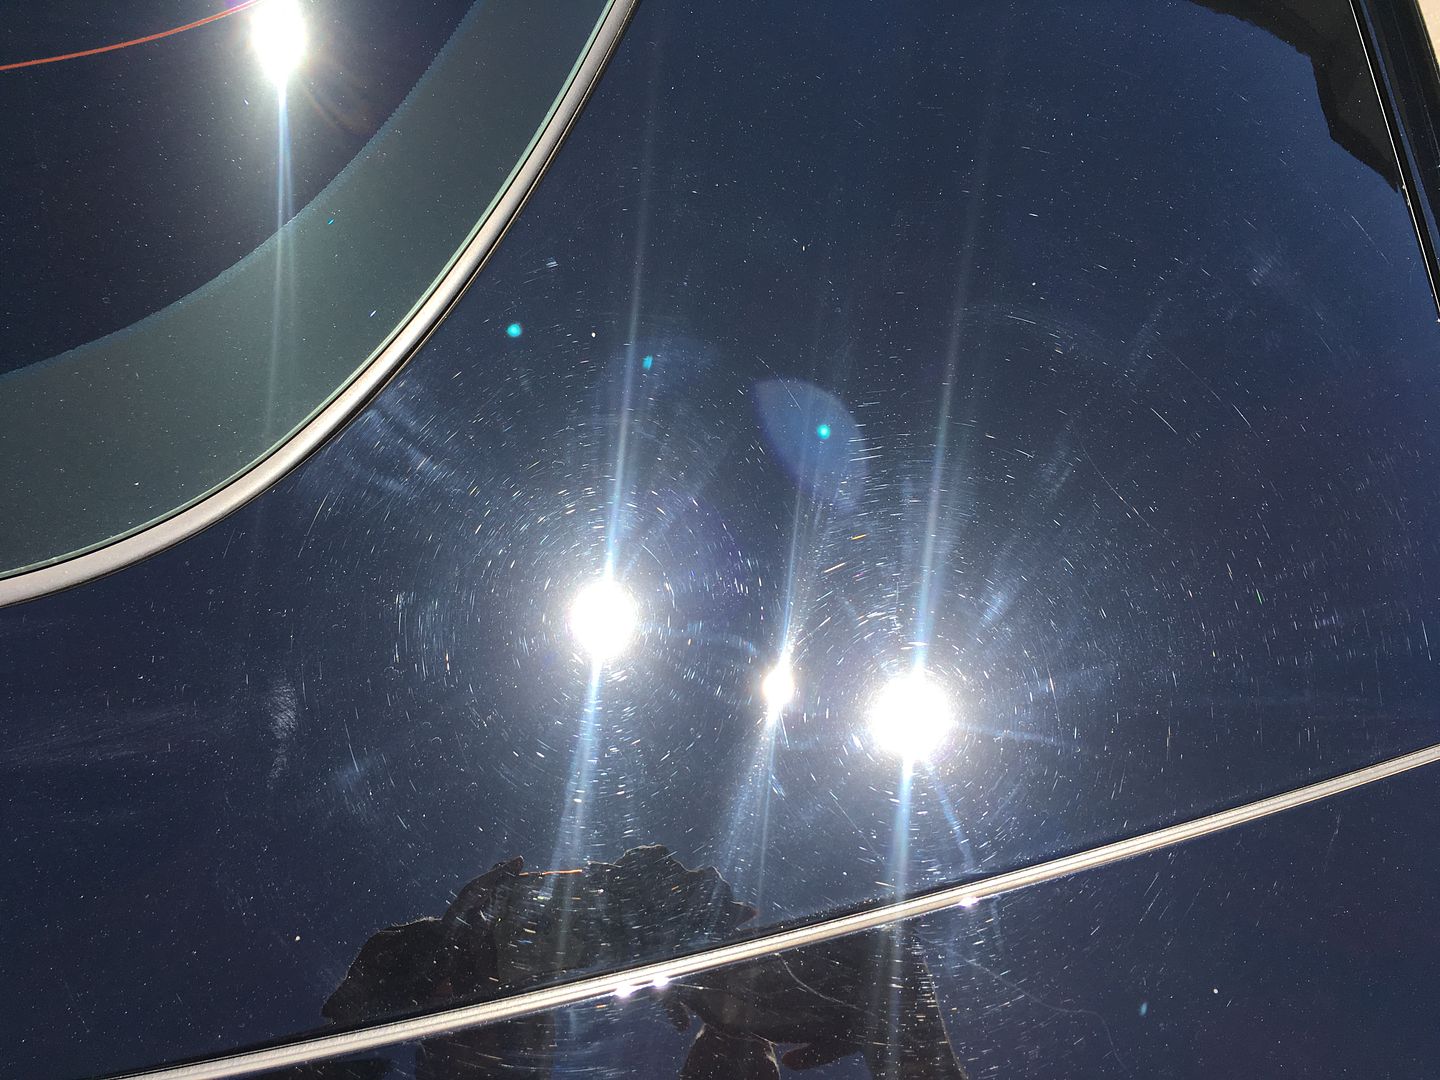
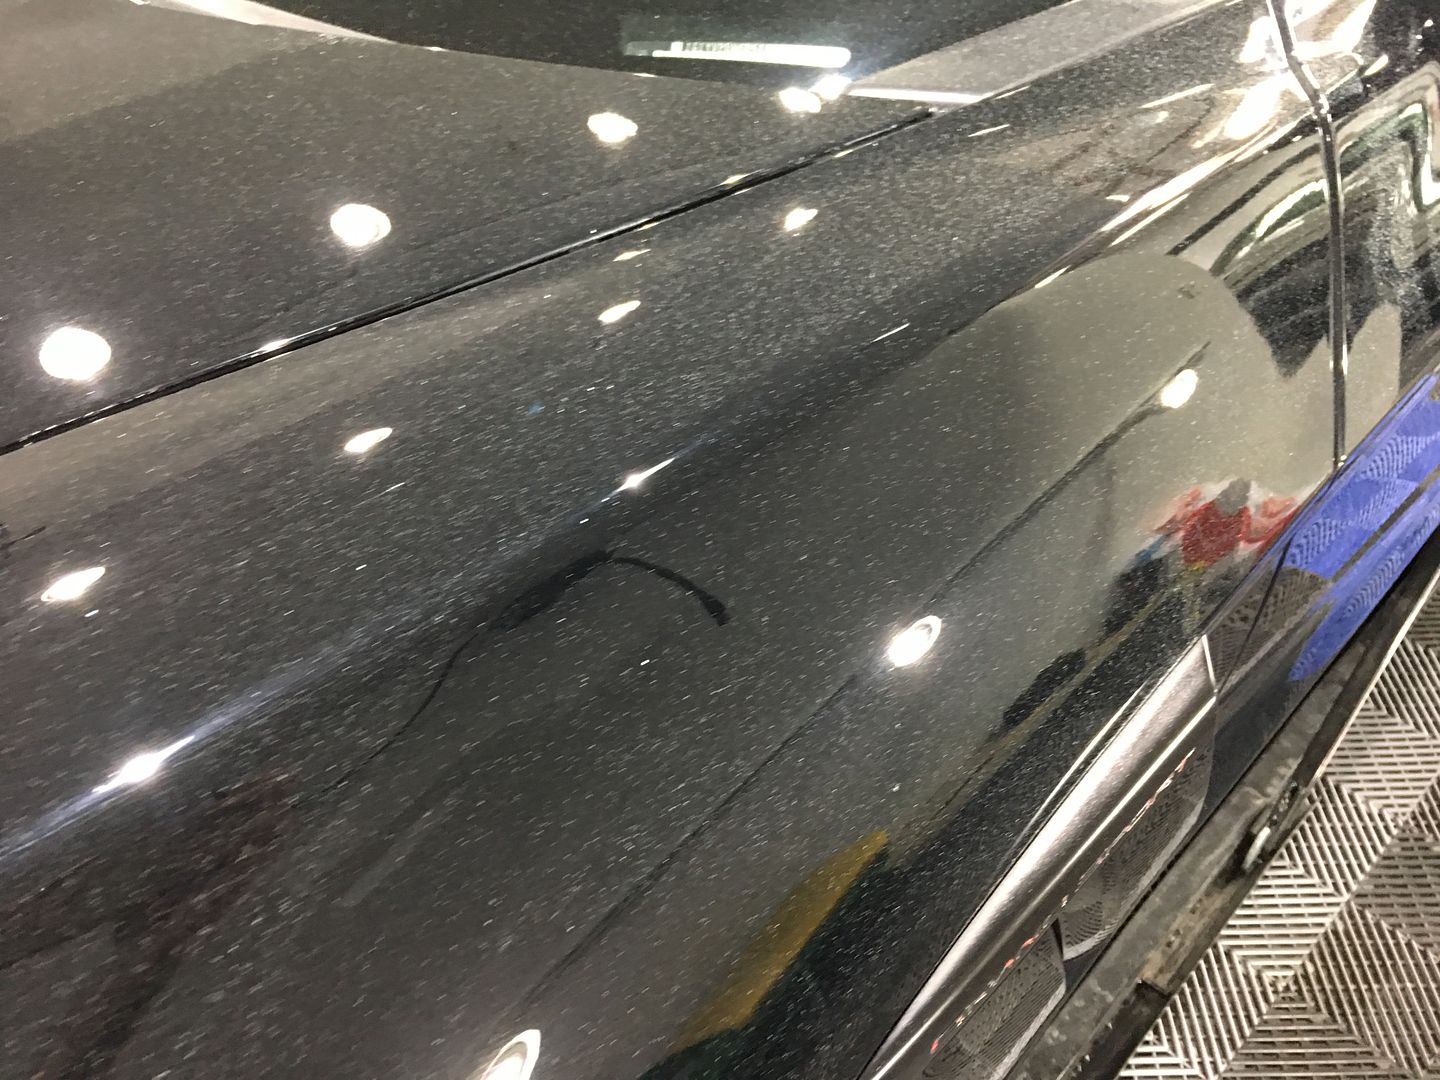
Bit of a deep one here:
Alright! So, now we know what we're looking at. After taking a look at the car together and then discussing the differences between our Stage 1, Stage 2 and Stage 3 correction options - the owner decided if he was going to do it he was going to do it right. Stage 3, wheels pulled and coated and Nano-Ceramic coating on the paint to lock in that soon to be gorgeous finish.
We went ahead and scheduled for this Grand Sport to stay with us for a week. Between the condition of the car, the fact it was black, and that we we've now entered into 110 degree weather here in Az, we knew this was going to be a doozy!
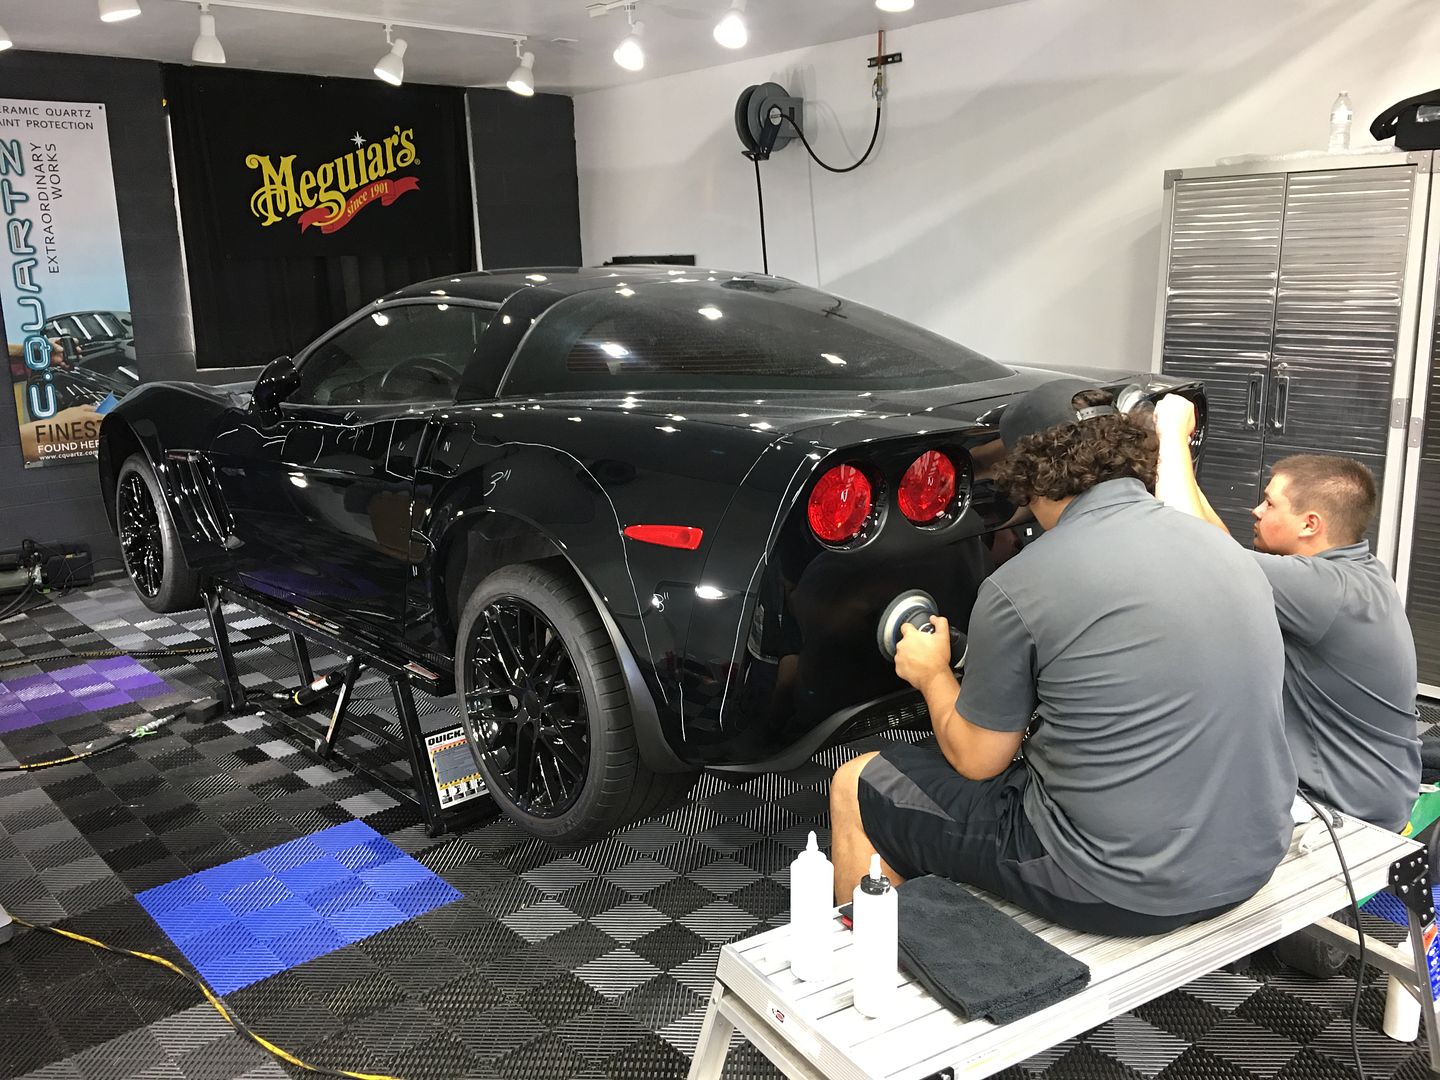
Now while I usually have quite a few "in action" pics we only have a few this time. Here are Henry and Noah working the back end of this baby. Our cut consisted of M100 and M205 on either a Megs Finishing microfiber pad or a Megs burgundy cutting disc.
You'll likely notice the white marks through out the side of the car...kind of like what a surgeon does prior to operating. Well, thats pretty much what we're doing here. Marking areas of concern, areas that need a 3" cutting pad used because the 5" didn't get into certain spots well enough and so on.
Now while M100 is an awesome product...the major draw back is...the dust!
It just gets to a point where you don't try to wipe it all off, you don't try to fight it, you just accept it is part of the process and keep moving. We recently had a fellow detailer move out here from New Hampshire (Paul from Looks So New Detailing) and aside from the obvious blistering heat that wears you down, the other note he made was on the amount of dust and how quickly your pad CAKES up out here compared to the nice cool climate he was use to. Needless to say, you also inevitably destroy a pad here and there as well, even though we try to change them out quite often to avoid over heating.
As you can see though, even through all the dust, the swirls were taking beating! Our QuickJack pulled its weight (pun intended?) as always by getting the low stuff up to chest level and making it much easier to see what it was we were working on (comparatively speaking).
Now when a vehicle gets this dusty again from the cutting/compounding process, really the only way to make sure as much of the dust is removed as possible, is to re-wash the car.
We opt to do this BEFORE the final polishing step so that if any light wash marring were to happen while the paint is bare and unprotected like this, it wouldn't matter much since we still have the final polishing step left to go anyway.
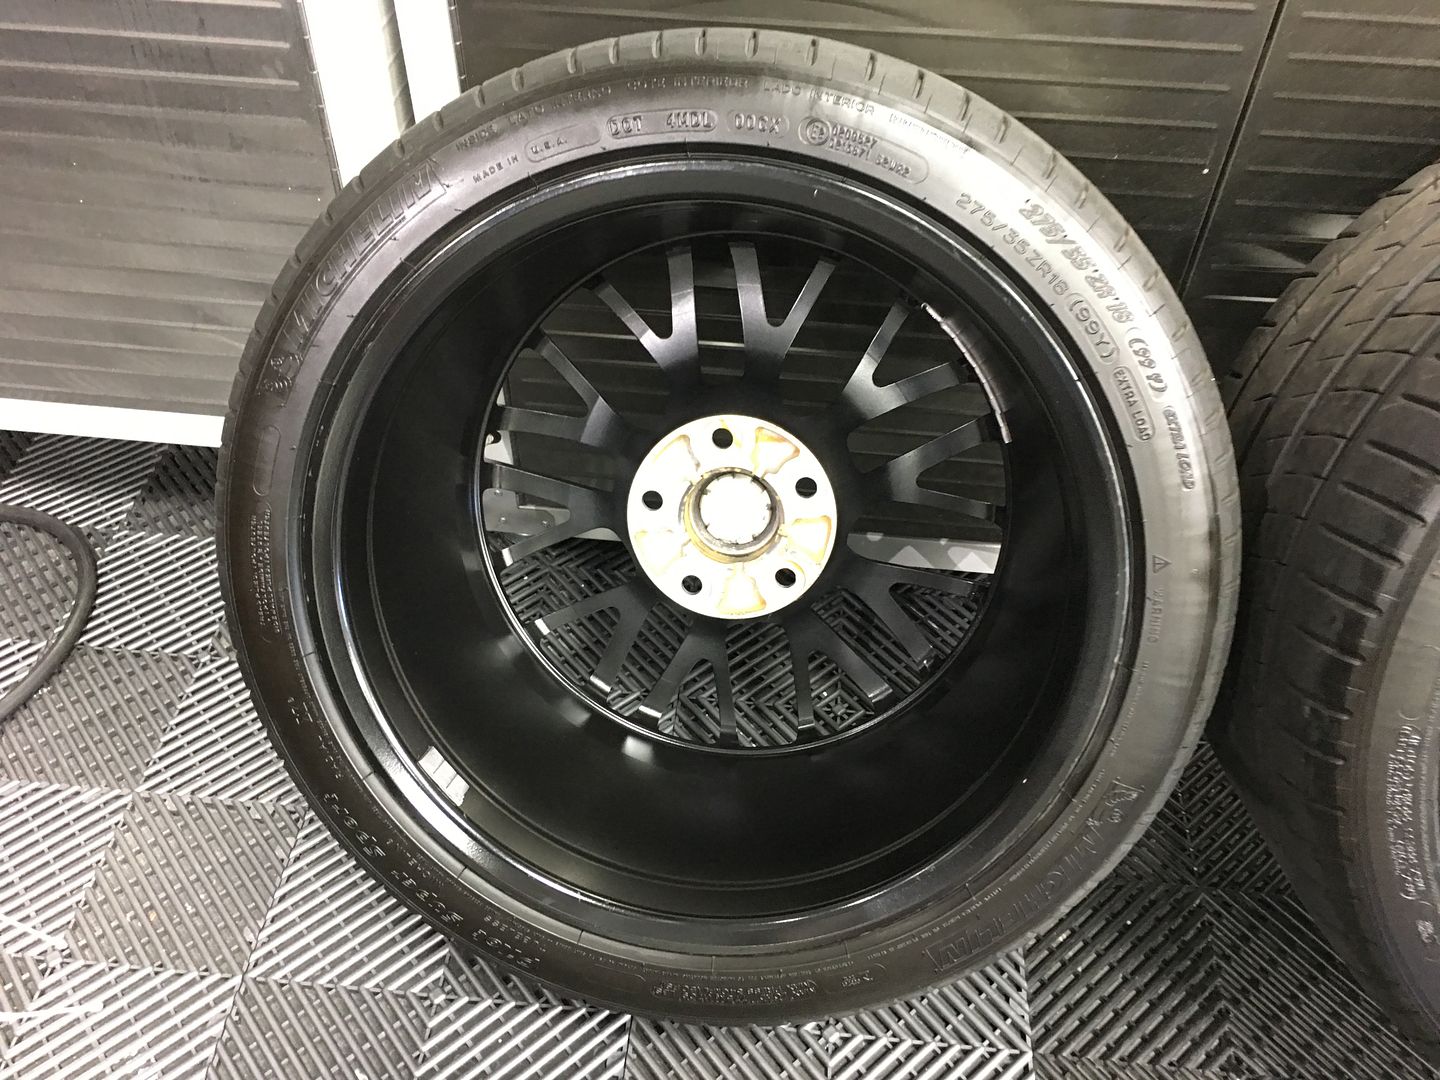
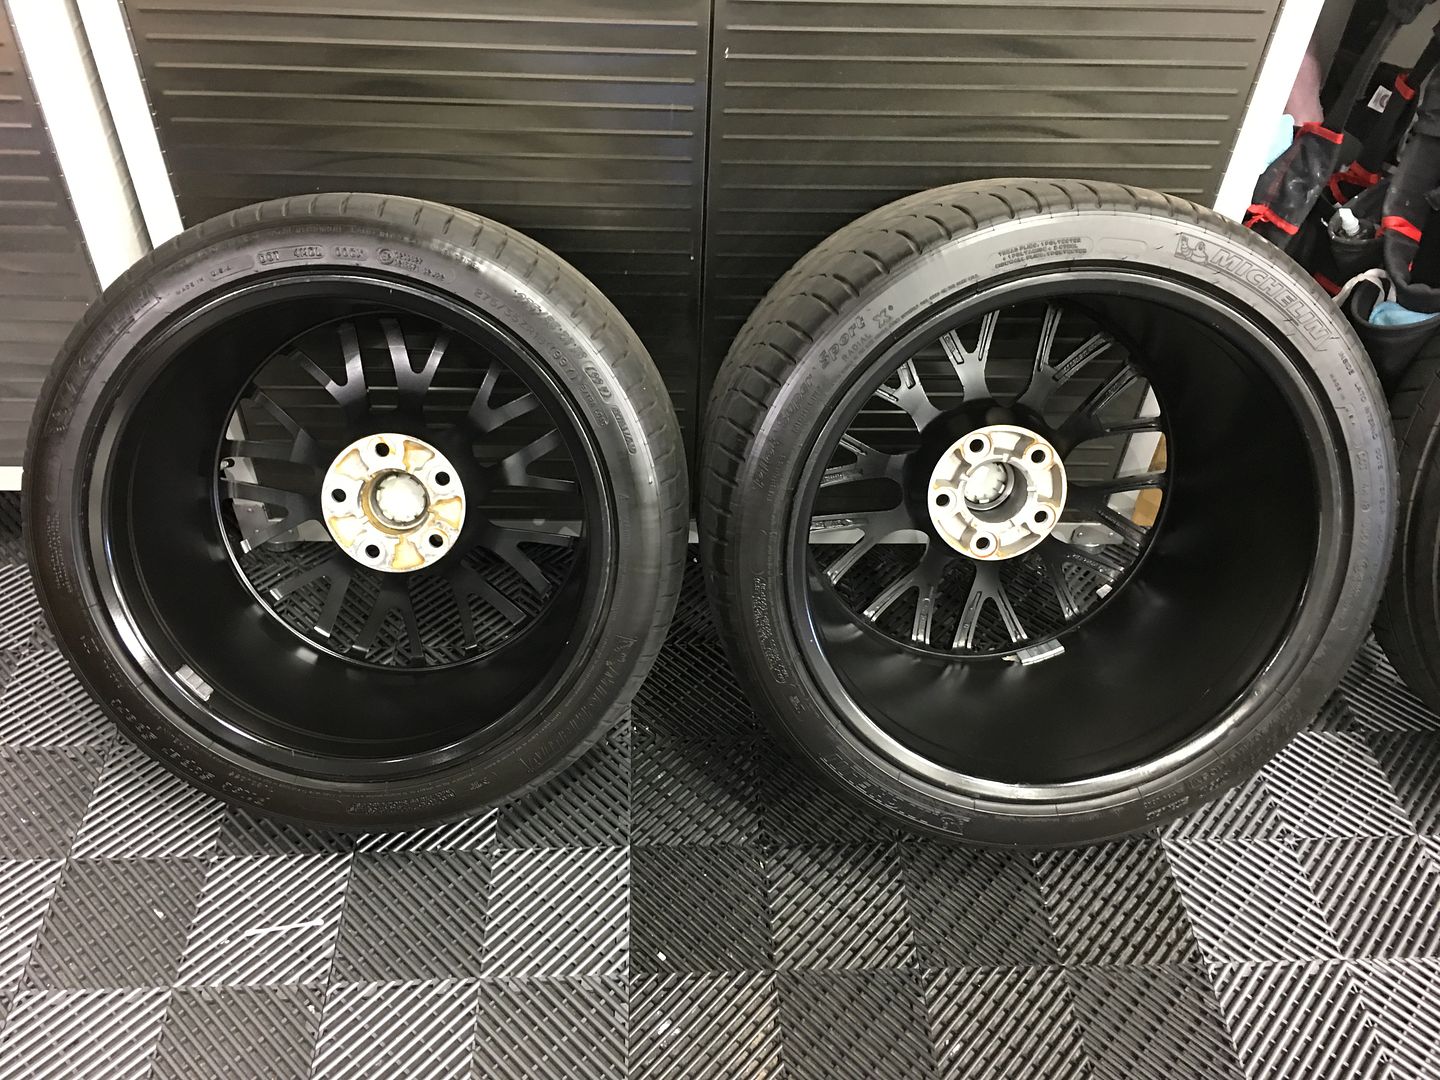
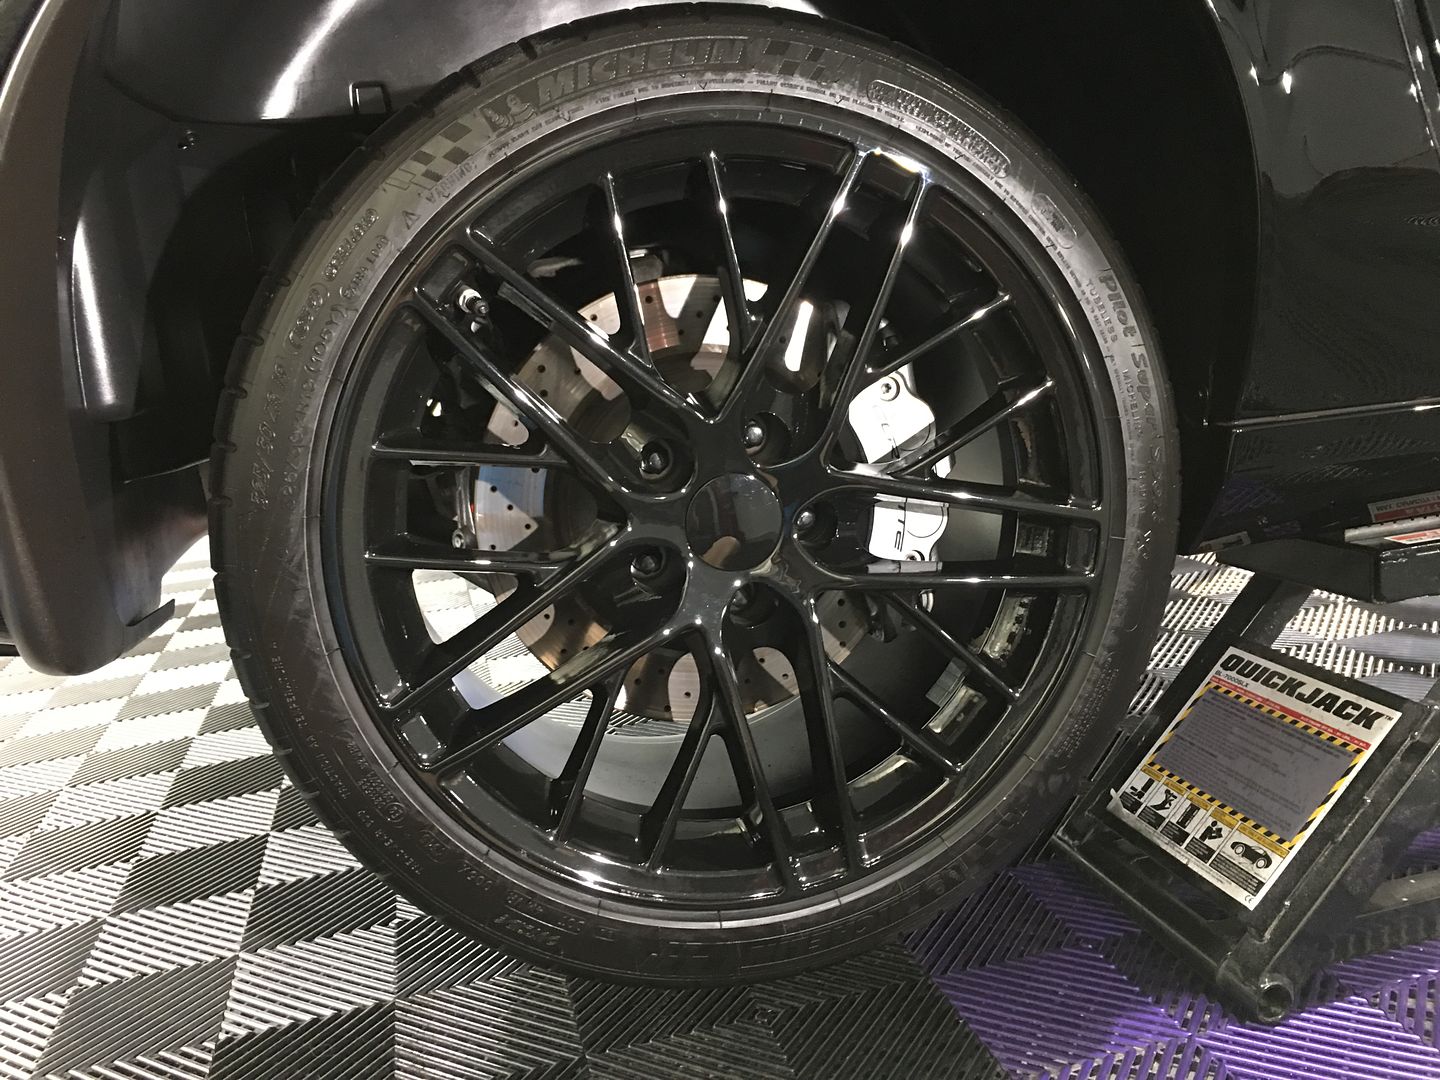
Once the vehicle was fully cut (or so we thought) and the re-wash was complete, it was time to pull the wheels and get them cleaned up.


Brake dust combined with Az dust combined with....whatever. It was dirty, thats all we knew!
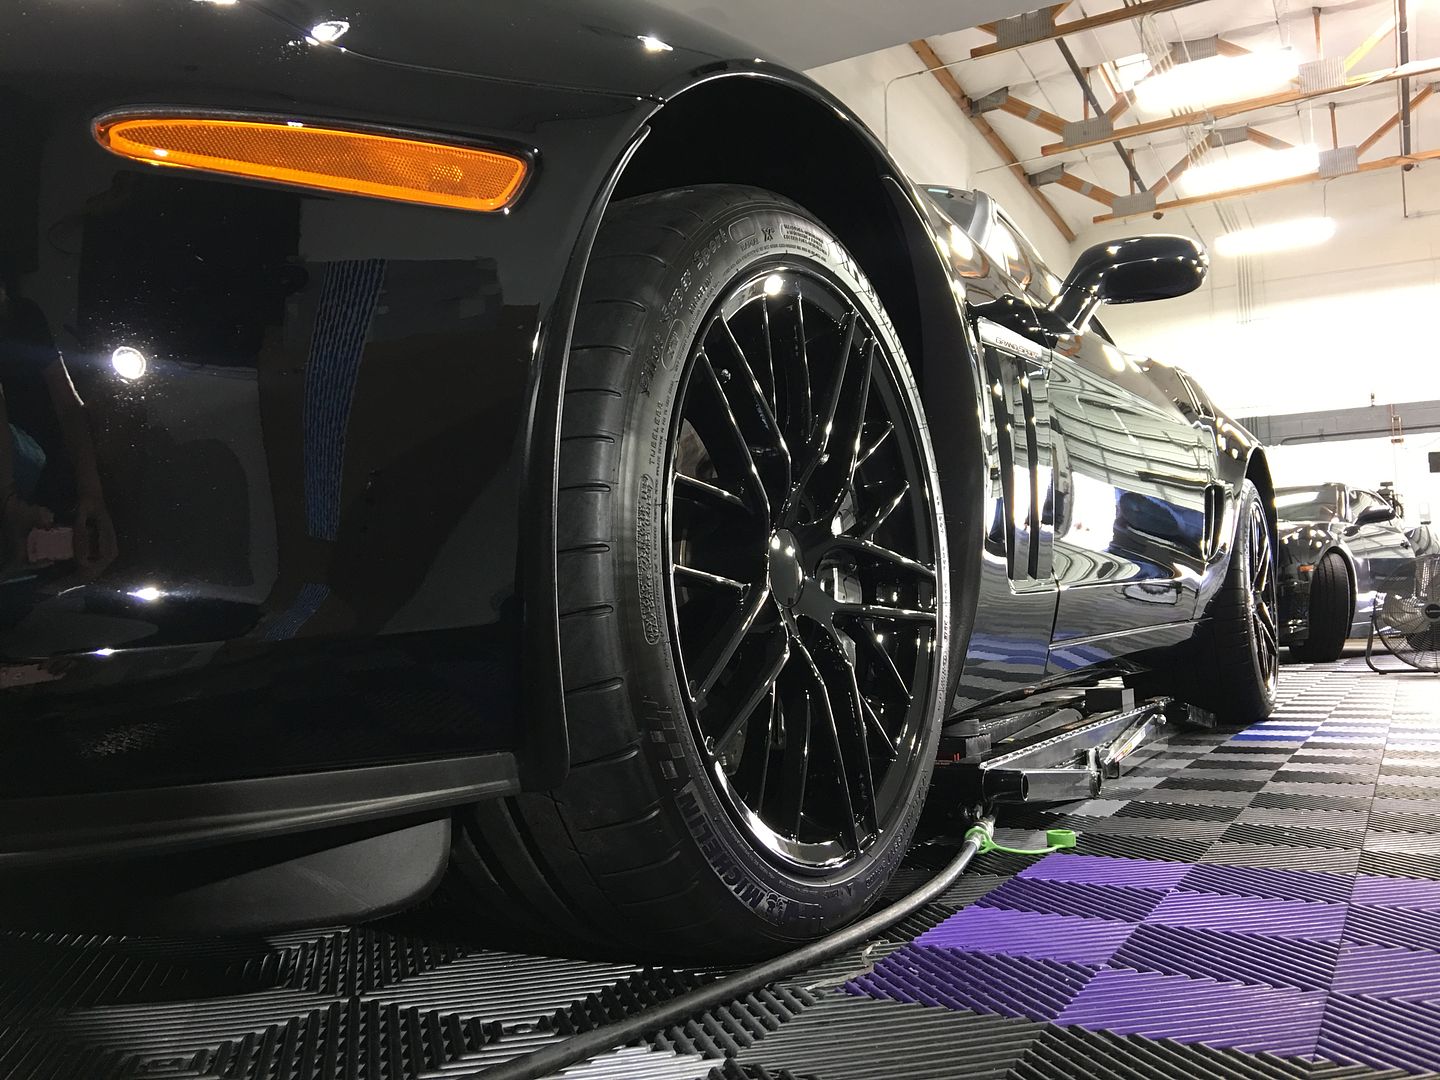
A nice bath in Iron-X along with some good ole' patience cleaning all the spoked areas and hard to reach places left these babies looking like new again. Once coated...they were gleaming.
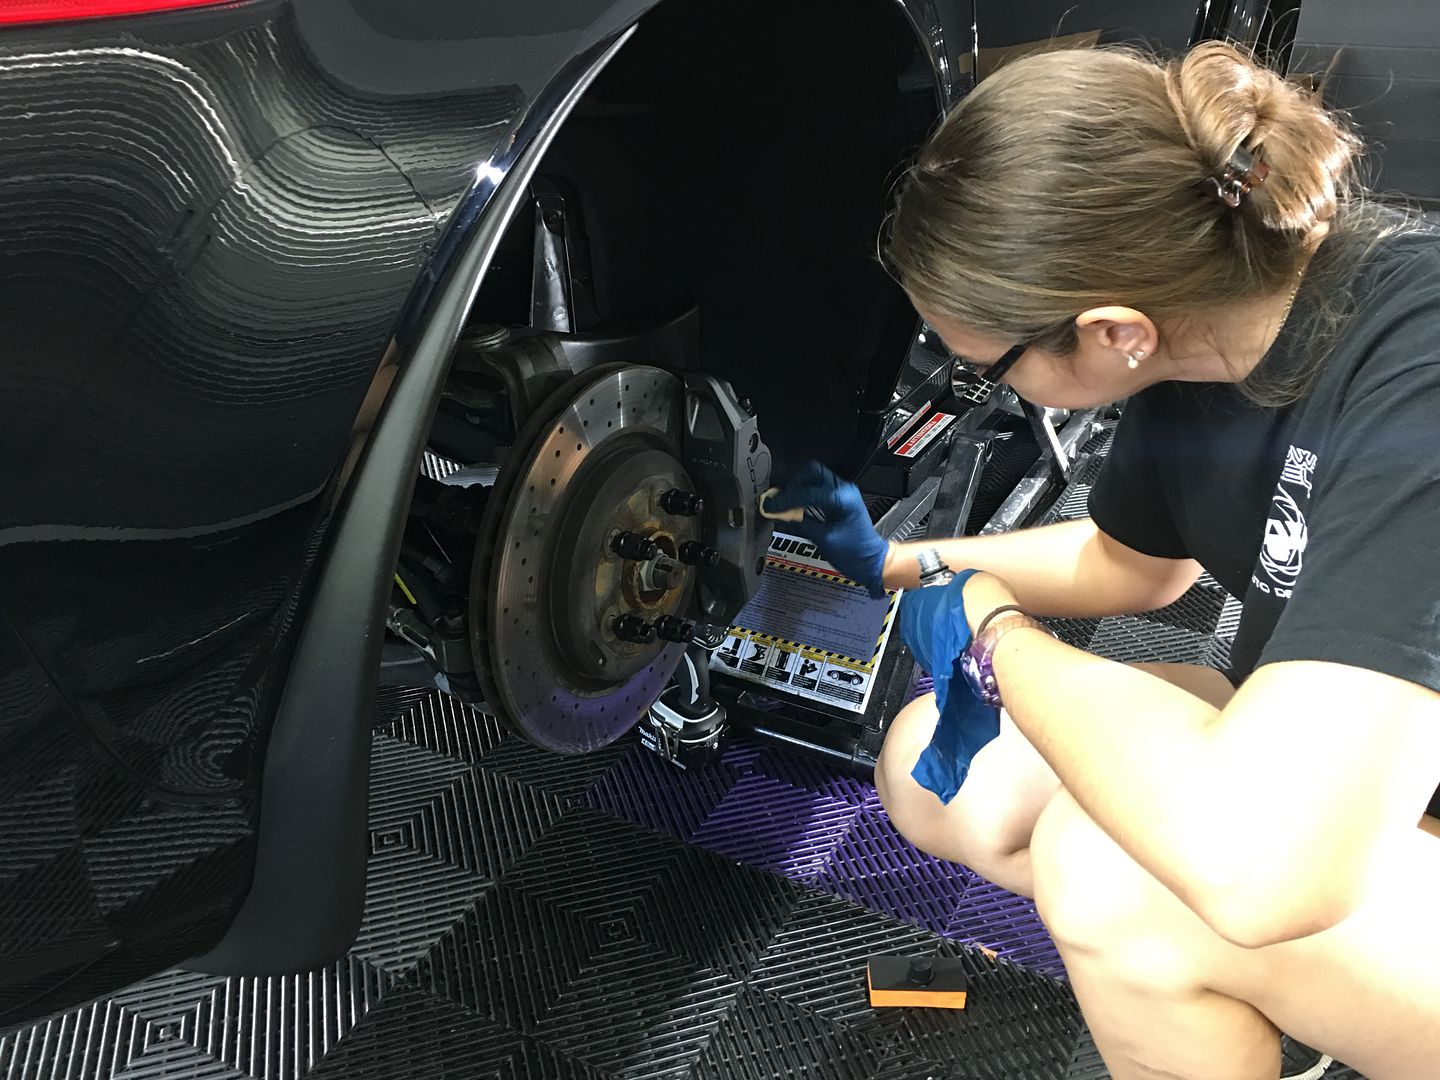
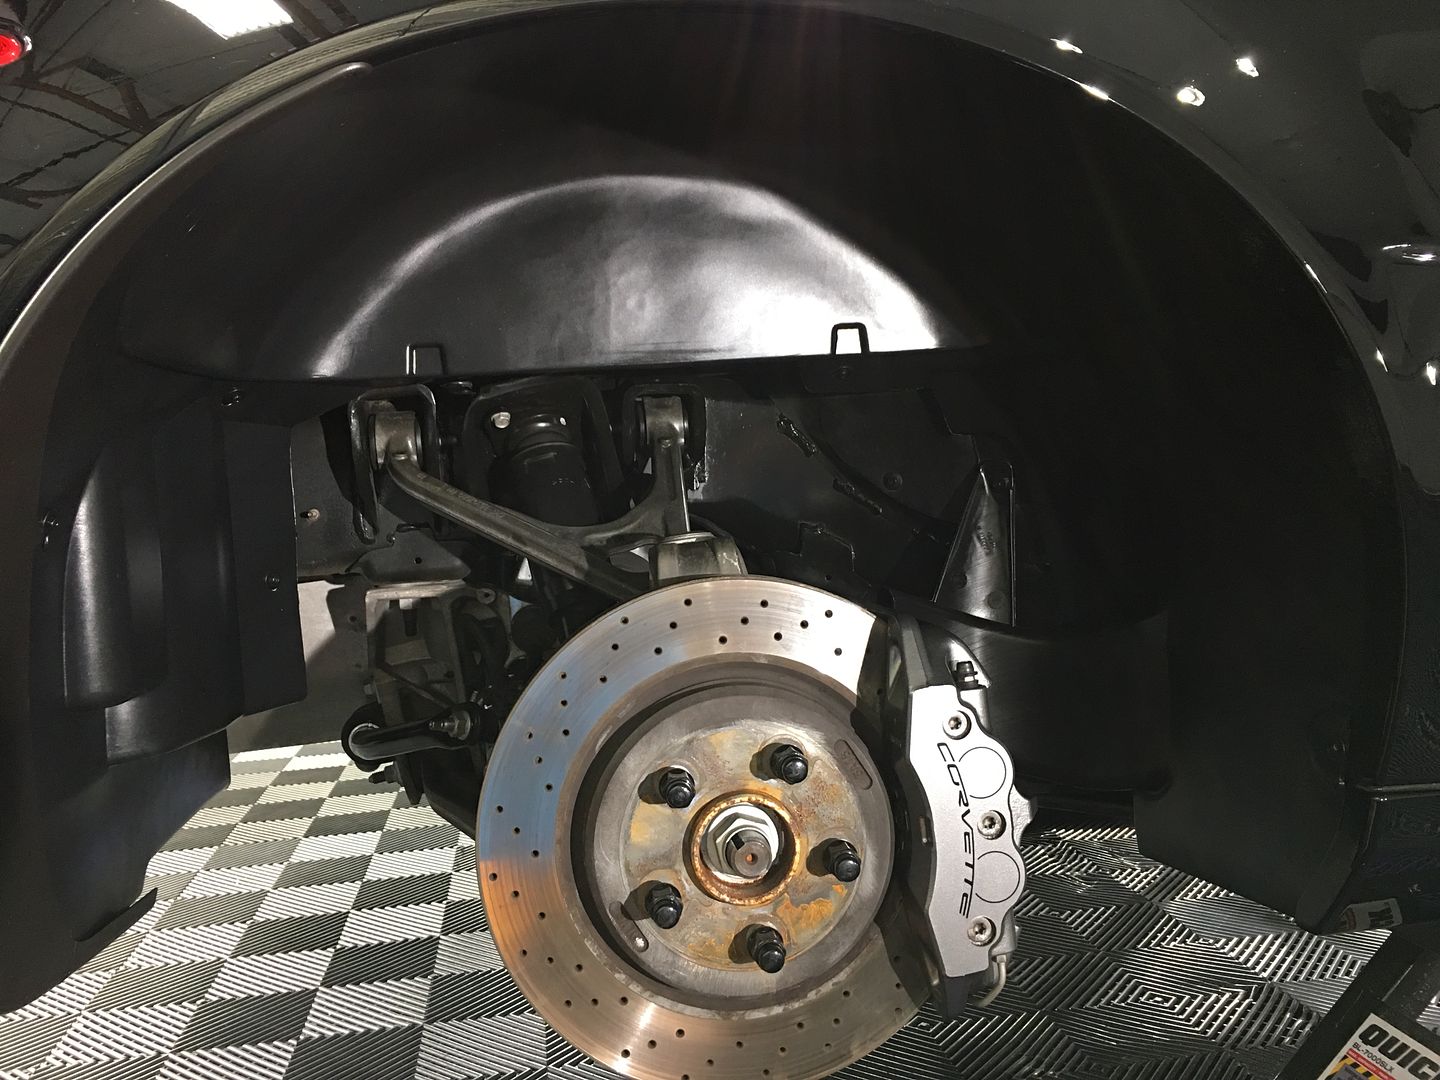
Of course while the calipers were exposed (along with the fender wells) they received some major TLC as well. Here's Daniela applying a caliper coating after the fender wells had been detailed and dressed.
Installed and looking like a boss:
Now as I said, we thought we were done cutting, but there were a few RIDS that required a bit of additional attention, however these spots were few and far between and corrected fairly easily.
Once the spot cutting was complete, it was time to dial in that final polishing step and make this paint look dripping wet.
Essence with a green Buff n' Shine pad worked well in most areas. A CarPro Gloss pad was used for the 3" work and Megs Yellow and Black pads were used for the 1-2" Nano work.
Henry can be seen here touching up some of the super light marring that was left in some spots using the Rupes Nano.

This shot was one of my favorites. Wheels re-mounted, final polishing completed and looking like a glowing onyx under all of our LED lights.
While she was still lifted and in a fairly comfortable position for lower work, I took the opportunity to work on the exhaust tips:
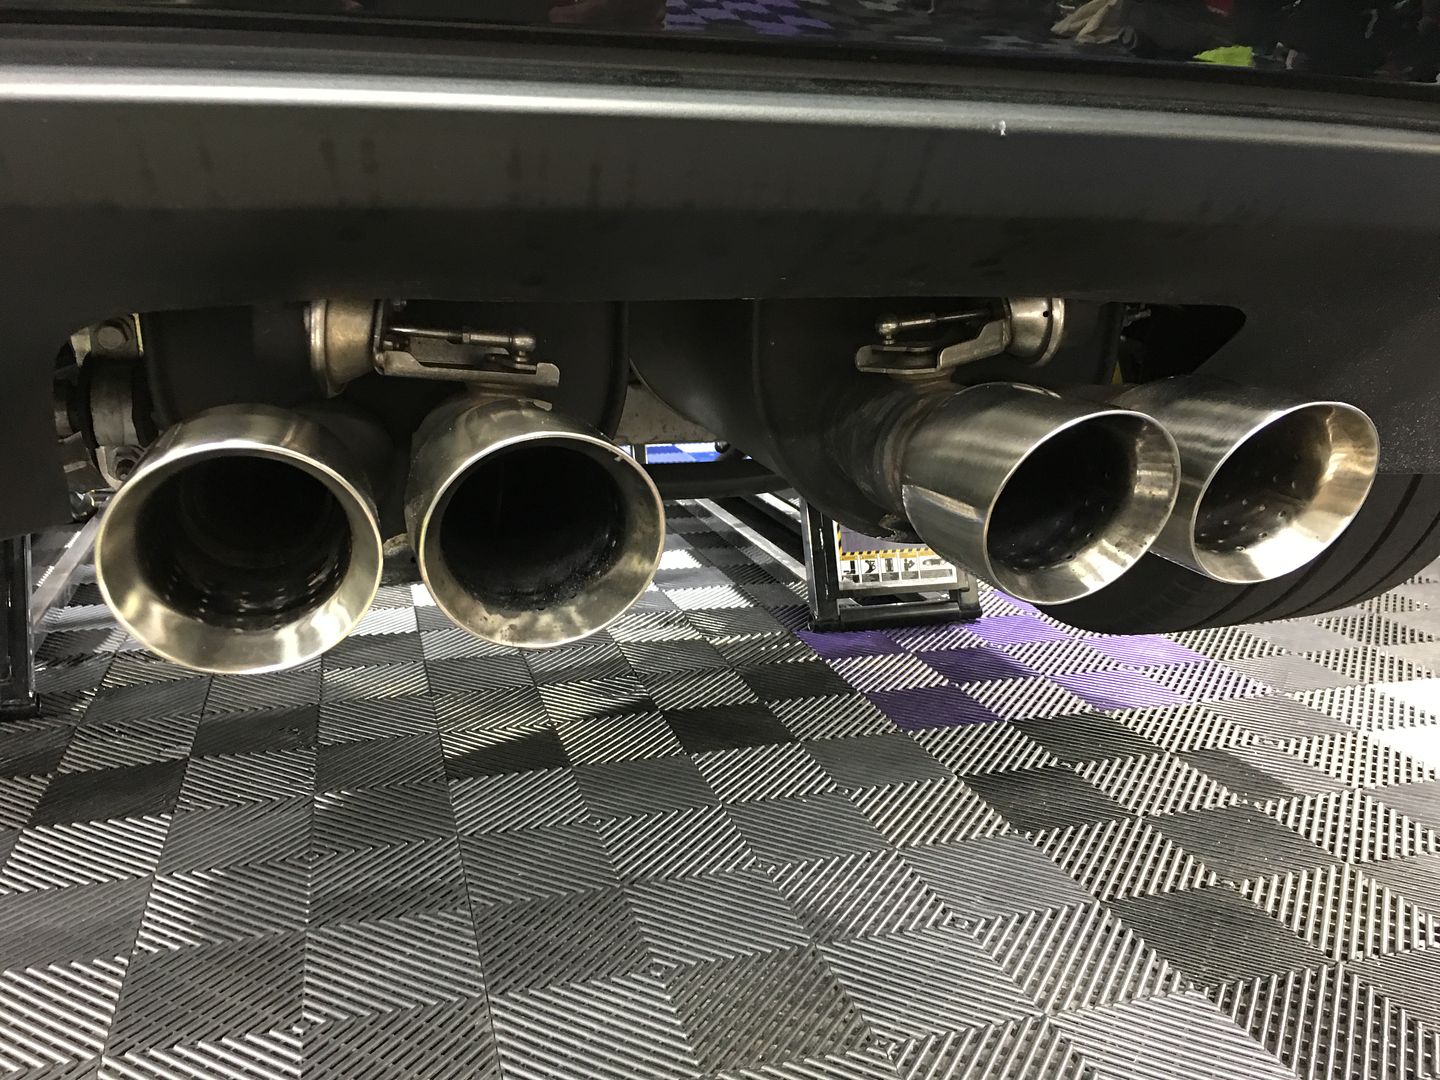
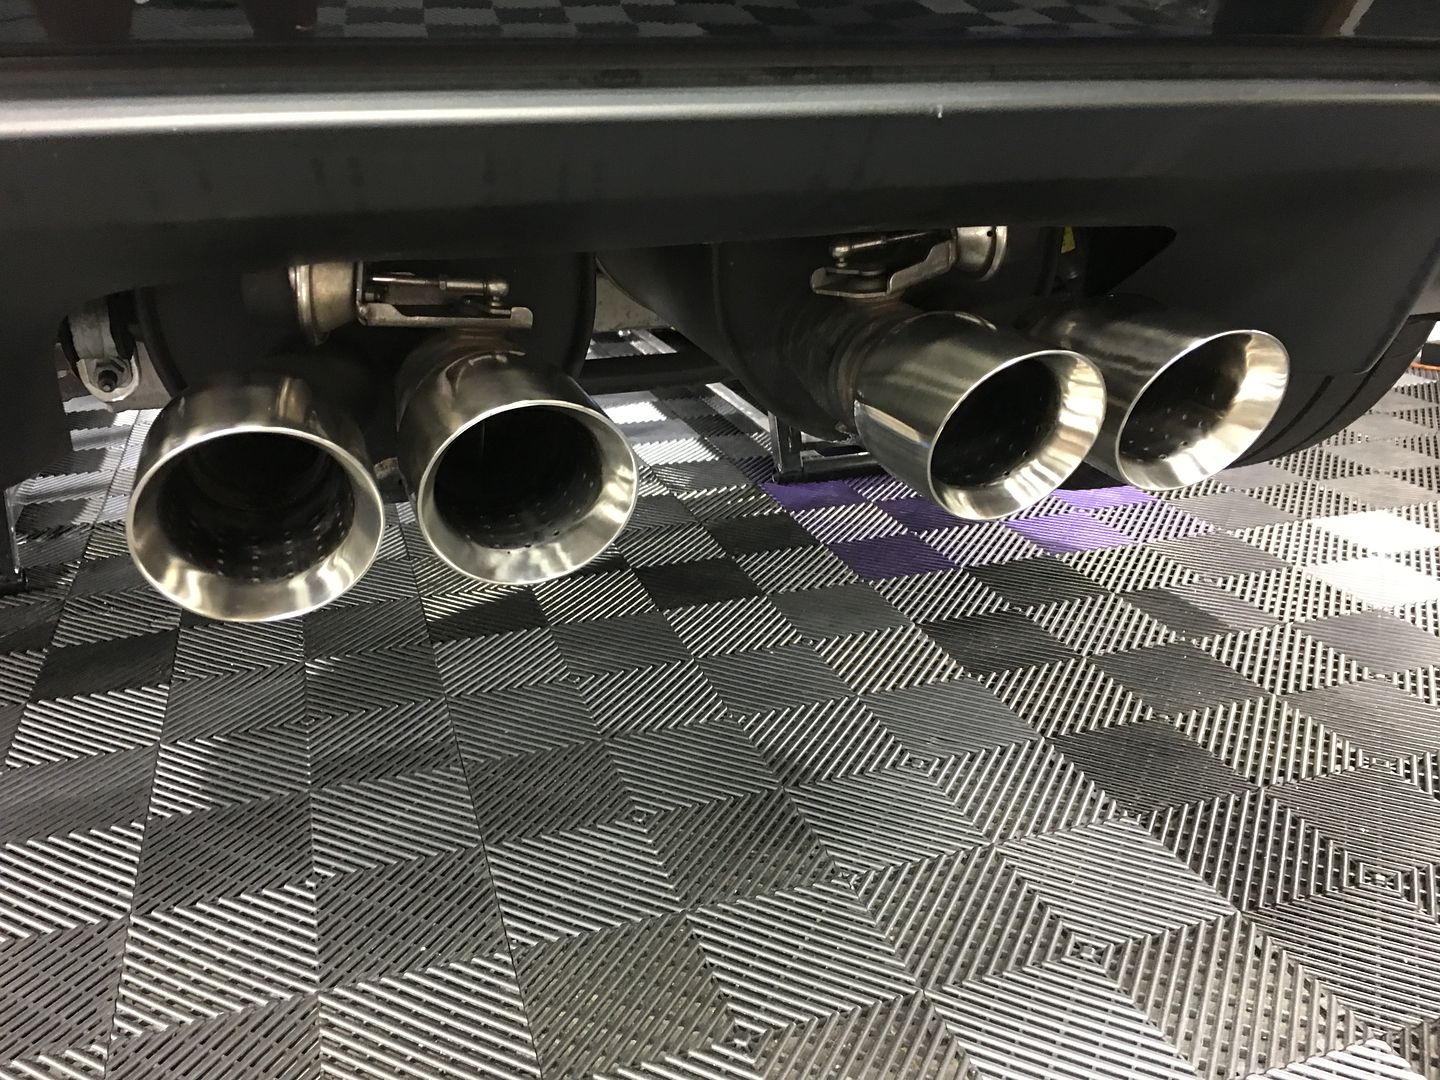
Always a must do for a final touch of clean.
As a final work of art for the wheels, we plasti-dipped them a bright neon green. It was a little blotchy but its ok.
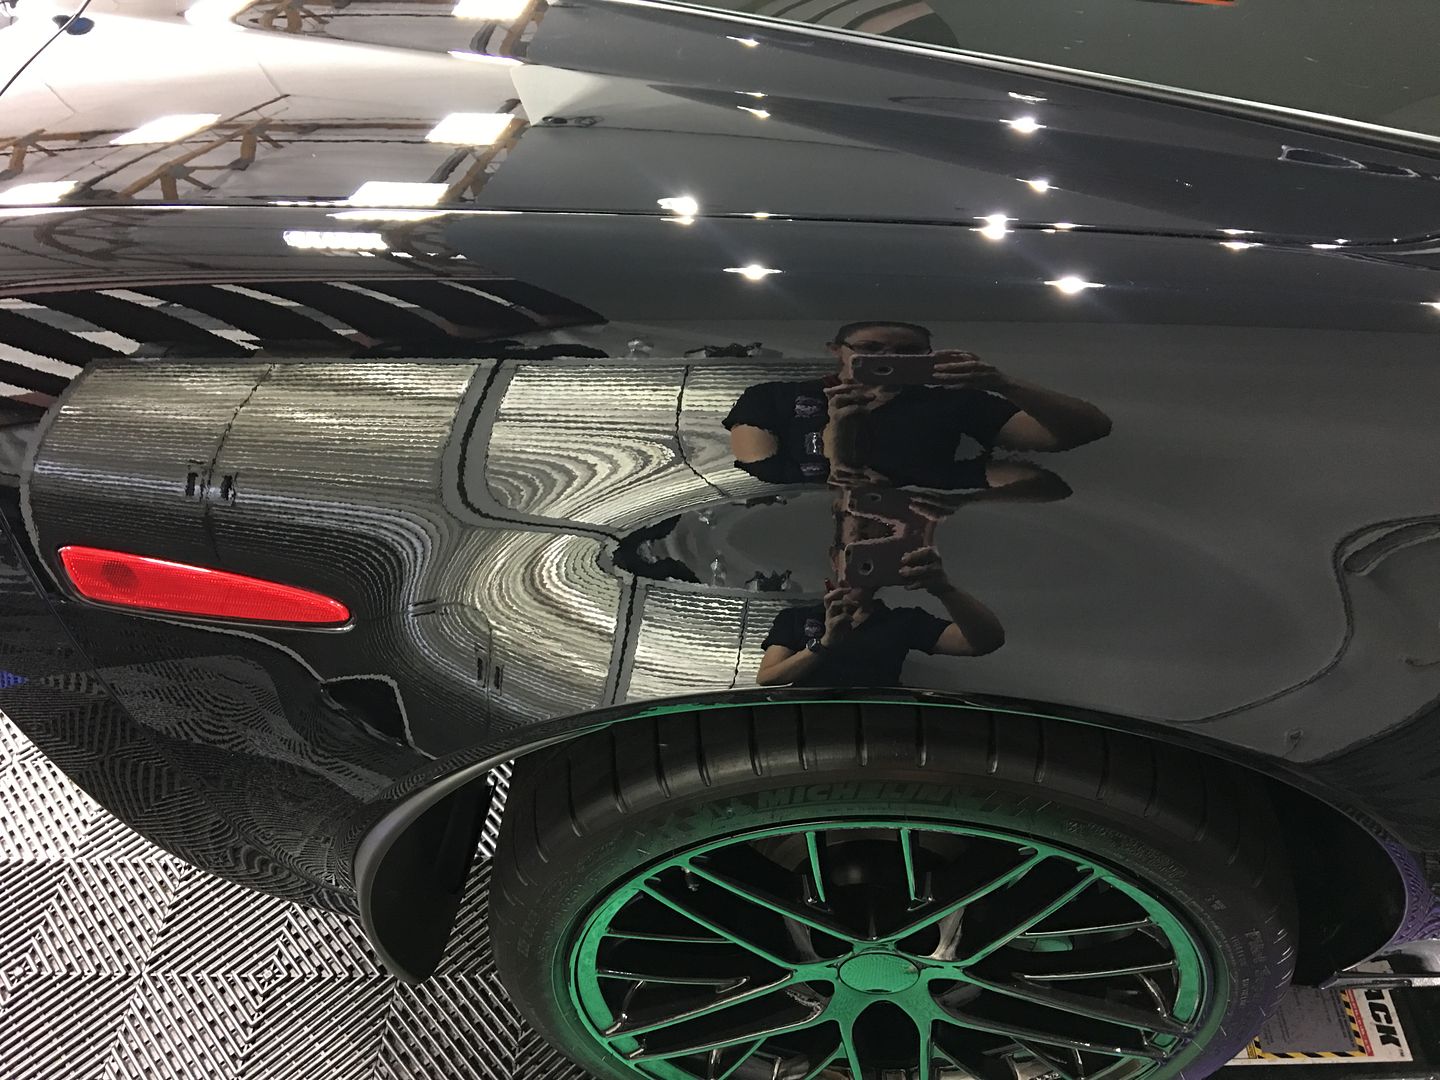
Hopefully you're all done ranting in your heads by now lol....this was actually just the reflection of the foam pad we use to sit on. You can see it in the reflection of the paint here:

When I was sorting through all the uploaded pictures and came across this one I asked Dani, "Did you put these pictures in the wrong folder?" Thats when she informed me as to what happened there lol.
One of the notorious areas on these vettes, is the rear fender flare which begs to be washed too aggressively and is tricky to get into the deepest part of the curve. The light marring that remained after final polishing was minuscule to say the least.
Even we had a hard time spotting it, but the fact of the matter was, we spotted it so therefore it had to go! The Rupes 75 pneumatic was the best tool for this little area (once I was done using it on a headlight restore i was working on lol) and as you can see...this is about as close to perfect as you can humanly get.
Lowered back down and ready to received two coats of CQuartz Professional...for that wet look that would match the sweat dripping off our foreheads lol.
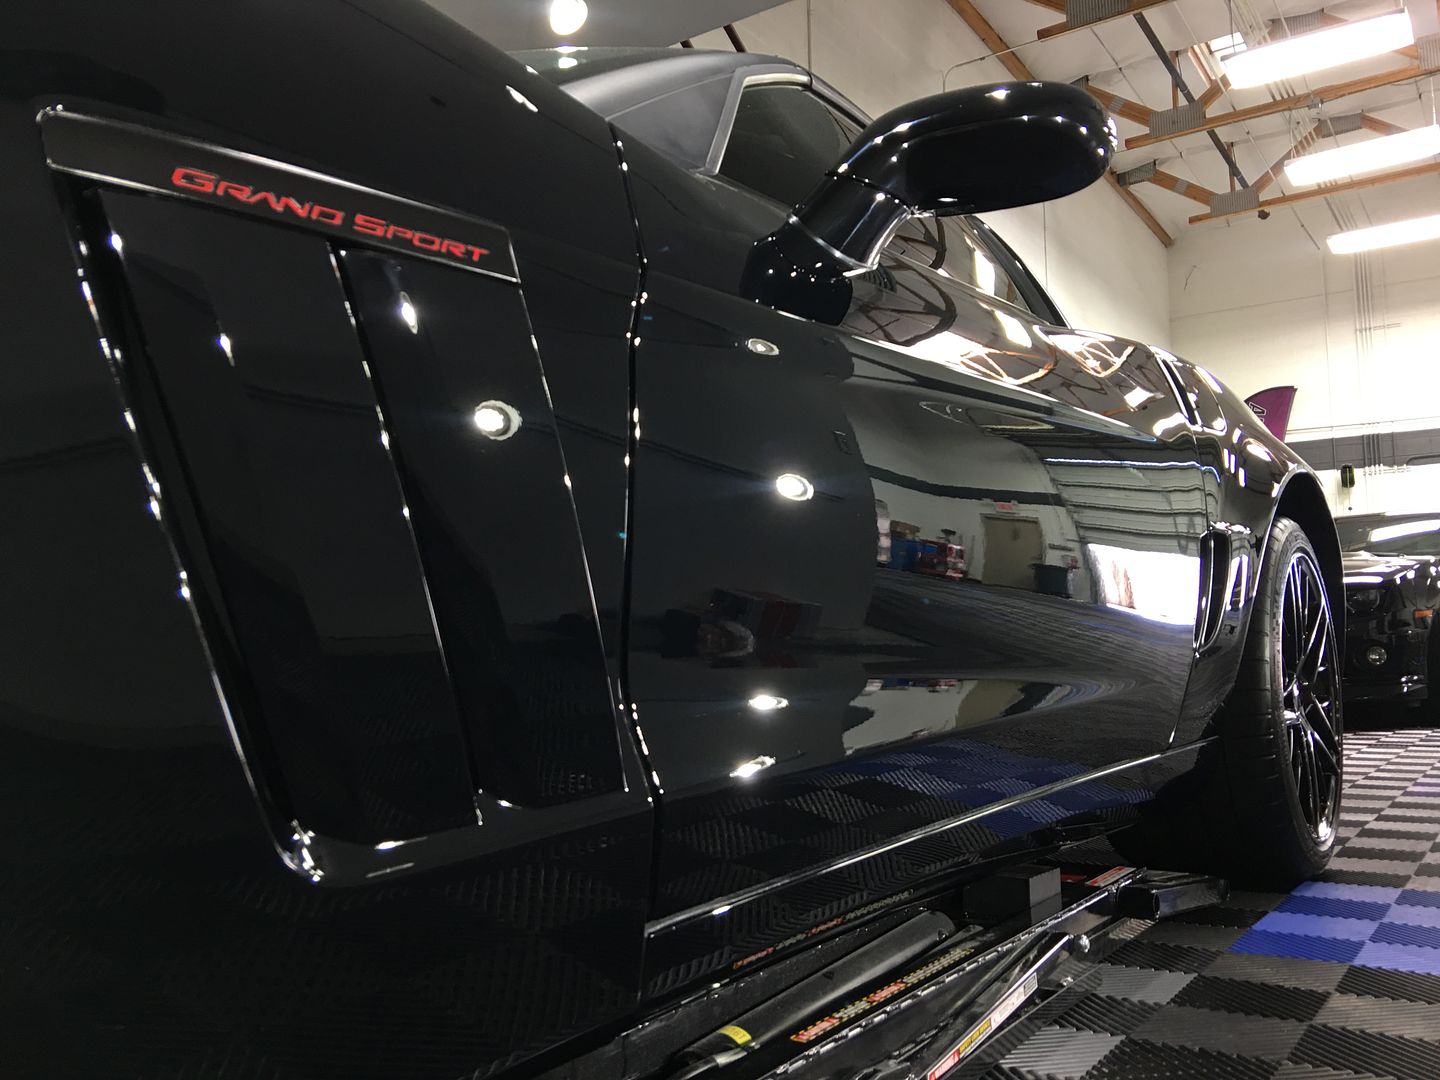
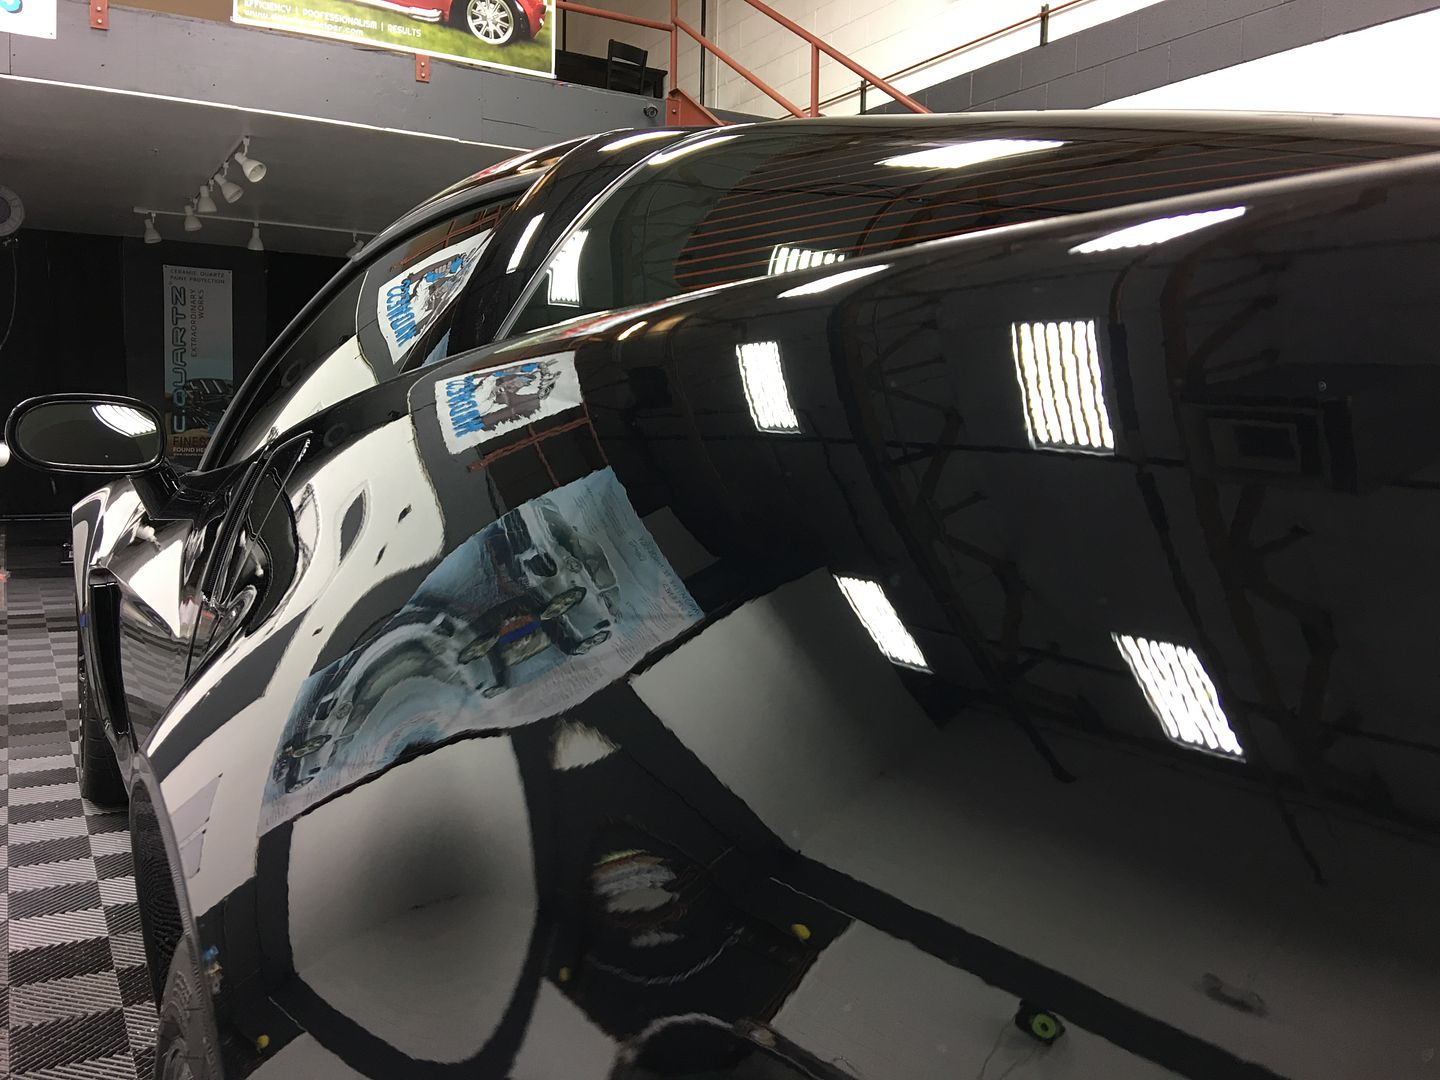
Even without a coating, this baby looked great:
Front bumpers suck, but other than some pitting...it turned out looking right:
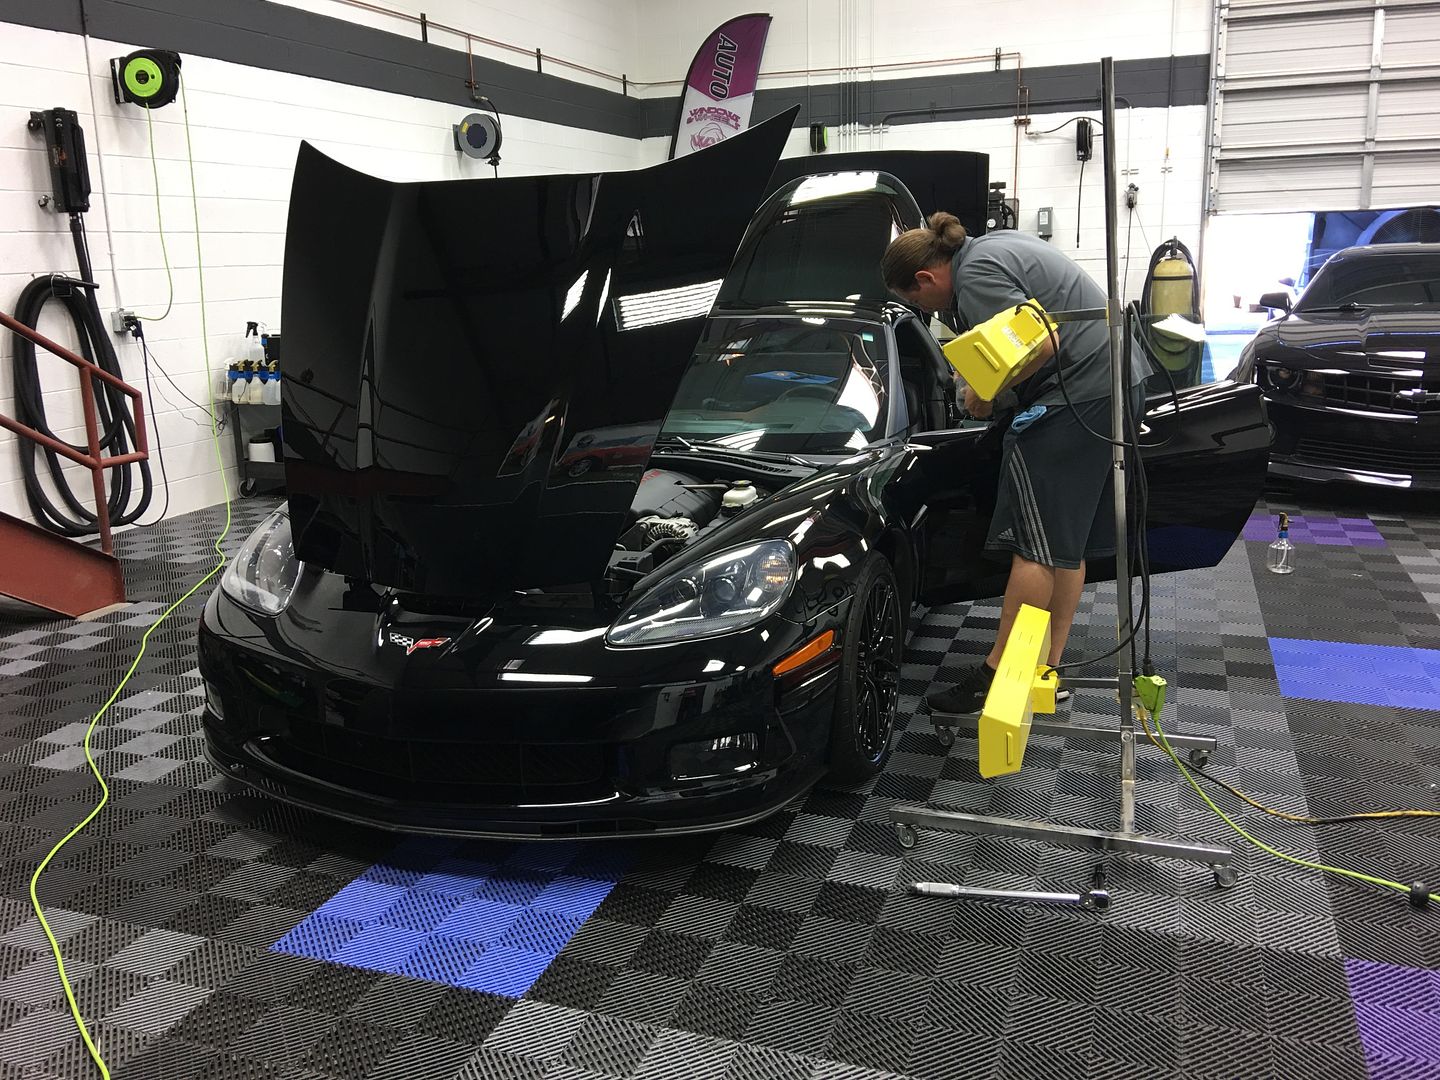
Now once the coating is complete, its a must to do a final walk around. Open up the doors, hatch and hood - inspect every nook and cranny (especially after such an extensive compounding session).
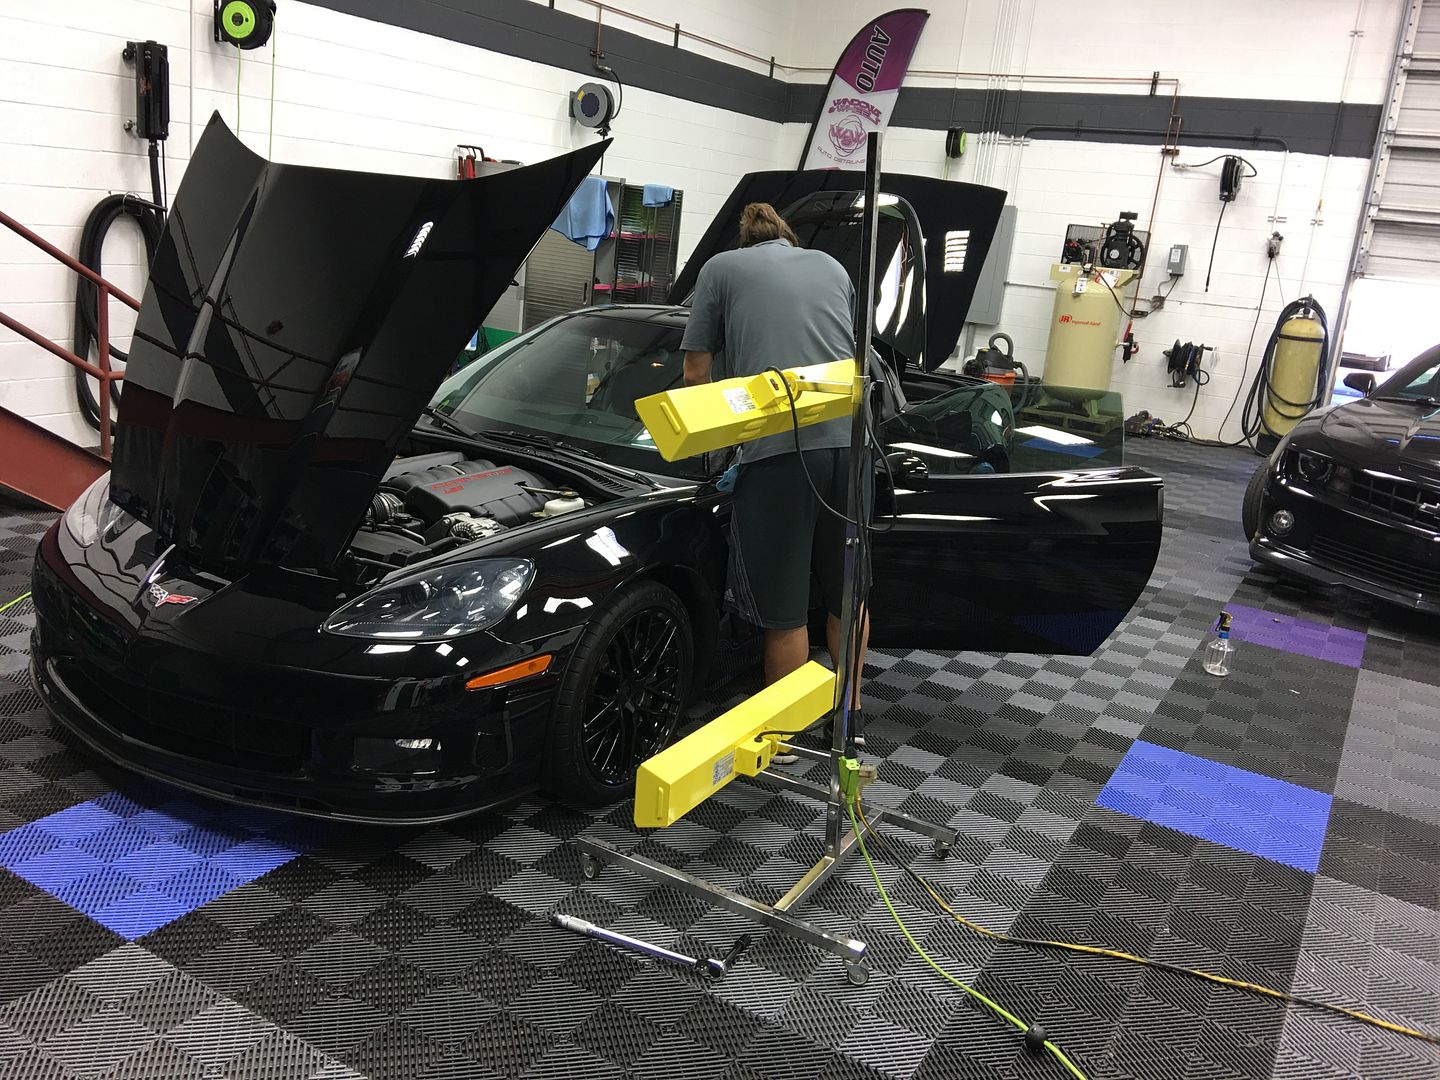
Got the Infra-red lights baking my ass while i do it hahaha. Quite possibly the most redundant thing we've done, IR cured a coating when its literally 110 outside.
But, whatever, its the right way to do things, especially on the sides and lower panels.
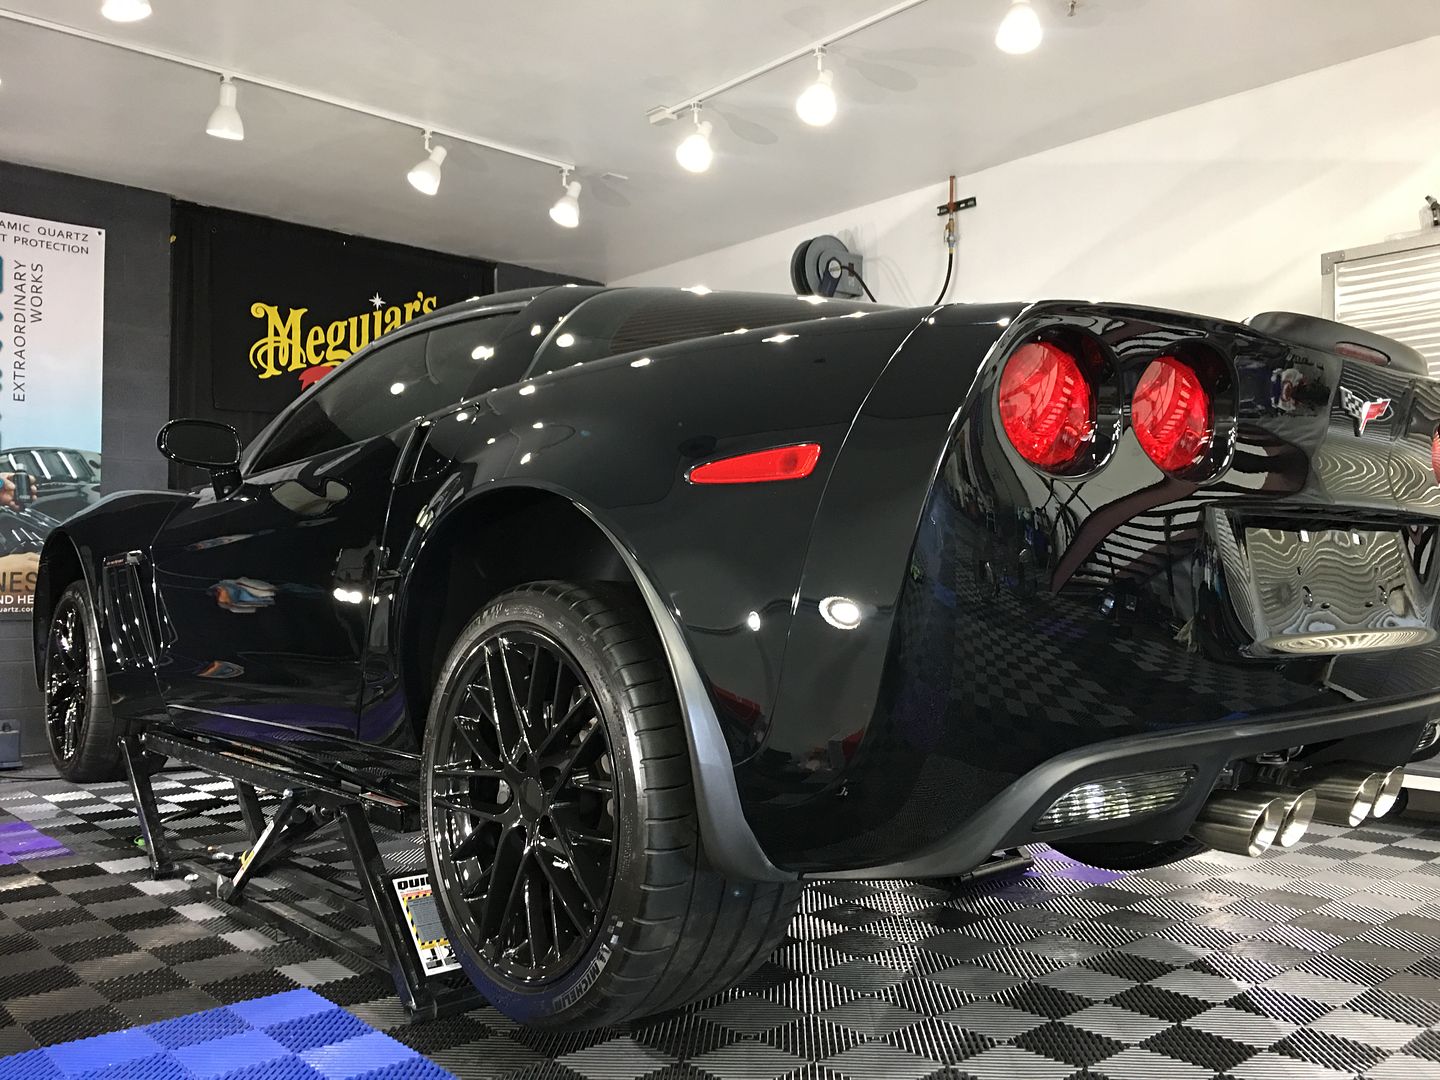
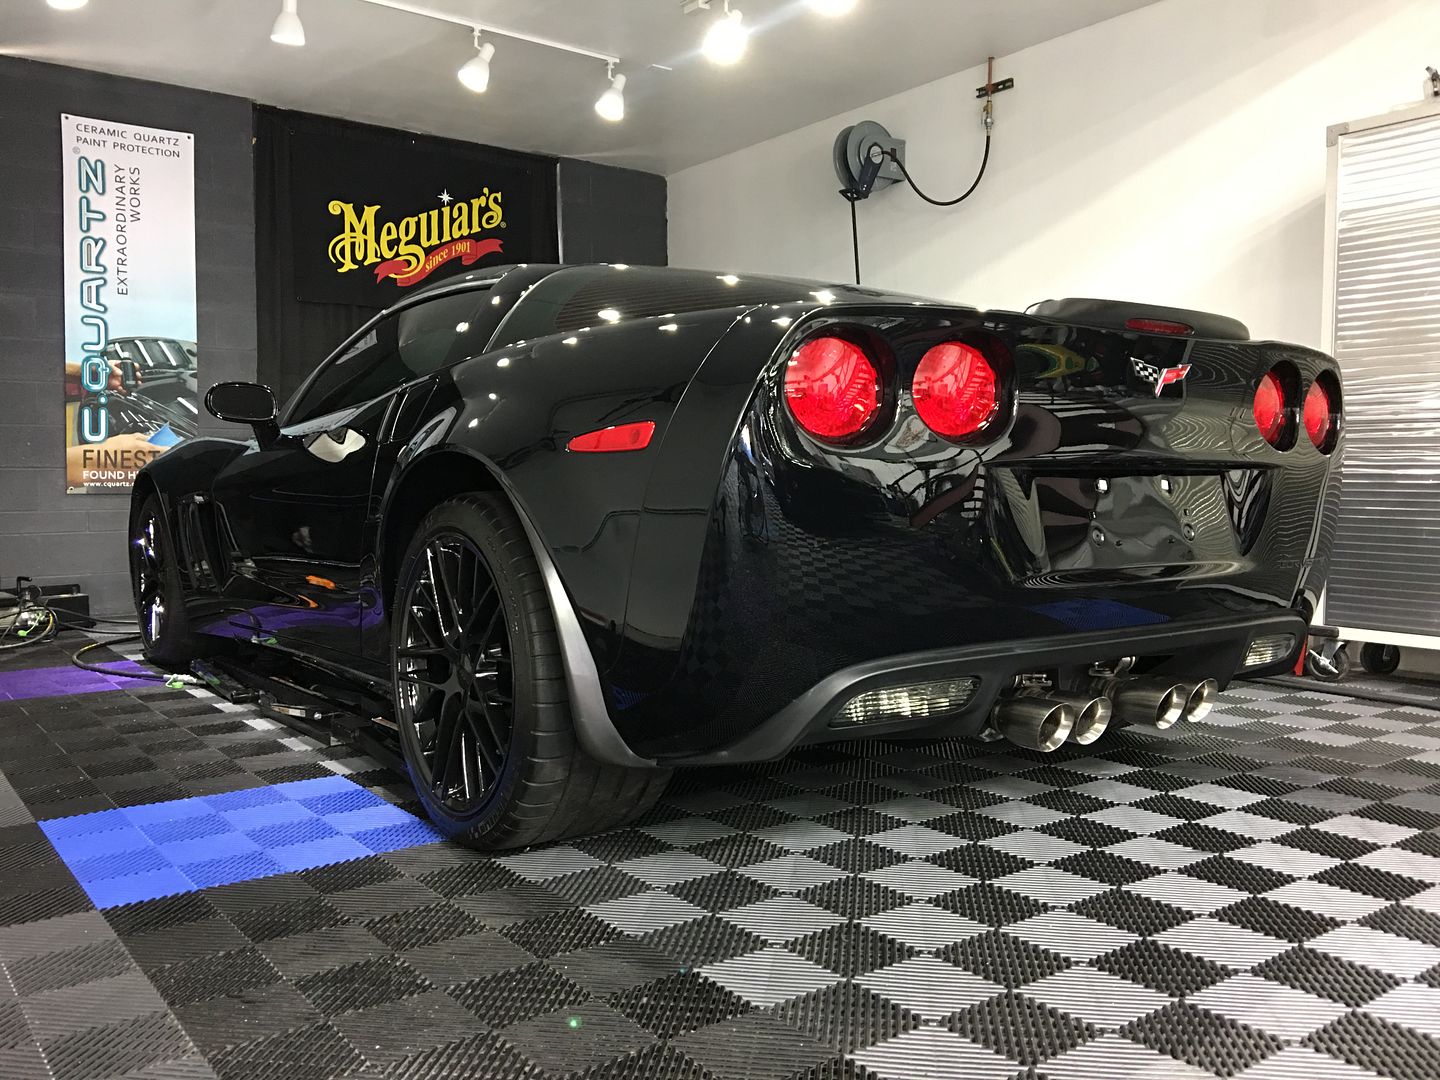
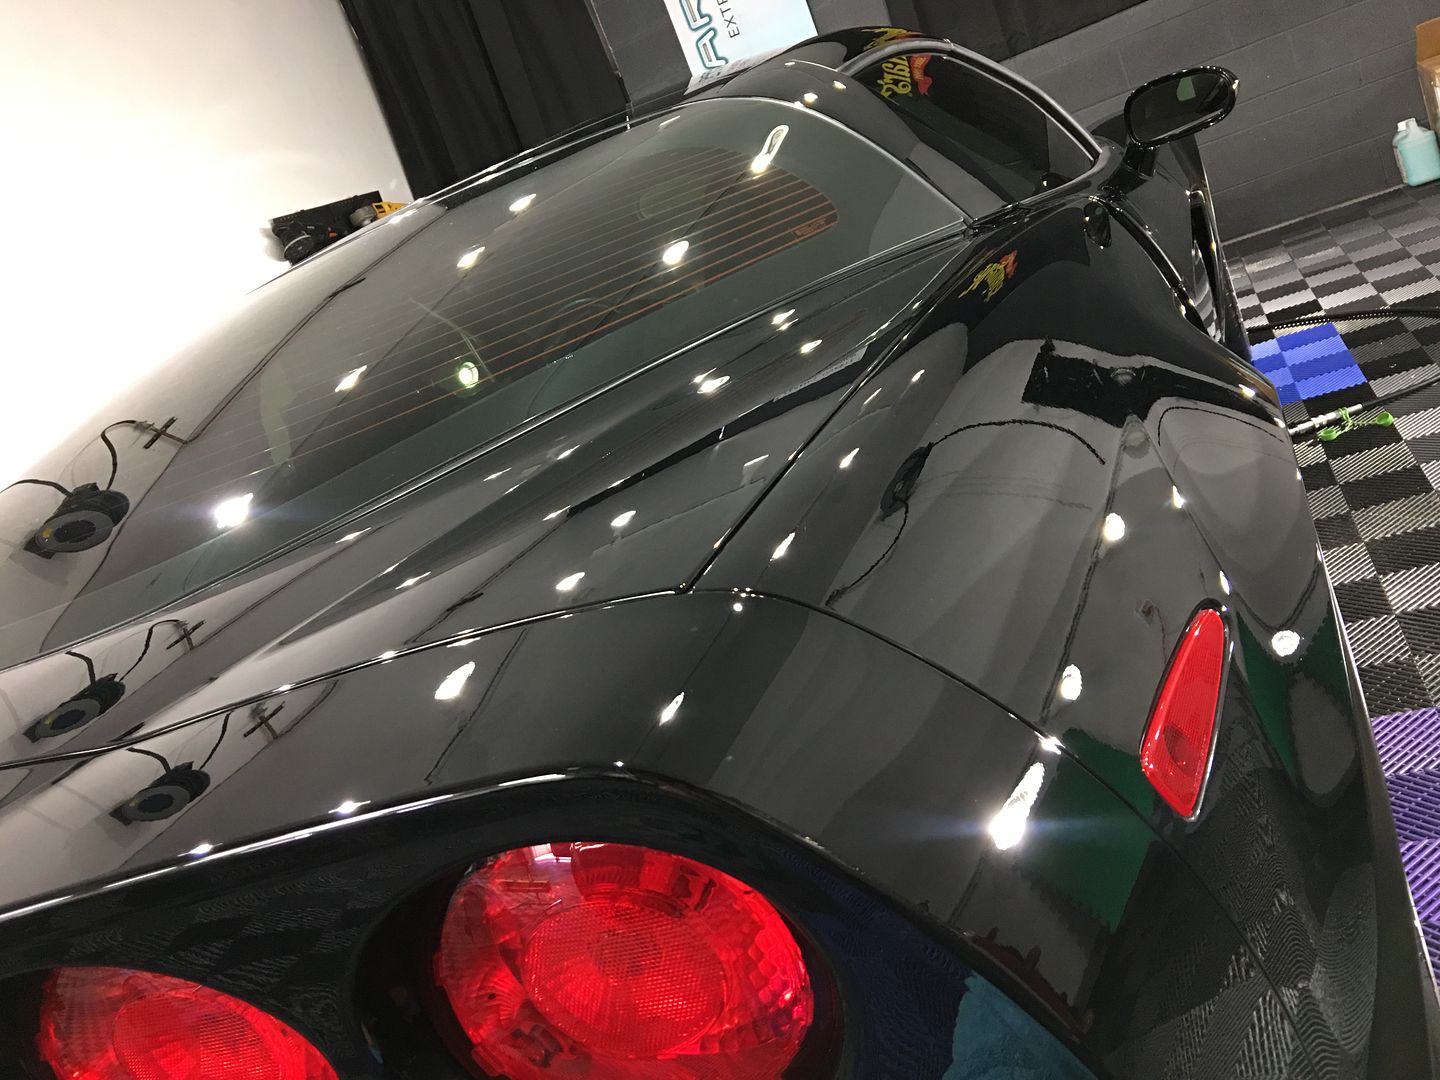
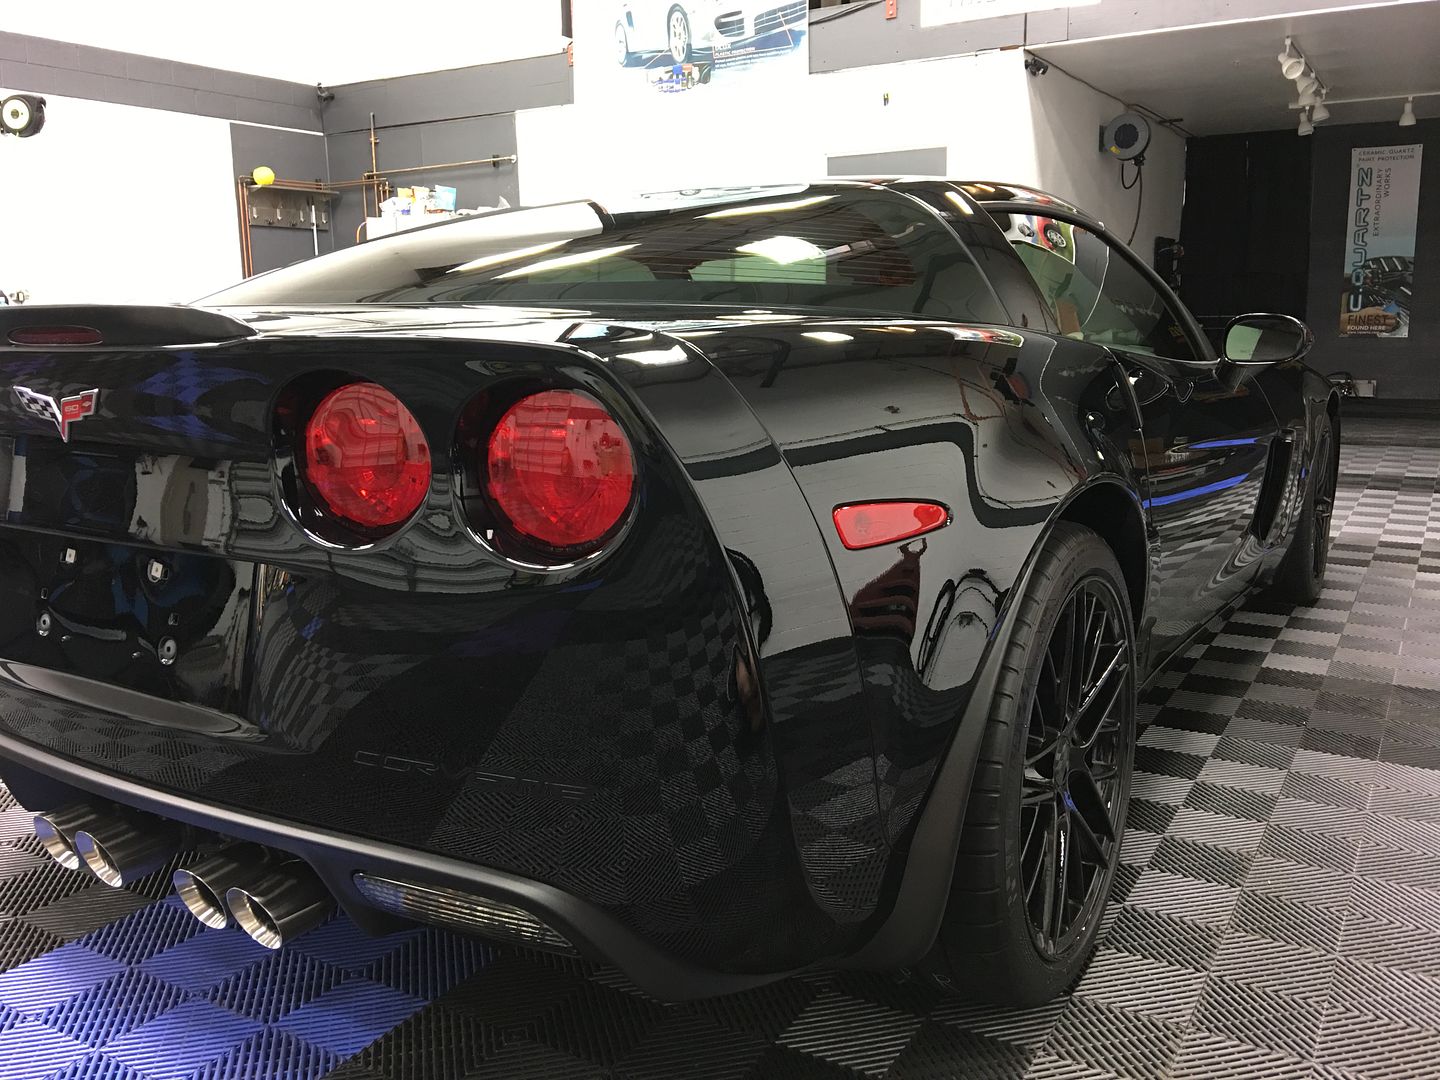
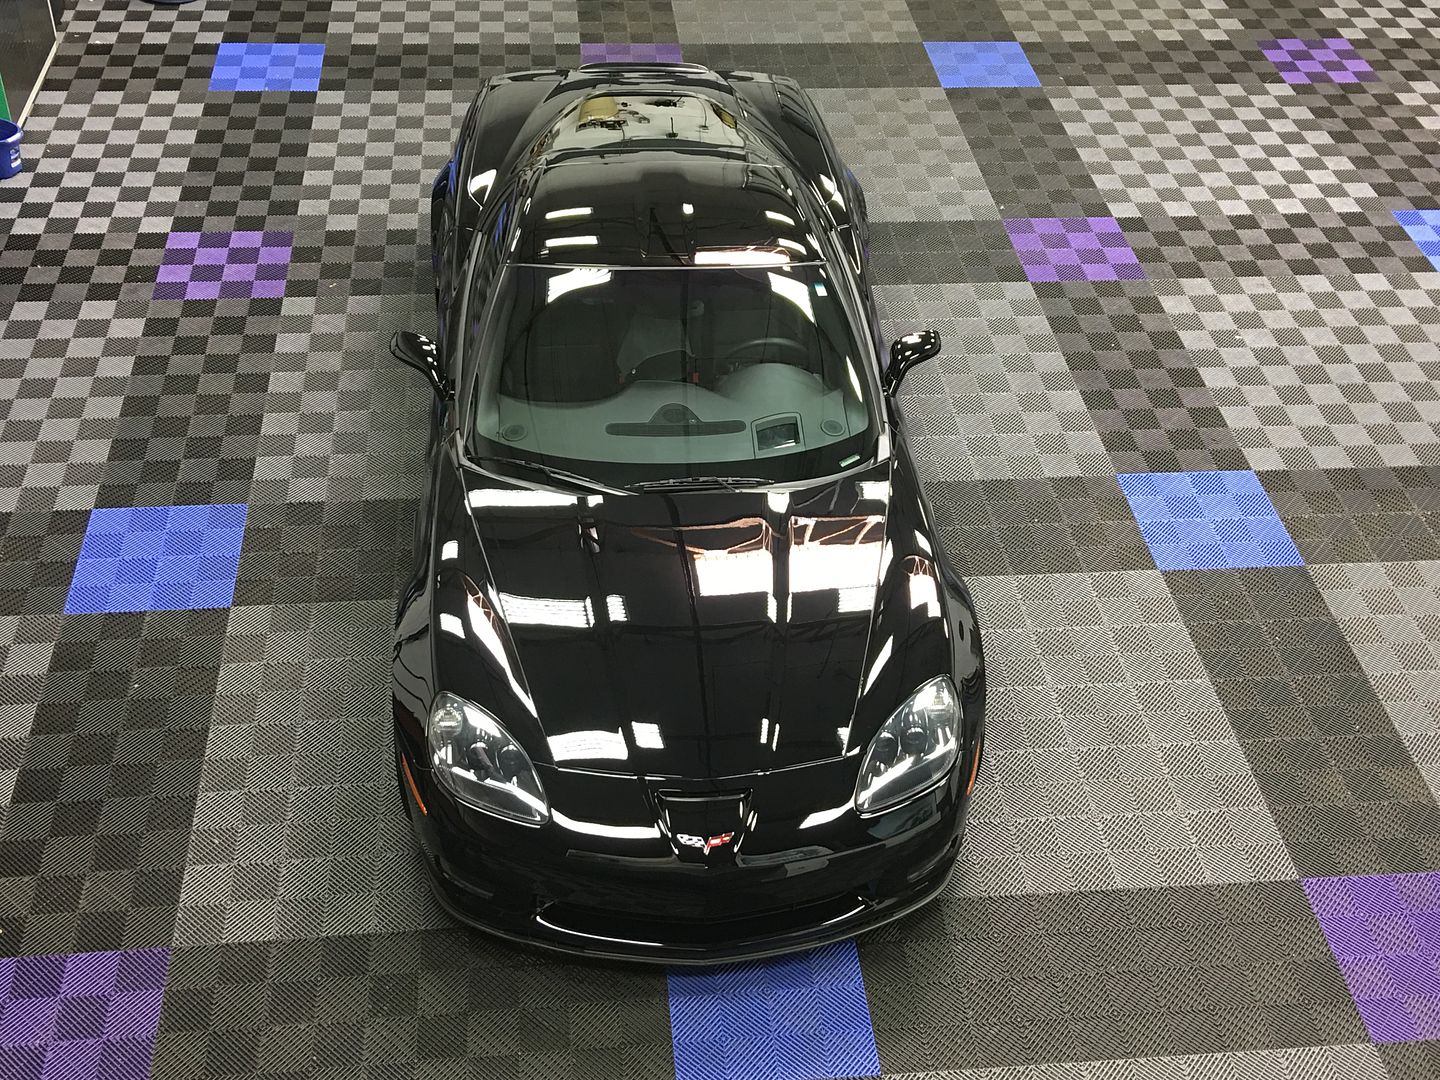
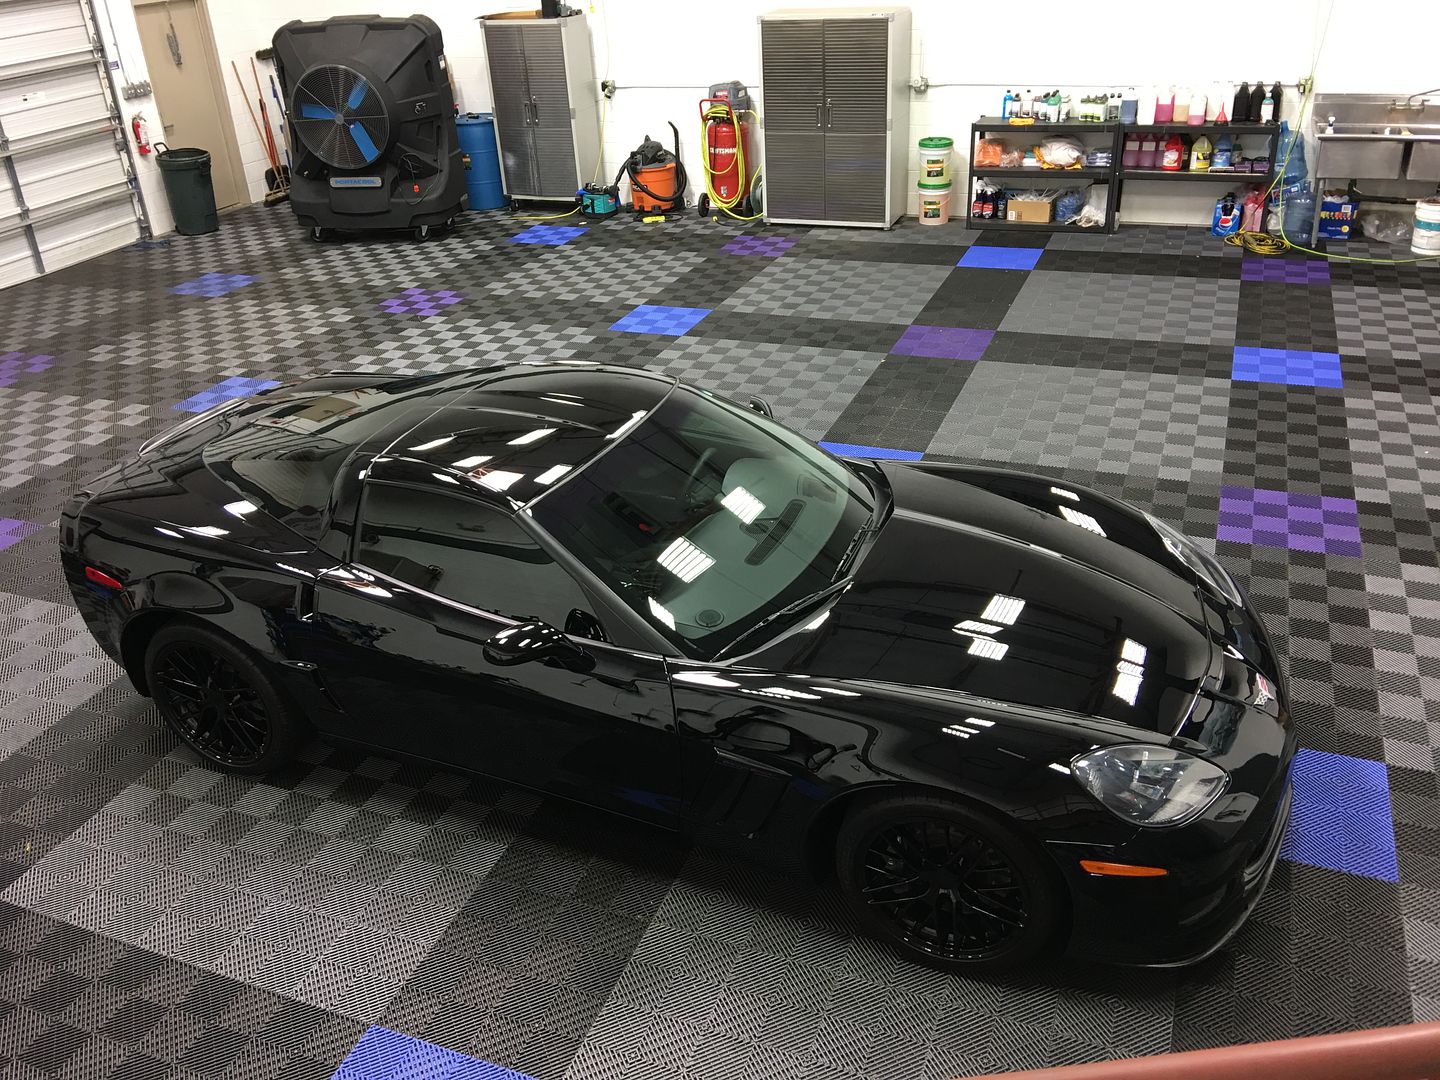
Once the curing and final detailing was completed...this Grand Sport looked outstanding.
Like you could just reach right into it...
See how those shiny exhaust tips just tie everything in!

And the 6th Man award for this detail goes to...
Our newest addition to the shop, our monstrous Port A Cool portable evap cooler. After having priced out dropping an A/C unit to cool the shop down and realizing that it just wasn't going to happen....we decided to start hunting for alternative options.
Even tho it's a portable evap, these bad boys were still pretty pricy brand new. However, after doing some hard core hunting on Offer Up of all places, we found this baby brand new and got it for a good price. During the 105 and lower days, the inside of the shop is out right comfortable. Once it creeps to 110+, even with the PAC going it's still a bit warm inside the shop, but easily 15-20 degrees cooler compared to outside.
I can't speak for more humid climates, but if you're in a hot/dry climate like us and you're looking for an affordable cooling option, I'd highly recommend one of these. Even the up stairs of our shop was cooled.

Oh yeah, swirled like a Dairy Queen ice cream cone as well....you know it.

Our attitude...lets do it! (Later followed by...lets kill ourselves, what did we get into!)
This was the last year the C6 Grand Sports were made (2013) - and while she had very low mileage and was kept very clean, the paint was definitely in need of some serious reconditioning.
When the owner came in for a consultation, we did a full walk around and pretty much every panel looked the same.


Ouch right?


Typical heavy wear area....no matter how careful you are this area always seems to get damaged from loading and unloading.

Some light water spots were also sprinkled in with all the swirls:


Bit of a deep one here:


Alright! So, now we know what we're looking at. After taking a look at the car together and then discussing the differences between our Stage 1, Stage 2 and Stage 3 correction options - the owner decided if he was going to do it he was going to do it right. Stage 3, wheels pulled and coated and Nano-Ceramic coating on the paint to lock in that soon to be gorgeous finish.
We went ahead and scheduled for this Grand Sport to stay with us for a week. Between the condition of the car, the fact it was black, and that we we've now entered into 110 degree weather here in Az, we knew this was going to be a doozy!
Now while I usually have quite a few "in action" pics we only have a few this time. Here are Henry and Noah working the back end of this baby. Our cut consisted of M100 and M205 on either a Megs Finishing microfiber pad or a Megs burgundy cutting disc.

You'll likely notice the white marks through out the side of the car...kind of like what a surgeon does prior to operating. Well, thats pretty much what we're doing here. Marking areas of concern, areas that need a 3" cutting pad used because the 5" didn't get into certain spots well enough and so on.
Now while M100 is an awesome product...the major draw back is...the dust!


It just gets to a point where you don't try to wipe it all off, you don't try to fight it, you just accept it is part of the process and keep moving. We recently had a fellow detailer move out here from New Hampshire (Paul from Looks So New Detailing) and aside from the obvious blistering heat that wears you down, the other note he made was on the amount of dust and how quickly your pad CAKES up out here compared to the nice cool climate he was use to. Needless to say, you also inevitably destroy a pad here and there as well, even though we try to change them out quite often to avoid over heating.

As you can see though, even through all the dust, the swirls were taking beating! Our QuickJack pulled its weight (pun intended?) as always by getting the low stuff up to chest level and making it much easier to see what it was we were working on (comparatively speaking).
Now when a vehicle gets this dusty again from the cutting/compounding process, really the only way to make sure as much of the dust is removed as possible, is to re-wash the car.
We opt to do this BEFORE the final polishing step so that if any light wash marring were to happen while the paint is bare and unprotected like this, it wouldn't matter much since we still have the final polishing step left to go anyway.
Once the vehicle was fully cut (or so we thought) and the re-wash was complete, it was time to pull the wheels and get them cleaned up.


Brake dust combined with Az dust combined with....whatever. It was dirty, thats all we knew!
A nice bath in Iron-X along with some good ole' patience cleaning all the spoked areas and hard to reach places left these babies looking like new again. Once coated...they were gleaming.


Of course while the calipers were exposed (along with the fender wells) they received some major TLC as well. Here's Daniela applying a caliper coating after the fender wells had been detailed and dressed.


Installed and looking like a boss:

Now as I said, we thought we were done cutting, but there were a few RIDS that required a bit of additional attention, however these spots were few and far between and corrected fairly easily.
Once the spot cutting was complete, it was time to dial in that final polishing step and make this paint look dripping wet.
Essence with a green Buff n' Shine pad worked well in most areas. A CarPro Gloss pad was used for the 3" work and Megs Yellow and Black pads were used for the 1-2" Nano work.
Henry can be seen here touching up some of the super light marring that was left in some spots using the Rupes Nano.

This shot was one of my favorites. Wheels re-mounted, final polishing completed and looking like a glowing onyx under all of our LED lights.

While she was still lifted and in a fairly comfortable position for lower work, I took the opportunity to work on the exhaust tips:


Always a must do for a final touch of clean.
As a final work of art for the wheels, we plasti-dipped them a bright neon green. It was a little blotchy but its ok.

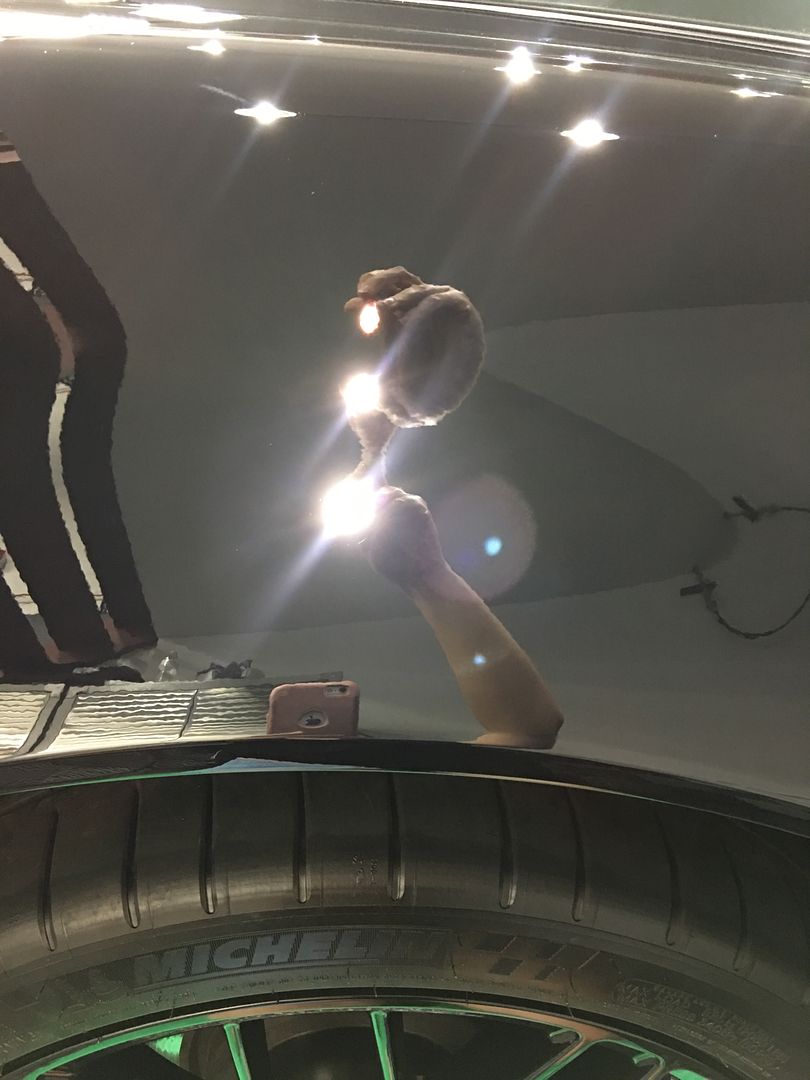
Hopefully you're all done ranting in your heads by now lol....this was actually just the reflection of the foam pad we use to sit on. You can see it in the reflection of the paint here:

When I was sorting through all the uploaded pictures and came across this one I asked Dani, "Did you put these pictures in the wrong folder?" Thats when she informed me as to what happened there lol.
One of the notorious areas on these vettes, is the rear fender flare which begs to be washed too aggressively and is tricky to get into the deepest part of the curve. The light marring that remained after final polishing was minuscule to say the least.
Even we had a hard time spotting it, but the fact of the matter was, we spotted it so therefore it had to go! The Rupes 75 pneumatic was the best tool for this little area (once I was done using it on a headlight restore i was working on lol) and as you can see...this is about as close to perfect as you can humanly get.


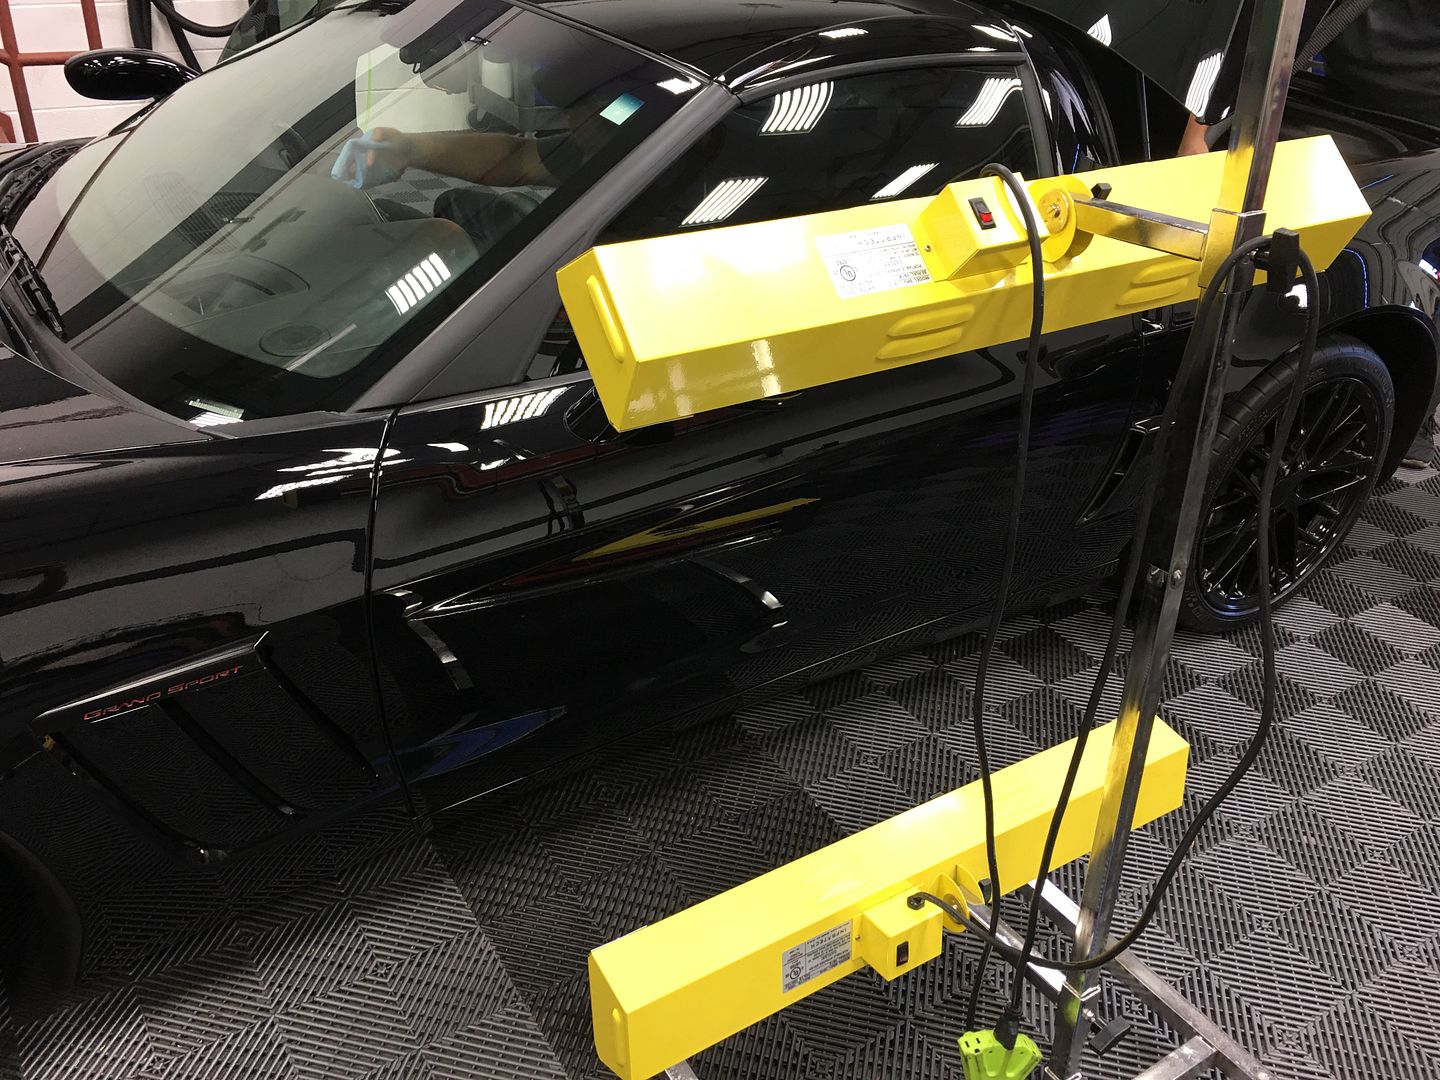
Lowered back down and ready to received two coats of CQuartz Professional...for that wet look that would match the sweat dripping off our foreheads lol.

Even without a coating, this baby looked great:

Front bumpers suck, but other than some pitting...it turned out looking right:


Now once the coating is complete, its a must to do a final walk around. Open up the doors, hatch and hood - inspect every nook and cranny (especially after such an extensive compounding session).


Got the Infra-red lights baking my ass while i do it hahaha. Quite possibly the most redundant thing we've done, IR cured a coating when its literally 110 outside.

But, whatever, its the right way to do things, especially on the sides and lower panels.
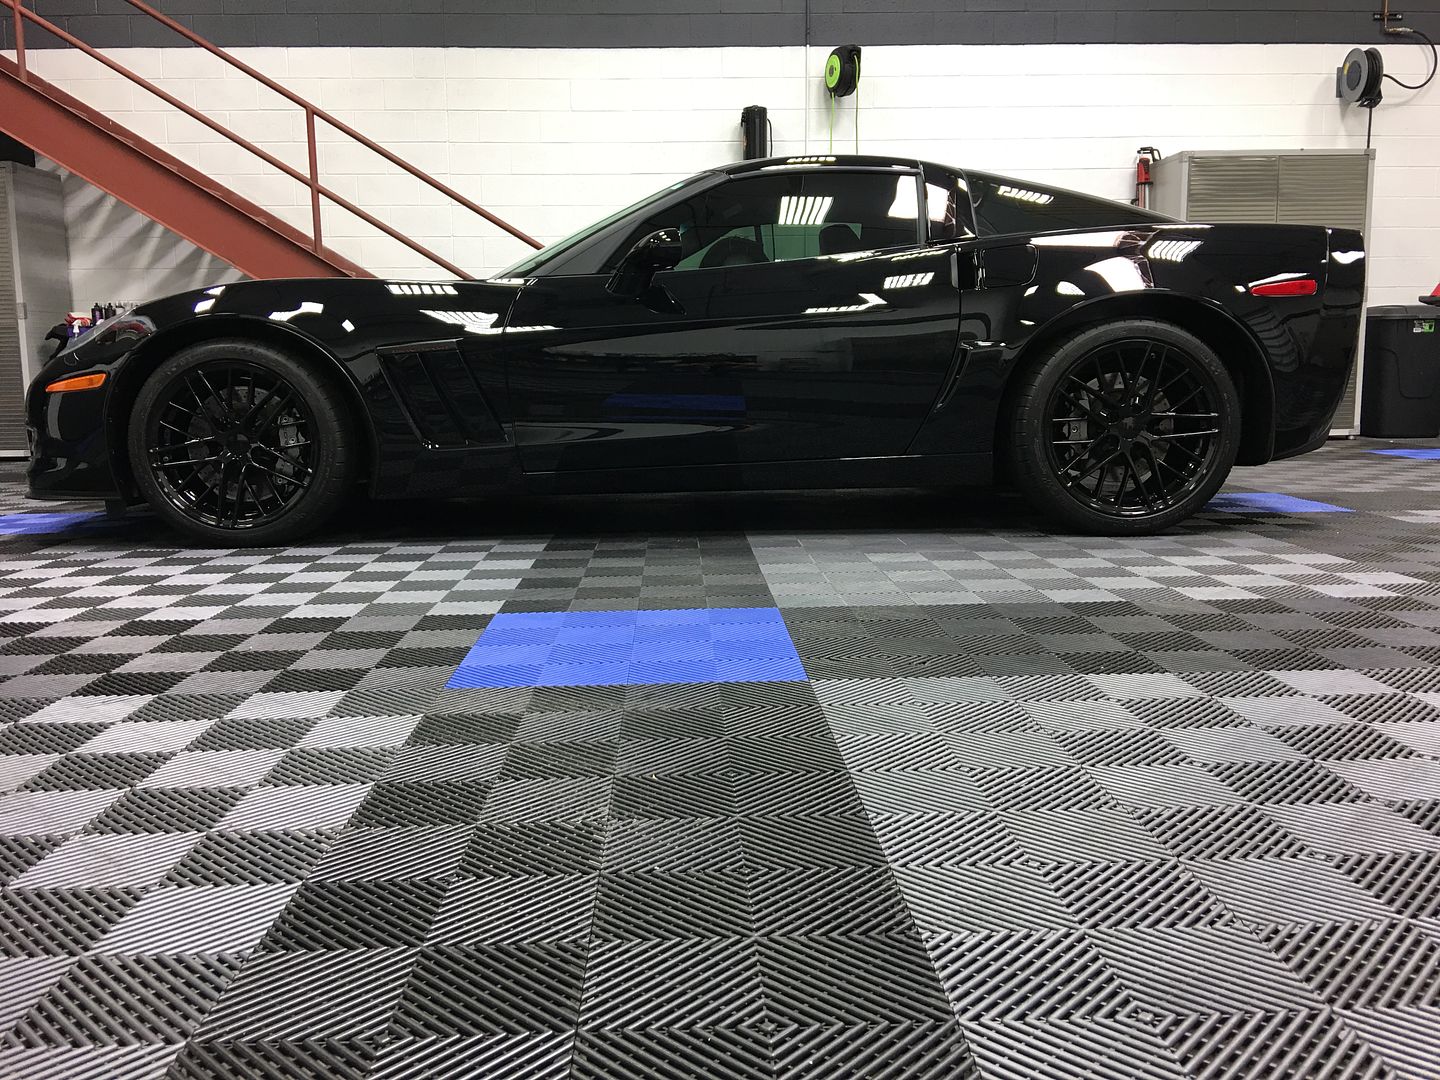
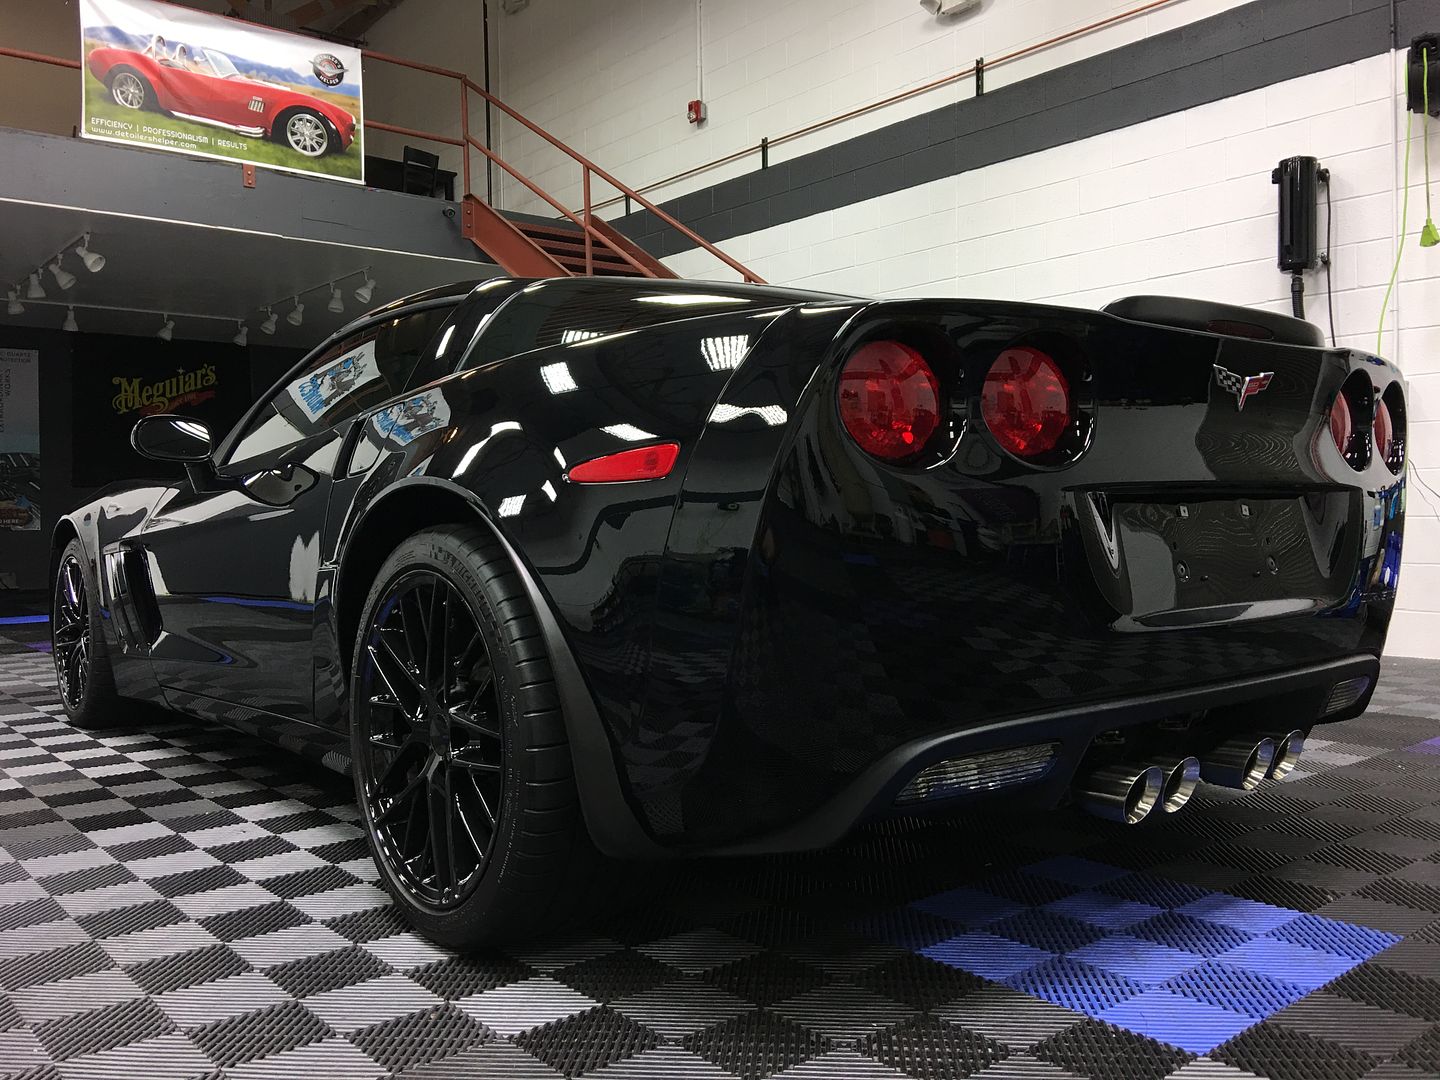
Once the curing and final detailing was completed...this Grand Sport looked outstanding.


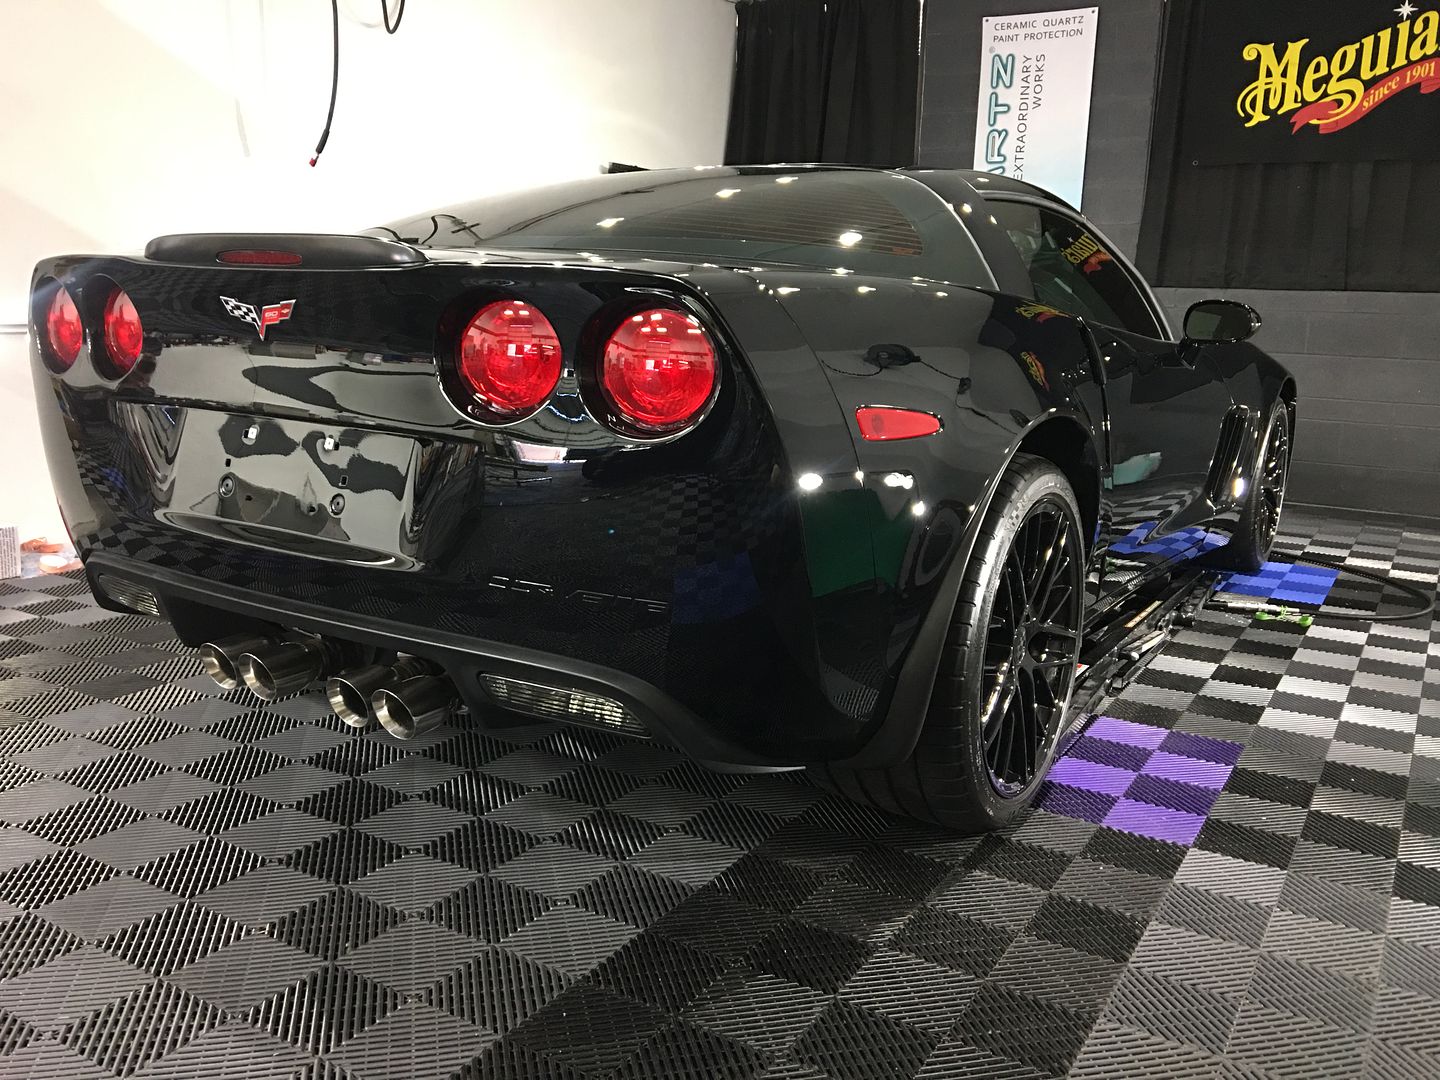
Like you could just reach right into it...


See how those shiny exhaust tips just tie everything in!


And the 6th Man award for this detail goes to...

Our newest addition to the shop, our monstrous Port A Cool portable evap cooler. After having priced out dropping an A/C unit to cool the shop down and realizing that it just wasn't going to happen....we decided to start hunting for alternative options.
Even tho it's a portable evap, these bad boys were still pretty pricy brand new. However, after doing some hard core hunting on Offer Up of all places, we found this baby brand new and got it for a good price. During the 105 and lower days, the inside of the shop is out right comfortable. Once it creeps to 110+, even with the PAC going it's still a bit warm inside the shop, but easily 15-20 degrees cooler compared to outside.
I can't speak for more humid climates, but if you're in a hot/dry climate like us and you're looking for an affordable cooling option, I'd highly recommend one of these. Even the up stairs of our shop was cooled.
 rops:
rops:


") .
.