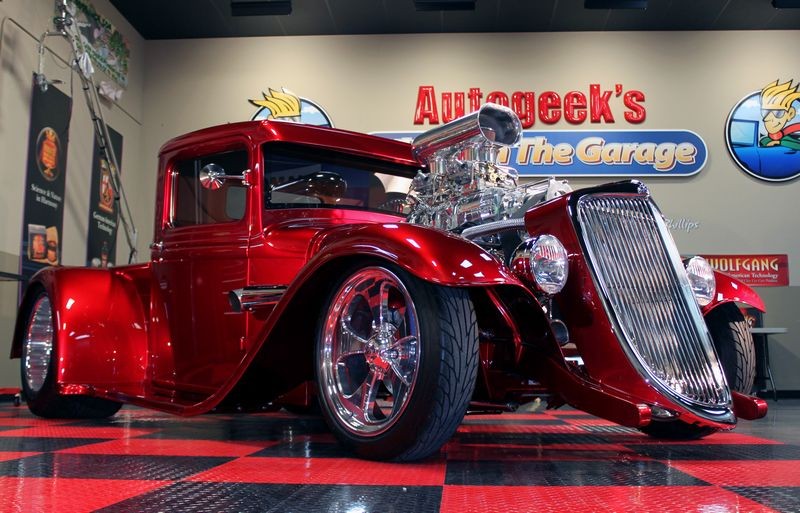
Blown 1934 Ford Pick-up - Show Car Makeover - Modeled by Kristin

Joined
Dec 5, 2022
Messages
51,004
Reaction score
7
Blown 1934 Ford Pick-up - Show Car Makeover - Modeled by Kristin


AG-car-of-the-week.jpg

As I type this it's 8:30am Saturday morning and the below street rod will be showing up any minute. I'm going to go roll out the floor mats to protect out studio tile floor while we work on this truck today and I'll try to post a couple of pictures of the truck after it arrives.

BlownBadTruck01.jpg


Hang tight...

:)
 
Here go...

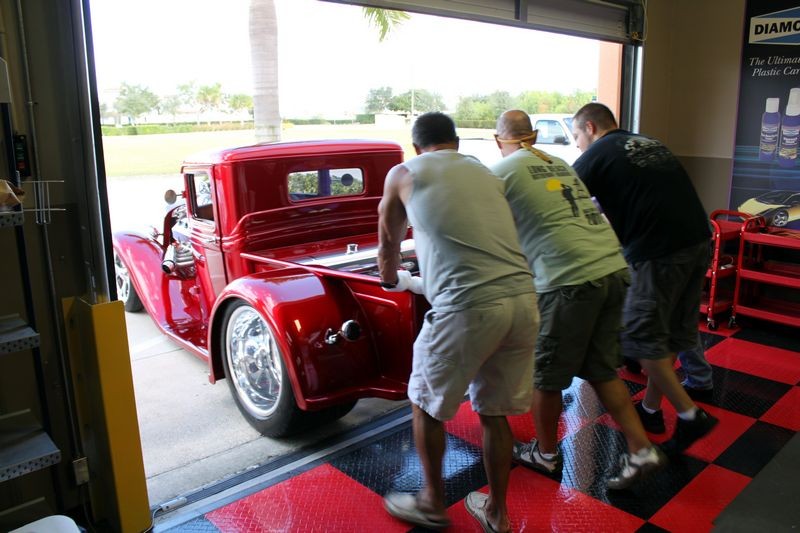
9:00am sharp we hear a very 
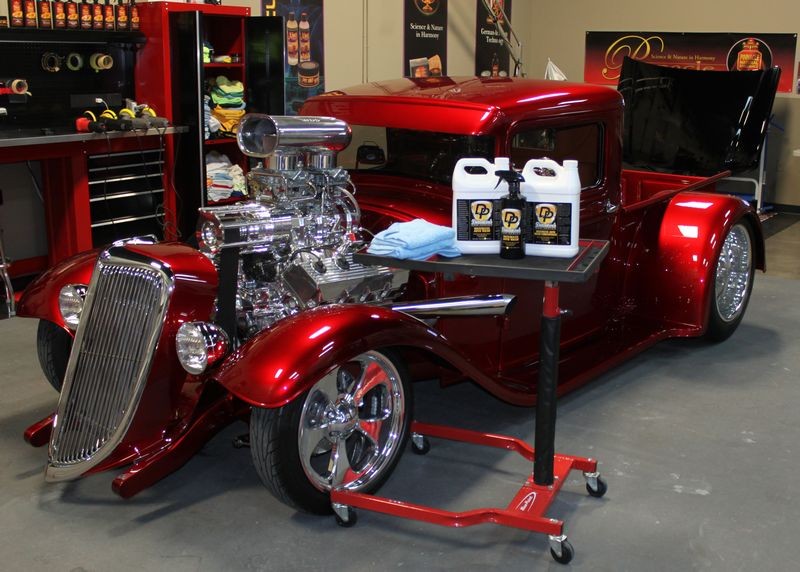
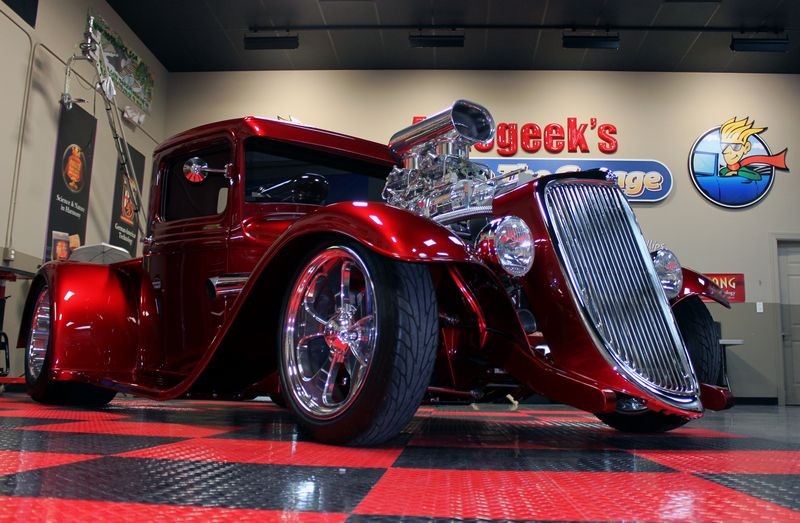
loud rumble outside the studio, I grabbed my camera, opened the garage door and took these shots of the 34 driving toward our studio..

Project34016.jpg


Project34017.jpg


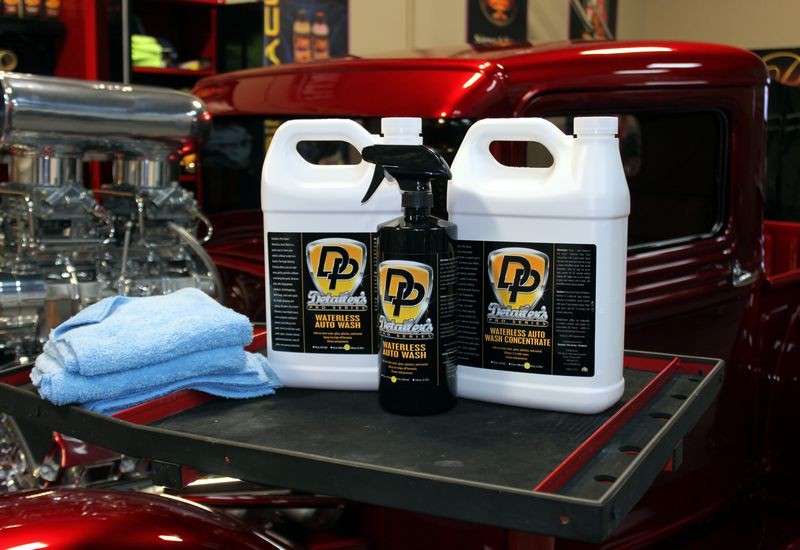
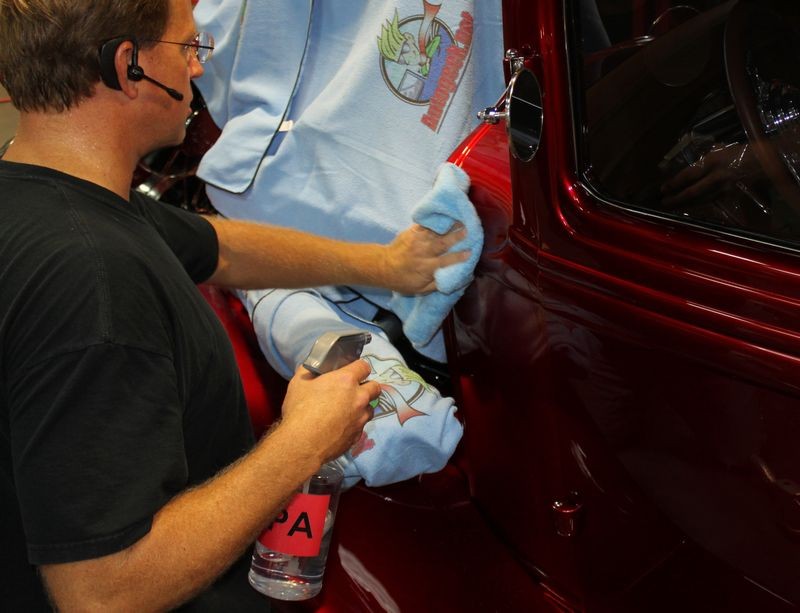
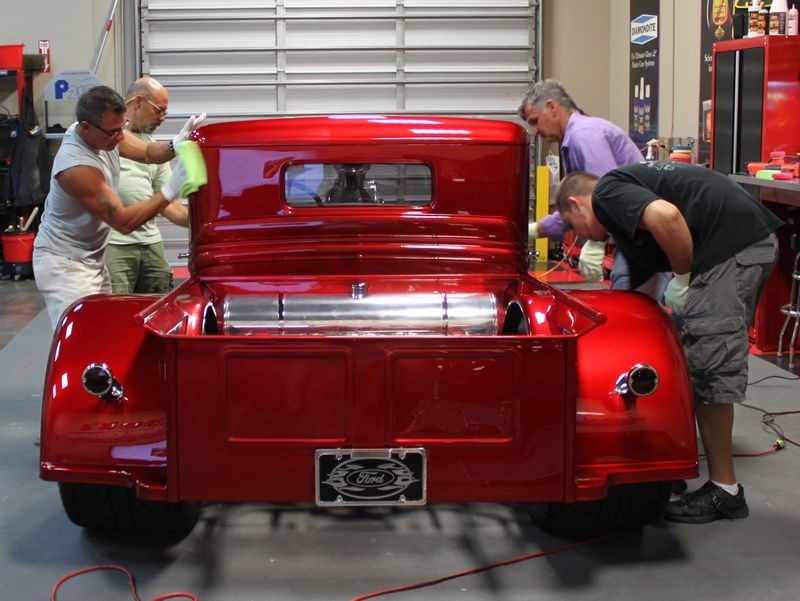
We moved the 1934 inside and then wiped the finish down using Detailer's Pro Series Waterless Auto Wash.

Project34001.jpg


Project34024a.jpg


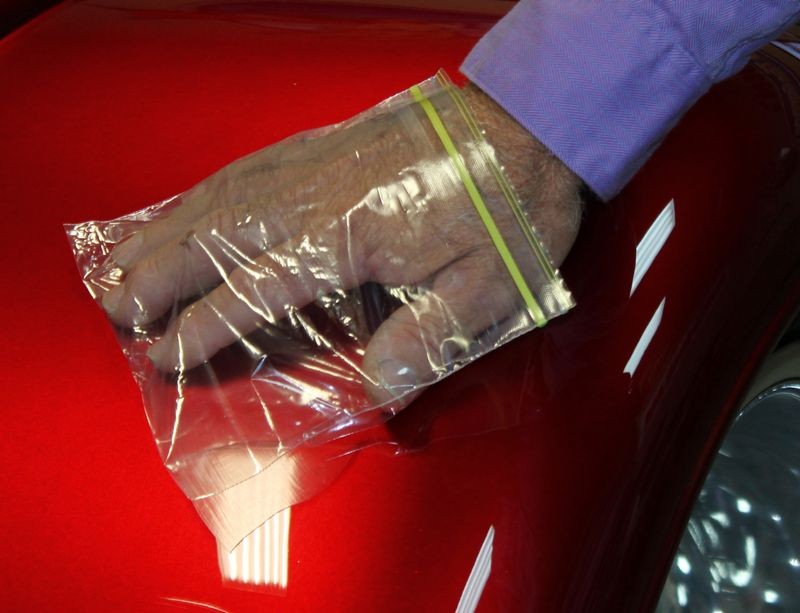
After wiping the finish down we felt the paint using our clean hands and also using The Baggie Test.

The Baggie Test - How to inspect for above surface bonded contaminants


Both methods of inspecting the paint revealed a very clean and contaminant free finish so we skipped claying the paint.

Project34002.jpg


Project34003.jpg


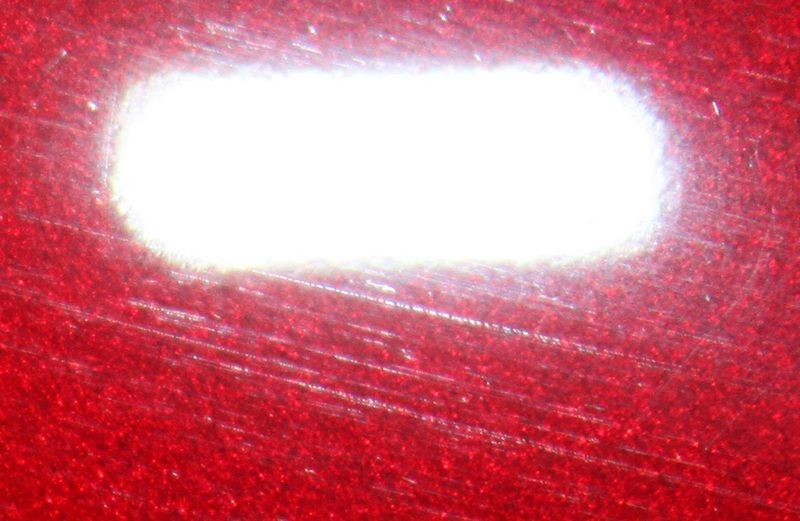
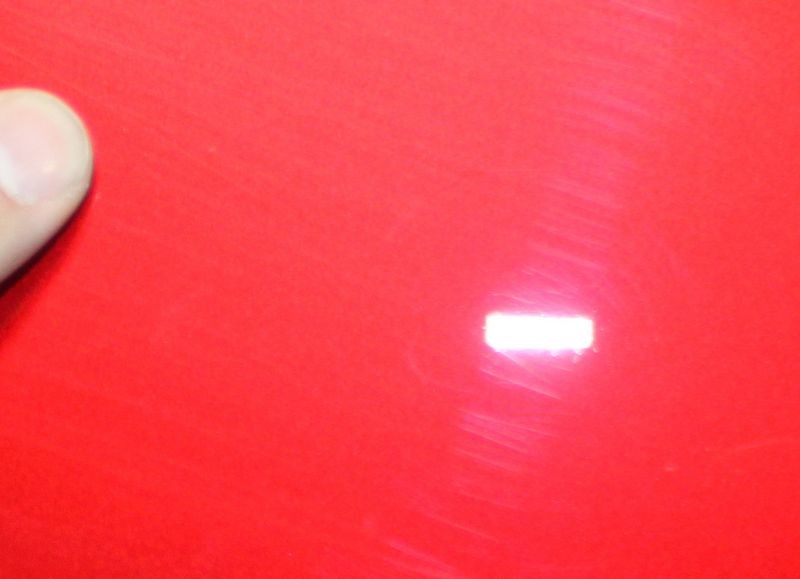
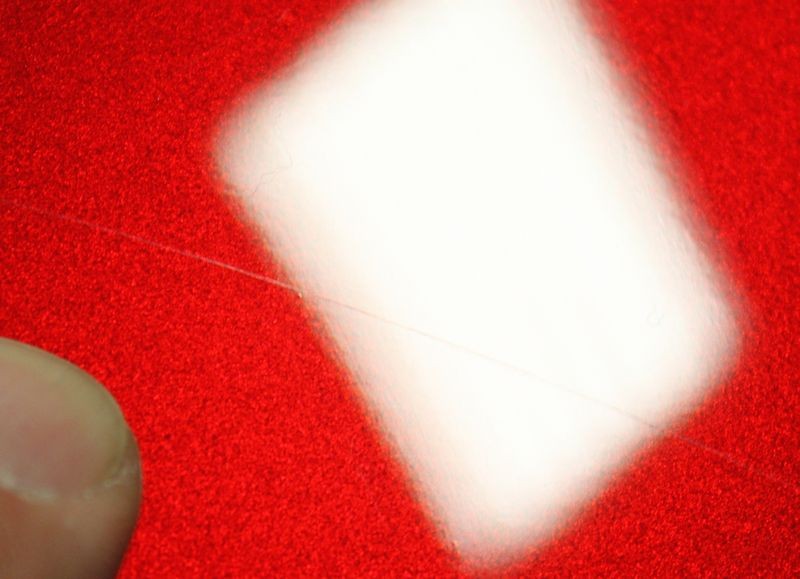
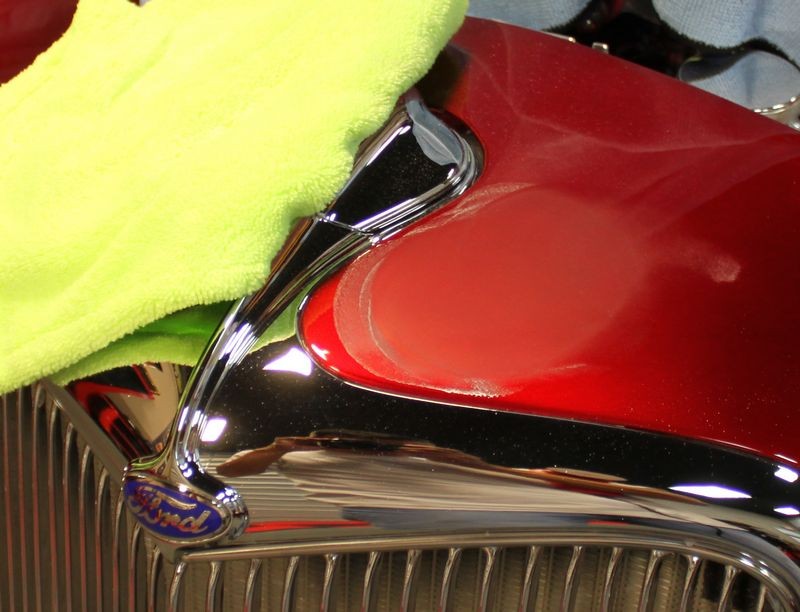
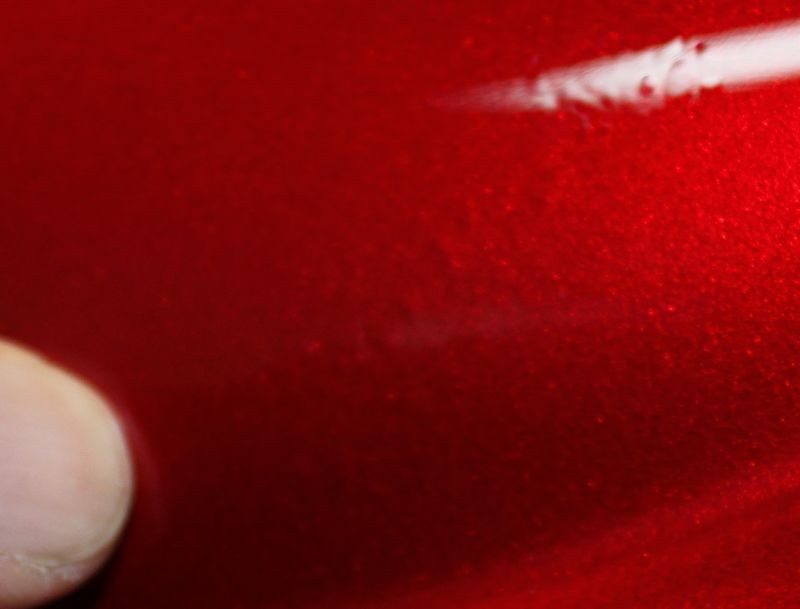
Then I did my best to capture the fine or shallow swirls and scratches in the paint... hard to do with a camera but easy enough to see in person with your eyes...


Project34019.jpg


Project34020.jpg


Project34021.jpg


Project34022.jpg


Project34023.jpg


Project34024.jpg


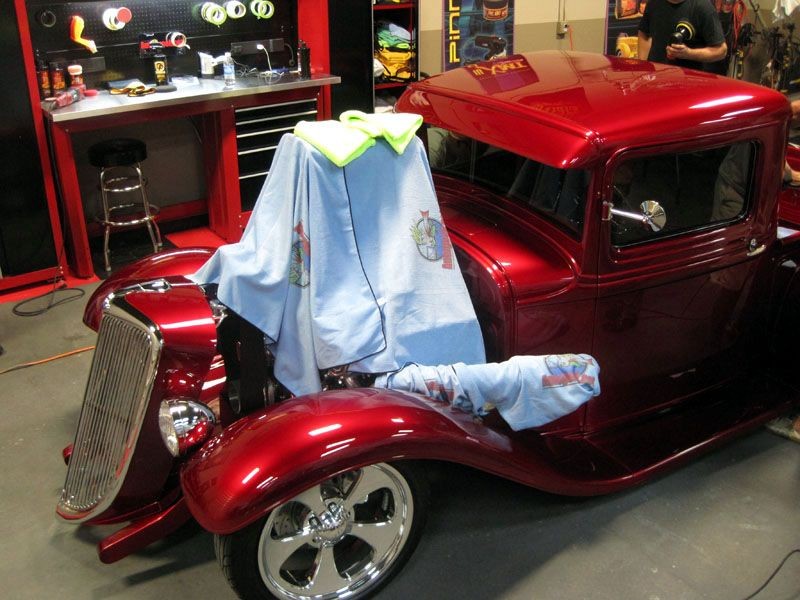
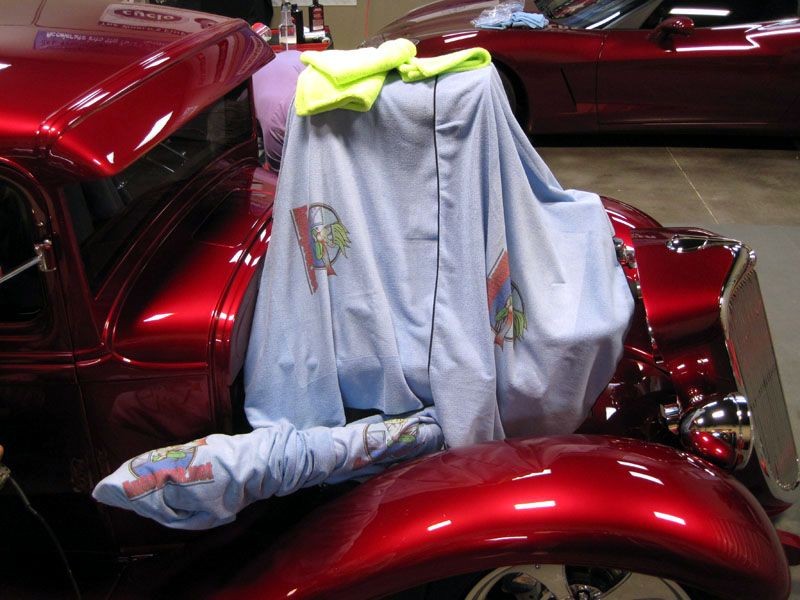
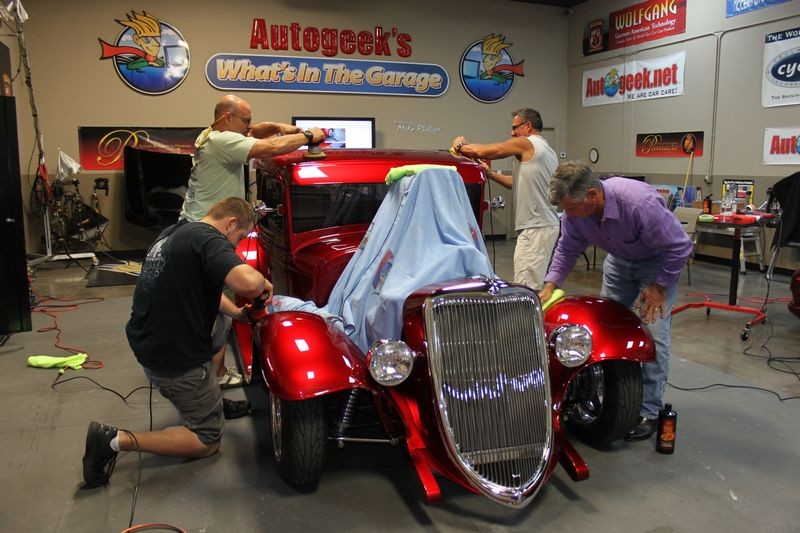
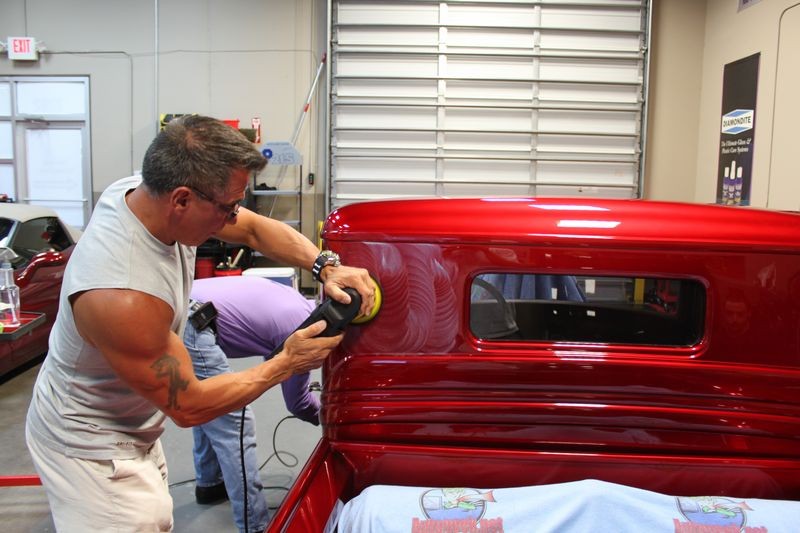
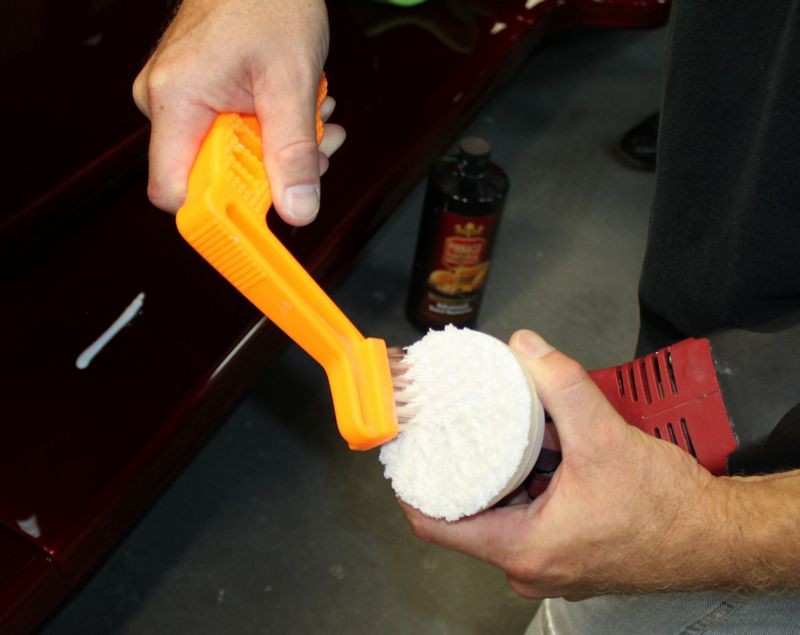
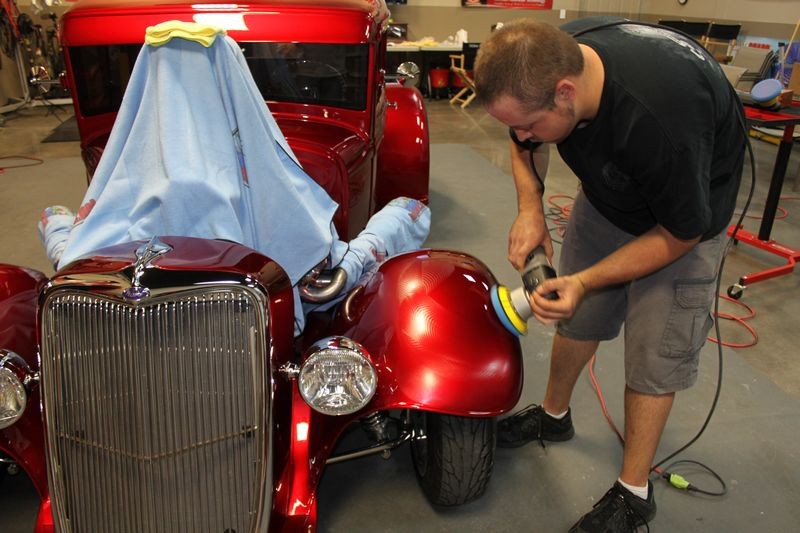
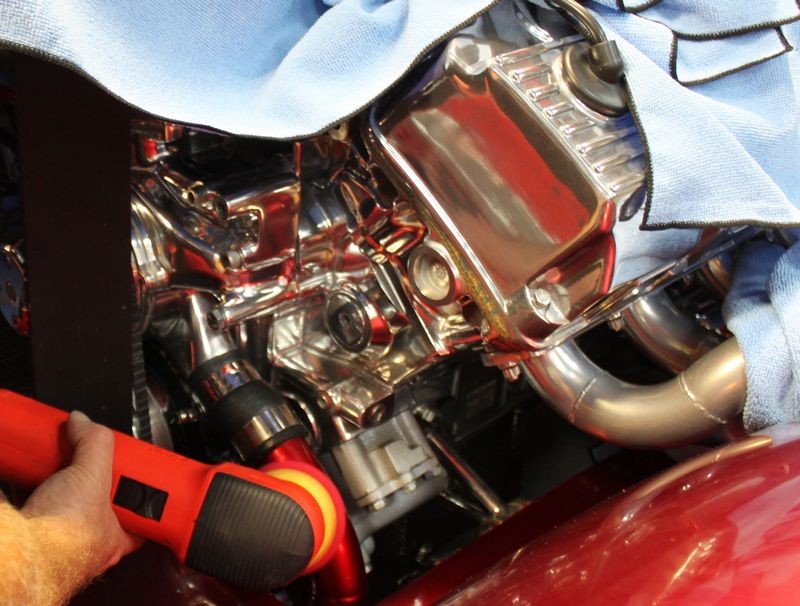
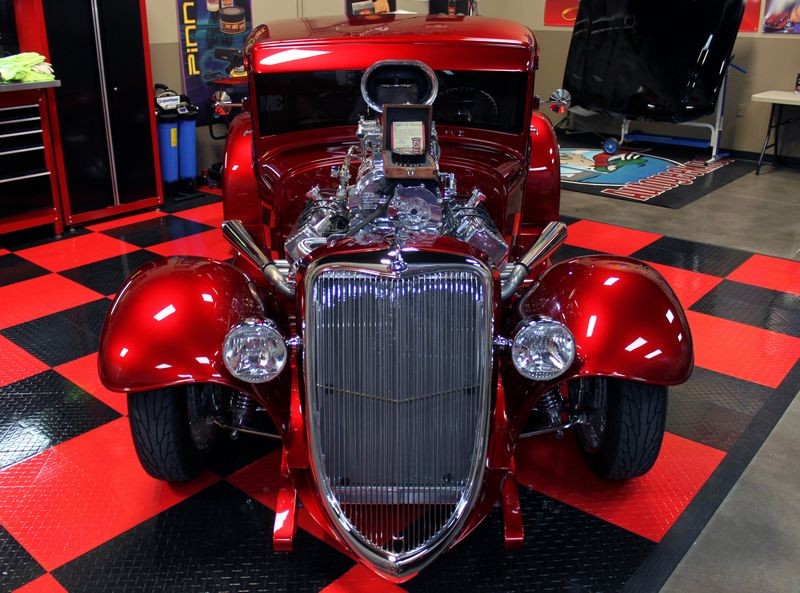
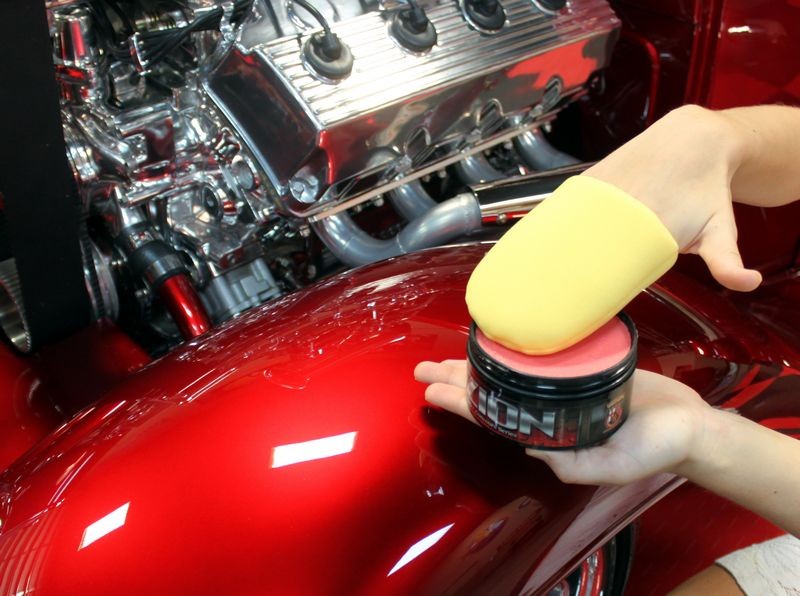
Next we cover-up all the brightwork and there's lots of it. Take my word for it, when it comes to projects like this you don't dare get polish spatter dots on the engine or in this example the exposed running gear in the truck bed. It's not professional and besides that it would take you hours to wipe the little dots of polish splatter off.

Project34024b.jpg


Project34024c.jpg


The Autogeek Cover-up Towel is made from soft microfiber and can be washed and re-used. This come in real handy for covering up anything you don't want to get compound or polish splatter dots onto so you won't have to detail these areas with a toothbrush after the the wax has been removed.

Nicks34pics001.jpg


The soft microfiber won't scratch paint or polished metals. Simple cover or wrap around components and then use a little painter's tape to secure them in place.

Nicks34pics002.jpg


Here we've covered the polished aluminum gas tank and the chrome independent rear-end...
Nicks34pics003.jpg


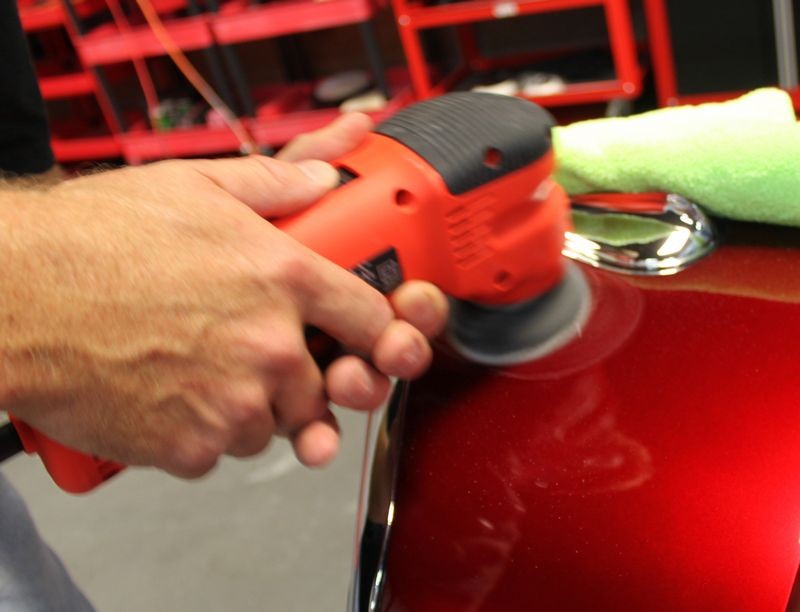
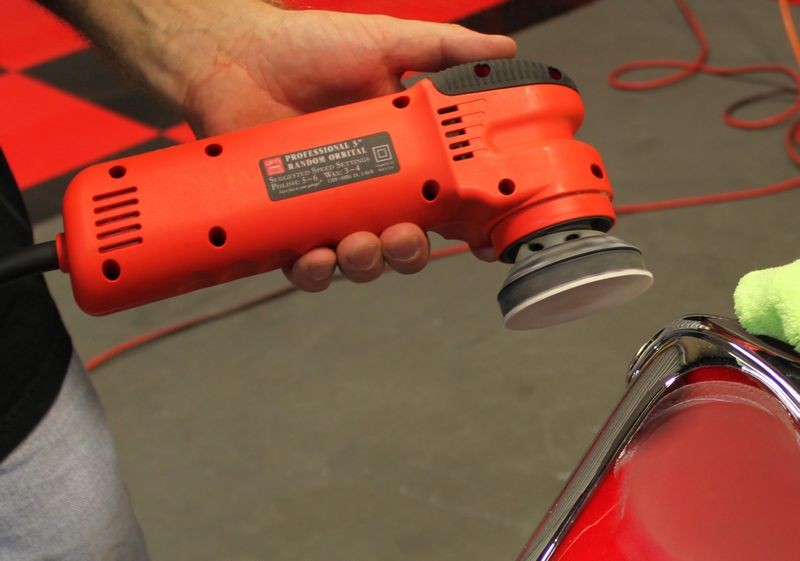
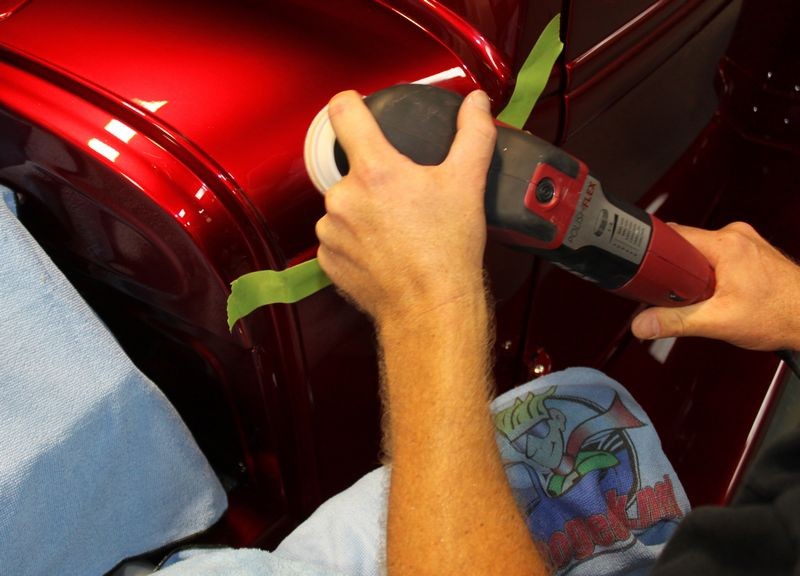
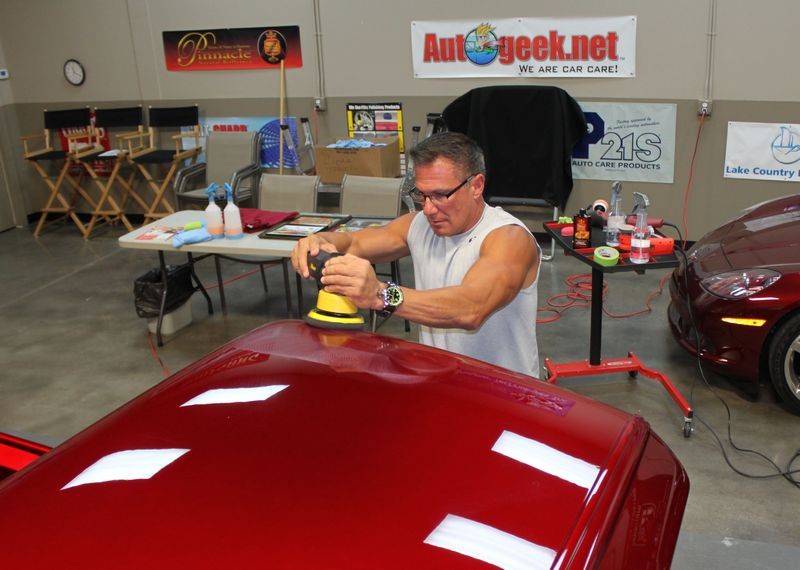
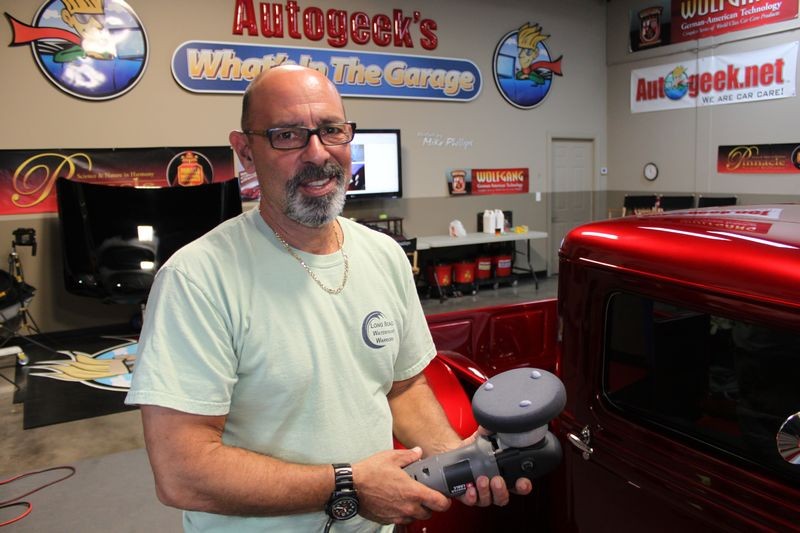
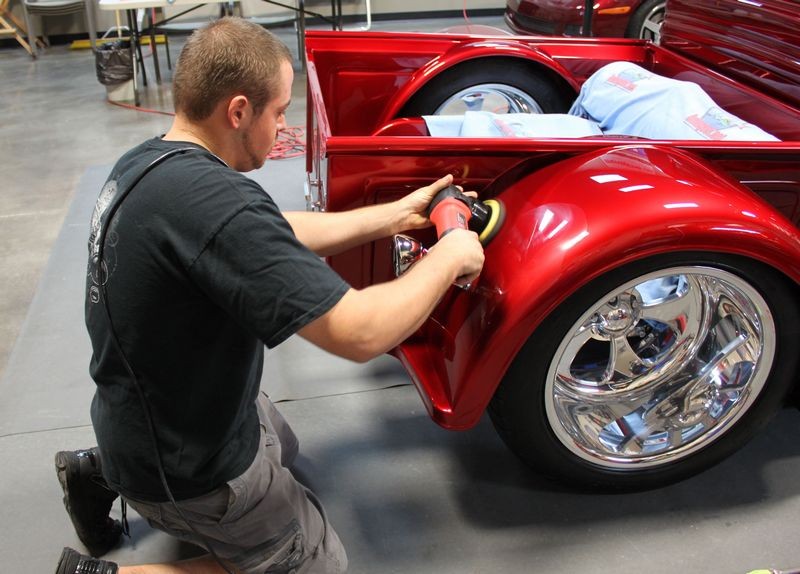
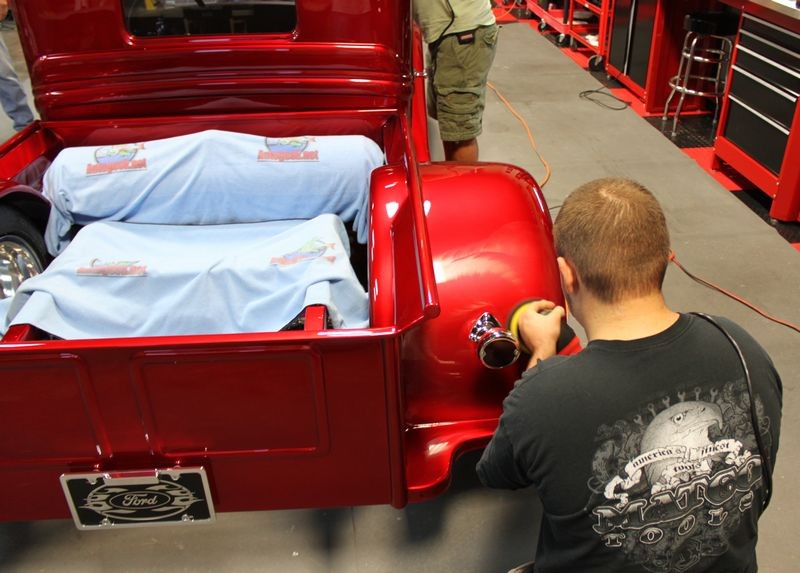
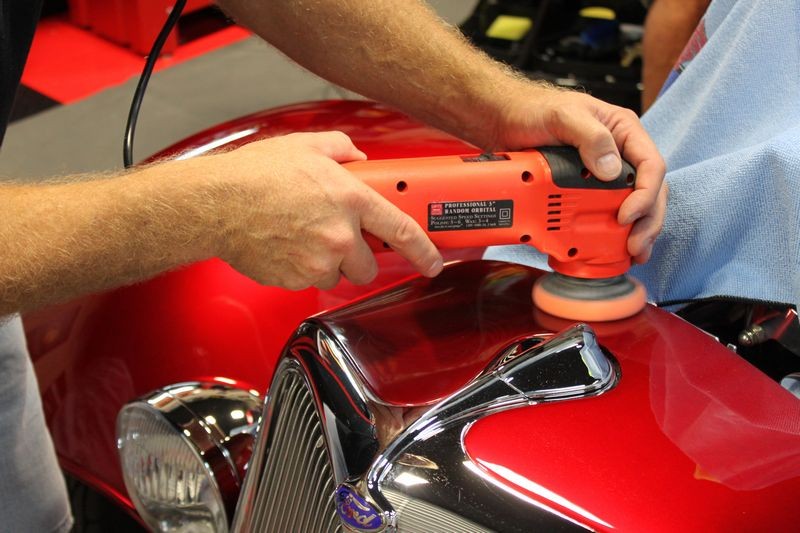
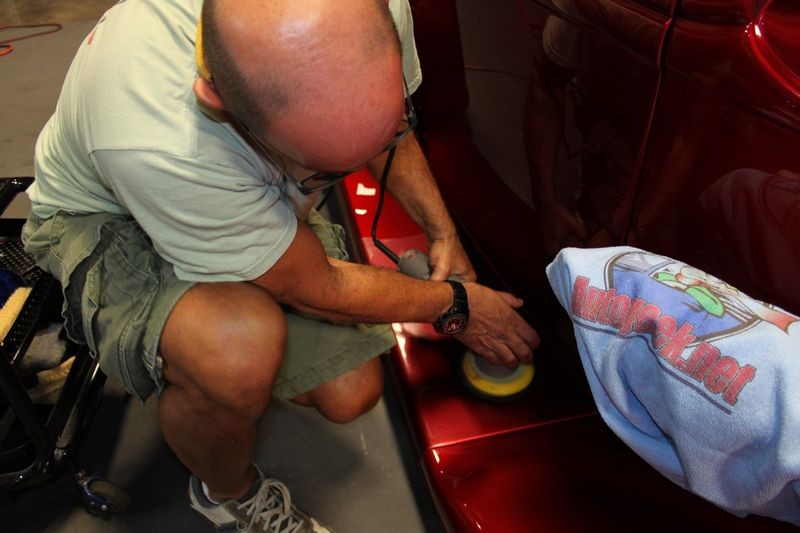
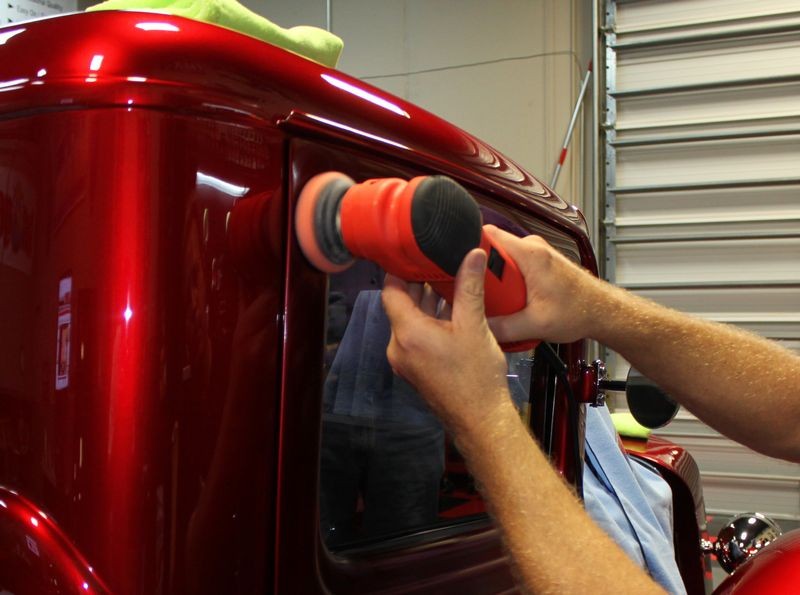
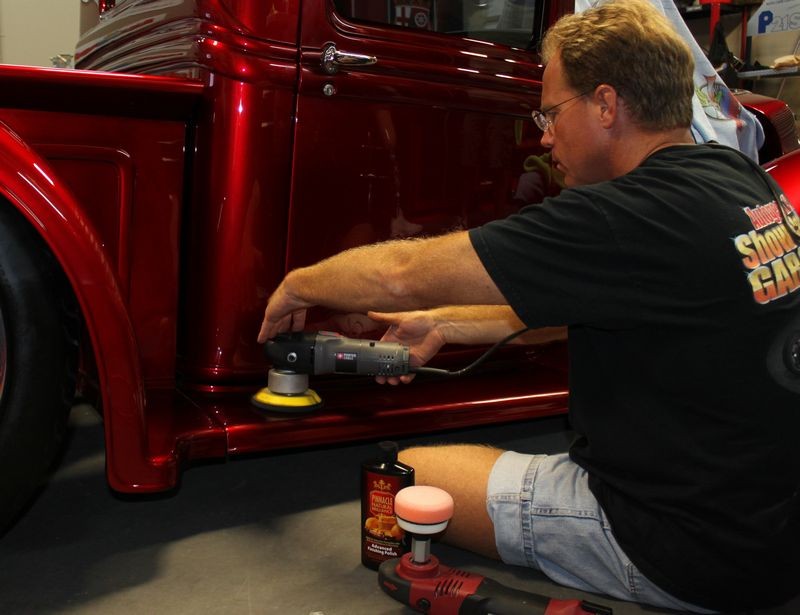
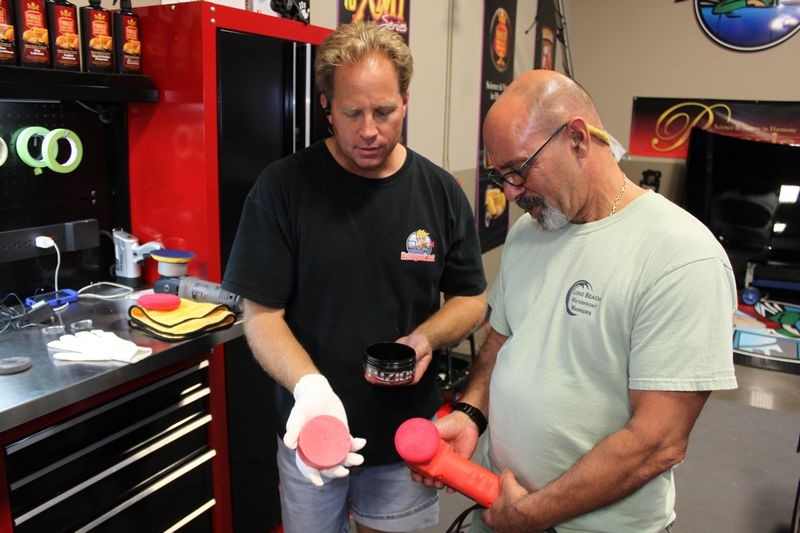
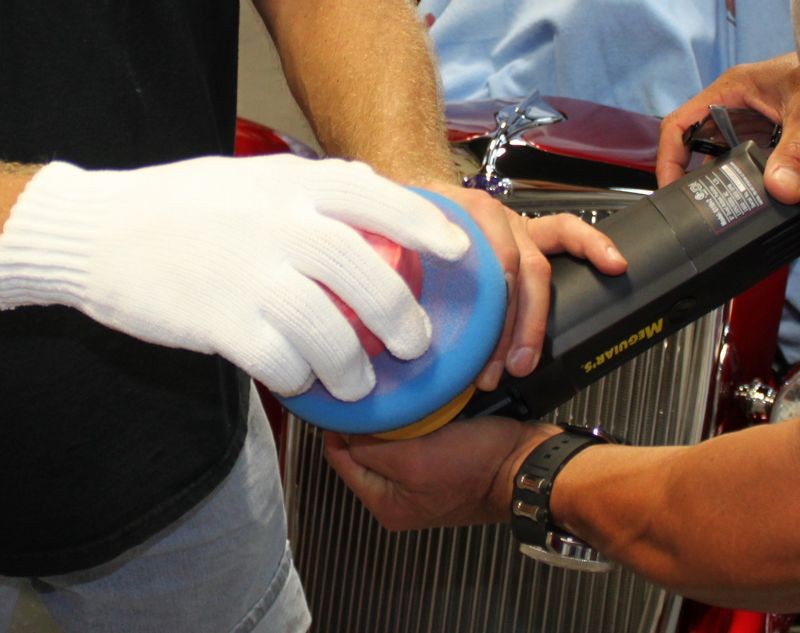
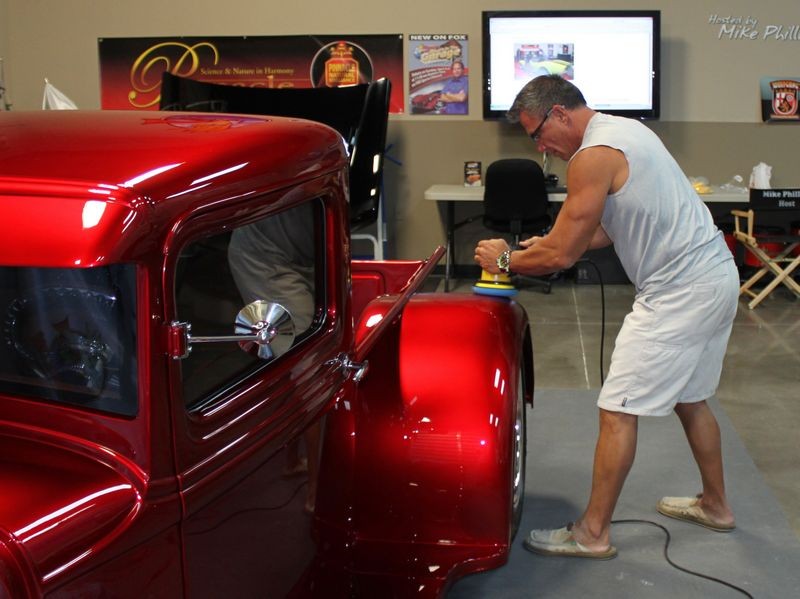
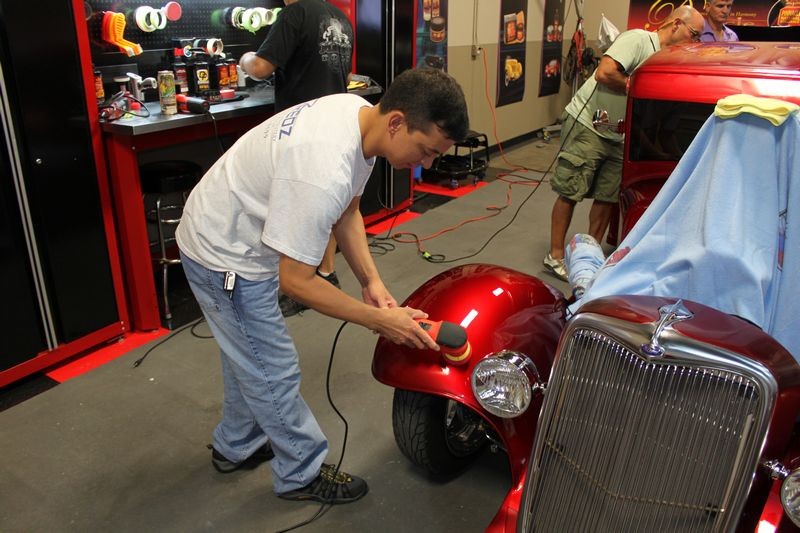
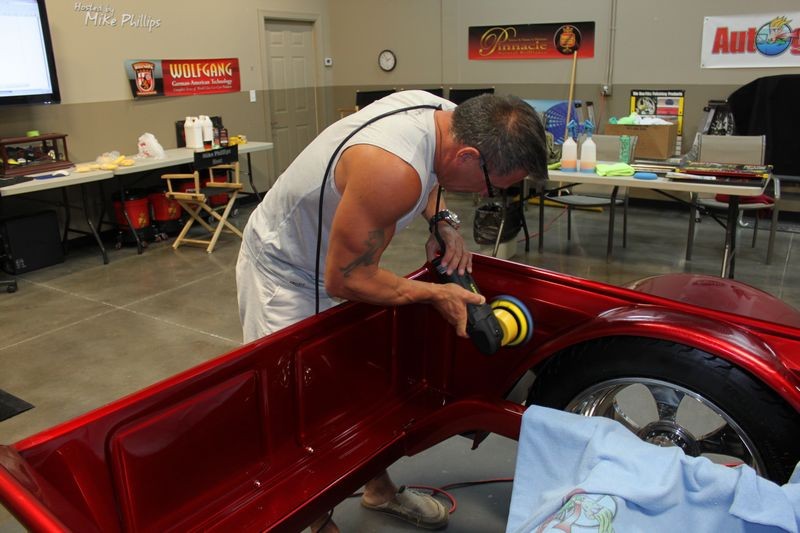
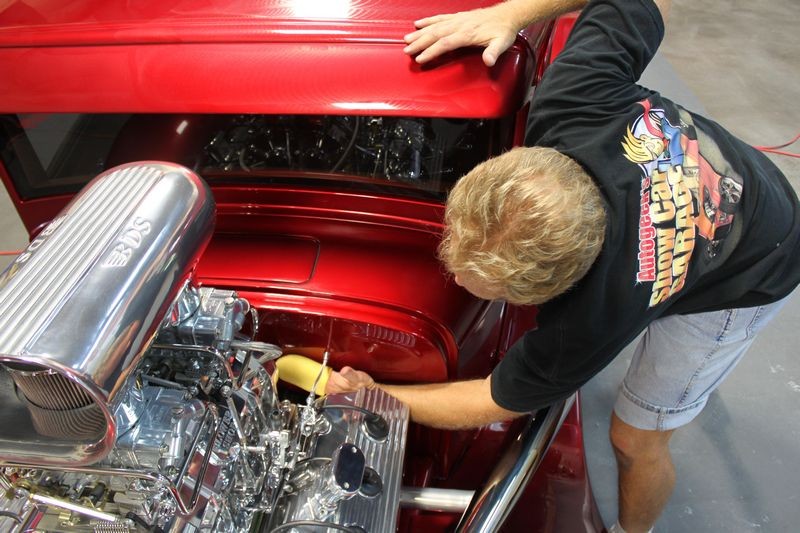
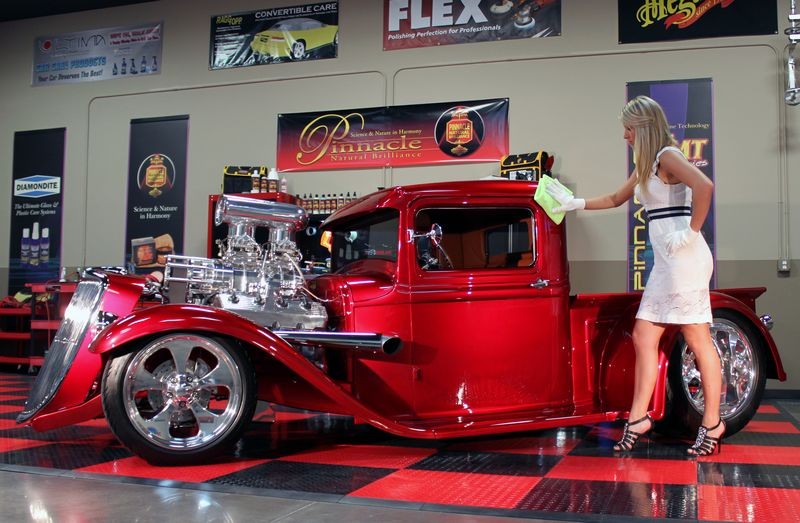
I got the other guys going with the Meguiar's, Porter Cable and Griot's Garage full size DA Polishers polishing all the major panels and set up the Griot's Garage 3" Mini Polishers for the smaller, tighter hard to reach areas.

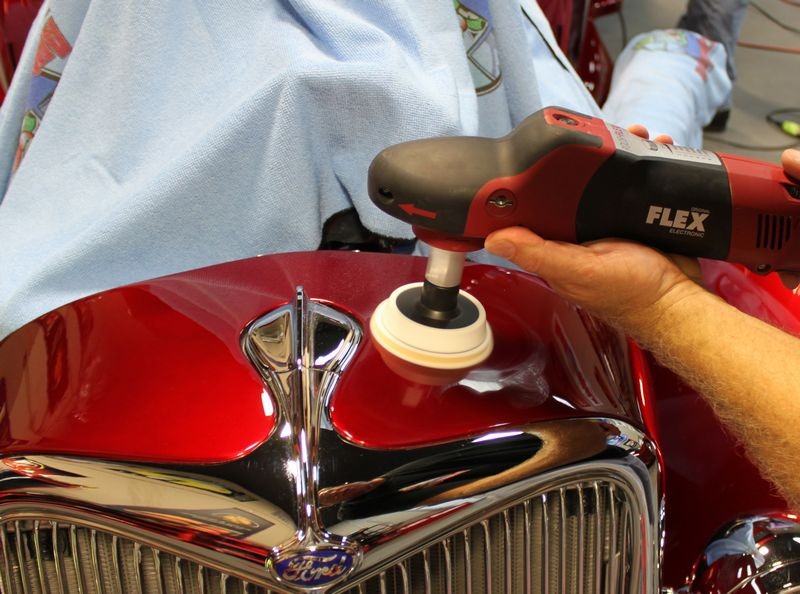
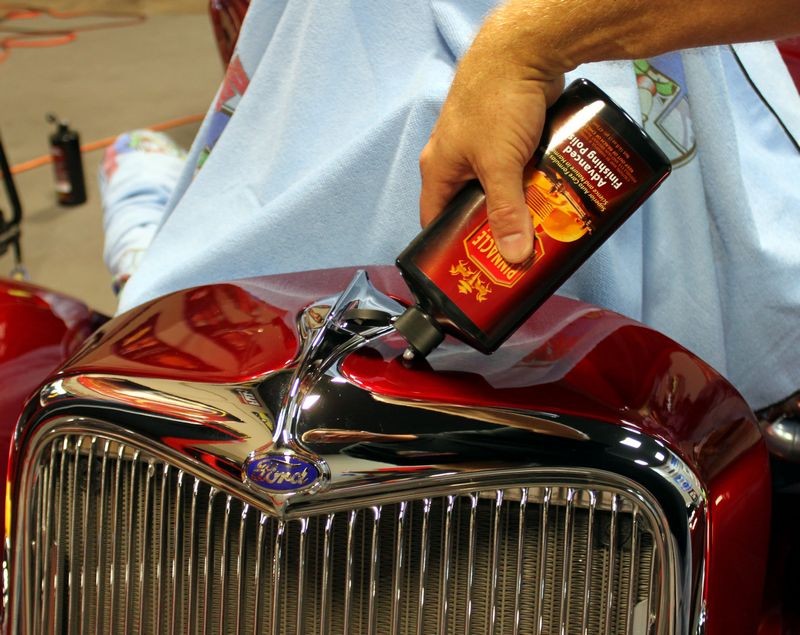
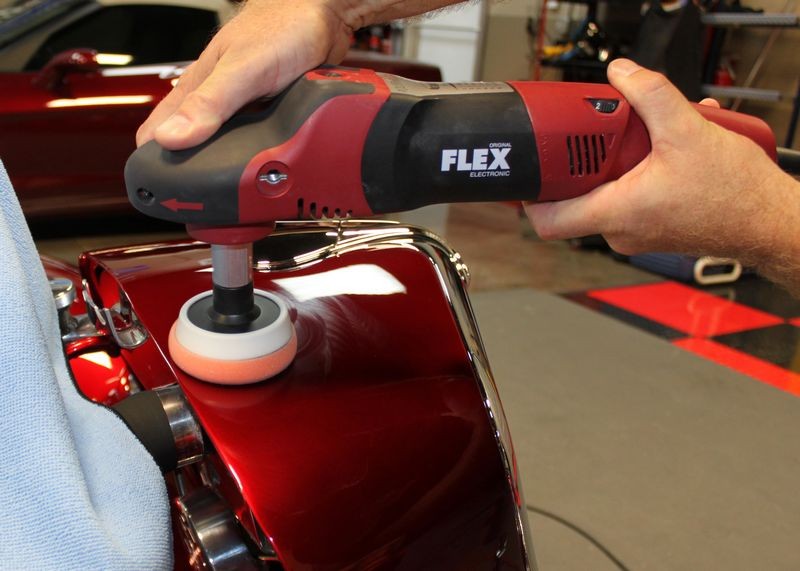
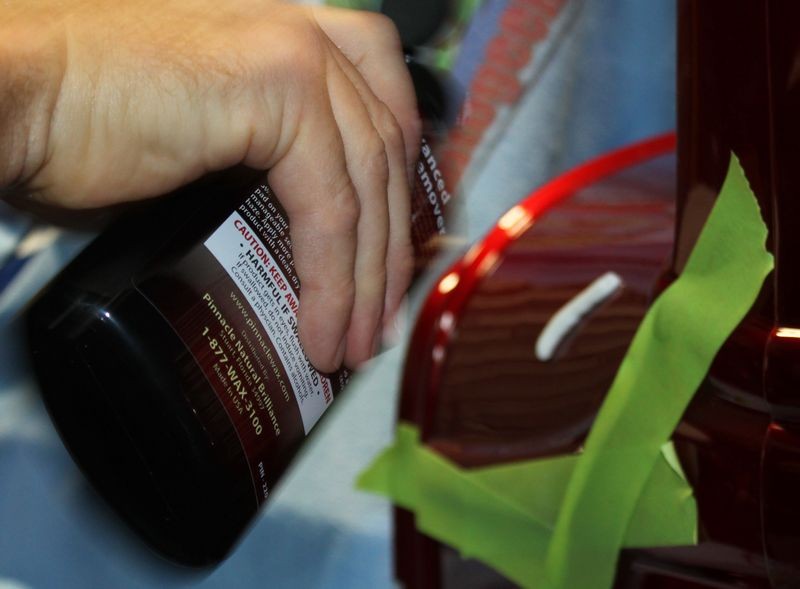
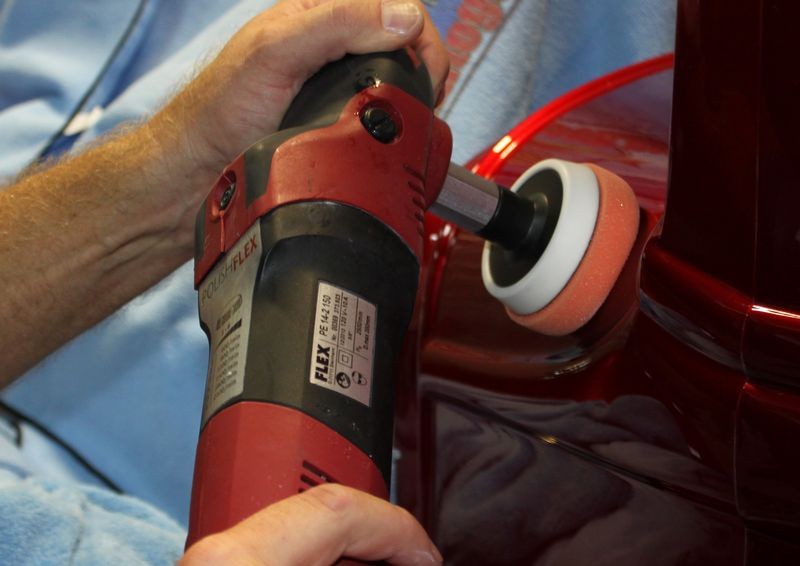
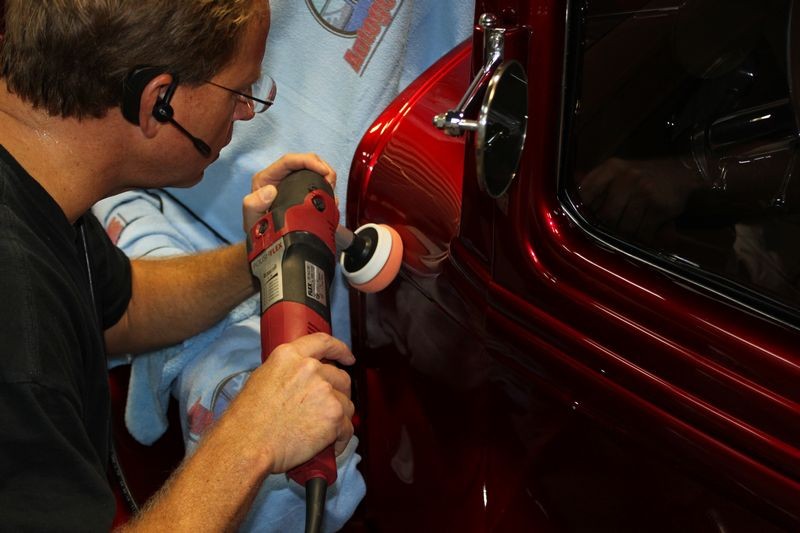
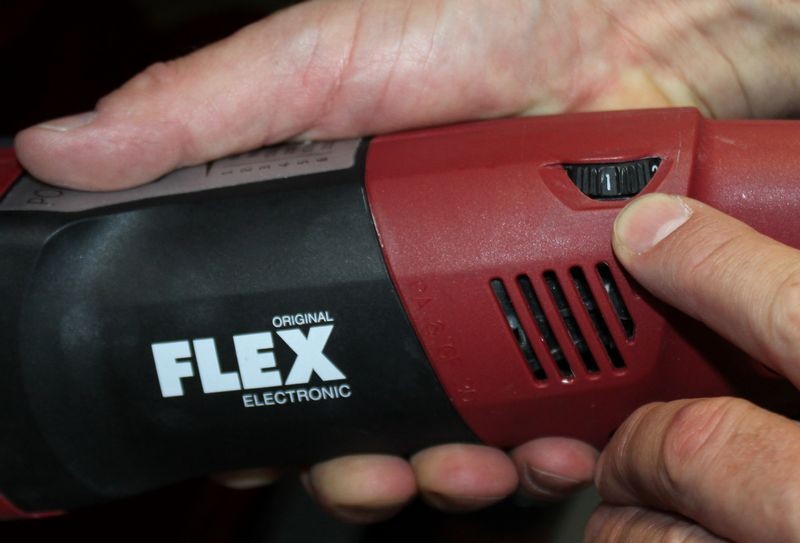
Meanwhile I tackled the random, isolated deeper scratches, some by dampsanding with Meguiar's #3000 Finishing Discs and some just using the new Optimum 3" Microfiber Pads on a Flex PE 14 Rotary Buffer using Pinnacle Advanced Swirl Remover.

Dampsanding34Ford01.jpg


Dampsanding34Ford02.jpg


Dampsanding34Ford03.jpg


Dampsanding34Ford04.jpg


Dampsanding34Ford05.jpg


Dampsanding34Ford06.jpg


Dampsanding34Ford07.jpg


Dampsanding34Ford08.jpg


Dampsanding34Ford09.jpg


Dampsanding34Ford10.jpg


Dampsanding34Ford11.jpg


Dampsanding34Ford12.jpg


:)
 
Continued...

After the radiator shell we moved to an area with some raised dimples on the paint, we sanded the area flat and then removed our sanding marks.

Project34025.jpg


Project34026.jpg


Project34027.jpg


Project34028.jpg


Project34029.jpg


Project34030.jpg


Project34031.jpg


Project34032.jpg


Project34033.jpg


The above is what I call Surgical Rotary Buffer work which comes in real handy for working on small or thin panels or hard to buff areas. You need an extension for your rotary buffer, small backing plates and small buffing pads.

Trend: Backing Plate Extensions for Surgical Precision Buffing

On Autogeek.net
Optimum Optimum Double-Sided Rotary Adapter
2-3/4 inch Hook & Loop Rotary Backing Plate


The Polishing or Minor Correction Step
To remove any shallow scratches, scuffs and other imperfections we used the Porter Cable 7424XP, Meguiar's G110v2 and Griot's Garage 6" and 3" DA Polishers with polishing pads and Pinnacle Advanced Finishing Polish.


Here's Brian using the Porter Cable 7424XP with a 5.5" Lake Country Black Flat Foam Polishing Pad with Pinnacle Advanced Finishing Polish on the inner portion of the driver's front fender.
Project34036.jpg


Here's Tommy using a Meguiar's G110v2 with a 5.5" Lake Country Black Flat Foam Polishing Pad with Pinnacle Advanced Finishing Polish on the driver's side roof.
Project34037.jpg


Here's Andy with PC ready to tackle the passenger's side of the roof...
Project34038.jpg


Teamwork...
Project34039.jpg


Here's Kyle using a Griot's Garage 6" DA Polisher...
Project34040.jpg


Project34041.jpg


Project34042.jpg


Project34043.jpg


Project34044.jpg


Project34045.jpg


Project34046.jpg


Using the Griot's Garage 3" Mini Polisher with a Griot's Garage 3" Foam Polishing Pad and Pinnacle Advanced Swirl Remover to remove any haze or swirls left by the rotary buffer step...
Project34047.jpg


Project34048.jpg


Andy knocking out the running boards...
Project34049.jpg


Kyle getting the inside of the pick-up bed...
Project34050.jpg


This is me working on the window frames...
Project34051.jpg


Machine polishing the visor using the Griot's Garage 3" Mini Polisher...
Project34052.jpg


:)
 
Continued...

Cleaning an Optimum 3.25" Microfiber Polishing Pad using a Pad Conditioning Brush
Project34053.jpg


Start out slow on the 1 setting which is 600RPM to spread the product out after using the 10 @ 10 Technique to pick up a bead of product
Project34054.jpg


Project34055.jpg


Project34056.jpg


The 10 @ 10 technique for picking up a bead of product with a rotary buffer


Following up using a Porter Cable 7424XP to ensure any swirls are removed...
Project34057.jpg


Project34058.jpg


Machine Waxing - The Protection Step
After carefully wiping off all polishing residue we moved onto applying a coat of Wolfgang Füzion by machine. Two guys will use full size DA's and two of us will be using the 3" DA's...
Project34059.jpg


I used a hot air gun to heat the outside of the plastic jar so I could slide the wax out as a single chunk of wax and hold it in a clean Microfiber Glove...
Project34060.jpg


Then carefully swipe it across the face of a clean, foam finishing or waxing pad...
Project34061.jpg


Tommy machine waxing the rear fender...
Project34062.jpg


Getting Kyle set up to machine wax...
Project34063.jpg


Kyle machine waxing the front fender...
Project34064.jpg


The 3" Mini Polisher with a 3" Red Waxing pad works perfect on the front frame rails...
Project34065.jpg


Lance has been playing Photographer all night and as you can see by the pictures he did a great job. Here you can see him checking out the 3" Mini Polisher to machine wax...
Project34066.jpg


Tommy machine waxing the inside of the bed...
Project34067.jpg


Machine waxing the paint in front of the engine...
Project34068.jpg


Machine waxing the painted steel radiator tube...
Project34069.jpg


Project34070.jpg


f
Project34071.jpg


Where we couldn't get a machine we used soft Gold Wax Finger Pockets which worked great...
Project34073.jpg


Project34074.jpg


Time to remove the wax
Microfiber Gloves help you to grip your microfiber towels and they also prevent you from putting fingerprints on the paint...
Project34075.jpg


For the wax removal step we're using Super Soft Deluxe Green Microfiber Towels with Rolled Edges these microfiber towels are incredibly soft and gentle to highly polished paint.
Project34076.jpg


End Results...
We didn't want to get the headers hot so we pushed it out after removing the coat of Fuzion, to avoid getting finger prints on the car everyone is wearing Microfiber Gloves...

Project34005.jpg


Need to get this truck outside for a few mintutes...
Project34006.jpg


So we can roll up the protective mats...
Project34007.jpg


:)
 
And then bring the pick-up back in to take some beauty shots...
Project34008.jpg


Oh yeah...
Project34009.jpg


Project34012.jpg


Blown bad boy...
Project34010.jpg


Project34077.jpg


To get these kinds of results we machine polished this using Pinnacle Advanced Finishing Polish
Project34078.jpg


Then applied Wolfgang Fuzion over it, which you see Kristin holding here...
Project34013.jpg


Project34079.jpg


Wolfgang Füzion is a true show car wax creating a clear, deep, wet shine on properly prepared paint...
Project34080.jpg


Wolfgang Füzion is also super easy to apply by hand...
HandApplyWG01.jpg


HandApplyWG02.jpg


HandApplyWG03.jpg


HandApplyWG04.jpg


And wipes off super easy...
Project34080a.jpg


HandApplyWG06.jpg


Kristin inspects our work using the Brinkmann Swirl Finder Light...

Project34014.jpg


Project34081.jpg


Looks like a polished gemstone...
Project34015.jpg


Project34083.jpg


And of course, the Transformation Team...

From left to right...
Tommy, Andy, Brian, me, Lance and Kyle...
Project34084.jpg


:xyxthumbs:
 
Placeholder #7

This is a placeholder for the process pictures and write-up after we've finished this project. This way the pictures and information won't be on added pages later so anyone clicking on this link will see the entire project on the first page and at the same time people can post comments and questions...
 
The guys are hard at work out in the Show Car Garage! :buffing:


IMG_5056.JPG


IMG_5057.JPG


IMG_5058.JPG


IMG_5059.JPG


IMG_5061.JPG


IMG_5062.JPG


IMG_5064.JPG


:righton:
 
Another fantastic make-over, on a fantastic vehicle, by a fantastic team!! Did I mention fantastic!

Thanks for sharing!

:)

Bob
 
That is a nice looking truck? Is that special paint that was applied?
 
That is a nice looking truck? Is that special paint that was applied?

House of Kolor Candy Apple Red with a Gold Base

The finish was very nice when it arrived except just from wear-n-tear and repeated wiping there were the normal light or shallow swirls throughout the finish plus some random, isolated deeper scratches here and there. I machine sanded 1 scratch out and leveled another area with some surface texture and then removed my sanding marks.

The rest of the car we simply machine polished using DA Polishers, Pinnacle Advanced Finishing Polish on black Lake Country 5.5" Polishing Pads and then machine waxed the paint using Wolfgang Fuzion.

The paint has been waxed around 5 times since the owner took possession of the pick-up from the painter and polishing effectively removed all the previous coats of wax and any other light surface impurities plush the swirls and shallow scratches.

So it wasn't in horrible shape when it arrived but it was in need of a light polishing to restore the paint back to show car quality.

On page 37 of my how-to book, I list 11 paint condition catagories...

The paint on this custom hotrod pick-up fell into category 2. Excellent Condition we restored it to category 1. Show Car Quality.

I did my best to capture the light swirls, scratches and RIDS but I have not looked through all the pictures taken with my camera today. My norm is to always document as best as I can the defects in the paint before we start machine polishing but until I start going through the pics I don't know if captured them or not.


:)
 
Wow that truck (and the model too! ;)) is looking nice!!! The paint couldn't get any better than where you brought it to. Great job guys! Wish I lived in FL!
 
That's the best looking car, urrrr truck to ever hit the AG floor IMO

The swirl girl is pretty sweet too!!!
 
Awesome job. That is one amazing truck. I absolutely love the color. You can tell the owner appreciates keeping it looking nice because from the before pics it wasn't in bad shape overall
 
Back
Top