Considering a DIY Custom Paint Job on Mobile Van?

art72

New member
Joined
Feb 5, 2012
Messages
96
Reaction score
0
As if finding AGO recently wasn't addicting enough, I just stumbled upon some pretty wicked airbrushing tutorial videos on YouTube. For the last 3-4 days, I can't seem to stop myself from watching guys like Ed Hubbs, Cory Saint Clair, Ryan Townsend, Ryno and several others who craft amazing works of art on various metal surfaces (i.e. cars, trucks, motorcycles, etc...)

Perhaps this began as a result or punishment of sort having had to 'miss' Detail Fest this year to prioritize tools, supplies, and my business needs.

So anyway, yesterday my wife and I started discussing the cost of 3M wraps, paint, and the advertising options available for our mobile detailing van, which are all pretty darn expensive to outsource... and we both agreed; I should do-it-myself for a multitude of reasons...

The main reason being it'll (hopefully) save us some money. The second reason is to better understand the painting process, and hopefully become a better detailer doing so. And finally, I have always had a huge passion for drawing lettering, cartoons, skulls, graphics, etc... so, it should be painstakingly fun...lol


Honestly, I have NEVER picked up an airbrush in my life, let alone sprayed an entire vehicle, but in watching the process these guys use to create realistic flames, water droplet techniques, ripped metals, and some awe inspiring works... I'm gonna do a practice run on my hood within the next couple of weeks.

The idea is to strip the factory clear/basecoat and cheap primer completely down to the metal, repair a few dings in the hood, prime, sand, and start laying my foundation with House of Kolor's new line of "Shimrin 2 Primers & Paints".

While I have sketched out 'in my mind' what I want to do across the entire van, I don't have the skills to digitize it in photoshop yet, so, I'll add some pics once the hood gets done, and go from there.

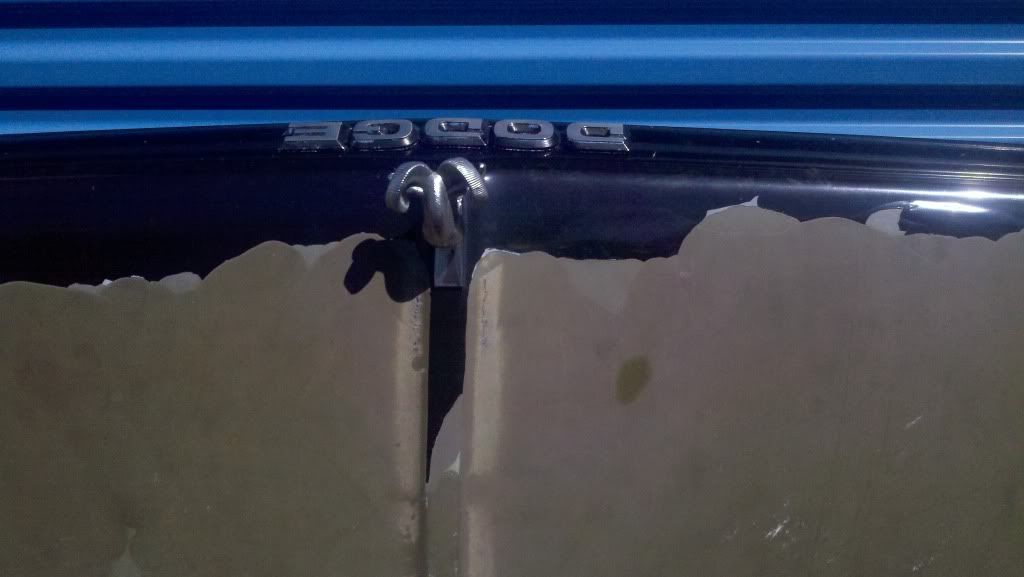
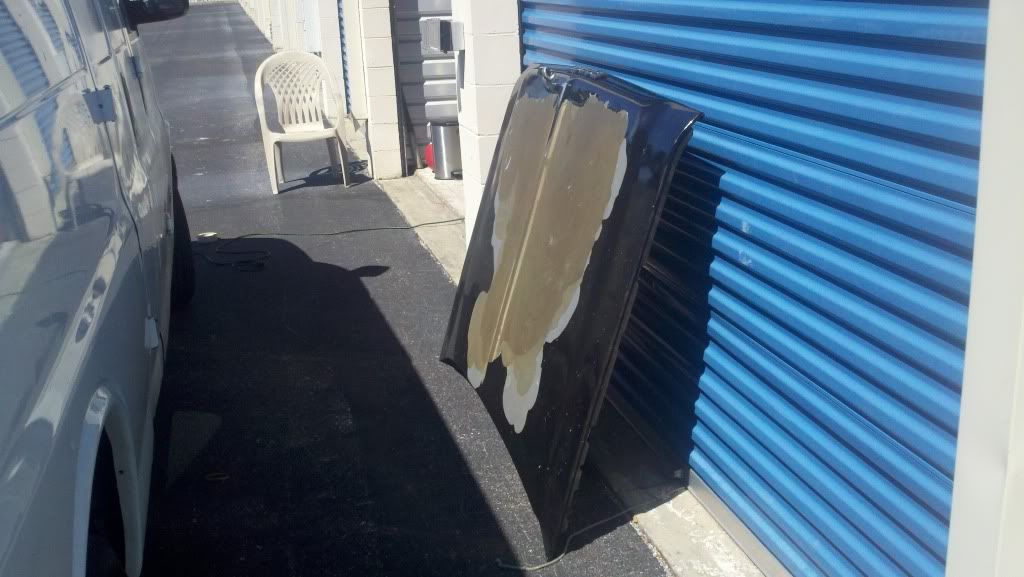
To think... this all started because the factory Chevy Van hoods all seem to share a common problem; paint flaking and missing from the hood! -arrggghhh!!!

The overall idea is to combine a series of flames, water droplets (beading), torn metal, wavy checkered flags, and eye-popping metallic's and kandy's on a 3 color paint job, without it looking too busy or detracting from my Logo, Name, Website, and detailing services.

Again, as a complete beginner, I may be biting off more than I can chew here, but worse case scenario the projected costs including primers, paints, reducers, HOK Kandy's, 3M tapes, masking, compressor's, airbrushes, spray guns, and possibly renting a booth periodically will run me approximately $2,000 - $2,500 and I'll have all the tools to pursue future projects as my reward. *God only knows how many man hours this task will consume, as that is still to be determined.

Am I going insane?

Honestly, I dunno. Ever since I first laid eyes on AGO this obsession will not relent!

To think this all began as a 'simple' plan to start washing cars, and throwing down an orbital buffer to make some cash... has instead become a voyage down a path to 'beautify' and 'protect' peoples vehicles properly using proven techniques, and exploded an age old (yet dormant) childhood passion of mine to be an artist, mechanic, and car enthusiast.

Stay tuned, if all goes well, over the next 30 - 90 days I am hoping to piece together the tools, primer's, paints, and perform this 'labor of love' on my 05' Chevy Van, and as I do I'll try to post some pics and video links to show my success or failure!

Currently, I am studying the dynamics of compressor SCFM's -vs- the spray guns I am planning to purchase. Mind boggling, as I thought I'd just pick up a cheap one, but now realize, a 60 -80 gallon compressor will be needed.

Still much to learn before starting this project... but if the end result goes well, I'd like to add 'custom paint & airbrushing' to my detailing business... as that would round things out nicely and break up the monotony.

PS - Guess the only reason I posted this was to 'commit' myself to completing this project, and by professing it... I am now obligated to 'making it into a reality!'

Only time will tell... if I have what it takes.

Peace.

-Art

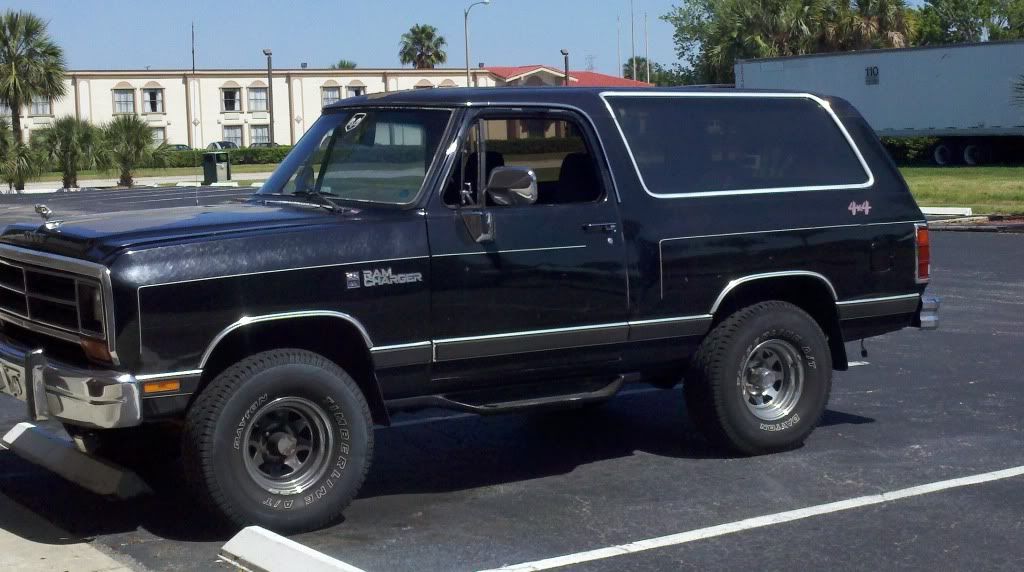
Here's few pics of the van now...

picture.php


picture.php


picture.php
 
Oh man, custom airbrush paint? I would leave that to the professionals with experience IMO. Since this is your mobile detailing van correct? You don't want to make it look 'cheap'.

Now if it was just solid paint you were doing, I would say go for it.

Why not just custom paint it with the HoK paint then put a vinyl on the side with your Business info?
 
Image is everything.

Don't forget your goal for getting into detail in the first place. Stay focused on your gameplan.

My .02.
 
Image is everything.

Don't forget your goal for getting into detail in the first place. Stay focused on your gameplan.

My .02.

Thanks, that is solid advice. My initial plan was to do simple vinyl graphics in the beginning. Unfortunately, the estimates I got were from $1,800 - $4,000 depending on how much coverage I wanted (Partial - full wrap) which seemed way too expensive IMHO. (*Only paid $3,100 for the van.)

I agree wholeheartedly; "image is everything" so having flaking (cheap) paint, and a ton of dings, dents, and paint missing doesn't seem acceptable on a professional detailing rig. Since I got a great deal on the van, kinda knew ahead of time the body and paint was in pretty rough shape. Looks good from 10 feet away, but up close she needs some serious TLC.

Started out on the hood earlier, which took 4.5 hours to sand it clean to the metal, removed the hood, applied 3 coats of primer, and reinstalled it. Looks better already, still have to repair 3-4 small dings & dents, and prime it again.

One thing that 'confirmed' a bad paint job was when I removed my masking tape, it pulled paint off both the fenders. Really, don't have any option other than to sand, prep, and paint at this point.

If my calculations are correct, to do the entire van it will take me another 50-60 hours to complete all body work, repairs, and temporary primer. Again, I am removing everything down to the metal, as I suspect; cheap primer is the real problem with the paint lifting an flaking... so it's gotta go.

Couple pics from today...

picture.php


picture.php


picture.php


picture.php
 
I used to airbrush alot and even painted motorcycles as a side business.

I mainly airbrush now just for fun.

Air brushing is a blast and very rewarding. Take the time and learn the science behind the materials you will be using.

Re coat windows, flash times, dry times, color theory, etc all have to be accounted for when custom painting. It could be challenging when painting motorcycles.

Do your homework and have a plan before you pull the trigger on your custom paint job.

A few good websites for custom painting are:

Kustom Kulture Lounge -=KKL=-
Learnairbrush.com
Airbrush.com

Good luck and keep us updated...

I forgot about a resource that was very helpful, local paint and body suppliers. Some have classes and even free demonstrations held by their suppliers. The demonstrations are to sell paint but they are a great tool for someone learning how to paint...
 
^^^^^^
AGO: experience and guidance for free. Great post david79z28!!!

10-04 hand. Pictures can be deceiving. I spend too much time on the forum. I also have read a lot of your postings over time -Good luck and much success.

Happy detailing hand...:buffing:
 
I used to airbrush alot and even painted motorcycles as a side business.

I mainly airbrush now just for fun.

Air brushing is a blast and very rewarding. Take the time and learn the science behind the materials you will be using.

Re coat windows, flash times, dry times, color theory, etc all have to be accounted for when custom painting. It could be challenging when painting motorcycles.

Do your homework and have a plan before you pull the trigger on your custom paint job.

A few good websites for custom painting are:

Kustom Kulture Lounge -=KKL=-
Learnairbrush.com
Airbrush.com

Good luck and keep us updated...

I forgot about a resource that was very helpful, local paint and body suppliers. Some have classes and even free demonstrations held by their suppliers. The demonstrations are to sell paint but they are a great tool for someone learning how to paint...

Cool... Thanks for the insight and the links.

Yeah, I'll be the first to admit, still have a long way to go in understanding reducer ratios, color theory, etc...

Been spending some time on coastairbrush.com & coastairbrushtv.com there's some amazing history behind some of these guys stories and great info for beginners... remember seeing 1 or 2 of the links you suggested on their site.

I really don't expect to make a profession of airbrushing myself, especially with the talent that's out there, but I can see it being a great past time and hobby.

Hoping by learning the science behind painting, it will help build my credibility as a detailer. I am still a 'newb' and learning the ropes (here on AGO) while assembling this rig.

AGO has definitely motivated me to 'do it right' or not at all.

PS - I think for now I'll stay away from the realistic flames, smoke, and more in-depth stuff, but some of the tricks I've seen on basic layouts I am pretty sure I can pull off with some practice... and a lot of masking.
 
Looking forward to seeing this.

I admire anyone with artistic talent, as I don't have any...

Bill
 
Here is a waterborne automotive paint that I use to practice with. It doesn't have the nasty stuff that the automotive urethane paints do. So, it was perfect for practicing.

Uros spray easier, dry faster, and are easier to mask over. So switching to Uros for the actual project is easy. Although the chemistry comes into play then.

AutoAir Colors

Coast airbrush is an awesome place to visit, if you ever have the opportunity. The art on display at that store is amazing.
 
Coast airbrush is an awesome place to visit, if you ever have the opportunity. The art on display at that store is amazing.

Yeah I have learned a lot on that site. Matter of fact, learned that Craig Fraser is Kustom Kulture Lounge's founder... that guy is phenomenal!!!

I have a 1990 Dodge Ramcharger 4x4 that my son and I are hoping to start restoring (sooner or later) sitting in my warehouse. So, I'll probably practice airbrushing on it a few times before spraying anything on the van.

Since the hood on the Dodge looks like this in it's present state, I highly doubt anything I do to it could possibly hurt...

1332702725739.jpg


2012-03-25_15-16-47_139.jpg


2012-03-25_15-16-56_607.jpg


The beast was my 'daily driver' up until a few months ago, it was getting a whopping 5 mpg and needs some TLC. Amazingly it runs great, but is eating gas like no tomorrow.

Once the mobile detailing business is up and running, planning to rebuild the 360 cu engine and transmission. Needs some suspension work, ripped one of the 3" lift spacers out hammering on it one day and almost lost the rear axle.

Notice the front quarter panel, some idiot (ah...hem, clears throat) rubbed compound wax on it and scratched it to hell. Naturally, this was before finding AG.

Droid1035.jpg


Getting some #105, #205, and some (orange, white, and grey) LC CSS pads ordered this week, and plan to do some corrective work just to add some before & after pics to my website.

Today was a wash, ran around spending money all day...

12v ShurFlo Pump (3gpm), wire, and plumbing fittings for the van. Then, we picked up a contractor pack of sanding discs, bondo, cheap primer (for now), and some other junk.

Planning to sand, repair, and prime both front quarter panels and lower bumper on the van tomorrow... should be fun. :work:
 
New-B here too, with detailing, but not auto body. Just some advice, watch what you're doing with your primer, know you said Cheap,but this is your foundation. Use a good epoxy primer over bare metal,or you'll have rust forming under it,as cheap primer may not be water proof. Something I learned a long time ago at PPG training. Also,watch your Topcoat time,the epoxy I use needs to have some type of Topcoat within a week.Just don't want to see all your hard work go to waste.Good luck with it.
 
New-B here too, with detailing, but not auto body. Just some advice, watch what you're doing with your primer, know you said Cheap,but this is your foundation. Use a good epoxy primer over bare metal,or you'll have rust forming under it,as cheap primer may not be water proof. Something I learned a long time ago at PPG training. Also,watch your Topcoat time,the epoxy I use needs to have some type of Topcoat within a week.Just don't want to see all your hard work go to waste.Good luck with it.

Thanks for the heads up.

The plan (as shade tree as it is) was to strip, repair, and prime one panel at a time, mainly just to get the bodywork done, and once she's ready for paint, I planned to strip it all ( temp primer) down again, prime & seal it all properly, right before starting paint.

Probably, not the the most economical of approaches, but since I have plenty of time while awaiting funds to attain the proper environment, tools, and materials to do the spraying, it'll have to do for now.

Having just been introduced to AutoAir's waterborne line of paints (*Thanks Dave), still a bit indecisive of which route I'll take paint wise. I was actually quite impressed at what can be accomplished with AutoAir's water based paint line. *Not sure I am as impressed as I am with the new Shimrin2 line from HOK tho.

I'll probably go with HOK's low VOC eurothanes, as they seem limitless, and really quite impressive. Who knows, maybe Jon's experience and salesmanship over at HOK has me pre-sold... I dunno.

Somehow, the voice in my head is screaming; "Be ready to do a lot of wet sanding" - as I imagine my first time spraying a black base coat will be a 'fun' learning experience.

And just for the record, as I failed to respond to a comment referring to my detailing van 'looking cheap' - the layout, color scheme, and attention to detail I am "hoping" to achieve is actually quite the opposite, and will remain consistent will a professional "wow factor" if all goes well.

Off to suck up some dust and get some more sanding done.
 
I only used auto air for practicing or things that would not be exposed to the elements.

I used either PPG or HOK Uros for motorcycle parts.

I was a little hesitant to use it on anything that was in the elements a lot. I was always concerned with the clear coat getting chipped or scratched, exposing the auto air.

However, a lot of body shops are now using waterborne paints without issues....
 
Link, would he be better off doing the body work, seal with an epoxy, then use something like PPGs K36 primer within 7 days?

Could that sit and be blocked out later? He could still go panel by panel then?
 
Dave, the way I've been taught a PPG training and the way I've been doing it for years - strip to bare metal, do all dent and other repairs- all ruff body work- I use a STINGER to put out all small dents. Next,prime with DP Epoxy Primer. All body filler is then put over top of that, NOT over the bare metal. I use ALL METAL body filler , because its water proof, its a little harder to sand, but to me it's worth it. Must be done within a week or you need to sand and recoat. After filler work, I prime with one of PPG's primer-surfacer.3 heavy coats. Next, ruff sand with 220. If panel looks and feels good, I'll guide coat, with 400 wet paper,that way you can't go wrong. If I don't find anything wrong with the guide coat I resand with 600 wet and this panel is ready to seal and shoot. If you are in a garage this panel can be left till the rest of the repairs to other panels is done or till the whole car is ready to spray. Just cover with something to keep it dirt free. Hope this was a help.
 
OK, so after reading several of the responses, I have decided to only repair the damaged areas for now, as opposed to stripping the entire truck down to the metal. -At least until I am ready to spray quality primer & paint.

Today, I bought a small 4.5 gallon Ridgid air compressor for $100 @ a local pawn shop. According to the specs: 6.2 SCFM @ 90 psi, I am hoping it'll run a small paint spray gun @ 35 - 40 psi smoothly (?) - Gonna need to get an in-line water trap, and test it out.

Considering I was pricing out Intersol Rand's w/60 -80 gallon tanks at $699 and up, I'm gonna roll the dice with this little one for now.

Also, I had initially planned on getting a Iwata Power Jet Pro or their Maxx Jet set up (*which is bad @$$) specifically for airbrushing - but if all goes well this Ridgid compressor might afford me to wait on that expense as well, so I can (hopefully) focus more on airbrushes, masking, paint, primer, and a decent spray gun set.

No body work today, instead, I wired up the 12v ShurFlo pump (3gpm), tested it out with a Craftsman 3000 psi pw... and with just a garden hose and sprayer, and gotta admit; that little pump rocks! - amazingly everything worked right and tight... with no leaks Im the MAN

One thing's for sure, the 3/4 ton suspension handles the 175 gallons of water (250 gallon tank), but I definitely can feel the weight and the water moving quite a bit, ...it caused me to 'slow down' a bit driving, as I am usually lead footed.

Started organizing and laying out the inside, wet/dry, pw, DA, rotary, tools, hoses, applicators, cleaners, canopy, etc... It's almost hard to believe how much stuff we already have in the van, and I haven't even scratched the surface yet with the things we plan to acquire in the near future from AG and some other sources.

Should be ready to start pulling some jobs in the next week or two.
 
OK, so after some great advice from David and Link, I started throttling back on the "bigger picture" and decided to do something 'just for now'.

Call me crazy, but I started drawing some lettering from a 'logo' I created online. Anyway, I drew the letters by hand, made 2 copies on a cheap printer and cut them out. By having copies (uncut) this enabled me to scale various sizes with my printer/copier for placement on other panels on the van. *God knows; a plotter would've been awesome, as this took me a 7 hours just to draw the lettering, cut out the stencils, tape, and trace them out.

I did this just to see how it would look. Naturally, I'll be needing some masking film before I start playing with any paint, but here's the results of my test...

picture.php


picture.php


picture.php


picture.php


picture.php


picture.php


What I might do for now is prep, scuff & sand the clear coat in the areas I intend to add artwork/lettering and contact info, and thoroughly clean the area and tack cloth it.

Then, overlay the penciled areas with masking film, cut out areas (lettering) I intend to paint, and spray the artwork. Once the base coat of the lettering dries, I plan to brush a 1/8 to 1/4 border around the lettering and maybe add some shadowing or highlighting.

If it looks worthy, I'll spray 2-3 layers of clear coat, wet sand and polish.

Again, this is NOT my main paint scheme, but should serve well enough for a 1-3 months until I am ready to do it right, and continue with the full custom paint I plan to do.
 
Have you looked into 1shot sign painters enamel. Existing base just needs to be cleaned 1st, no sanding/ scuffing. It can be removed with east off oven cleaner.

No need to clear over it either....

Btw: Those letters look great for cutting by hand!!!!
 
Have you looked into 1shot sign painters enamel. Existing base just needs to be cleaned 1st, no sanding/ scuffing. It can be removed with east off oven cleaner.

No need to clear over it either....

Btw: Those letters look great for cutting by hand!!!!

Thanks, my middle finger is killing me from the cheap scissors I used!

I designed a business card with some free software, and really like the font, but couldn't blow the lettering up without distorting it all to hell. Don't even remember what font it was! - So I drew 'Finish Line' looking at the card, and then had to create the letters for 'auto spa' by altering the existing letters. Turned out pretty cool though.

Funny, I was just searching for local hobby shops and art suppliers for some decent 'rattle cans' until I get my airbrushes. Find that most art supply stores are more brush & canvas based , and if they carry any airbrushing or spray paint, it's either over-priced or junk.

AutoZone was bout the only place with decent metallics.

That 1shot paint could be the answer since this is just until I get the tools and the time to do the 'real' paint job. Going to look it up now.

EDIT: 1shot.com <---Thanks, I appreciate that!!!
 
OK so I have 75% of the graphics drawn & stenciled, to include some pretty cool looking wavy checkered flags, re-designed the phone number graphics last night, and have been playing around with some color schemes & and custom graphics for the custom paint job.

To be honest, getting a 'proper education' to the basics of auto paint has been mind boggling, to say the least. However, as several have contributed some great tips & information, I am slowly acquiring the tools, knowledge, and confidence to commit myself to complete this project in the next 60 - 90 days.

Just about done getting all the equipment & legalities together to start up the 'mobile car wash & detailing' business out of the van - so as the money comes in, I plan to re-invest into the rig's paint job, which right now I project to cost at or around $1,500 - $1,800 including all the body work materials & parts, tools, spray guns, airbrushes, DP epoxy primer, HOK custom paints, Klear Coat, etc... (*Still way cheaper than a 3M wrap!)

I'll try to scan some pics of the artwork I'm working on, and hopefully before long, I'll be showing step-by-step pics of the actual paint job unfolding from start to finish. -If all goes well, it should look pretty killer!
 
Back
Top