TTQ B4U
Well-known member
- Jan 20, 2016
- 5,504
- 70
So a fellow racing club member picked up a really nice 2013 CTS-V and wanted to get himself a little something for the holidays.
Body wise the car is in great shape and has just over 50k on the ODO but it needed some love on the surface. It's pure black which really shows everything and once it's out in the sun or under lights, the true condition of what he was faced with jumped out. It didn't help that early on in his ownership his little one grabbed a key and tried to put a pin stripe down the entire passenger side of the car

With all that was facing it we decided on my Elite Enhancement Correction Service. This service is geared to greatly reduce the appearance of the marring and defects. Topping it all off would be a dual layer protection of CarPro Cquartz UK v3.0.
Here's what the starting point was:
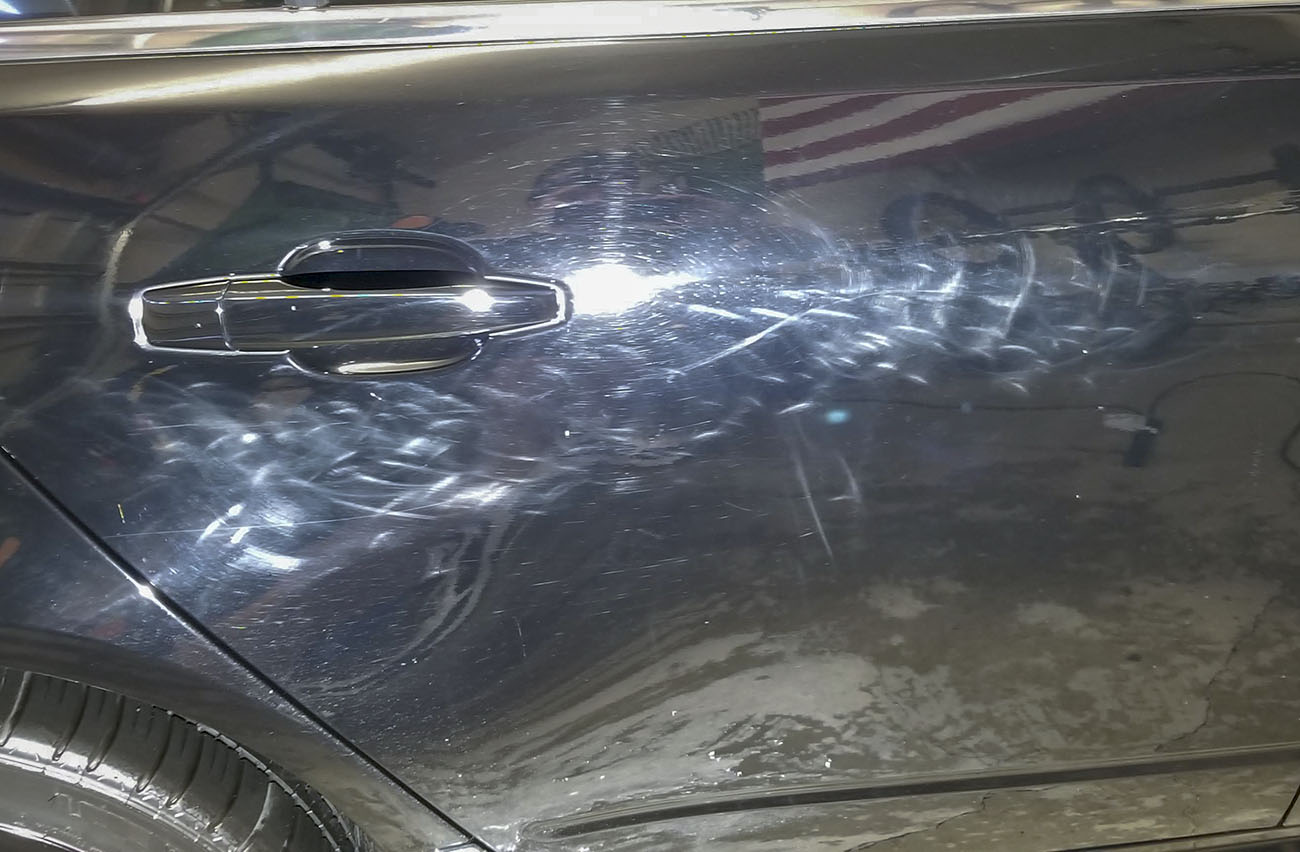
Part of what we're seeing here is an attempt by the owner to correct the key marks. Unfortunately when polishing on paint by hand the pressure is never even and will result in the inability of the work to blend properly
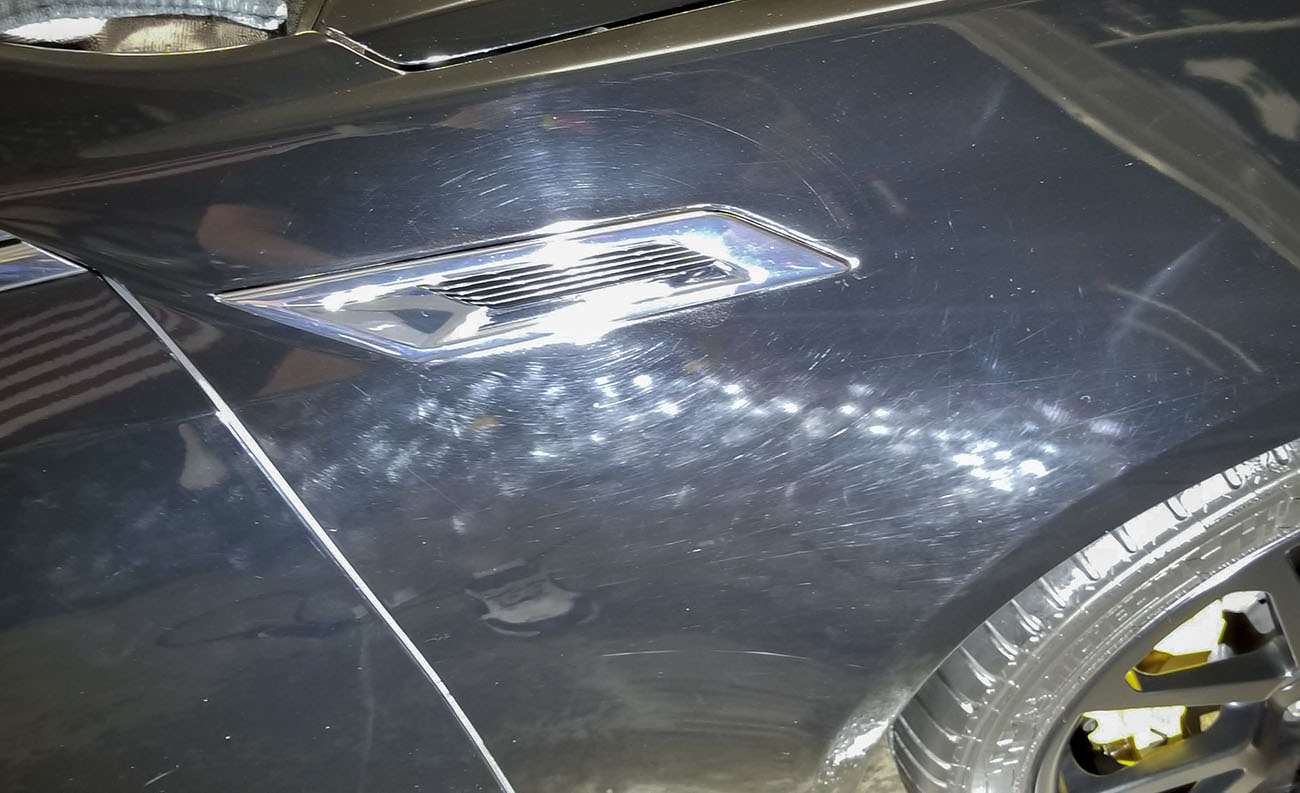
These Swirls and holograms are what prevents the true depth and beauty of pure black from showing
The hood.....these swirls would dominate under the lights of a gas station or the sunshine at a car meet. Critical to remove them
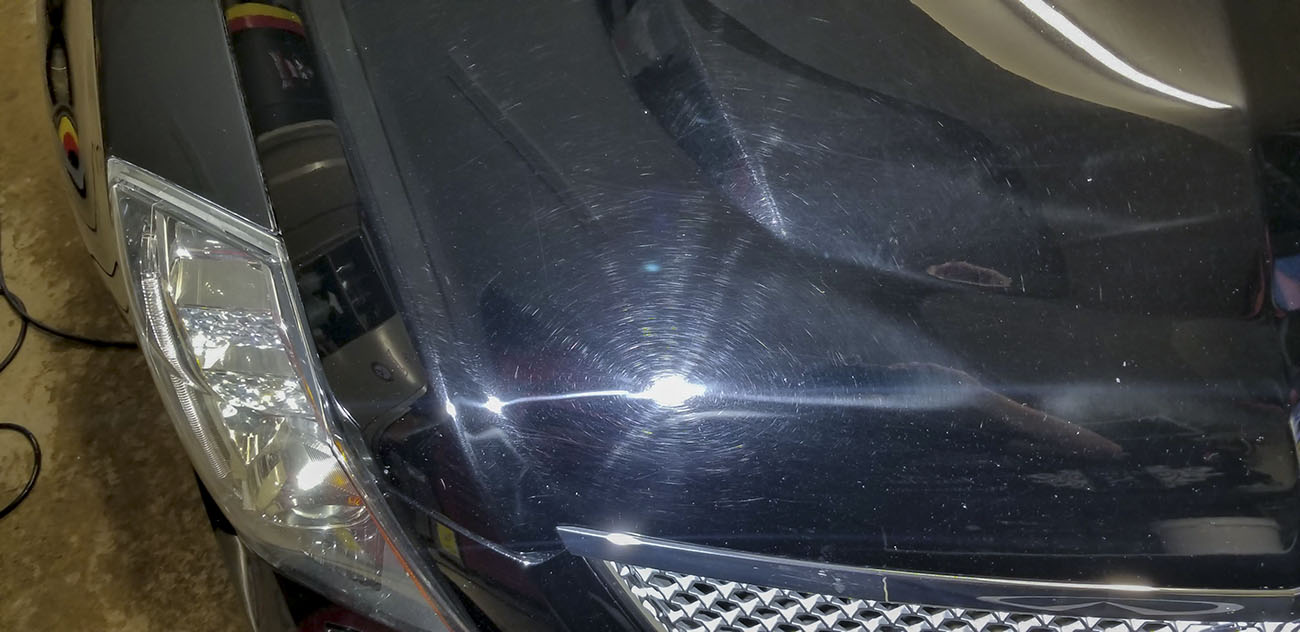
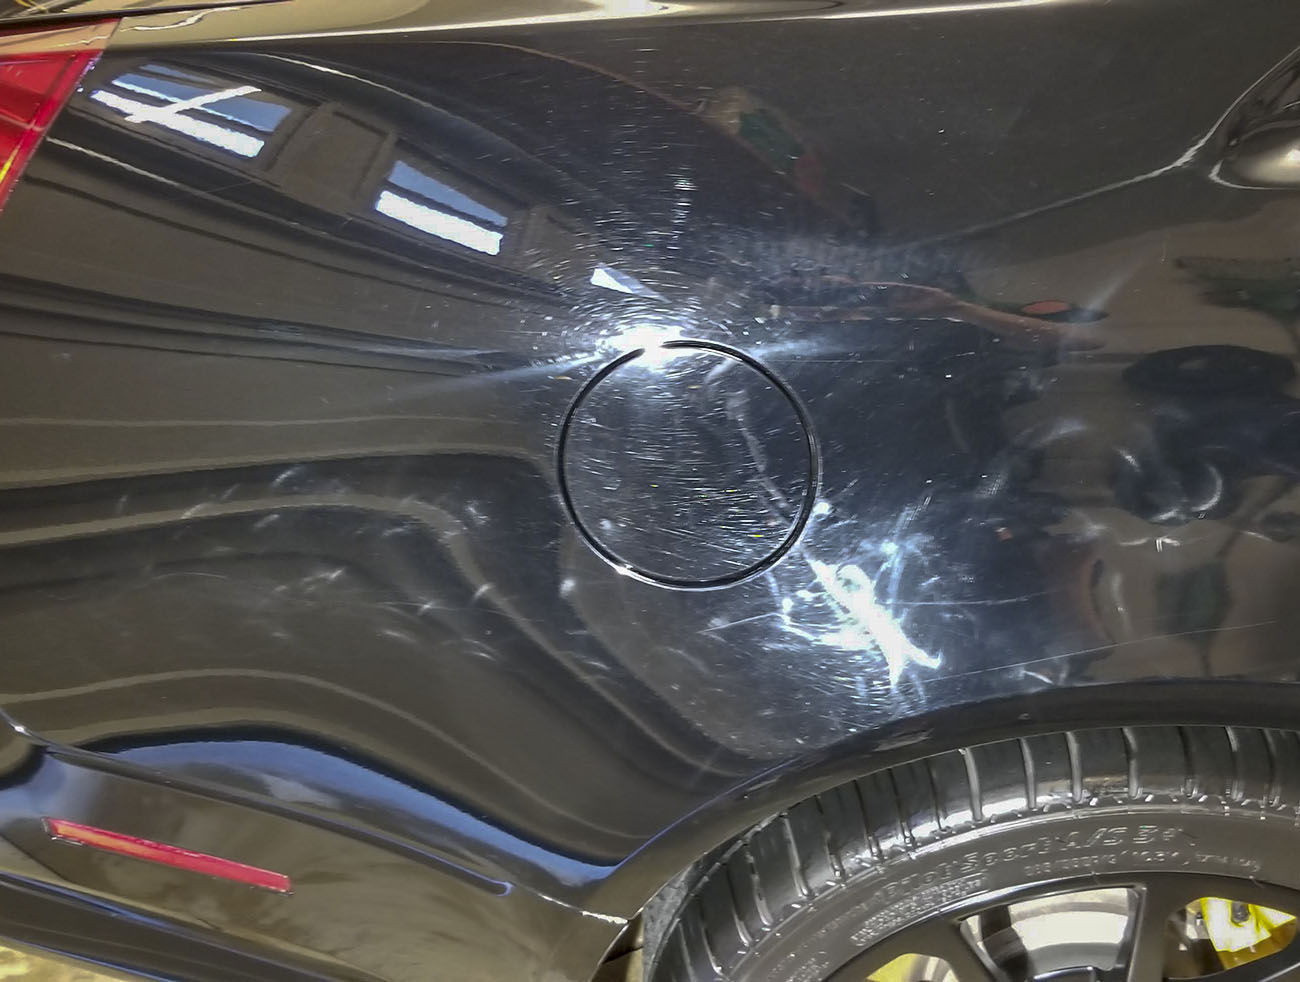
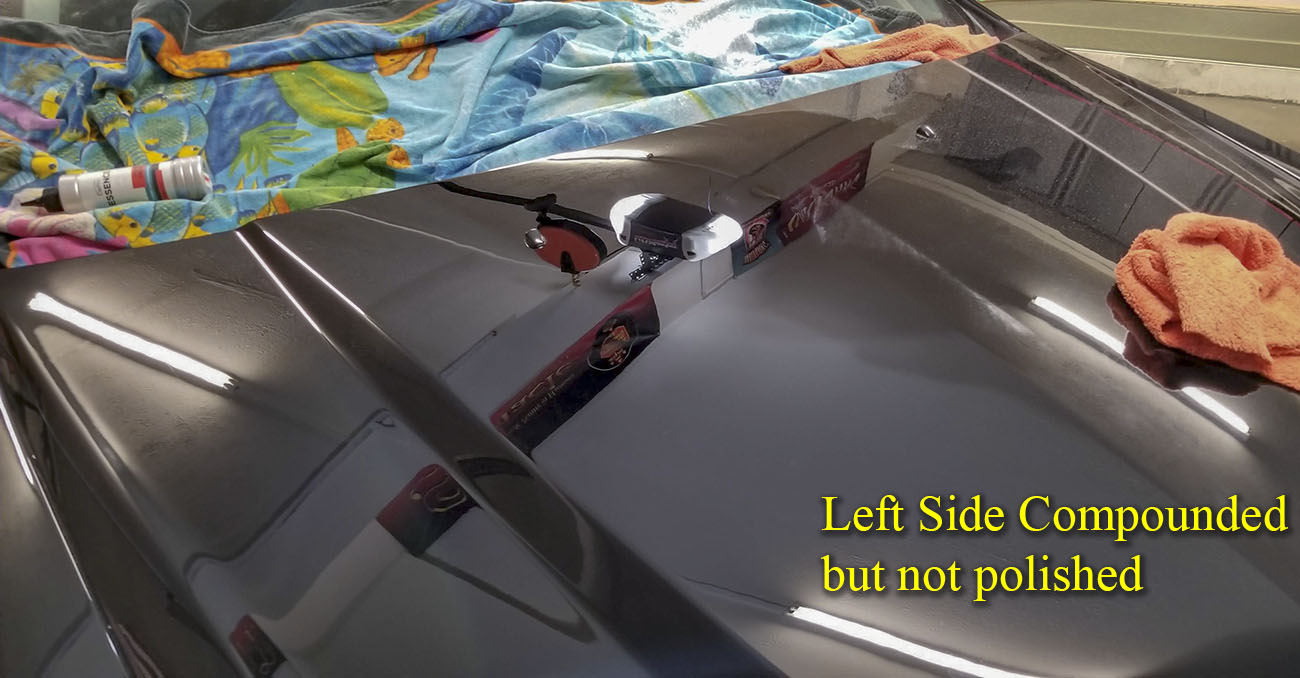
Not a problem. Phase one was to lightly compound the surface and remove the defects. Goal here is correction and thus leaving just some minor haze that would easily clear up in the next step of polishing.
Same here on the door/sides of the vehicle. Here the haze is a little more visible.

Next comes the polishing. Not only does this serve as a means of ramping up the gloss but the polish I use serves as a primer or base-coat for it's corresponding coating

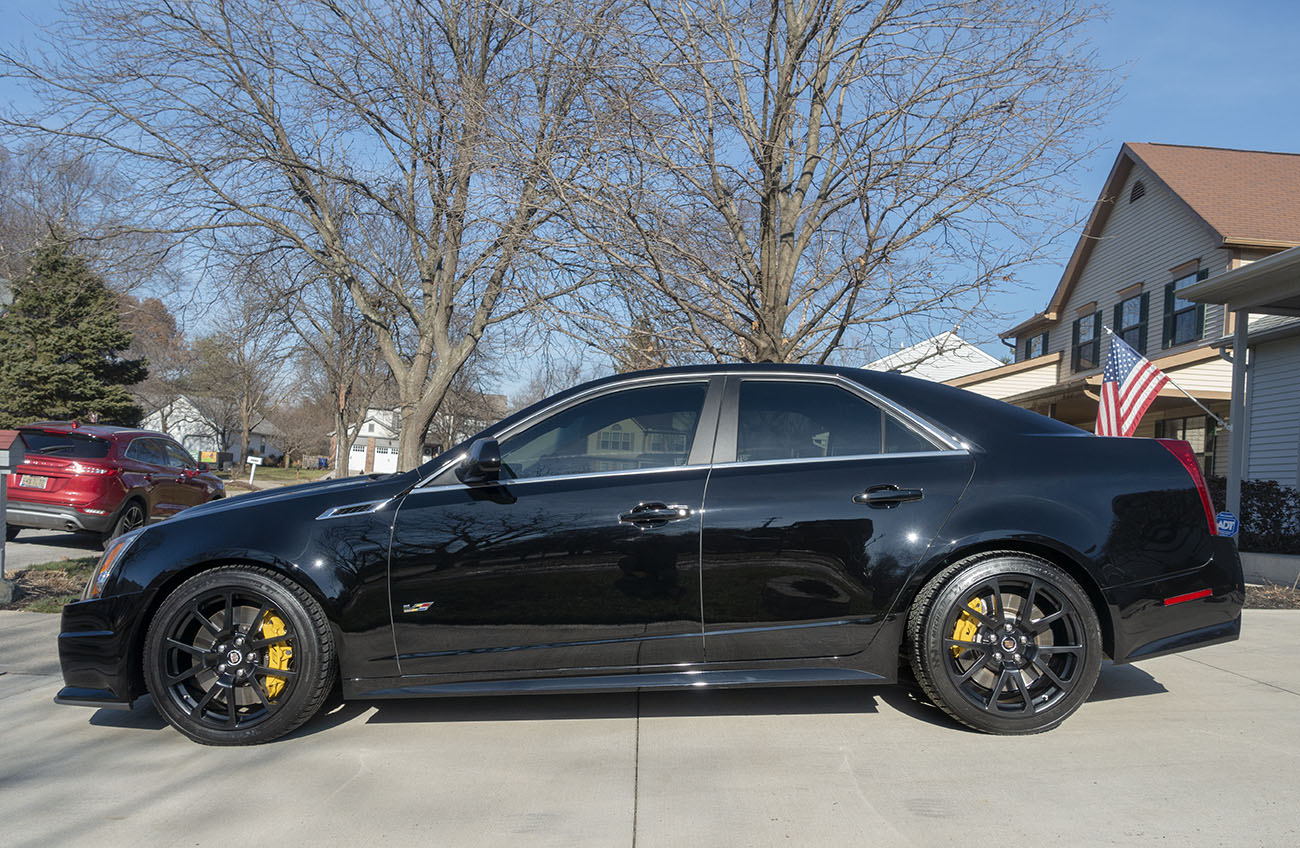
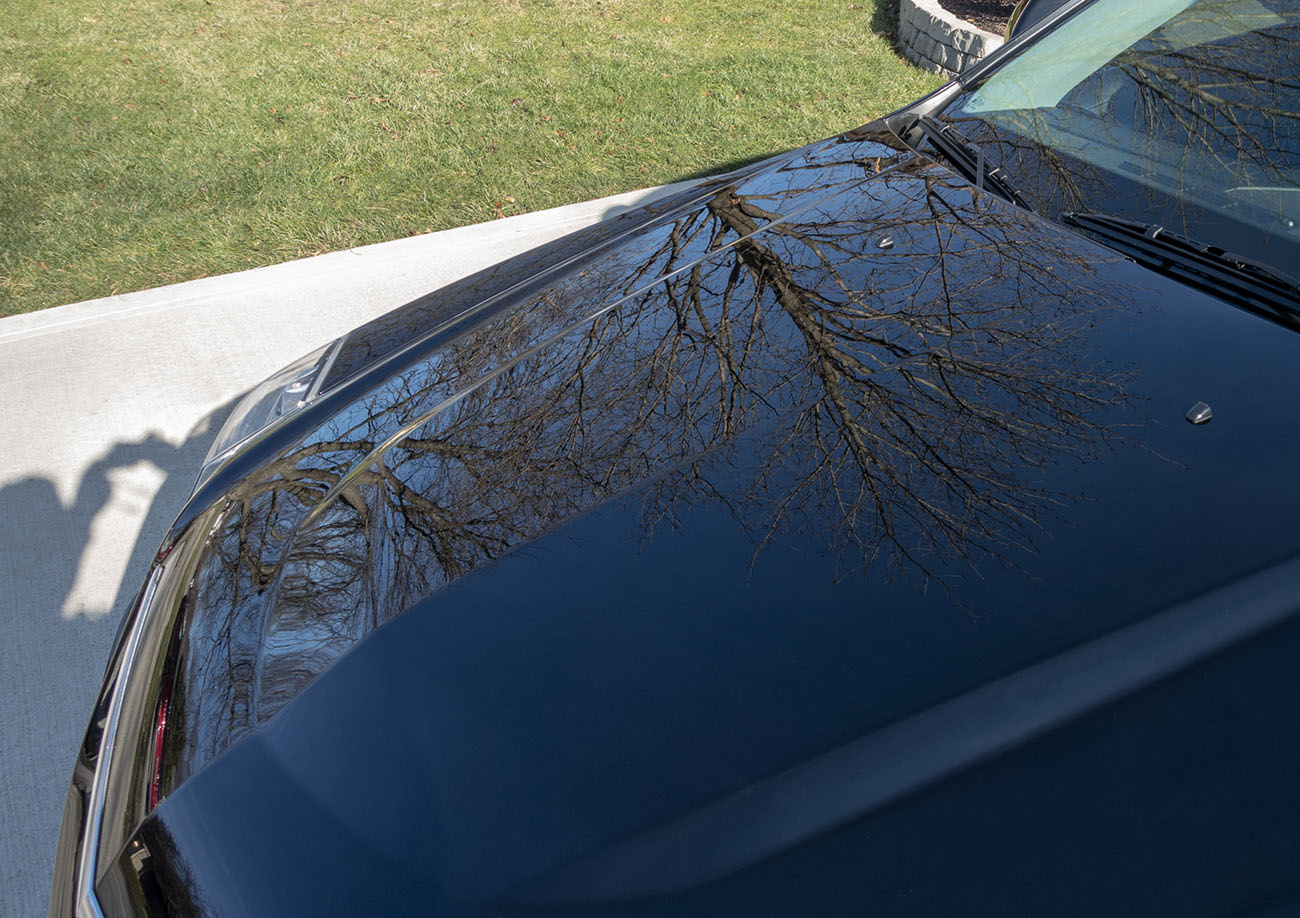
The end result becomes a deep black mirror-like surface that will show nicely at a car meet
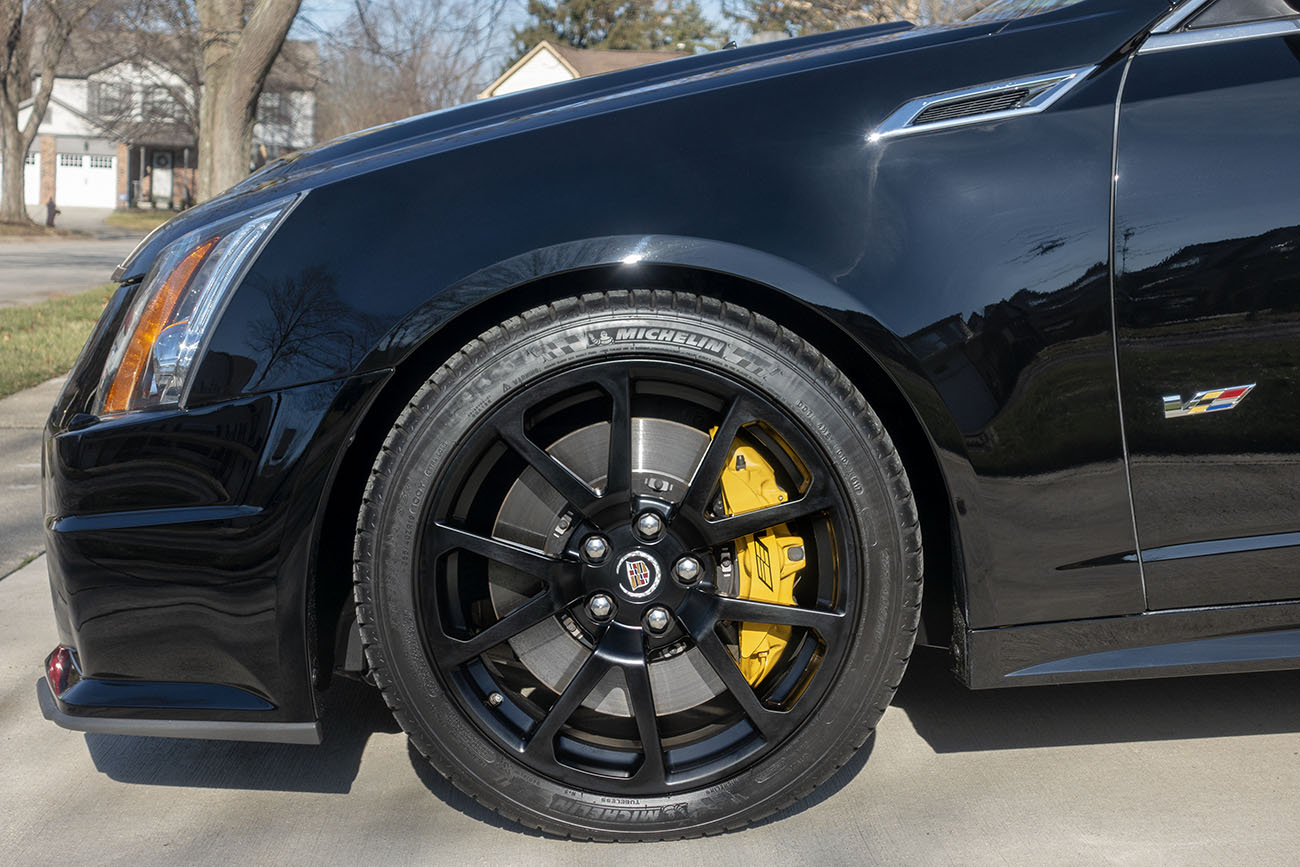
Can't skimp on the wheels or calipers
Knocked about 5yrs off the age of the vehicle IMO


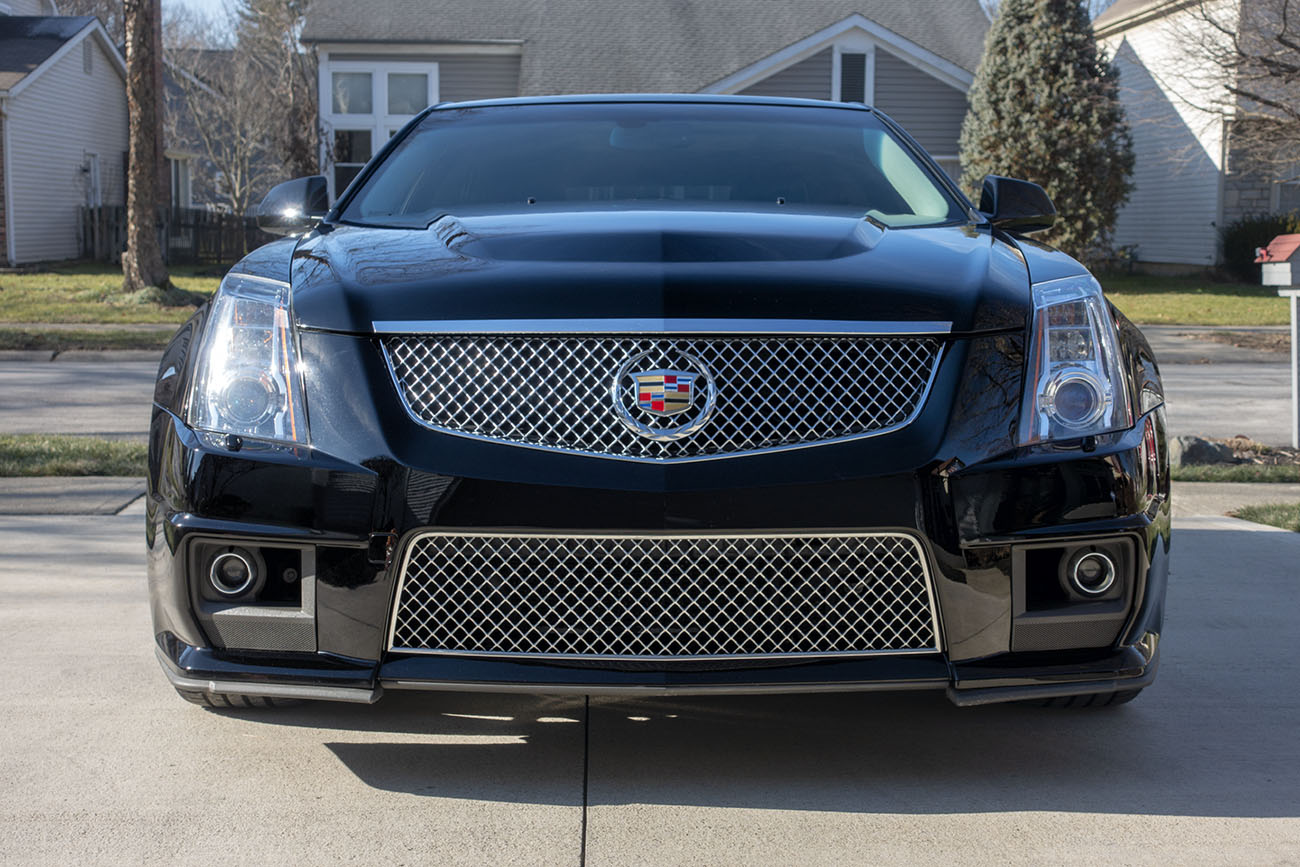
Body wise the car is in great shape and has just over 50k on the ODO but it needed some love on the surface. It's pure black which really shows everything and once it's out in the sun or under lights, the true condition of what he was faced with jumped out. It didn't help that early on in his ownership his little one grabbed a key and tried to put a pin stripe down the entire passenger side of the car
With all that was facing it we decided on my Elite Enhancement Correction Service. This service is geared to greatly reduce the appearance of the marring and defects. Topping it all off would be a dual layer protection of CarPro Cquartz UK v3.0.
- Washed: Rinseless Wash with Wolfgang Uber
- Decontaminated: Iron-X / Medium Grade Nano-Mitt
- Compounded: CarPro ClearCut with a Rupes Mille & UHS Pads
- Polished: CarPro Essence with Flex 3401 & Green Hexlogic Pads
- Coated: CarPro Cquartz UK v3.0
- Trim: WETS used to treat the bits of gray trim work and windshield cowling
Here's what the starting point was:
Part of what we're seeing here is an attempt by the owner to correct the key marks. Unfortunately when polishing on paint by hand the pressure is never even and will result in the inability of the work to blend properly
These Swirls and holograms are what prevents the true depth and beauty of pure black from showing
The hood.....these swirls would dominate under the lights of a gas station or the sunshine at a car meet. Critical to remove them
Not a problem. Phase one was to lightly compound the surface and remove the defects. Goal here is correction and thus leaving just some minor haze that would easily clear up in the next step of polishing.
Same here on the door/sides of the vehicle. Here the haze is a little more visible.
Next comes the polishing. Not only does this serve as a means of ramping up the gloss but the polish I use serves as a primer or base-coat for it's corresponding coating
The end result becomes a deep black mirror-like surface that will show nicely at a car meet
Can't skimp on the wheels or calipers
Knocked about 5yrs off the age of the vehicle IMO