BeachZone
New member
- Aug 30, 2012
- 341
- 0
First off, Happy New Year! I hope 2013 was a great year for everyone, and I most definitely wish the best for everyone in ’14!
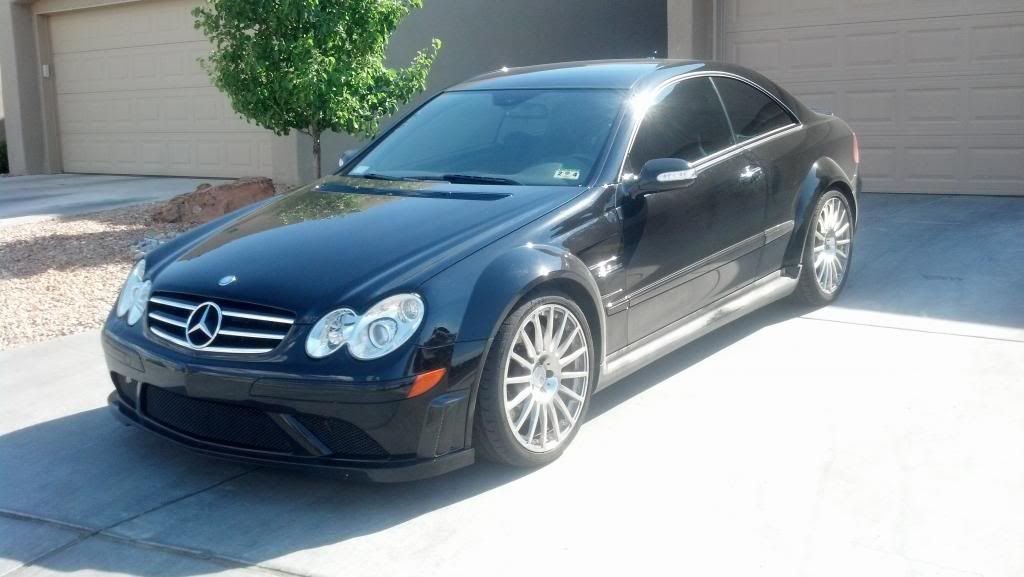
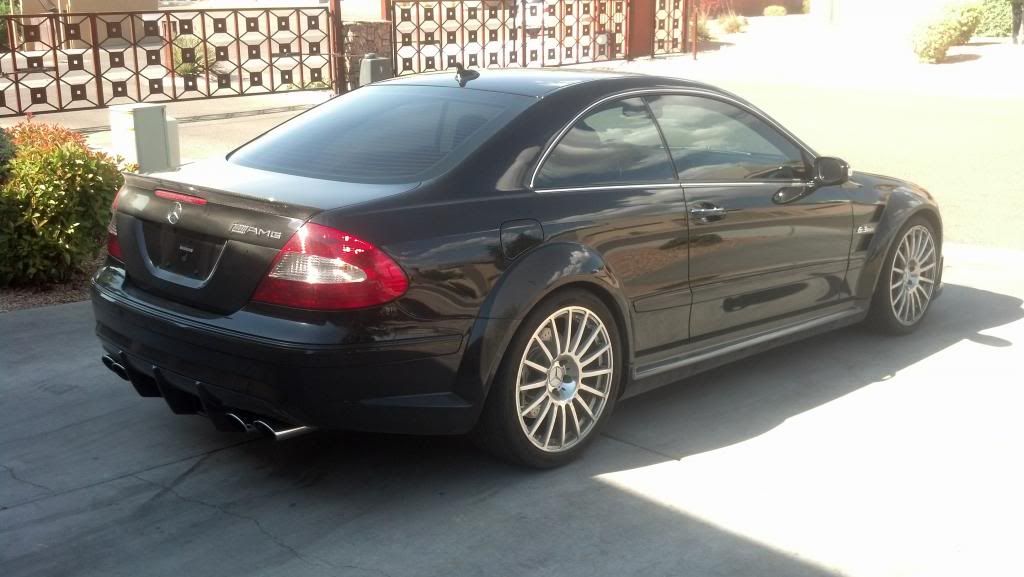
Year - 2008
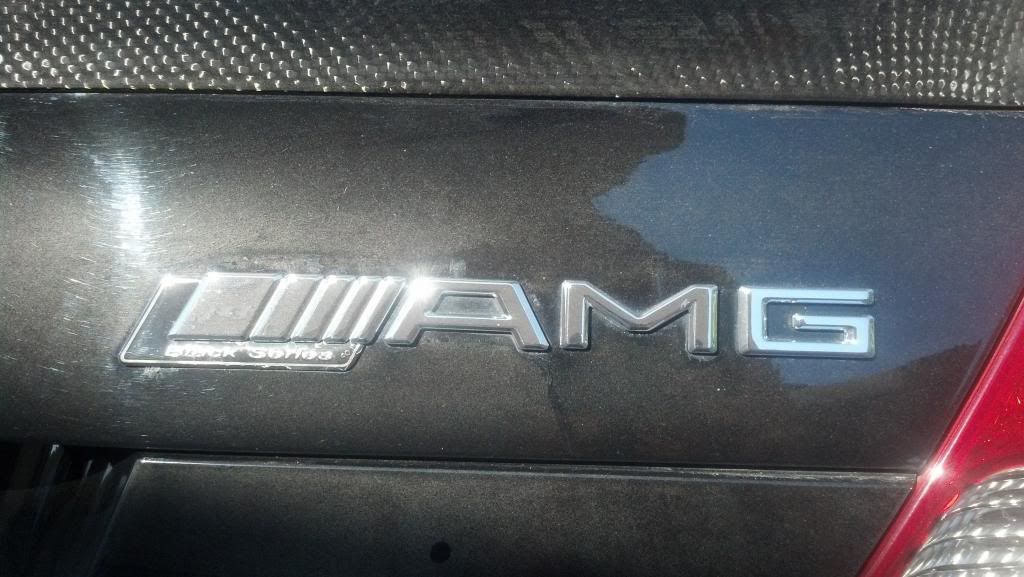
Make - Mercedes
Model - CLK63 AMG Black Series
Custom Detail:
- 3-Step Paint Correction Package
+ IronX Paint Decontamination
+ Headlight & Taillight Polish
+ Ext. Glass Clayed and Sealed
+ Wheels Sealed
+ Basic Interior Detail
+ Leatherique Treatment
+ CQuartz Original Ceramic Paint Protection
It’s been some time since I completed the Restoration on this particular vehicle. Unfortunately, I am just getting around to sharing the work I put into it until now… but I suppose it’s better late than never! Right?
Well, I’ll start of by saying, Wow! I really do love this car! I have never been a fan of the CLK’s but I sure do love the ‘Black! Very aggressive-looking and aggressive-sounding, and just all around a joy to look at and work on. Although it wasn’t a walk-in-the-park type of Job, I enjoyed every minute of the ~30 hours put into it!
We discussed a few things about it’s condition and decided to get it looking near perfect. After having some experience with Mercedes and their super-tough Ceramic Clearcoat, I knew a 3-Step Paint Correction Package would suit it well and take care of almost all defects present. I underestimated the amount of damage the paint had and was a bit surprised after the car was washed, stripped, and put under 1000w Halogen Lights, but it made for a sweet turnaround!
A few upgrades were made to the PC (Paint Correction) Package including CQuartz Original Nano-Coating, which made perfect sense after doing such extensive paint work. CQuartz has sealed in this look and will provide the ultimate protection for years to come!
Be sure to click the Product links to find out more information about them and why they are important!
I hope you all enjoy the amount of time put into this vehicle and write-up! :cheers:
Arrival:
A solid layer of dust and dirt covered the entire vehicle
Badging needed a good cleaning
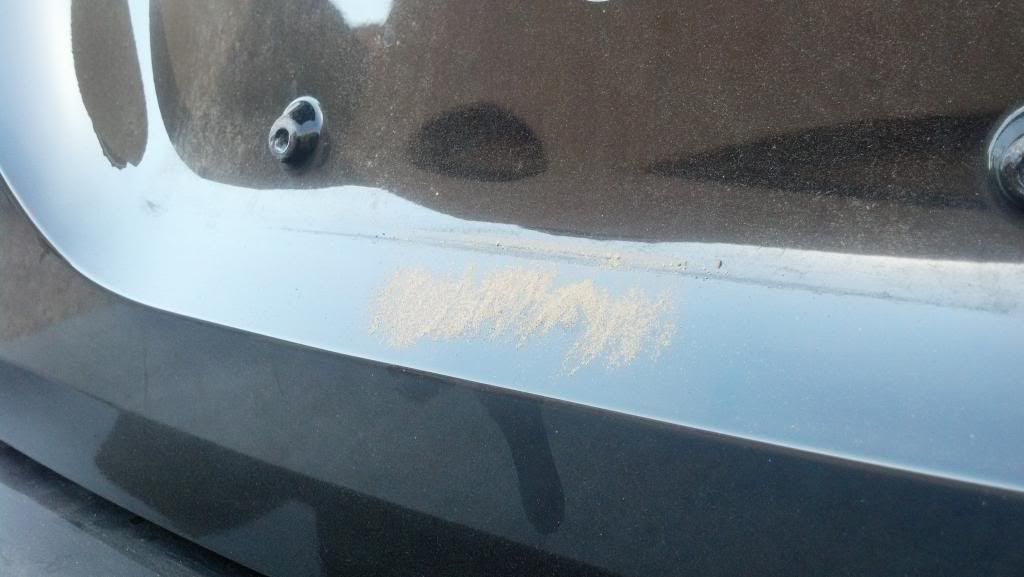
A good amount of dirt accumulation behind the plate… a commonly overlooked area
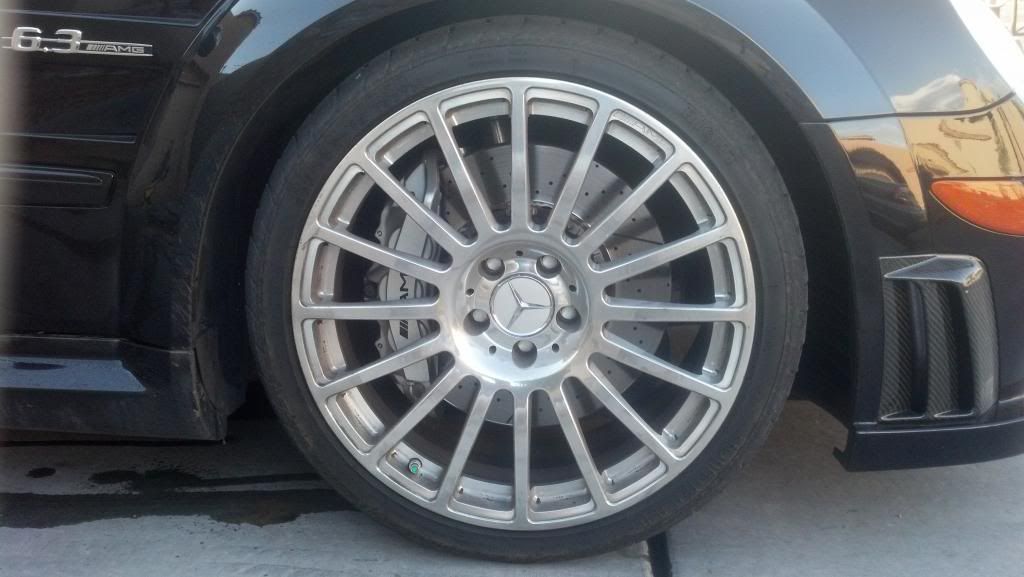
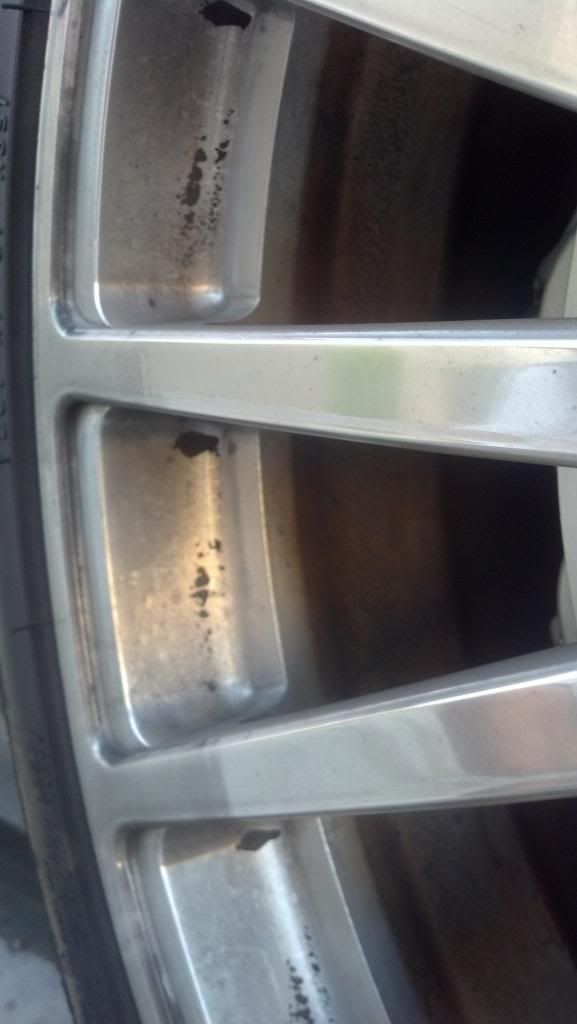
German brake dust is always a tough opponent
Pipes needed a refresh
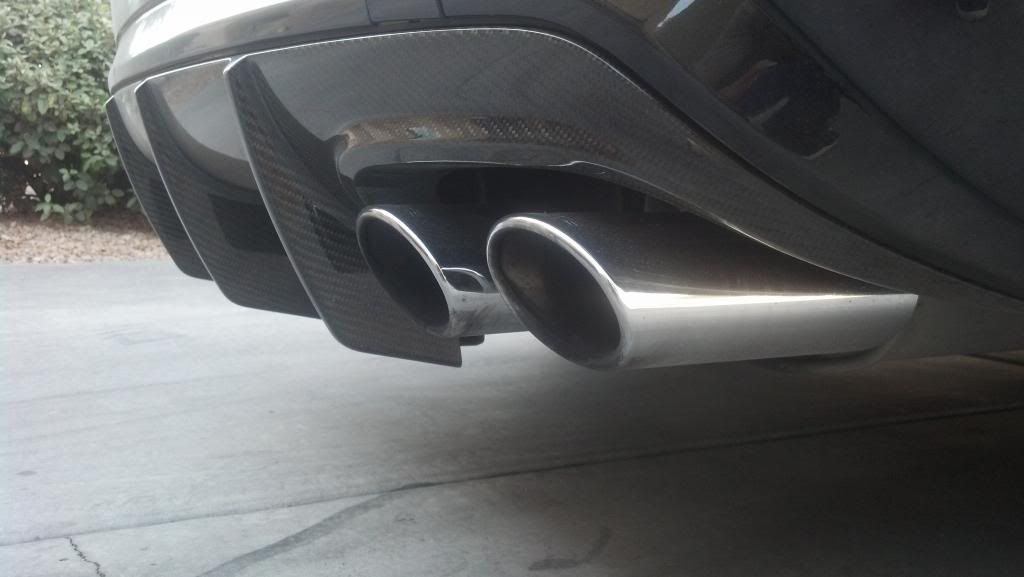
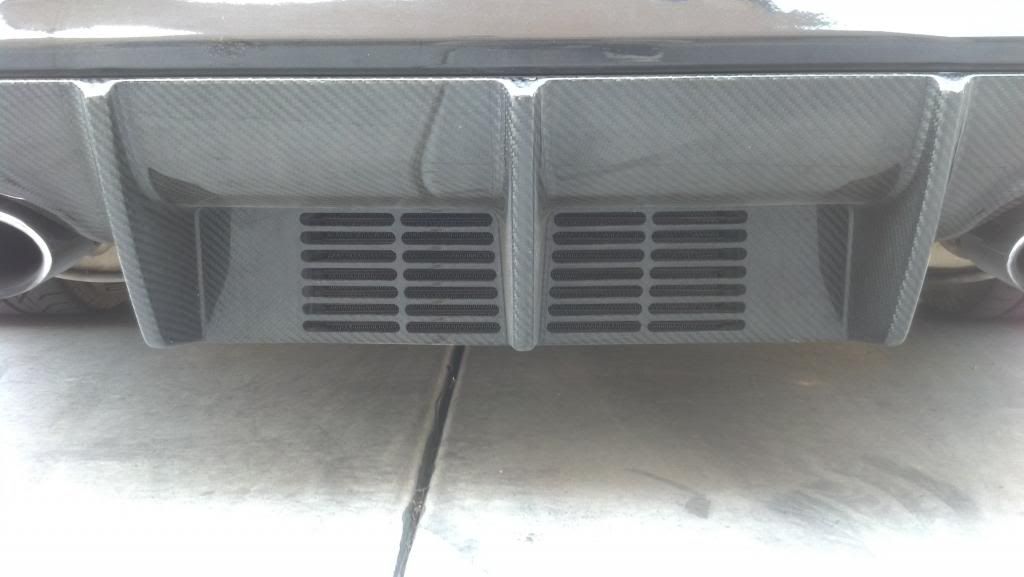
Rear Carbon looking a little tired and dull
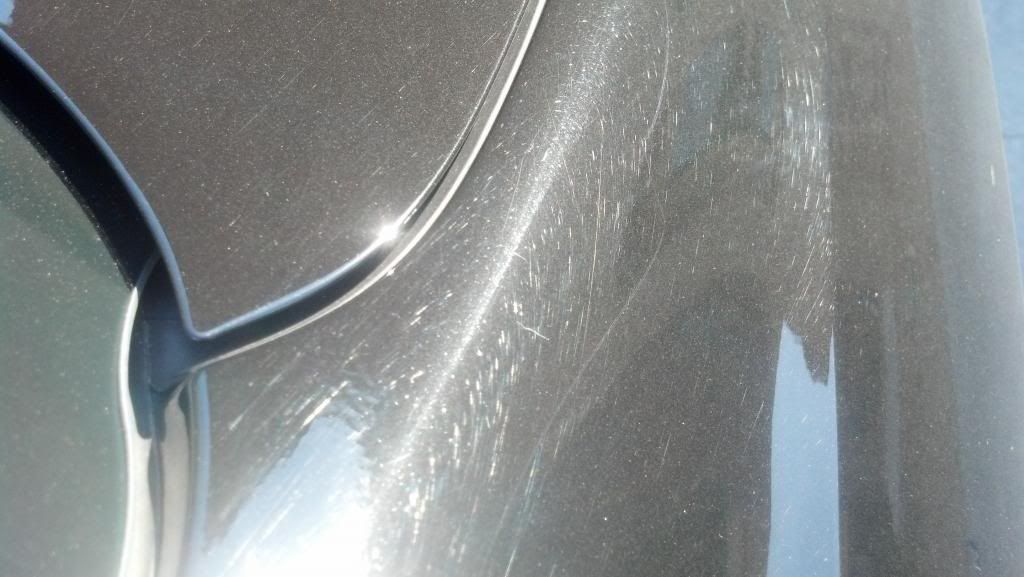
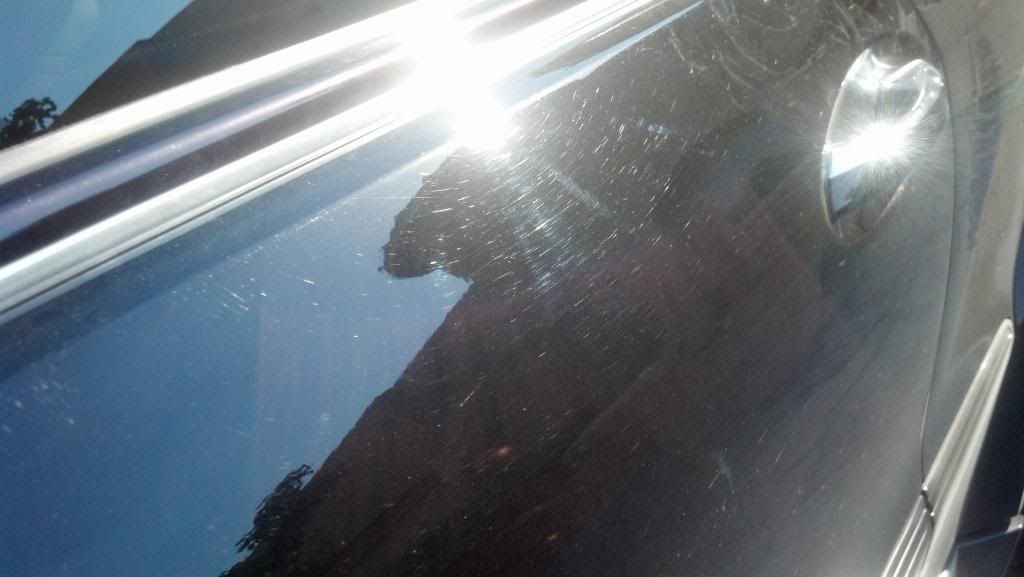
Initial inspection of paint defects showed a whole lot of swirls, random isolated deeper scratches, and holograms. Even under the layer of dirt and existing protection (wax or sealant), an awful lot of problems can be seen. I knew I was in for a treat once a full wash and decontamination was to be completed! You’ll see later in the write-up how only after the paint is completely clean and stripped, and under proper lighting, can you see the true condition of the paint!
The damage seen in the following pictures only gives a glimpse of what is to be corrected…
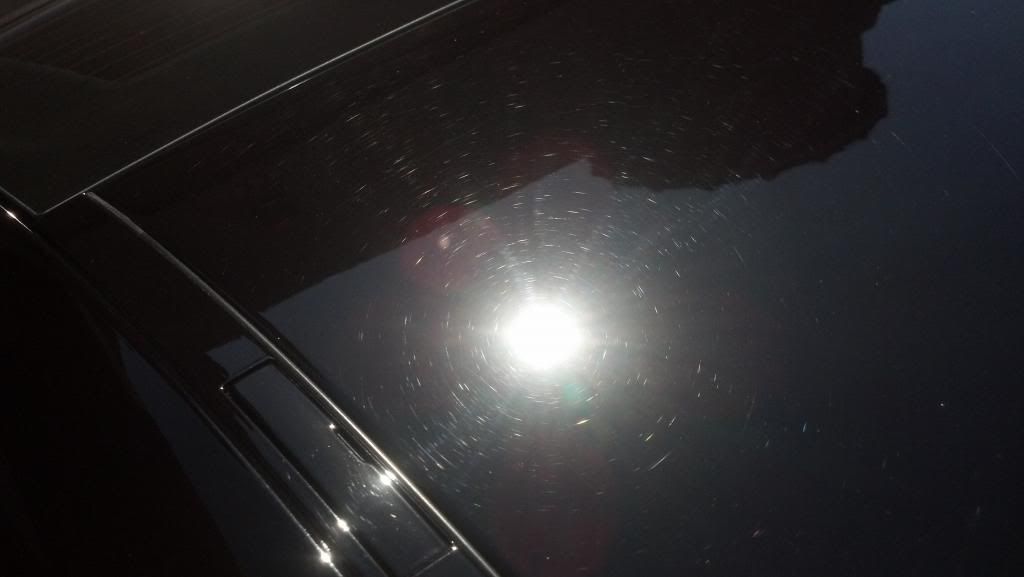
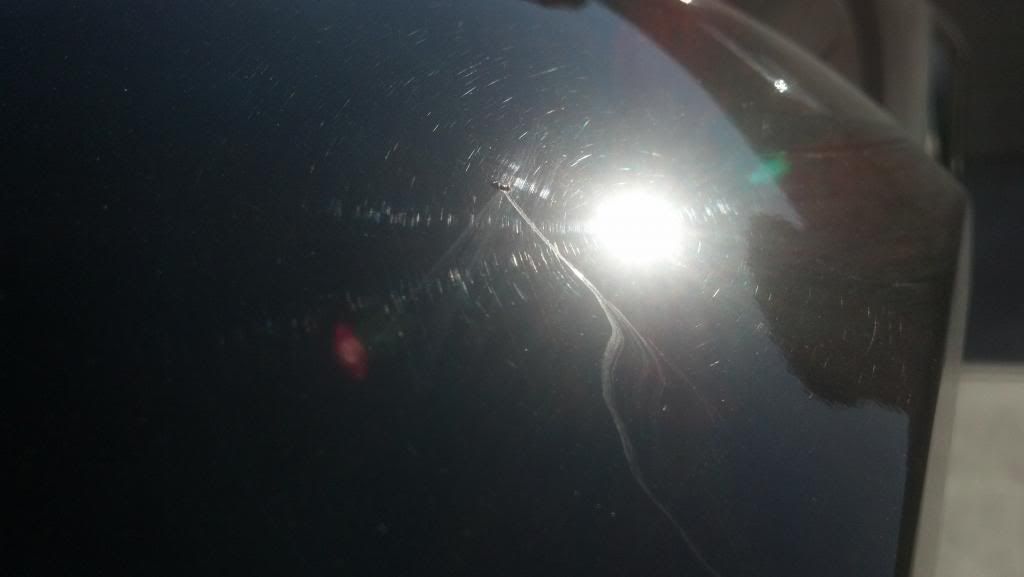
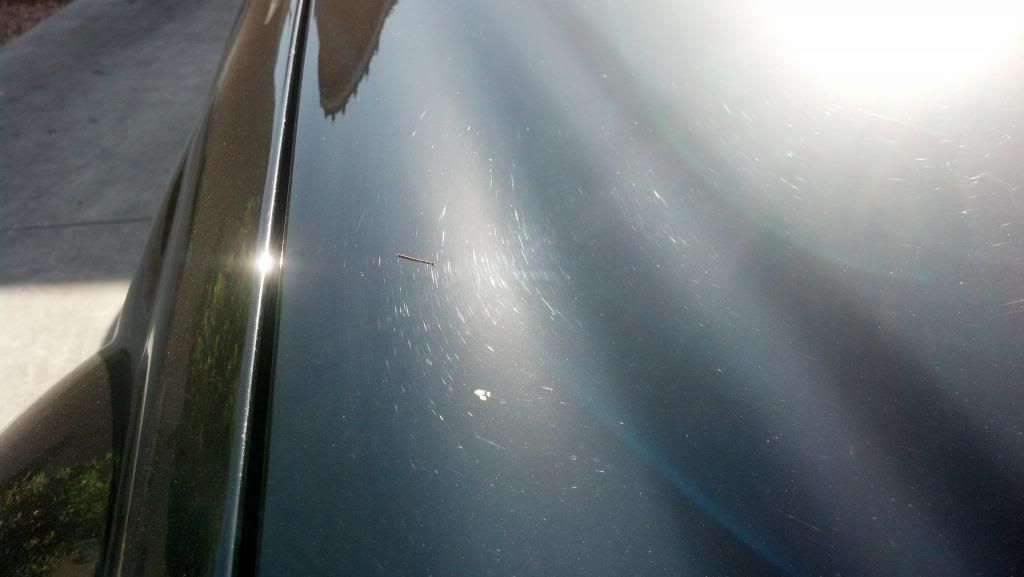
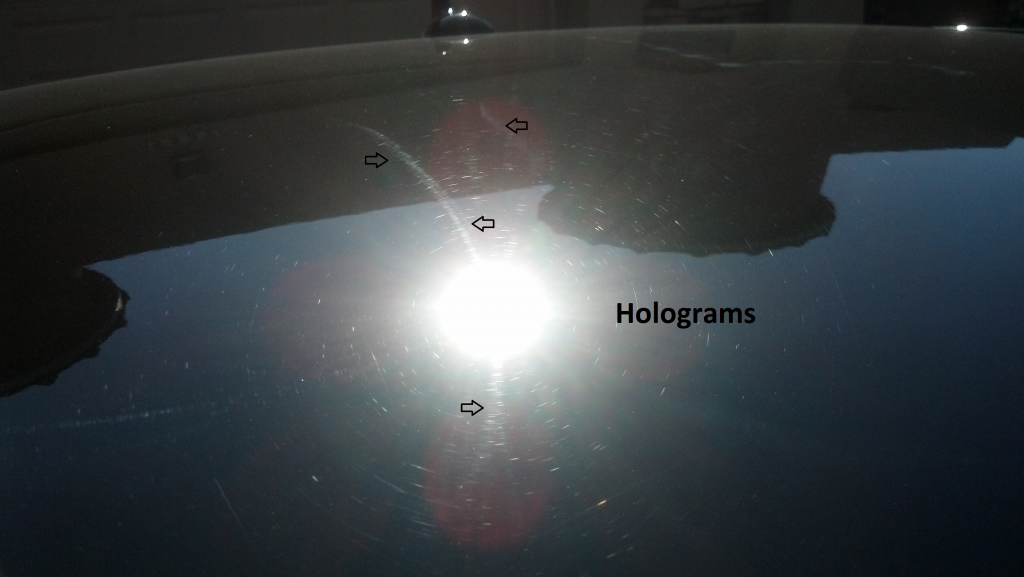
Swirls on the Roof
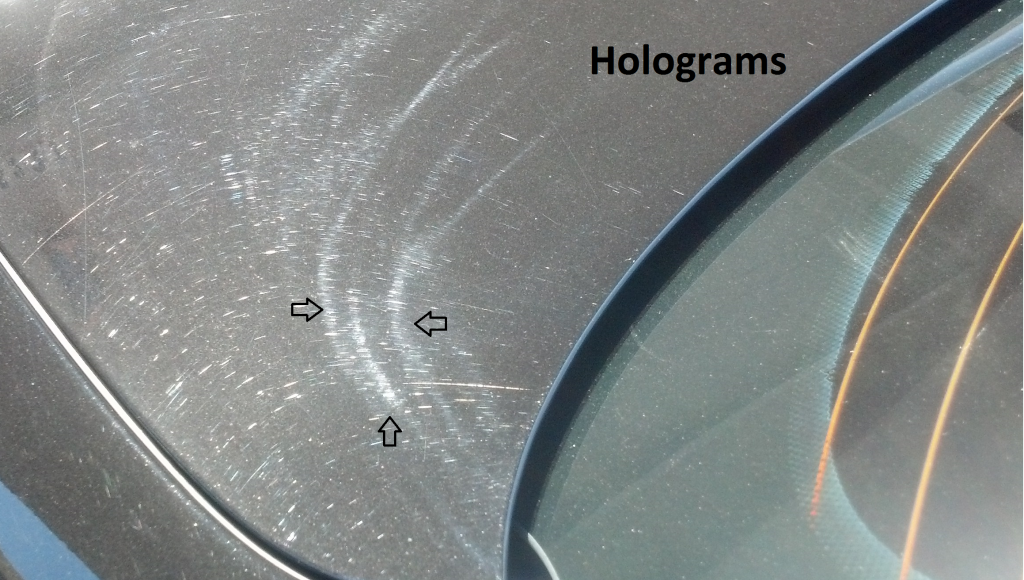
Some may be asking themselves… What are Holograms or Buffer Trails?
Well, Holograms (aka Buffer Trails or Rotary Buffer Swirls) are Micro-scratches or swirls introduced into the paint by the rotating action and misuse of a buffer or polisher.
**Important**
Improper use of these machines and poor technique by an unskilled ‘Detailer’ can install these 3D-like defects while actually trying to remove the existing swirls/scratches from the paint!
Though Holograms (or Buffer Trails) were evident on all panels, the angle of the Sun showed them best on the Trunk Lid and Roof. These aren’t the worst I’ve seen, but are a terrible sight to see on ANY vehicle, let alone one of this caliber. Thankfully we’ll be getting this paint dialed in and looking the way it should when we’re through!
‘Diamond Detail’ Guarantees a Hologram-Free finish!
Trunk Lid
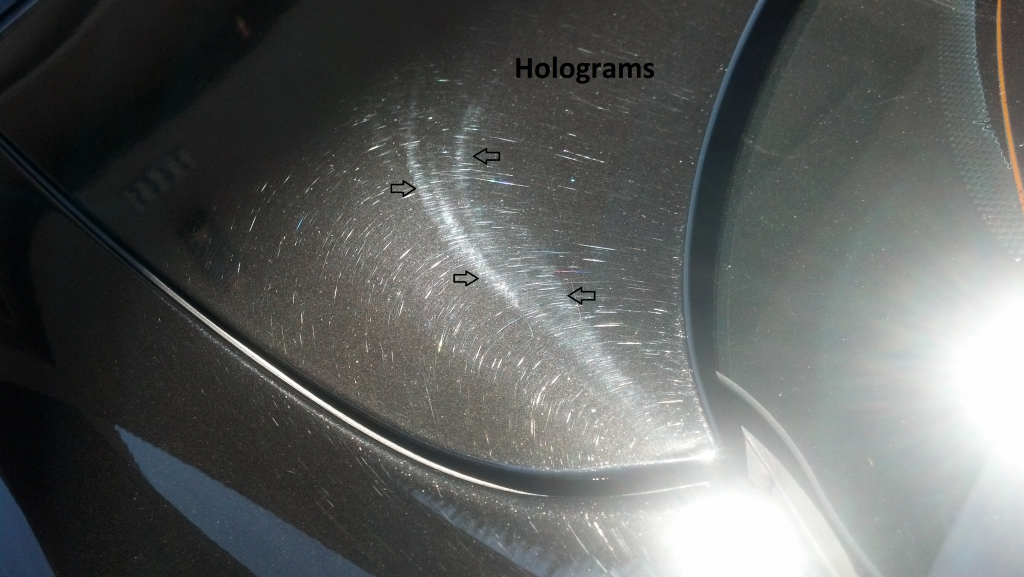
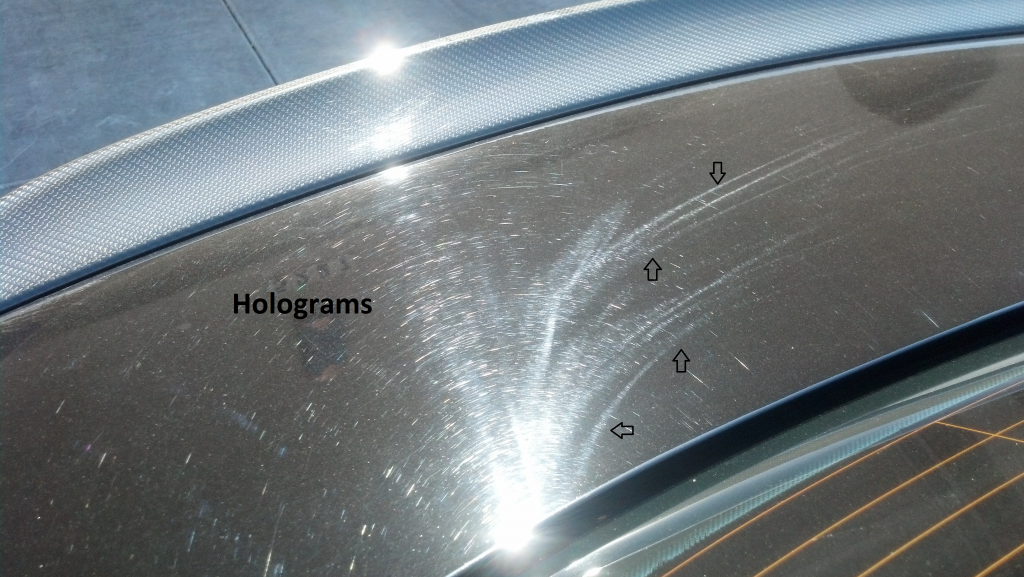
Roof Holograms
Wash and Decontamination Process:
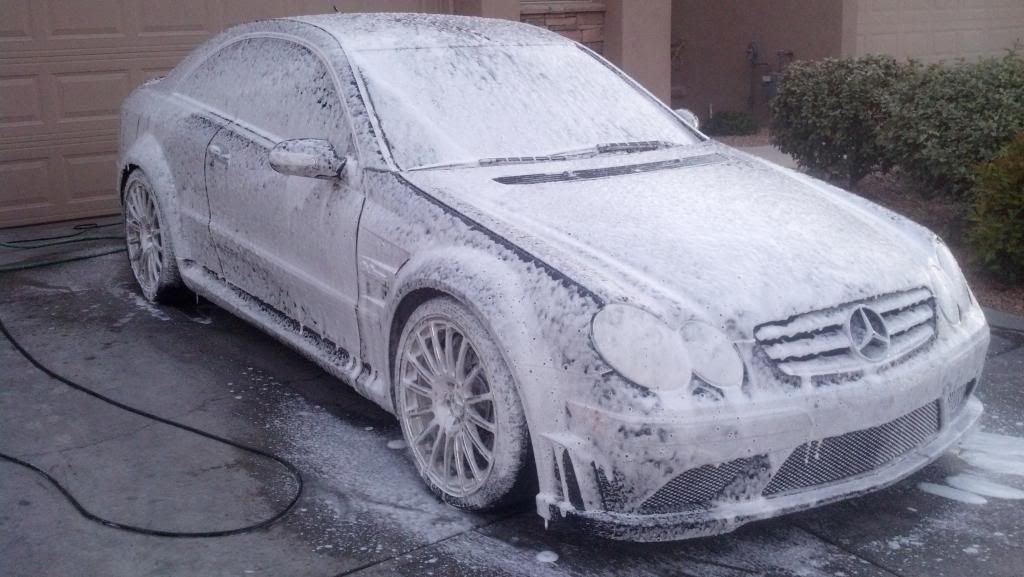
Vehicle was given a Foam Pre-Soak to loosen any dirt, Rinsed, Re-Foamed, Hand-Washed using the Two Bucket Method and a Merino Wool wash mitt, Rinsed, and finally dried via warm filtered air through a high-powered blower.
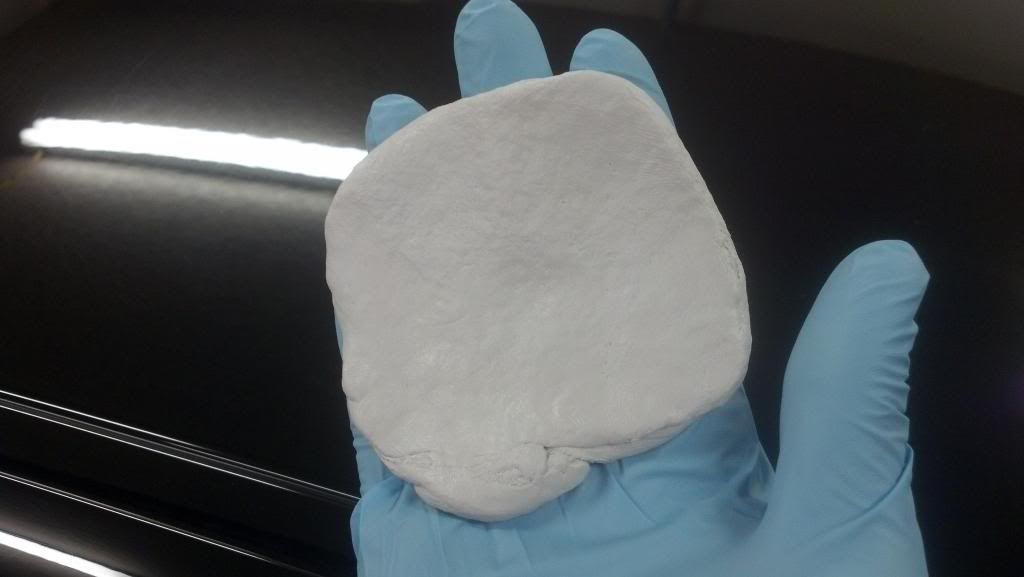
After drying, the paint, glass, headlights & taillights were Clay Bar’d. Clay Bar’ing removes the Above surface contaminants that have bonded to the paint etc. and cannot be removed with normal washing. This step cannot be overlooked before performing any type of Paint Correction!
Due to the heavy amount of contamination, an aggressive Clay Bar was used on the paint…
Before
After Claying a 2’x2’ Section

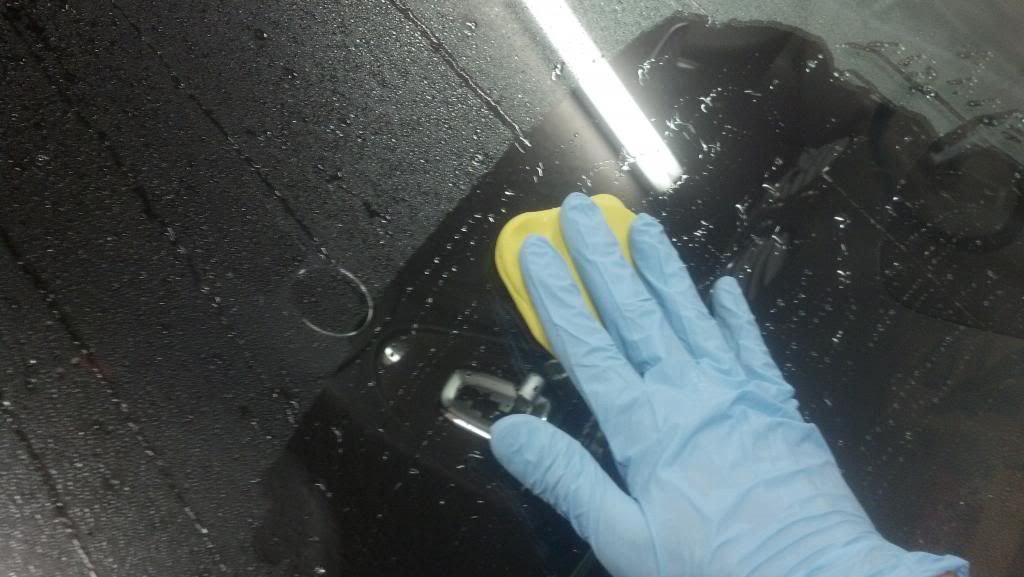
Claying the Glass
After Claying, IronX Contaminant Remover was used to chemically remove the Below surface embedded contaminants. Once every inch of paint and glass was thoroughly decontaminated, the vehicle was rewashed, dried, and prepped for Paint Correction. *No pictures were taken of this process
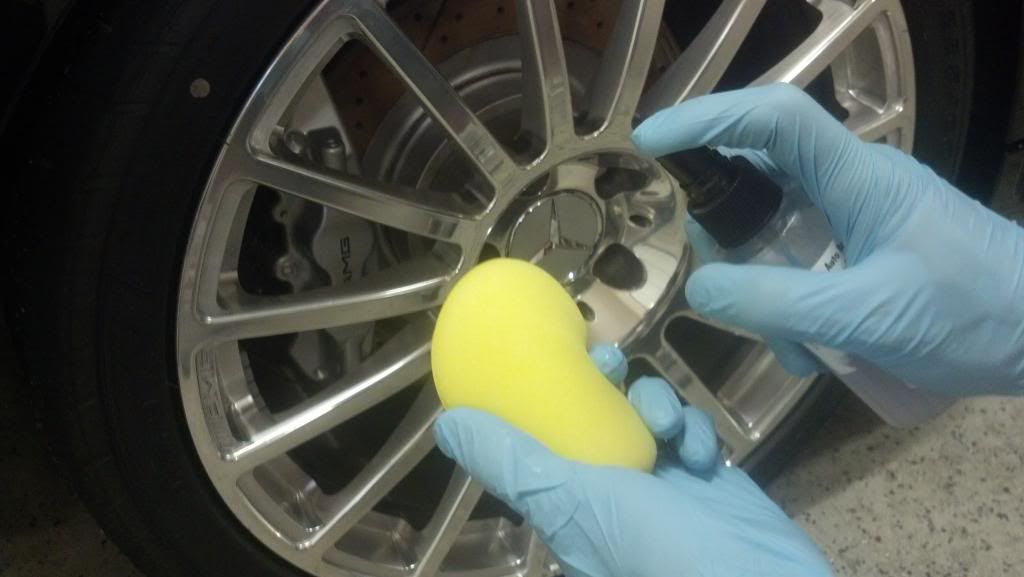
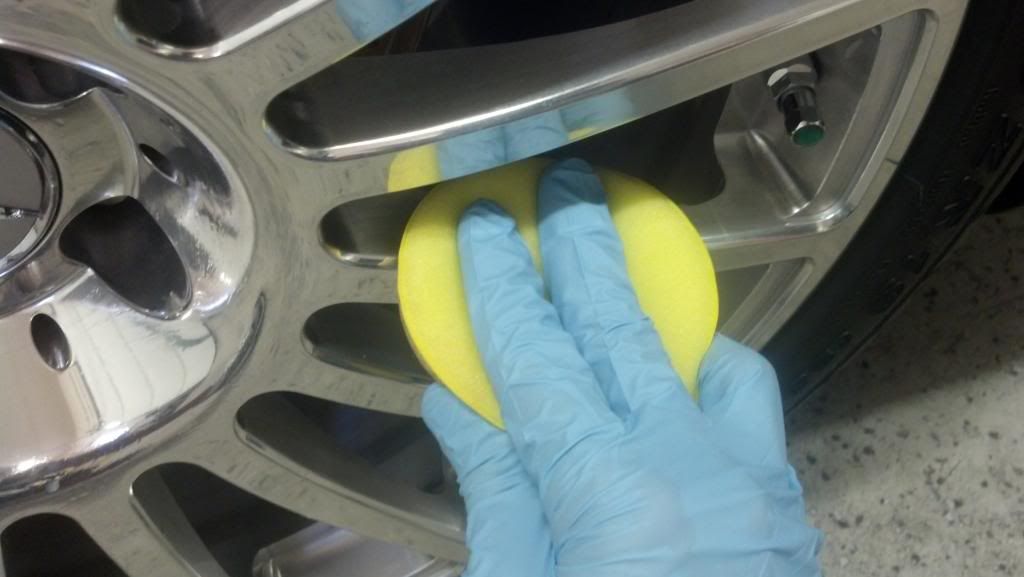
Spritz Sealant was applied to the wheels and left to cure
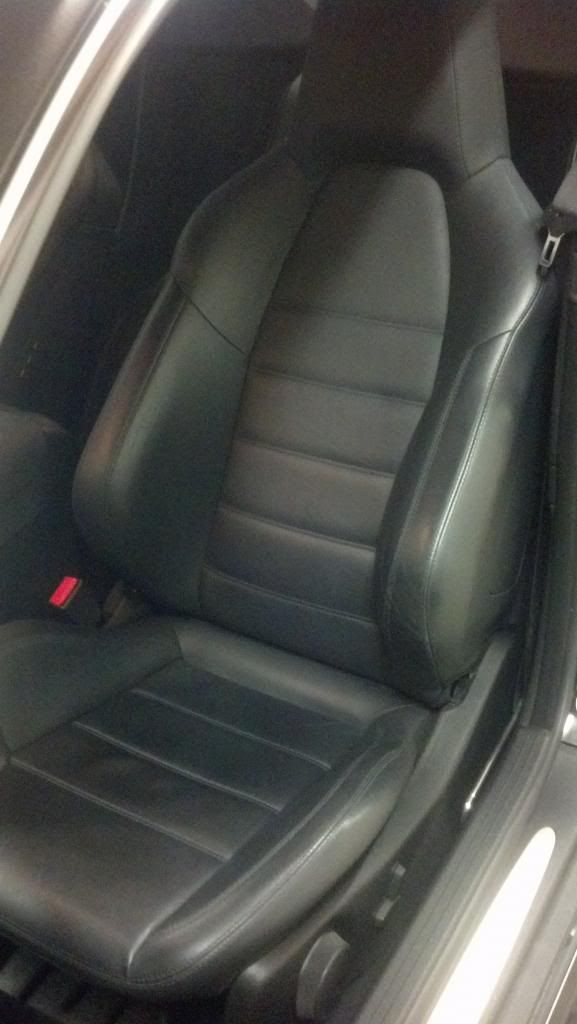
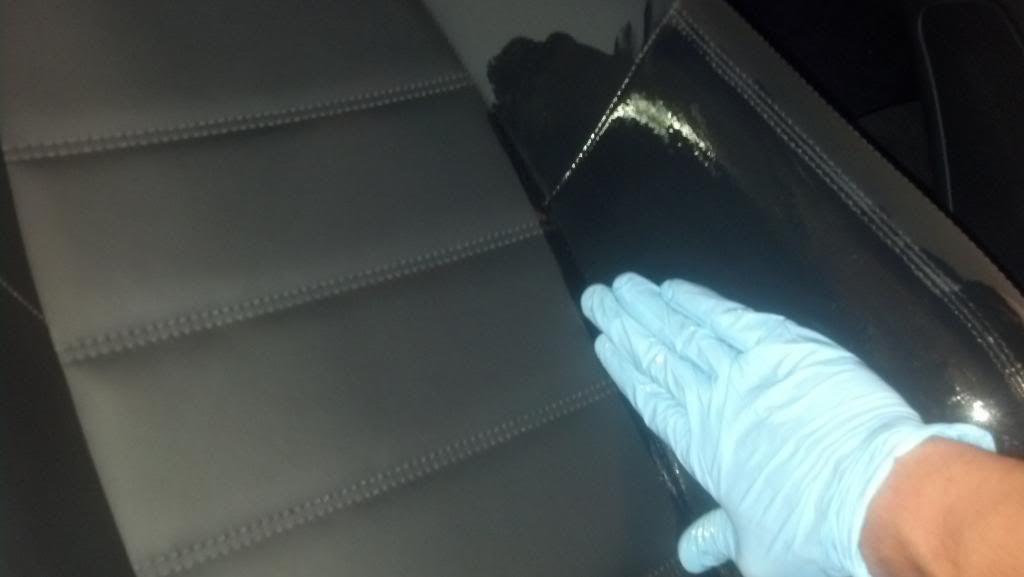
Before Paint Correction, we wanted to treat the Leather seats and door cards with Leatherique and let the oil soak at ~100 Degrees for at least a full 24 hours. Prior to soaking, all Leather surfaces were cleaned using a PH Neutral leather cleaner and a Horse Hair brush, then rinsed down with distilled water.
The Leather was fairly clean on the surface, but needed a full refresh to reintroduce proteins and collagens, and bring back the suppleness and strength!
Before
Looking a little dry and brittle


Massaging a liberal amount of Rejuvenator Oil onto the seats and door cards
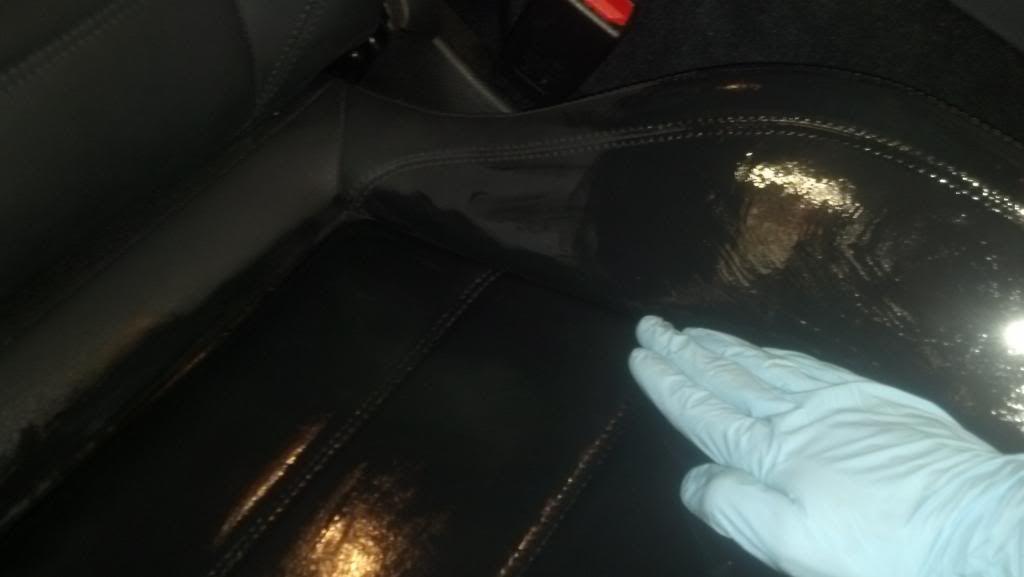
Making sure to get in the stitching as well
-Beach
Year - 2008
Make - Mercedes
Model - CLK63 AMG Black Series
Custom Detail:
- 3-Step Paint Correction Package
+ IronX Paint Decontamination
+ Headlight & Taillight Polish
+ Ext. Glass Clayed and Sealed
+ Wheels Sealed
+ Basic Interior Detail
+ Leatherique Treatment
+ CQuartz Original Ceramic Paint Protection
It’s been some time since I completed the Restoration on this particular vehicle. Unfortunately, I am just getting around to sharing the work I put into it until now… but I suppose it’s better late than never! Right?
Well, I’ll start of by saying, Wow! I really do love this car! I have never been a fan of the CLK’s but I sure do love the ‘Black! Very aggressive-looking and aggressive-sounding, and just all around a joy to look at and work on. Although it wasn’t a walk-in-the-park type of Job, I enjoyed every minute of the ~30 hours put into it!
We discussed a few things about it’s condition and decided to get it looking near perfect. After having some experience with Mercedes and their super-tough Ceramic Clearcoat, I knew a 3-Step Paint Correction Package would suit it well and take care of almost all defects present. I underestimated the amount of damage the paint had and was a bit surprised after the car was washed, stripped, and put under 1000w Halogen Lights, but it made for a sweet turnaround!
A few upgrades were made to the PC (Paint Correction) Package including CQuartz Original Nano-Coating, which made perfect sense after doing such extensive paint work. CQuartz has sealed in this look and will provide the ultimate protection for years to come!
Be sure to click the Product links to find out more information about them and why they are important!
I hope you all enjoy the amount of time put into this vehicle and write-up! :cheers:
Arrival:
A solid layer of dust and dirt covered the entire vehicle


Badging needed a good cleaning


A good amount of dirt accumulation behind the plate… a commonly overlooked area

German brake dust is always a tough opponent


Pipes needed a refresh

Rear Carbon looking a little tired and dull

Initial inspection of paint defects showed a whole lot of swirls, random isolated deeper scratches, and holograms. Even under the layer of dirt and existing protection (wax or sealant), an awful lot of problems can be seen. I knew I was in for a treat once a full wash and decontamination was to be completed! You’ll see later in the write-up how only after the paint is completely clean and stripped, and under proper lighting, can you see the true condition of the paint!
The damage seen in the following pictures only gives a glimpse of what is to be corrected…
Swirls on the Roof


Some may be asking themselves… What are Holograms or Buffer Trails?
Well, Holograms (aka Buffer Trails or Rotary Buffer Swirls) are Micro-scratches or swirls introduced into the paint by the rotating action and misuse of a buffer or polisher.
**Important**
Improper use of these machines and poor technique by an unskilled ‘Detailer’ can install these 3D-like defects while actually trying to remove the existing swirls/scratches from the paint!
Though Holograms (or Buffer Trails) were evident on all panels, the angle of the Sun showed them best on the Trunk Lid and Roof. These aren’t the worst I’ve seen, but are a terrible sight to see on ANY vehicle, let alone one of this caliber. Thankfully we’ll be getting this paint dialed in and looking the way it should when we’re through!
‘Diamond Detail’ Guarantees a Hologram-Free finish!
Trunk Lid


Roof Holograms

Wash and Decontamination Process:
Vehicle was given a Foam Pre-Soak to loosen any dirt, Rinsed, Re-Foamed, Hand-Washed using the Two Bucket Method and a Merino Wool wash mitt, Rinsed, and finally dried via warm filtered air through a high-powered blower.

After drying, the paint, glass, headlights & taillights were Clay Bar’d. Clay Bar’ing removes the Above surface contaminants that have bonded to the paint etc. and cannot be removed with normal washing. This step cannot be overlooked before performing any type of Paint Correction!
Due to the heavy amount of contamination, an aggressive Clay Bar was used on the paint…
Before

After Claying a 2’x2’ Section

Claying the Glass

After Claying, IronX Contaminant Remover was used to chemically remove the Below surface embedded contaminants. Once every inch of paint and glass was thoroughly decontaminated, the vehicle was rewashed, dried, and prepped for Paint Correction. *No pictures were taken of this process
Spritz Sealant was applied to the wheels and left to cure


Before Paint Correction, we wanted to treat the Leather seats and door cards with Leatherique and let the oil soak at ~100 Degrees for at least a full 24 hours. Prior to soaking, all Leather surfaces were cleaned using a PH Neutral leather cleaner and a Horse Hair brush, then rinsed down with distilled water.
The Leather was fairly clean on the surface, but needed a full refresh to reintroduce proteins and collagens, and bring back the suppleness and strength!
Before

Looking a little dry and brittle


Massaging a liberal amount of Rejuvenator Oil onto the seats and door cards

Making sure to get in the stitching as well

-Beach


")
 Shiny they like, but honestly never notice the slow progression until they go to trade it in and it's parked next to one they HAVEN'T trashed yet.
 ")