DFB
Well-known member
- Aug 12, 2019
- 5,137
- 3,486
- Thread starter
- #2,621
Ranger Wiper Trim Restoration
Nothing ages a car more than faded black plastic trim. While certain areas are easy to deal with, say the wing mirrors or bumper inserts, others are harder to do properly. As such, these areas tend to get neglected and therefore show age sooner. Sitting at the top of this category would be the trim at the base of the windscreen, mainly because the bonnet and wiper arms block full access.
So, after 9 years on the road, it’s time for the Ranger to receive some attention in this department. Now, this job could certainly be done with the trim still fitted to the car. However, to clean and treat the windscreen trim properly, I find its best to remove it from the vehicle.
Trim Removal –
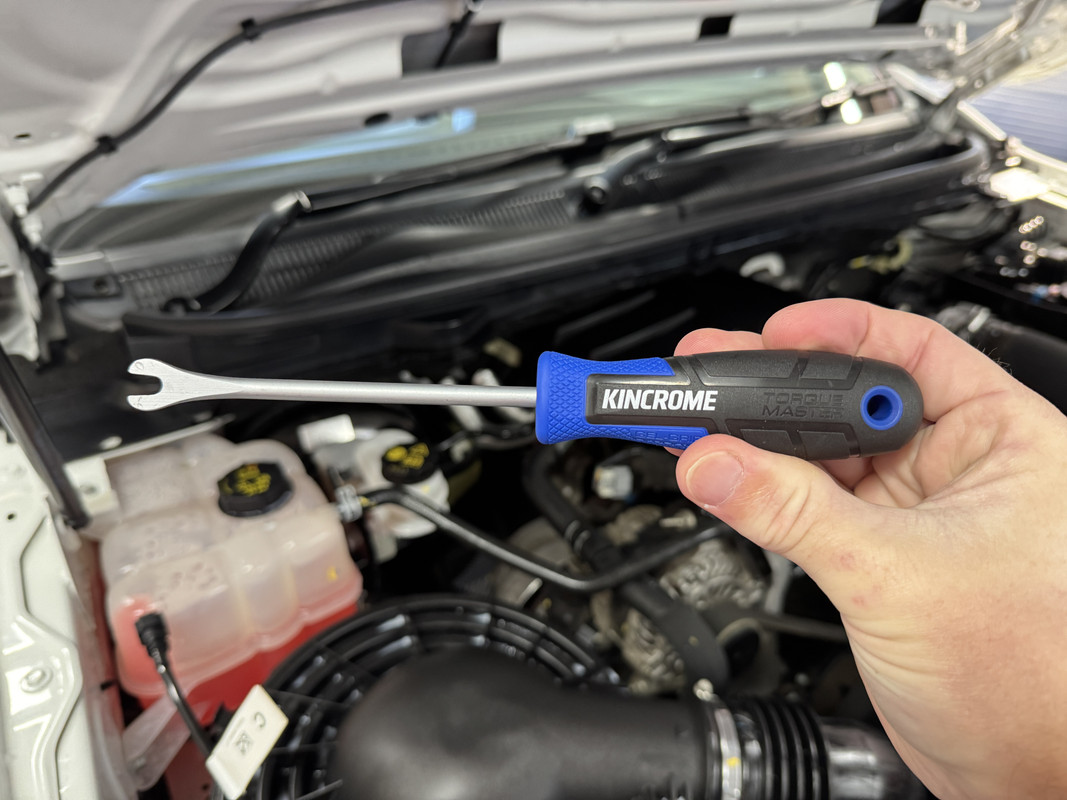
The PX-Series Ranger has a two-piece lower windscreen and wiper arm trim. To remove, first the wiper arms need to be removed. With the rubber caps popped out, remove the 13mm nut from the wiper arm.

Now, you would think it would be a case of simply lifting the wiper arm from the motor shaft……………nope. The arms were effectively fused to the shaft after being on there for 9-years, which actually delayed this project by three days while I waited for a small puller to arrive. When I did the same thing on the XR6, I don’t seem to remember having this problem. Anyway, the puller arms are placed under the wiper, you then wind down on the bolt and draw the wiper from the shaft.


Wiper arms removed, they were set aside for treatment later on.
Next, the removal of nine plastic rivets, aided by a removal tool.............why didn't I buy one of these years ago?
I was going to replace these rivets as two of them were quite badly faded. Different to most automotive trim hardware, I found they aren't an off the shelf item, strange considering the number of Ranger's on the road now. I tracked down the correct replacements at a few online retailers, but................................please tell me why these tiny little plastic rivets cost about $6.00 each? Absolutely ridiculous, for context that same spend buys you a 100 zinc plated timber screws. So, I decided to retore rather than replace.

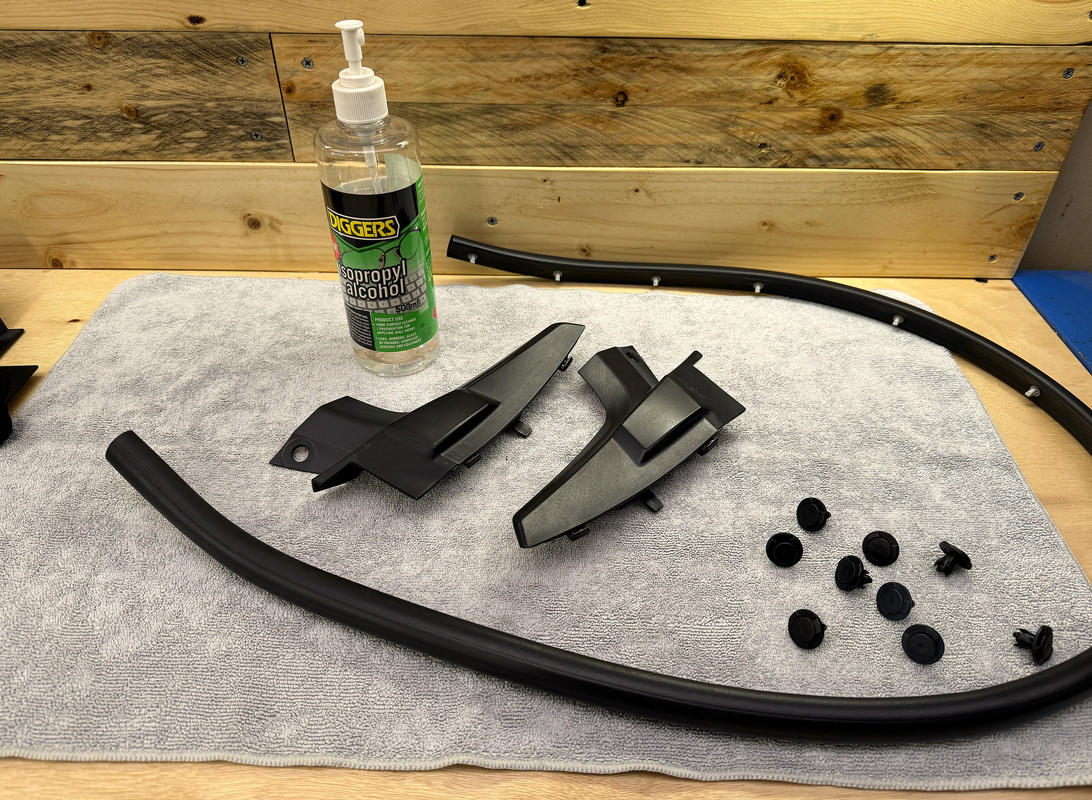
Before lifting up the two trim pieces, you need to first remove the single piece rubber seal.
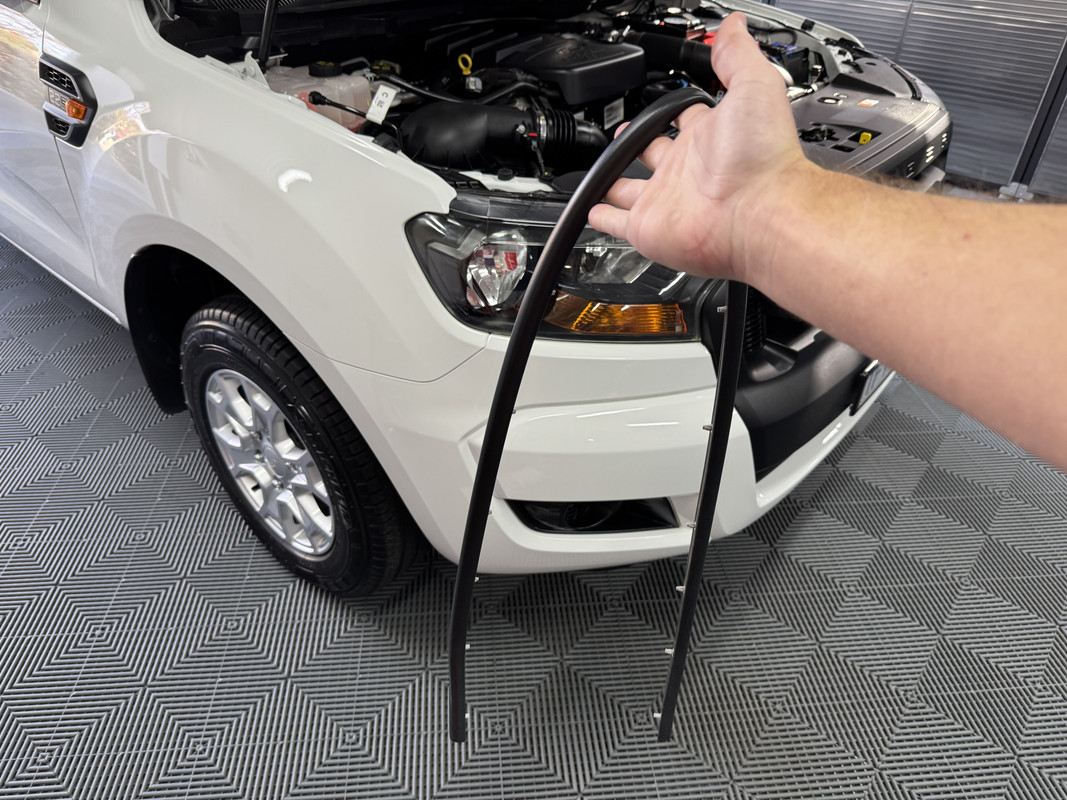
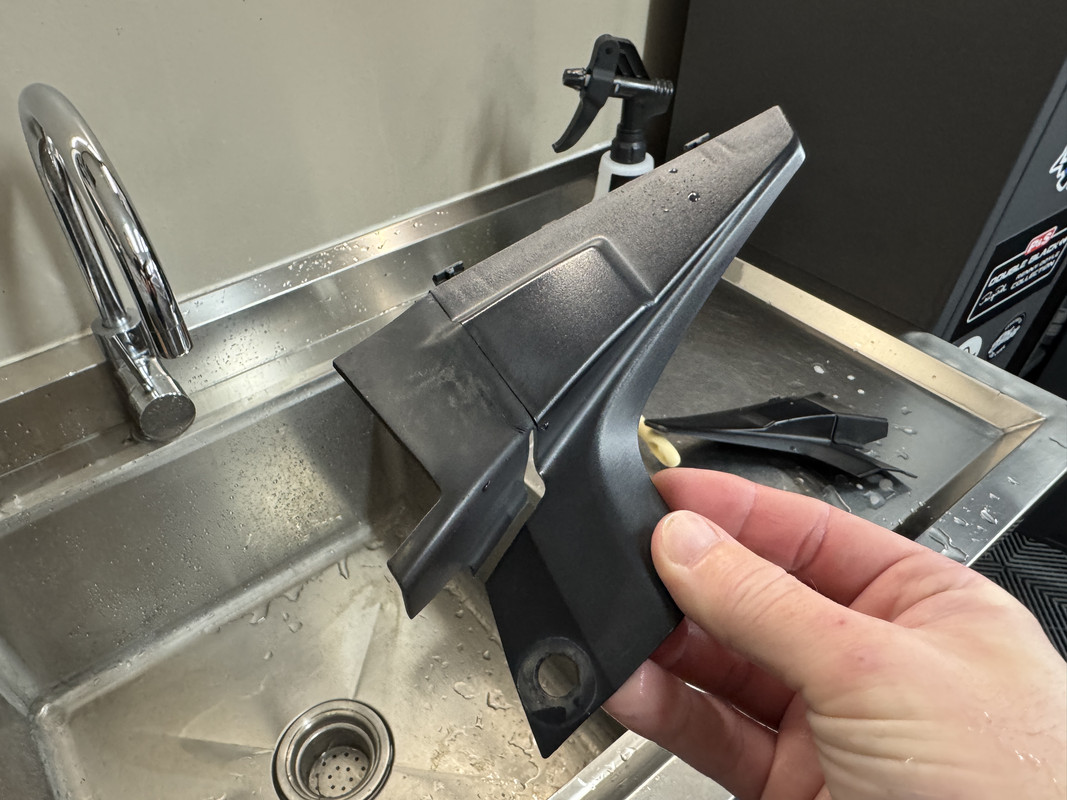
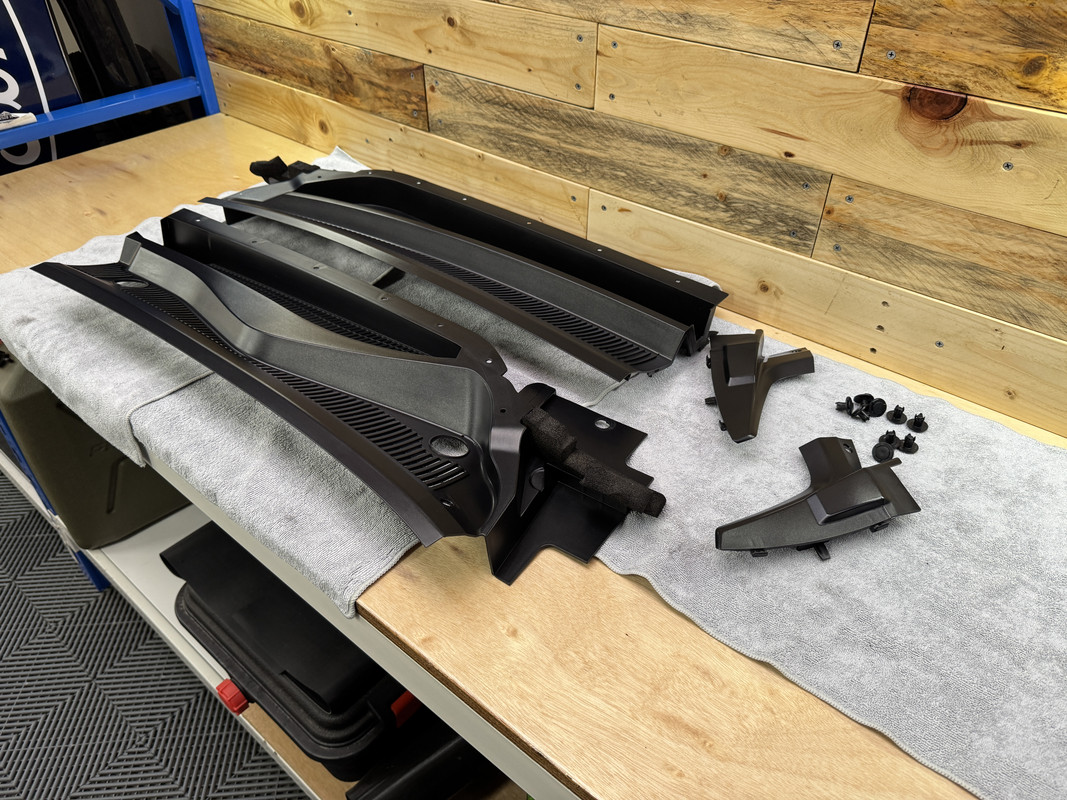
Each side of the trim is then gently prised upwards, the glass side will then pop out of the locating channel. There are then two side pieces that are clipped into the quarter panels, which gently levered up and away, more on these shortly.
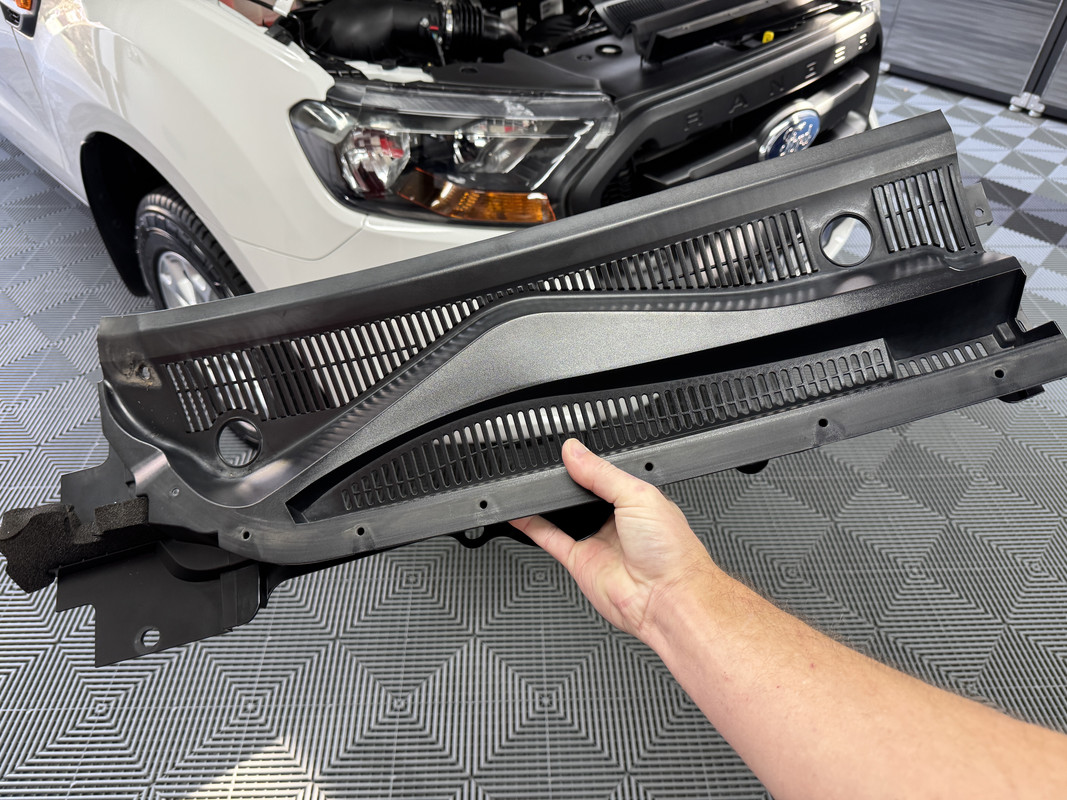

While not terrible, you can see discoloration on the surfaces most exposed to sunlight. Actually, its hard to properly show this on camera.
Cleaning –
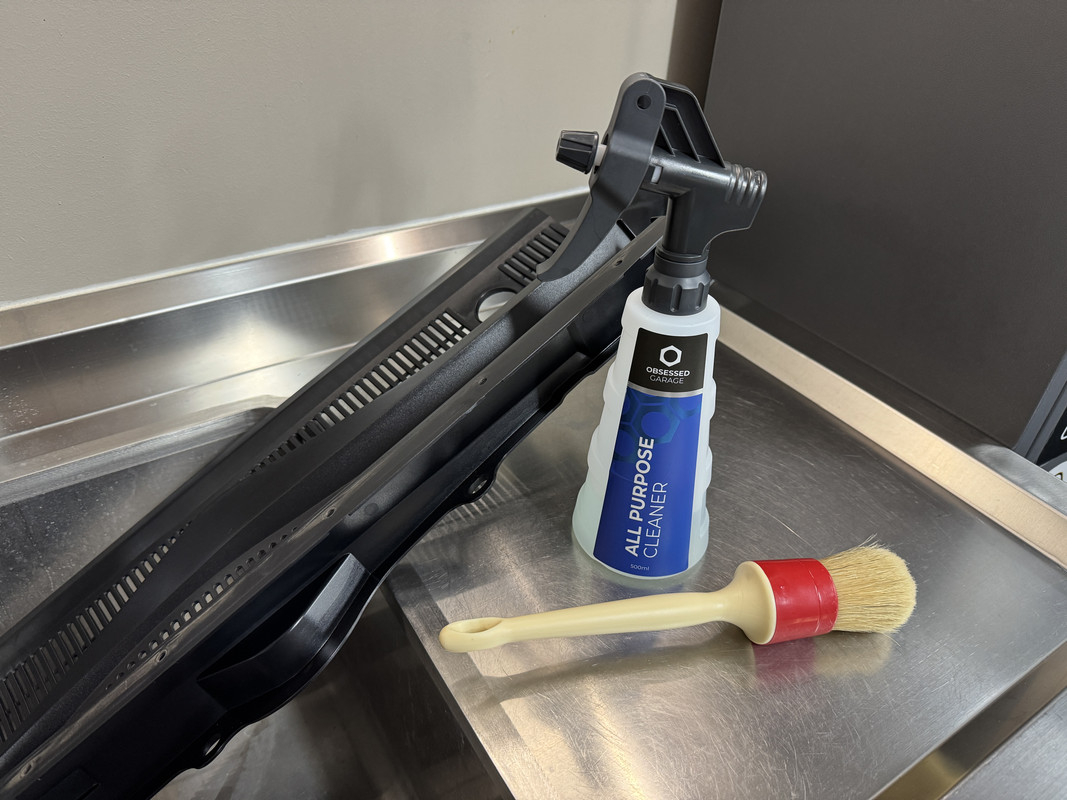
With everything removed it was time to get cleaning. This step is vital in ensuring the success of the end result.
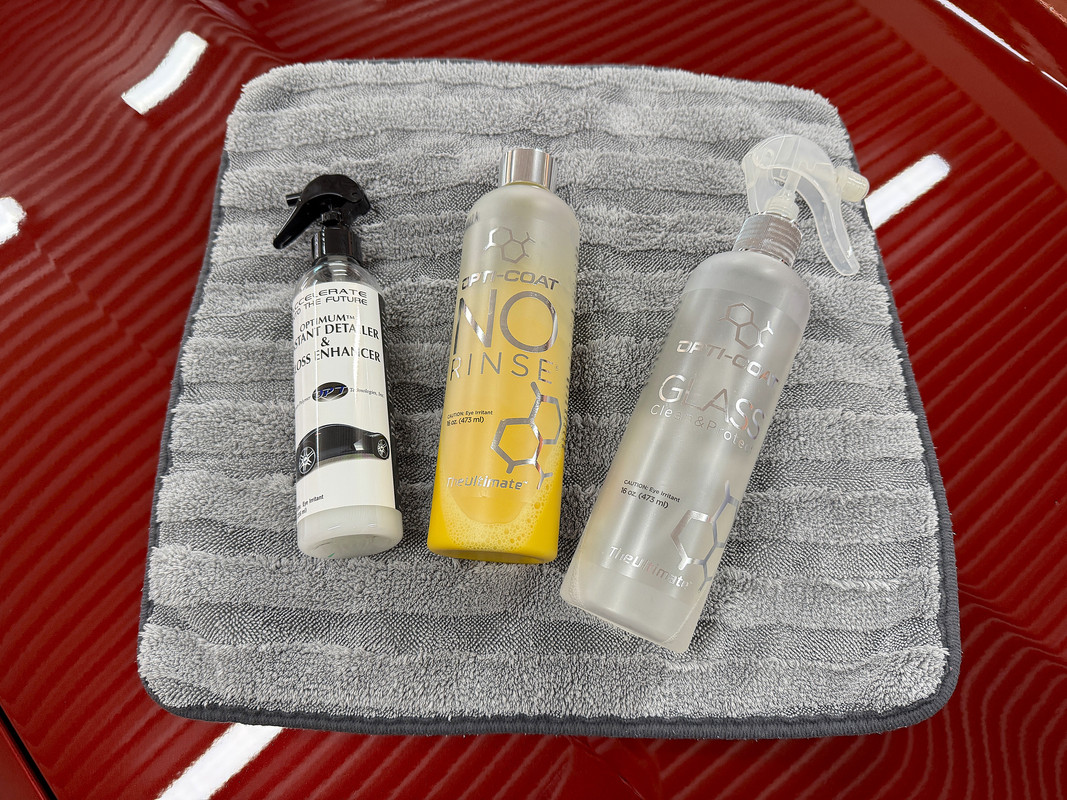
Using a brush and KCx Green Star APC, each trim piece was cleaned and rinsed thoroughly.
Below are the smaller side trims that bridge the gap between the windscreen, quarter panel and the larger trims. These have a flexible rubber section that folds away as the hood is raised/lowered. Both Ranger's in my care have faded badly in this area due to sun exposure.
To finish the prep work, I used undiluted IPA to wipe down each piece, including the rubber seal and plastic rivets.

Trim Restoration -
There are many ways of restoring a fresh finish on black plastic trim.
Plastic & Vinyl Dressings - The quickest and easiest method, think water based products such as Carpro Perl or 303 Protectant. These will only last a couple of weeks at best, less if it rains or you wash the car.
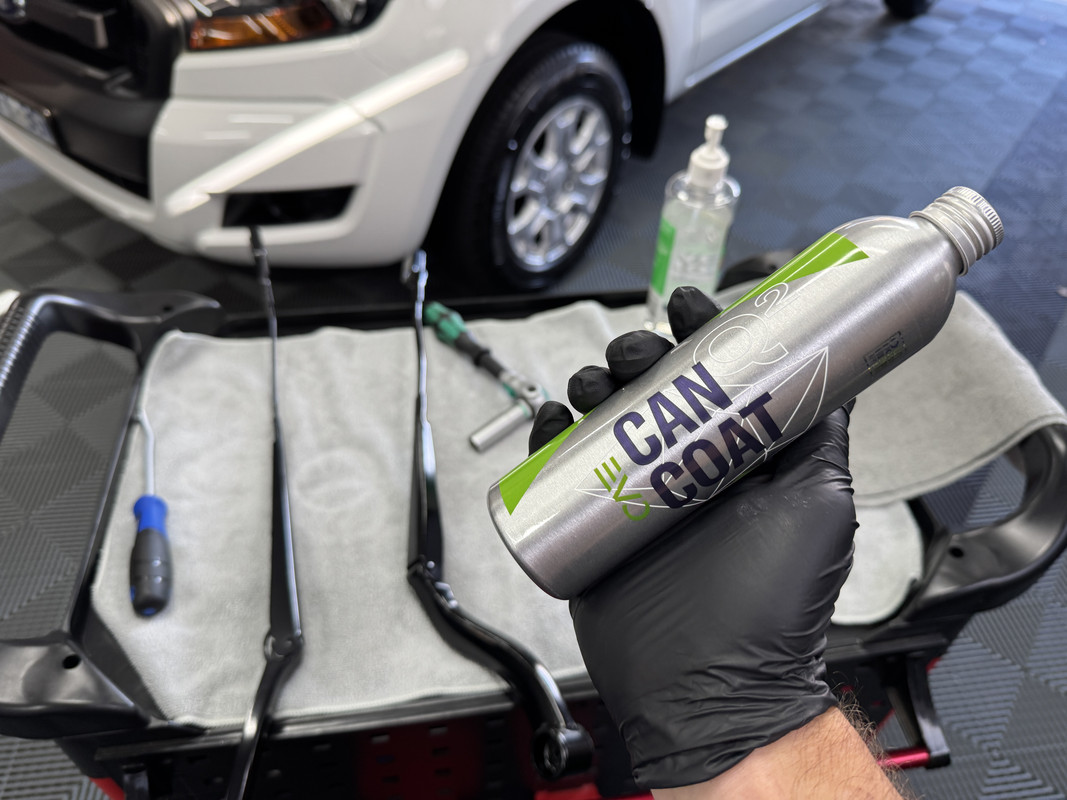
Ceramic Coatings - In the past, I've used dedicated trim coatings such as Carpro DLUX, and even regular coatings such as ADS Quartz and Gyeon Can Coat. These will last the longest, but after a lot of research, I've moved away from this method.
Spray Sealants - These sit in the middle of the two above, offering an easy application and longer lasting results. I absolutely love Carpro Reload for this, but most ceramic spray sealants will work in a similar manner. However, these are best used to maintain trim rather than restore a moderate to heavy fading.
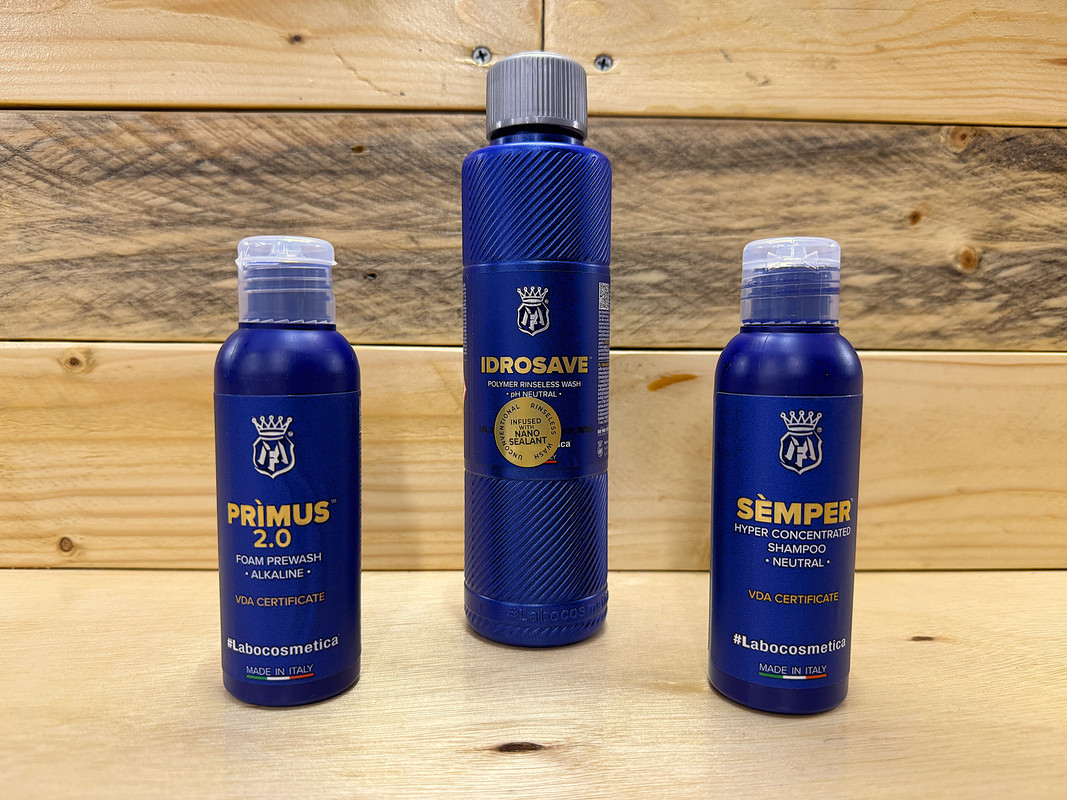
Trim Dye - A product such as Solution Finish restores faded plastic to a factory finish. I'm also keen to try Armour Detail Supply's new combined dye and ceramic coating, which is yet to hit the market but looks like the perfect solution.
Ultimately, I went with Solution Finish. I've used this multiple times in the past and really like how forgiving it is to use and the look of the finished result. It's termed a "semi-permanent" product that can last up to and beyond 12-months. Considering my vehicle use patterns, I should get plenty more than that.
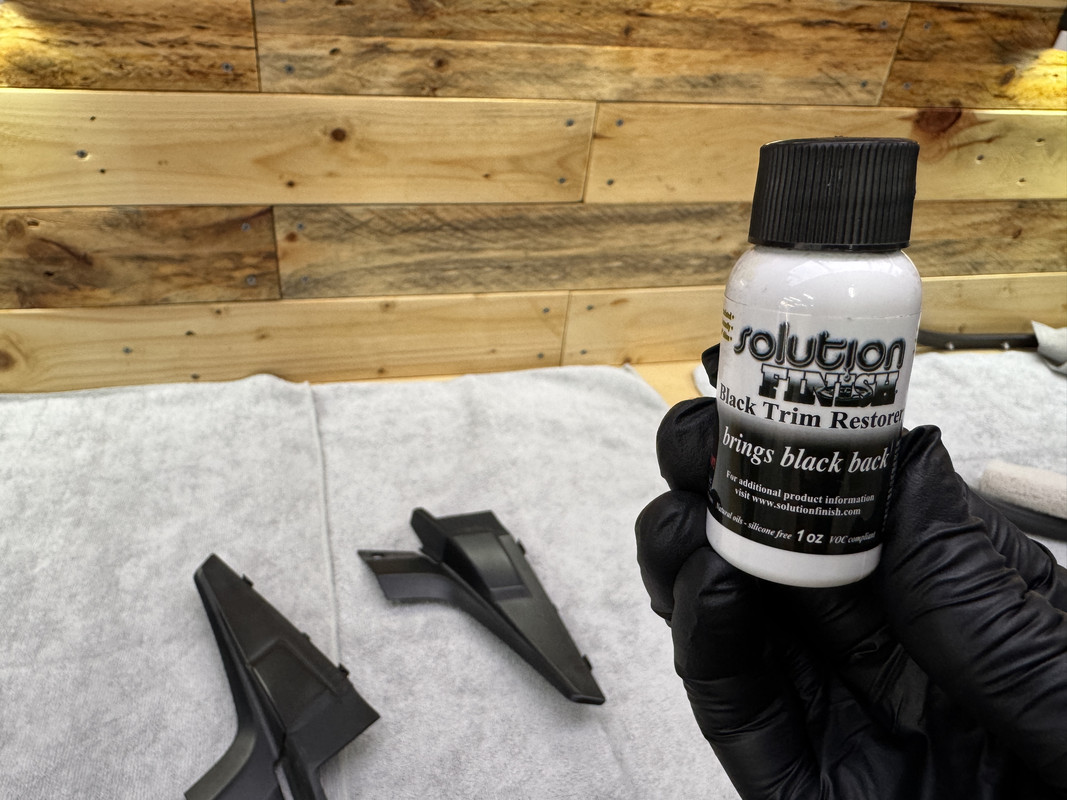
Application is simple, just shake the bottle very well, then apply a small amount to a microfiber applicator and work it over the surface. I did try one of the new Detail Factory foam brushes, which was designed with Solution Finish in mind, but a microfiber applicator works best. After thoroughly massaging the product into the plastic, leave it to absorb for 5-minutes and lightly buff away any residue. Choose you towel wisely as you won't be using it again after this. TRC Rip-n-Rag's are your friend here.

Each piece of trim was treated, as well as the rivet heads and rubber seal.
To be continued...............................
Nothing ages a car more than faded black plastic trim. While certain areas are easy to deal with, say the wing mirrors or bumper inserts, others are harder to do properly. As such, these areas tend to get neglected and therefore show age sooner. Sitting at the top of this category would be the trim at the base of the windscreen, mainly because the bonnet and wiper arms block full access.
So, after 9 years on the road, it’s time for the Ranger to receive some attention in this department. Now, this job could certainly be done with the trim still fitted to the car. However, to clean and treat the windscreen trim properly, I find its best to remove it from the vehicle.
Trim Removal –
The PX-Series Ranger has a two-piece lower windscreen and wiper arm trim. To remove, first the wiper arms need to be removed. With the rubber caps popped out, remove the 13mm nut from the wiper arm.
Now, you would think it would be a case of simply lifting the wiper arm from the motor shaft……………nope. The arms were effectively fused to the shaft after being on there for 9-years, which actually delayed this project by three days while I waited for a small puller to arrive. When I did the same thing on the XR6, I don’t seem to remember having this problem. Anyway, the puller arms are placed under the wiper, you then wind down on the bolt and draw the wiper from the shaft.
Wiper arms removed, they were set aside for treatment later on.
Next, the removal of nine plastic rivets, aided by a removal tool.............why didn't I buy one of these years ago?
I was going to replace these rivets as two of them were quite badly faded. Different to most automotive trim hardware, I found they aren't an off the shelf item, strange considering the number of Ranger's on the road now. I tracked down the correct replacements at a few online retailers, but................................please tell me why these tiny little plastic rivets cost about $6.00 each? Absolutely ridiculous, for context that same spend buys you a 100 zinc plated timber screws. So, I decided to retore rather than replace.
Before lifting up the two trim pieces, you need to first remove the single piece rubber seal.
Each side of the trim is then gently prised upwards, the glass side will then pop out of the locating channel. There are then two side pieces that are clipped into the quarter panels, which gently levered up and away, more on these shortly.
While not terrible, you can see discoloration on the surfaces most exposed to sunlight. Actually, its hard to properly show this on camera.
Cleaning –
With everything removed it was time to get cleaning. This step is vital in ensuring the success of the end result.
Using a brush and KCx Green Star APC, each trim piece was cleaned and rinsed thoroughly.
Below are the smaller side trims that bridge the gap between the windscreen, quarter panel and the larger trims. These have a flexible rubber section that folds away as the hood is raised/lowered. Both Ranger's in my care have faded badly in this area due to sun exposure.
To finish the prep work, I used undiluted IPA to wipe down each piece, including the rubber seal and plastic rivets.
Trim Restoration -
There are many ways of restoring a fresh finish on black plastic trim.
Plastic & Vinyl Dressings - The quickest and easiest method, think water based products such as Carpro Perl or 303 Protectant. These will only last a couple of weeks at best, less if it rains or you wash the car.
Ceramic Coatings - In the past, I've used dedicated trim coatings such as Carpro DLUX, and even regular coatings such as ADS Quartz and Gyeon Can Coat. These will last the longest, but after a lot of research, I've moved away from this method.
Spray Sealants - These sit in the middle of the two above, offering an easy application and longer lasting results. I absolutely love Carpro Reload for this, but most ceramic spray sealants will work in a similar manner. However, these are best used to maintain trim rather than restore a moderate to heavy fading.
Trim Dye - A product such as Solution Finish restores faded plastic to a factory finish. I'm also keen to try Armour Detail Supply's new combined dye and ceramic coating, which is yet to hit the market but looks like the perfect solution.
Ultimately, I went with Solution Finish. I've used this multiple times in the past and really like how forgiving it is to use and the look of the finished result. It's termed a "semi-permanent" product that can last up to and beyond 12-months. Considering my vehicle use patterns, I should get plenty more than that.
Application is simple, just shake the bottle very well, then apply a small amount to a microfiber applicator and work it over the surface. I did try one of the new Detail Factory foam brushes, which was designed with Solution Finish in mind, but a microfiber applicator works best. After thoroughly massaging the product into the plastic, leave it to absorb for 5-minutes and lightly buff away any residue. Choose you towel wisely as you won't be using it again after this. TRC Rip-n-Rag's are your friend here.
Each piece of trim was treated, as well as the rivet heads and rubber seal.
To be continued...............................


 )
)


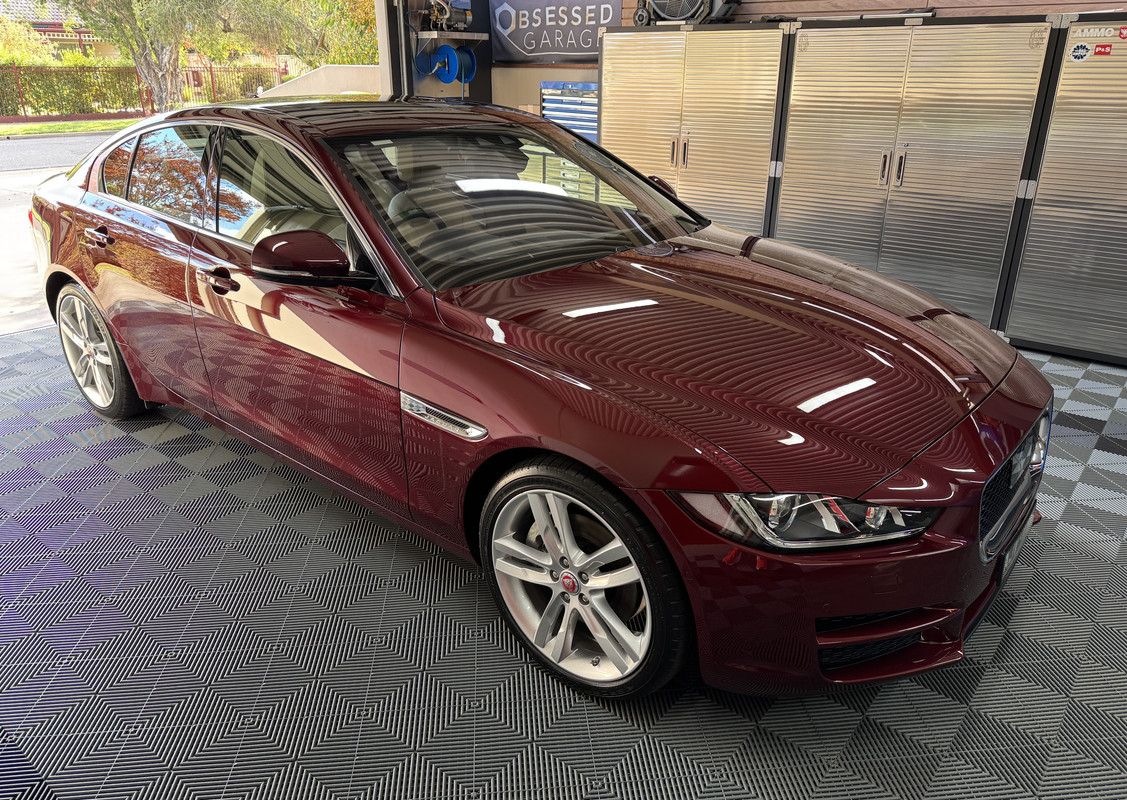


 My favourite car in the fleet, Why? Supercharged V8