DIY Pad Washer

I was chicken at first to post pics after I finished. *Marshalls...knock,knock.

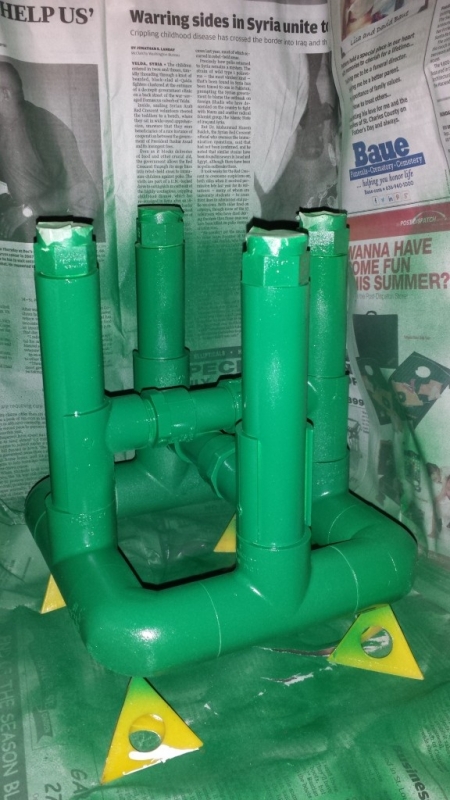
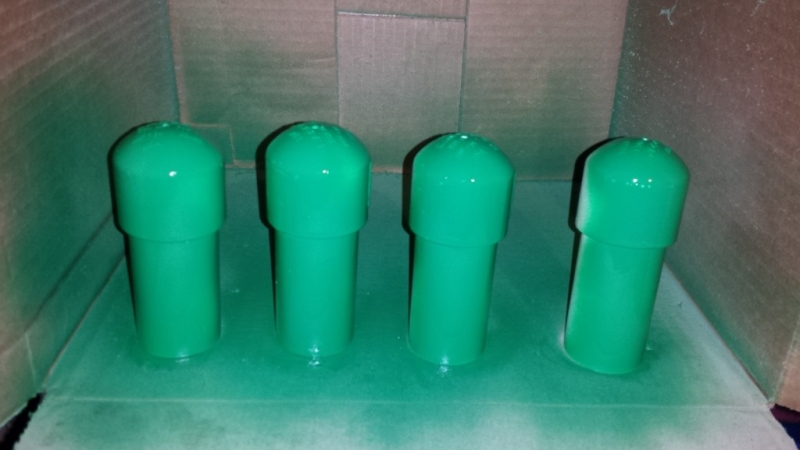
The spring seat piece: HD #612758 3/4" Plug (4) $0.97 ea. ouch
But I was all in.


*The Lid: I wanted to mimic the original.
Just a Lowes cheapie. #211809 $1.28
I cut the center out at the outer most ring, then cut it in half.
I cut the outer 'Lip' off (part that locks onto bucket lip) and trimmed each till they lined up and fit the recess of the cut out Gamma Lid.
Cutting out that Gamma Lid is the hardest part of the whole build. You end up buying (2) so you can close'r up if you choose to. HD #5GAMMA6 $7.25 ea.

The rest is 'Junk' drawer and hardware. 10/24 screws, nuts
and flat washers. Wing nut was junk drawer. Spring I ripped out of a Radio Shack single 'C' Battery Holder.
The hogged out Gamma Lid has ribbing on the under side so screw placement is fiddly.
Gott'a be damn careful!! some of the plastic cuts easily, some
doesn't. Hope I helped. Let me know.

Lol marshalls? Are you from Texas?

Thank you. I'm working on recreating this, but the Lowe's stores here have a slightly different cheapo lid. The outter ring is too small, so I got one of their better lids for a dollar more and cut that out. I also made a pretty cool clasp for the thing. I'll post it when it's complete.

Pro-tip: Before disposing of the better lids, get some plyers and pull out the rubber seal. You can reuse it if the seal goes bad on another lid, such as an expensive gamma seal lid. ;)


aren't you guys gonna try an aquarium pump? mine's still working. it doesn't have a lid since there's no splashing outside the bucket.

Are you the guy that posted the version with the pump at the bottom? If so, nice job! I like the design, but I have no experience with that sort of stuff, and I feel like I shouldn't jump right in to electronics under water... I may try it later, but for now I just thought I'd try this guy.

Thanks to the OP, I made my pad washer today and it came out great!! I even placed my order at Lowes for store pickup and when I got there she said she had fun picking it and smiled. I must of caught someone who actually liked their job, lol

You're welcome! Glad it worked out for you! Haha that is a rare find indeed. Funny story, when I went back for a part I forgot, the cashier couldn't get it so scan, so she goes "Screw it, here just take it." Sometimes people that hate their job can help too!

OK, I've seen these listed, but what does it do that is so different from a manual pad washing method.

I just place my pads in the bathroom sink after cleaning it to a shine, then add either Woolite or Pinnacle cleaning product to luke warm water and press down on my pad.

I never did it by hand since I built this before I ever used my DA, but I think this thing is just supposed to make it quicker and easier.
 
Are you the guy that posted the version with the pump at the bottom? If so, nice job! I like the design, but I have no experience with that sort of stuff, and I feel like I shouldn't jump right in to electronics under water... I may try it later, but for now I just thought I'd try this guy.

i am, thank you. it Is electrical. i've used it 24/7 to pump water up to an overhead aquarium filter when i was a kid. most of the time my arms are underwater setting up the ~100 gallon aquarium while these pumps are running. it can simply be plugged on a socket with a switch or a gfci. i hope you guys get to try it.

one more thing to note is that the bucket i used has a lip that stops the grit guard from going down. one can also just bolt on a ledge/ridge for it.

i've browsed amazon.com and the pumps i've seen don't have the tube with holes but i'm sure you guys can easily punch holes on a pvc pipe that fits the pump outlet.

Where did you get a bucket like that? And thanks for the tips man. I'm sure I'll try this eventually :xyxthumbs:
 
Money saving tip!
(Compression Springs)

You may recall the compression springs were a bit pricey:

2 x 2-pack 23/32" x 3-1/2" Compression Springs
2 x $4.48 = $8.96
20140308_181916.jpg


Yeah, everyday low price my ass...

Solution!
I was in Dollar Tree yesterday, and I saw a two pack of toilet paper holders. Exciting, I know. But then it hit me, those things don't
just make my post-candy-crush task easier, they also contain compression springs! So I bought a pack, for a dollar of course, and
the springs are almost an exact match.

20140531_130608.jpg
20140531_130923.jpg


They were really easy to pull apart, go figure. The wire appears to be a tad thinner, but it should still work. And I doubt it is anti-corrosive,
but as you can see, neither are the ones I spent 8 bucks on. I recommend spraying them with some Rustoleum, so they don't corrode like this.

20140601_132323.jpg


These springs are roughly 3/4" shorter, so the pipes will need to be adjusted to compensate.
Making the caps 3/4" shorter, and the vertical tubes 3/4" longer should do the trick.

Now for some added fun, don't let those plastic pieces go to waste. Snap them back together
without the spring, and carefully replace the holder in your bathroom. Then watch your wife or
girlfriend struggle to put it back together the next time she goes to use the roll.
 

Rusty - Crusty Pad Cleaning Solution. will have to watch for that.


"Now for some added fun, don't let those plastic pieces go to waste. Snap them back together
without the spring, and carefully replace the holder in your bathroom. Then watch your wife or
girlfriend struggle to put it back together the next time she goes to use the roll".


lol My son and I love to gently torture da' momma' every now and then.
 

Rusty - Crusty Pad Cleaning Solution. will have to watch for that.

The only pad cleaning solution I have used in this thing thus far is the Griot's Garage Micro Fiber & Foam Pad Cleaner. It's a clear liquid, so the white part is probably lime, calcium, or more likely product that came off the pads. I think it would take longer than a few uses for calcium to build up like that, but I'm no chemist so who knows.
 
Still... a good heads up! w. "Made in China " plating and all.
 
Where did you get a bucket like that? And thanks for the tips man. I'm sure I'll try this eventually :xyxthumbs:

most of the stuff were just things lying around the house. you might find one at cosco or any of those discount stores. bolting on a flexible plastic ridge will work.

np, glad to help
 
Thanks for posting all the information. I am making one from 3/4 pipe that had in the shed. I put washers in the top pieces connecting the top tubes to the bottom vertical tubes. These will be used to set the springs on. Next will be getting the bigger sleves and caps. Thanks again. buicfrank
 
Thanks for posting all the information. I am making one from 3/4 pipe that had in the shed. I put washers in the top pieces connecting the top tubes to the bottom vertical tubes. These will be used to set the springs on. Next will be getting the bigger sleves and caps. Thanks again. buicfrank

That's a good idea. :dblthumb2: I used washers in the same part on another project, don't know why I didn't think to do it here.
 
Here's a little winter update for those that are interested:

  1. The paint didn't really work out. It was kind of sticky, wouldn't fully cure, and I didn't trust it to stay on while in use. I didn't want to ruin a pad to find out, so I have never used the painted version. If I had been more patient and done thinner layers it could have worked. Maybe I'll try it out this spring since it's had a few months to cure.
  2. Home Depot now has shorter tee and elbow fittings. If you're using one of the tighter fitting buckets, then these new pieces allow the pad washer to actually fit into the bucket without forcing it.
  3. And finally, don't forget to empty your pad washer! I made this mistake a couple months ago and didn't even realize my mistake until last night.

Don't leave water in the pad washer in the winter for obvious reasons...
20150119_183659.jpg

20150119_183714.jpg


But, there is another reason to empty your pad washer after each use.
The pad cleaning chemicals seem to be a bit corrosive. I used CG Pad Cleaner, YMMV. In the pictures above, you can see the embossed text on the pipe is smoothed out and barely readable. There was also some white goop at the bottom of the bucket, which I'm pretty sure used to be PVC. You can see it on my glove in the picture below. I think the brownish stuff on the wall of the bucket is just polish that was floating in the bucket.

20150119_184009.jpg


Looks like I'll be rebuilding this guy before spring.
 
I made myself one of these when I first started detailing. It helped me save the cheap pads that I was working with and was pretty impressed with the over all design. Since then I decided to actually by a pad washer and I am glad that I did. I mainly purchased it for the splash guard and the center piece that can be used to drive polish out from the center of the pad or to dry the pad after being washed. In my eyes this is a great design for someone starting out, but once you have the client base to invest in better tools just drop the dough on the grit guard pad washer. You will be much happier.
 
I made myself one of these when I first started detailing. It helped me save the cheap pads that I was working with and was pretty impressed with the over all design. Since then I decided to actually by a pad washer and I am glad that I did. I mainly purchased it for the splash guard and the center piece that can be used to drive polish out from the center of the pad or to dry the pad after being washed. In my eyes this is a great design for someone starting out, but once you have the client base to invest in better tools just drop the dough on the grit guard pad washer. You will be much happier.

I actually made a splash guard for this. I guess I never posted the instructions for that...

As far as the center piece, that would definitely be nice to have. I made a cad model of it that I was going to print, but then everyone gave me crap about legal issues.
 
I actually made a splash guard for this. I guess I never posted the instructions for that...

As far as the center piece, that would definitely be nice to have. I made a cad model of it that I was going to print, but then everyone gave me crap about legal issues.

Yeah I made a splash guard myself, but I was able to get a good deal on the pad washser so I just dropped the money on it. I find that my pads don't get as soaked with water as they did with my DIY one.
 
Yeah I made a splash guard myself, but I was able to get a good deal on the pad washser so I just dropped the money on it. I find that my pads don't get as soaked with water as they did with my DIY one.

That's good to know. Thank you, I was going to ask what was better about the actual functionality. Are the holes smaller? I might try making them smaller on the next one.
 
Actually I think that your holes are a bit smaller. I think it might be because of the size of PVC pipe. Since the pad washer has 2-3 in diameter for the cones. I'll try and take a few good pictures/video of it so you can see better.
 
Actually I think that your holes are a bit smaller. I think it might be because of the size of PVC pipe. Since the pad washer has 2-3 in diameter for the cones. I'll try and take a few good pictures/video of it so you can see better.

Hmm... I know what you mean about the cones, but how would the extra width would make a difference?

Also, how far do the cones move down? I think mine move farther since I had to get those big springs from Lowe's, so that means more water volume spraying out.

The smaller holes could actually be part of the problem. Smaller holes => more pressure => inject more water into the pad.
 
Back
Top