How thin is to thin?

Mike lambert

New member
Joined
Aug 16, 2011
Messages
1,128
Reaction score
0
On single stage paint, how thin is the point at which you say,sorry?
I did a landrover defender today with only 2.5 mils left. All we did was meguiars 7 and ammo skin to seal. No worn thru spots,so I did not want to make any.
Thanks
 
On single stage paint, how thin is the point at which you say,sorry?


Here's your answer.

...my experience...the point of no return... that's when you start to see a cloudy look to the thinnest areas and the cloudy look is the beginning of the primer to show through...


More paint is better...

:dblthumb2:

Here's the link to the entire article leading to that quote.
http://www.autogeekonline.net/forum...w-car-finish-antique-single-stage-paints.html


EDIT:
Perhaps you were asking specifically about the mils though? Couldn't find any info during my search.
 
I've been wondering about this also. If it looks cloudy per se. Then it is pretty obvious of CC failure. However, since PTG's are preached here as must haves but I have not read at this point at which readings are ok, which are low or healthy.

From what I've learned, they all seem to be a case by case basis. So there are no actual definitive answers.

I know of asked it plenty of times, to well known members here, but have never gotten an answer. So don't know and subscribed.
 
I felt the same thing when detailing a severely oxidized Defender. My highest reading was 3 mils. I went with KAIO on a Black flat pad as the white pads were micro-marring.

2013-03-02_10-10-49_569.jpg


I was still removing paint even though I was using a non-cutting pad & product. The paint was super soft!

I did not go through it after doing the same procedure 2 times last year.

Hope that helps


-Beach
 
Good question Mike but there's no real definitive answer.


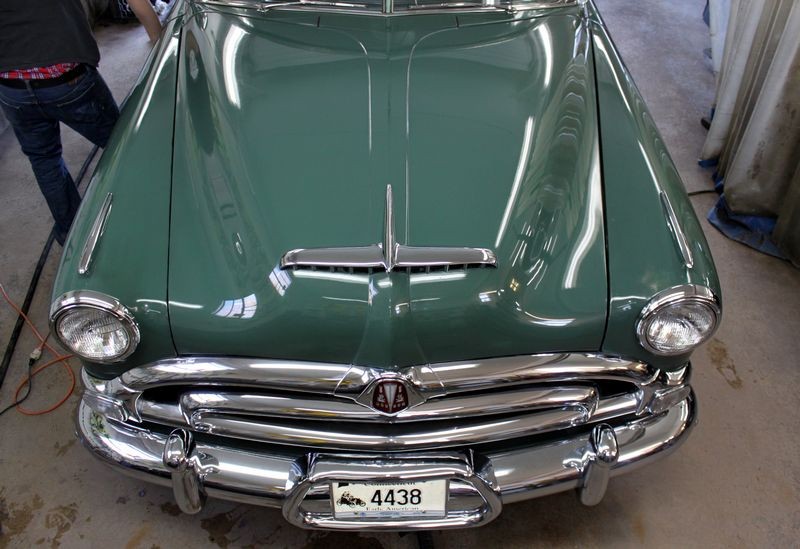
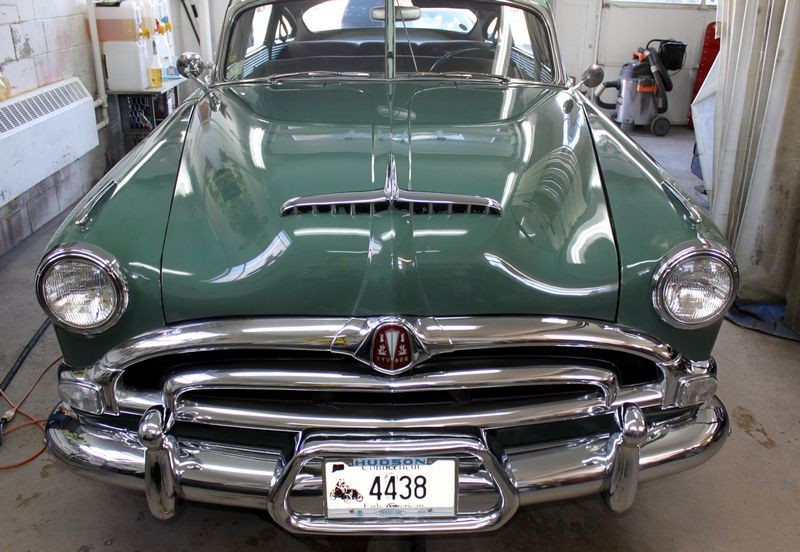
I have some great pictures from working on the original factory paint on Wayne Carini's 1953 Hudson Hornet. The scary part is the factory paint was thin to start with, by this I mean paint that had NEVER been touched by human hands.

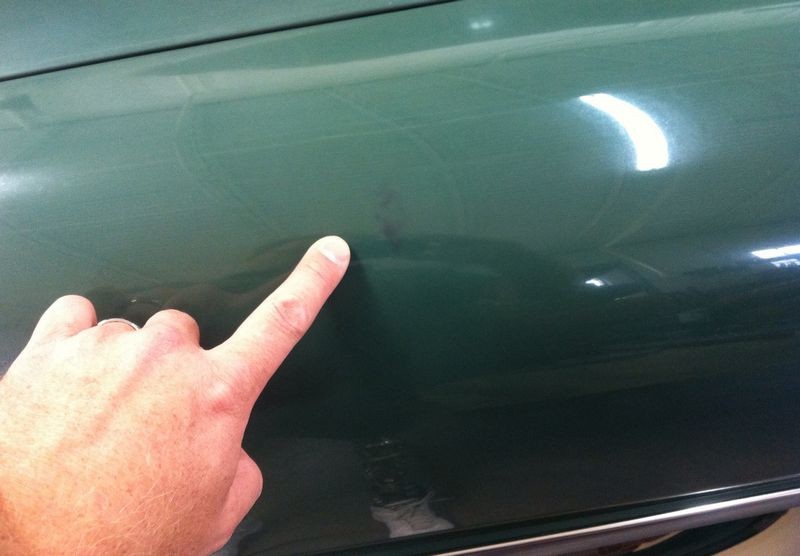
In this picture, I'm measuring the paint that was behind a "Dealership Badge" and my assumption is that it was bolted onto the trunk lid when the car was brand new and freshly arrived to the Hudson dealership.

Assuming, and I know this is usually not a good idea, but assuming the paint behind the dealership badge had never been polished, or anything, check out how thin it is....


Wayne Carini 1954 Hudson Hornet Original Paint Restored by Mike Phillips
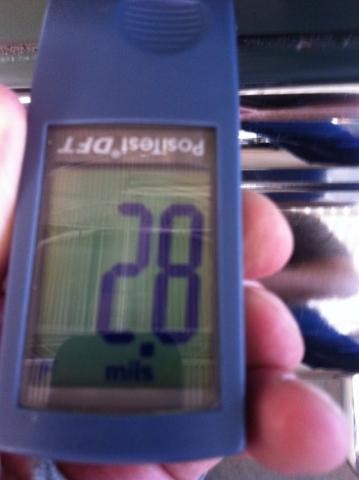

This measurement, LESS than 3 mils, was taken on a section of paint that was covered with a dealership emblem. While I was there Wayne removed it and it looked like it had never been touched. The paint in this area was NOT faded like all the rest of the paint on the car because it has been covered for 61 years.

Thin_Hudson_Paint_001.jpg


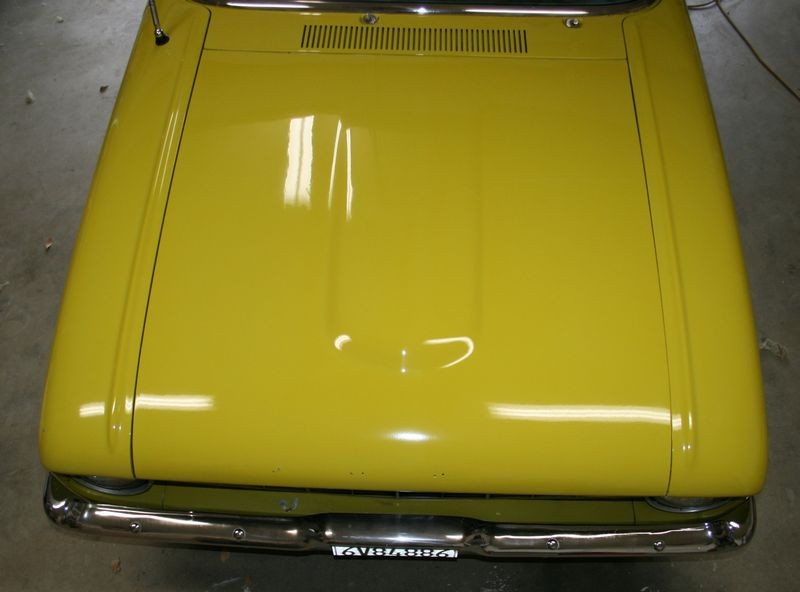
This measurement was taken on the hood where the paint WAS visibly thin....

Thin_Hudson_Paint_002.jpg


And for the hood on this car I carefully hand polished the paint while Wayne nervously watched....


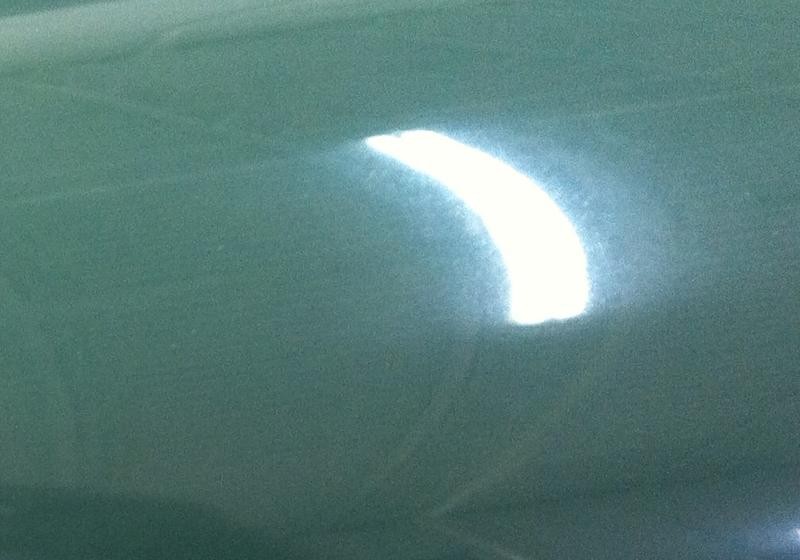
It's hard to see in this picture here but where the yellow outline box is there's a thin spot showing black primer.

Mike_Phillips_Wayne_Carini_009a.jpg


Here's the same spot from a picture I took with my iphone...

Mike_Phillips_Wayne_Carini_Thin_Paint.jpg


Close up cropped out of the original...

Mike_Phillips_Wayne_Carini_Thin_Painta.jpg


And this shot cropped out of the above shows the oxidation and cloudiness over the entire Hudson before restoring the original paint.

Mike_Phillips_Wayne_Carini_Thin_Paintb.jpg


Most of the rest of the car, (except the hood), was buffed out using a Porter Cable 7424XP and a Griot's Garage 3" Mini Polisher with both Pinnacle Advanced Swirl Remover and Advanced Finishing Polish. I only used the finishing polish on the hood.

In the end, the finish had a uniform appearance....


After

Mike_Phillips_Wayne_Carini_03.jpg


Mike_Phillips_Wayne_Carini_04.jpg


Mike_Phillips_Wayne_Carini_05.jpg


Mike_Phillips_Wayne_Carini_006.jpg


Here's what I do...

When in doubt, and I think the paint is what I call whisper thin, I tread lightly...


The last thing I want to do is leave my signature in the paint. Se this article...


Your Signature - Don't leave one...


Don't know if the above helps but for what it's worth...


:)
 
Thanks,I did steel your tip on number 7 for this vehicle. It was 3/4 mils on lower sides but 2/2.5 on top. All done by hand just to be safe.
Thanks again!
 
I've been wondering about this also. If it looks cloudy per se. Then it is pretty obvious of CC failure. However, since PTG's are preached here as must haves but I have not read at this point at which readings are ok, which are low or healthy.

From what I've learned, they all seem to be a case by case basis. So there are no actual definitive answers.

I know of asked it plenty of times, to well known members here, but have never gotten an answer. So don't know and subscribed.


This particular thread is discussing single stage paint systems. Could make a difference when related to total film thickness.
 
:hijacked:

The winner of this season's (#15) Biggest Loser:
Rachael Fredrickson.

She now looks kinda Karen Carpenter-ish. :(

Bob
 
I did not take any befores, applied 7 with micro applicator, let sit for about an hour,wiped of and applied skin with foam applicator.final wipe with ammo spit.

9e3c7755121baa51e700fe614d2d1931_zps0f828c81.jpg


cfd40b997d09e5855491be802da38234_zps3e16021a.jpg


:Picture:
 
Cool.

I was interested if you used a foam or fiber applicator pad as old, oxidized single stage paint clean fairly well when you use the #7 with a fiber type pad as doing it this way the fibers become your abrasive.

And I know you already know this but for other guys that might work on rigs with oxidized single stage paint,


The power in the after shots is created in the before shots

This first picture is not very impressive until you....

1960Ranchero01.jpg


See the after picture.... It's the before picture that gives the after picture it's power.

1960Ranchero06.jpg


Like I write in this article,

The power in the after shots is created in the before shots


After you do all the work you can always get the after pictures but you can never go back in time to get the before pictures.

It's the before pictures that give the after pictures their power.


:)


:)
 
I did pay attention when you were here, and I got both books! LOL!
 
:hijacked:

The winner of this season's (#15) Biggest Loser:
Rachael Fredrickson.

She now looks kinda Karen Carpenter-ish. :(

Bob
LOL, unfortunately, :iagree: She needs to now gain some weight....
 
Back
Top