LC Flex 3401 Interchangable Backing Plate Assembly Instructions

02xtreme07SS

New member
Joined
Oct 6, 2011
Messages
361
Reaction score
0
Since questions seem to come up quite a bit regarding this system, I decided to put together a quick guide on the proper assembly order of the components in the LC/FLEX 3401 Interchangeable Backing Plate System. This guide specifically shows the user where to install the shims when using the 6" backing plate with the system.

Step 1.
After you have removed the factory supplied backing plate from your 3401, you are ready to begin installing the LC Interchangeable Backing Plate System. Your Flex should look like this:
IMG_0456.JPG


Step 2.
Install the LC drive plate adapter onto your Flex ensuring that the slow fits snugly over the raised portion of the spindle. Your Flex will now look like this:
IMG_0457.JPG


Step 3.
Place the thin shims in the center of the drive plate adapter. This is how your Flex should look at this point:
IMG_0458.JPG


Step 4.
Place the 6" backing plate onto the drive plate adapter ensuring that you have aligned the tabs from the backing plate into the slots in the adapter plate. There should be no gap between the two plates. Now your Flex looks like this:
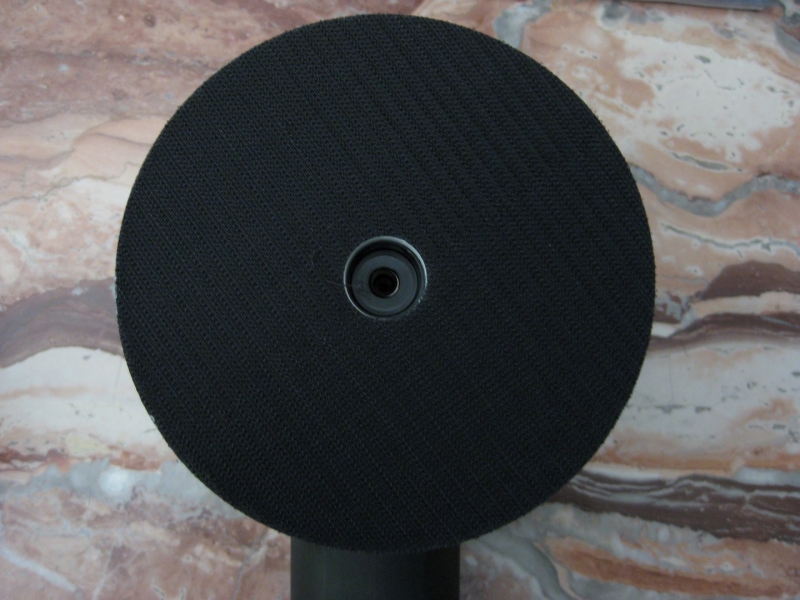
IMG_0459.JPG


Step 5.
Place the washer (some are calling this a thick shim) in the center of the backing plate. You're almost done and this is what you should see:
IMG_04601.JPG


Step 6.
Insert the socket-head cap screw through the entire assembly, thread the bolt into the spindle, and tighten. You have now completed the assembly of the LC Interchangeable Backing Plate System. Here is a picture of the finished assembly:
IMG_04614.JPG
[/IMG]


I hope this helps clear up some of the confusion regarding how to properly install this backing plate system on the FLEX 3401.
 
Whoa! Thanks for taking the time to do this, but this is NOT rocket science.
 
Whoa! Thanks for taking the time to do this, but this is NOT rocket science.

I agree with you 100%, but since the it seemed like the question was coming up quite a bit lately I figured I would just put it to rest once and for all.
 
Mine does not have the thin shim?

Sent from my DROID RAZR MAXX HD
 
Mine does not have the thin shim?

Sent from my DROID RAZR MAXX HD

I don't have the thin shim either. Interesting to note that in the Lake Country demo on installing the interchangeable backing plate, they do not use or mention a thin shim.
 
First, let me thank you 02xtreme07SS for putting this together it's very helpful!

this is NOT rocket science.
That's true but the issue here is that there aren't a set of definitive instructions that show the exact installation method. This could possibly be the reason that some people report failure with this system.

For instance if you view the video from the store's site (also linked in the instructions above posted by 02xtreme07SS) - FLEX XC3401 Changeable Backing Plate System it does not even show the 2 thin shims at all used with either backing plate.

On the bag that the backing plate system comes in it states - "screw, washer & 2 shims for 6" plate". It does not however mention where the 2 shims should go. I didn't know this before looking at these instructions from 02xtreme07SS.

02xtreme07SS doesn't show instructions for the 4" backing plate but the video does show, what seems to be, the original washer and screw being used. This would seem correct and does match what the bag states but again it's not very clear with the instruction.

I think it is humorous that there is a process laid out for nearly everything but skinning a gnat here and one can't find any definitive info to utilize this backing plate system as designed.
 
Mine does not have the thin shim?

Sent from my DROID RAZR MAXX HD

I don't have the thin shim either. Interesting to note that in the Lake Country demo on installing the interchangeable backing plate, they do not use or mention a thin shim.

I believe the Shim's were added to the newer shipments. I ordered mine the day before Xmas and it came with the shims. These were not included in the original shipment.

I was gonna add some pictures to an old thread Smack "Mike" linked me to. I asked him the question when I was trying to put my backing plate system together.

The only thing I did different to OP was to install the second shim below the washer and screw. I didn't notice anything crazy happen while using it like this. Hopefully a rep can shed some light on this situation. OP most likely has it correct though.
 
The shims were not included in earlier shipments. LC identified some instances where there was shrinkage in plastic on some of the 6" backing plates in the area where the bolt passes through the backing plate and into the adapter. This could potentially cause a gap between the plates in this area and when the bolt is tightened. This would create undue stress on the backing plate at this critical attachment point. The shims fill that gap and create a solid connection through the bolted area. My first LC system didn't have the shims and it has never exhibited and signs of failure.

The 4" backing plates did not have any of the same signs of shrinkage in the plastics like the 6" plates and as should not require the use of the shims. The shims are only required if there is a gap in the attachment area between the 6" backing plate and the drive plate adapter.

As far as I know, there were no reports of widespread problems without the shims, but this is a clear example of LC stepping up and supporting their products.
 
Thanks for putting is together to clear up any confusion on assembling the plates 02xtreme.

I ordered mine as soon as it was released and I only recieved the thick washer.
 
Thanks for taking the time to do this, will be ordering this shortly.
 
Thank you for this topic. I was looking all around how to use those shims (first it was hard to know what a SHIM should be).

I was calling them 'thin Washers', lol!

So you use both Shims, just with 6 plate? May I feel the need to use only one, or the correct manner is using both the same time?

Your initiative fitted my needs really well, just like mentioned, I've not received any instruction, I've saw the installation video and using the BP is really straightforward.

However, not knowing how and when to use Shims made this confusing, not that much science, but online instructions provided lack this kind of directions (also like yet related by others).

Thank you for taking your time helping us out.

Kind Regards.
 
Can you use the shims and washer with the 4 inch backing plate as well?

I just got the kit and looking at the washer placed in the center of the backing plate, I think it would spread out the force from the bolt against the seat of the plastic backing plate compared to using the bolt without the washer which could make it last longer.

Same question, I got my 4 inch backing plate out today, and it does have the 2 thin shims (or washers) in the pack. I did install them both, but did not work on the car yet.

Are they supposed to be used with 4 inch backing plates too, or just the 6 inch backing plates ?

Thanks.
 
I'm curious about that too. Shims with 4" plate?

Also, how are these LC backing plates holding up? The reviews on AG aren't very good...
 
Mines holding up real well, never used it without the two shims, won't ever use it without both shims.
 
I'm also using both shim washers in mine and going on about 2 months of use with no issues.
 
Back
Top