Mike Phillips
Active member
- Dec 5, 2022
- 51,004
- 8
Most hacked-up Mustang I've ever detailed
This is without a doubt, not only the most hacked-up Mustang I've ever detailed but possibly the most hacked-up car I've ever detailed.
This was the second car I detailed in one day. The first was a Mercedes-Benz SUV, so a full day's work. By the time I got to the Mustang I was pretty tired, so I didn't take many pictures. I did take a before video and an after video. These are hosted on my Facebook page so click the links to watch the videos. They are both short and worth watching. Especially the BEFORE video.
Here's the before,
BEFORE Video - 2013 Mustang
Here's the after,
AFTER Video - 2013 Mustang
The car was in such bad shape that I actually called the owners 2-3 times to tell them I simply didn't want to do the job. I couldn't reach them however so I stuck to my word and knocked it out.
Here's the few pictures I did take...
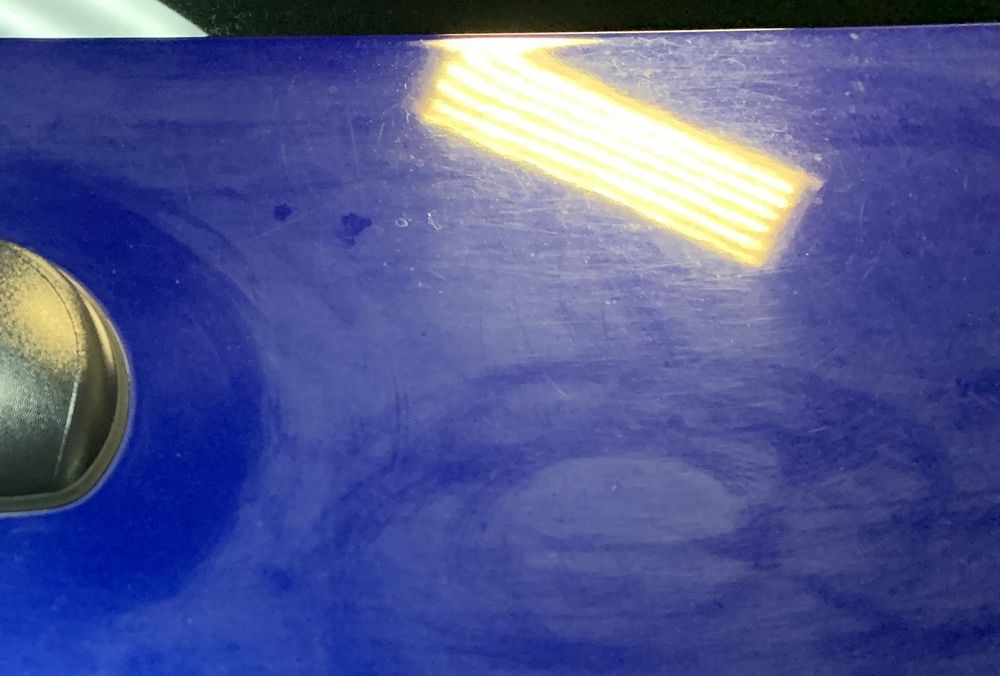
This is the trunk lid, just behind the rear window.

about 70% of the car body panels looked like this. Oxidized to the point of turning white. Stained all over the place and filled with swirls and scratches.

The plastic tail light housings were just as scratched-up as the paint. They were so bad. For the life of me - I couldn't figure out how someone could do this outside of washing them with a Brillo Pad?

 v
v

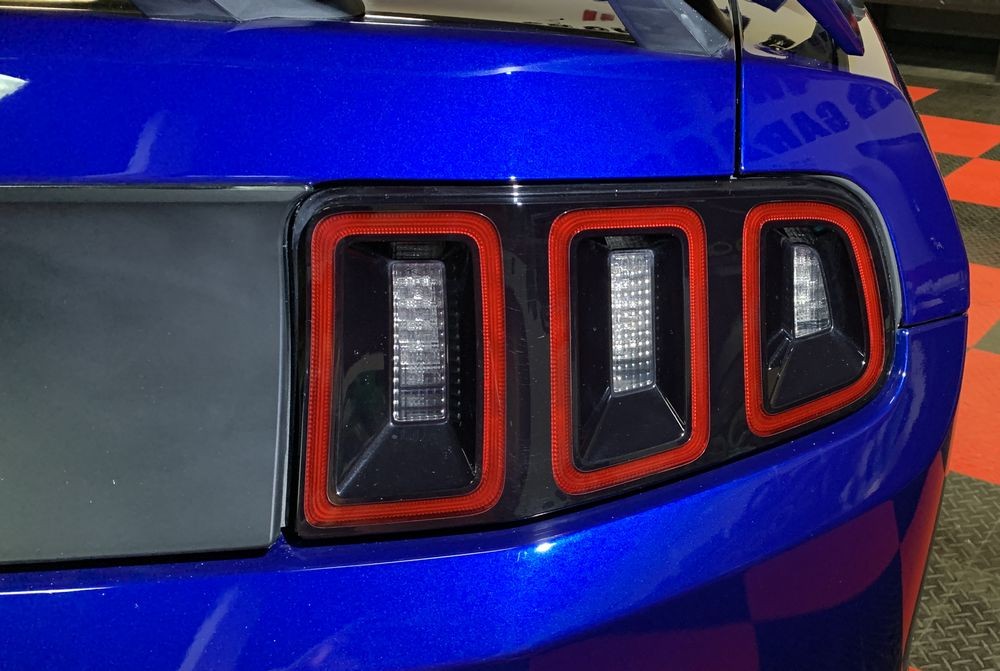
Here's after BLACKFIRE One Step...

What I did was finger paint some BLACKFIRE One Step all over the plastic then shoved the Lake Country 6.5" orange foam cutting pad against it and buffed every portion of these tail lights I could shove the spinning foam against. Real caveman style.

Here's everything I used...

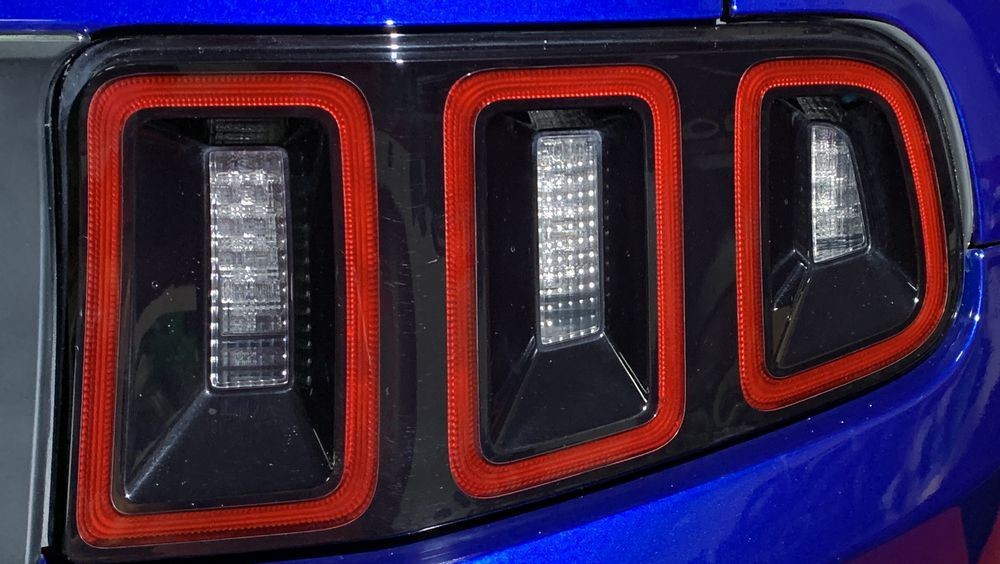
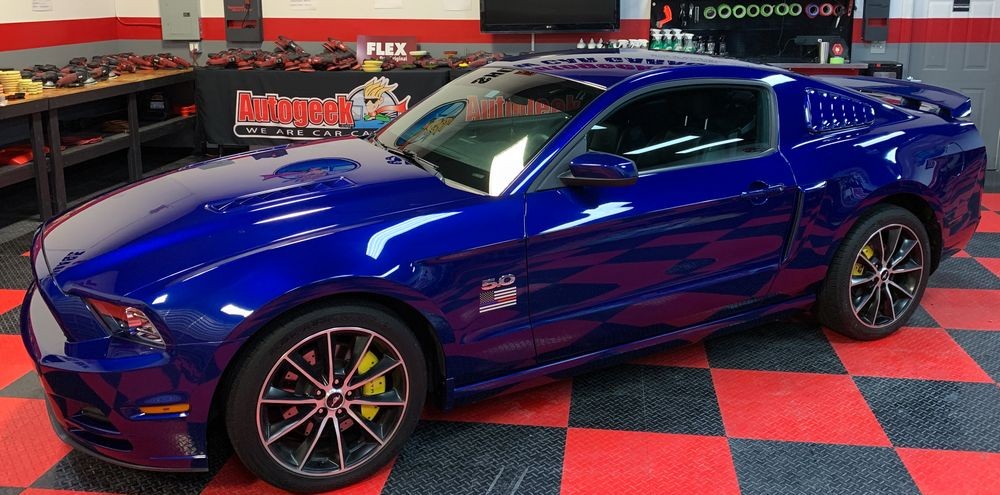
Final results...

Comments...
When the car was first dropped off, I was a tick busy so I didn't look it over very carefully. From a casual glance, it looked like a Mustang in dire need of washing. AFTER washing - that's when I could really take a closer look and inventory of just how bad of condition the entire car was on the inside and the outside. (it was a pig pen on the inside). I believe this is the only car in my 30+ years of detailing cars that wanted to walk away from.
In order to remove the bulk of the damage, including buffing out all the water spotted/stained glass and the louvers on the sides of the cars, I basically turned the BEAST up to the 6 speed setting and then PUSHED down on the head of the tool harder than I've ever pushed. When I went home that night my wrists hurt. They were sore the next day. This has never happened to me in my entire life.
One thing for sure, BLACKFIRE One Step made the magic happen. This was a one-step detail job and reality is - it needed to be compounded HARD. Instead, I just BF One Stepped it hard and the abrasive technology, plus the foam pad plus the 8mm gear-driven BEAST did what they always do.
On Autogeek.com
BLACKFIRE One Step 32 oz.
6.5 inch Lake Country Force Hybrid Orange Cutting Pad
The BEAST!
NOTE
FLEX is going to discontinue the original BEAST. They are already in the process. If you want one of the original FLEX XC 3401 VRG polishers aka The BEAST! - Then you better get one while the getting is good.
If do buy one, or if you already own one - I highly recommend you stock up on spare backing plates. The tool will outlive you. But the backing plates are "Wear Items". This means they do wear out. Currently Autogeek and I think all of North America is OUT OF STOCK when it comes to the 5.5" factory BEAST backing plate.
But... there is a shipment coming in the next few weeks. Again - get one or two while the getting is good.
Flex XC 3401 VRG 5.5 inch Backing Plate

This is without a doubt, not only the most hacked-up Mustang I've ever detailed but possibly the most hacked-up car I've ever detailed.
This was the second car I detailed in one day. The first was a Mercedes-Benz SUV, so a full day's work. By the time I got to the Mustang I was pretty tired, so I didn't take many pictures. I did take a before video and an after video. These are hosted on my Facebook page so click the links to watch the videos. They are both short and worth watching. Especially the BEFORE video.
Here's the before,
BEFORE Video - 2013 Mustang
Here's the after,
AFTER Video - 2013 Mustang
The car was in such bad shape that I actually called the owners 2-3 times to tell them I simply didn't want to do the job. I couldn't reach them however so I stuck to my word and knocked it out.
Here's the few pictures I did take...
This is the trunk lid, just behind the rear window.
about 70% of the car body panels looked like this. Oxidized to the point of turning white. Stained all over the place and filled with swirls and scratches.
The plastic tail light housings were just as scratched-up as the paint. They were so bad. For the life of me - I couldn't figure out how someone could do this outside of washing them with a Brillo Pad?
Here's after BLACKFIRE One Step...
What I did was finger paint some BLACKFIRE One Step all over the plastic then shoved the Lake Country 6.5" orange foam cutting pad against it and buffed every portion of these tail lights I could shove the spinning foam against. Real caveman style.
Here's everything I used...
Final results...
Comments...
When the car was first dropped off, I was a tick busy so I didn't look it over very carefully. From a casual glance, it looked like a Mustang in dire need of washing. AFTER washing - that's when I could really take a closer look and inventory of just how bad of condition the entire car was on the inside and the outside. (it was a pig pen on the inside). I believe this is the only car in my 30+ years of detailing cars that wanted to walk away from.
In order to remove the bulk of the damage, including buffing out all the water spotted/stained glass and the louvers on the sides of the cars, I basically turned the BEAST up to the 6 speed setting and then PUSHED down on the head of the tool harder than I've ever pushed. When I went home that night my wrists hurt. They were sore the next day. This has never happened to me in my entire life.
One thing for sure, BLACKFIRE One Step made the magic happen. This was a one-step detail job and reality is - it needed to be compounded HARD. Instead, I just BF One Stepped it hard and the abrasive technology, plus the foam pad plus the 8mm gear-driven BEAST did what they always do.
On Autogeek.com
BLACKFIRE One Step 32 oz.
6.5 inch Lake Country Force Hybrid Orange Cutting Pad
The BEAST!
NOTE
FLEX is going to discontinue the original BEAST. They are already in the process. If you want one of the original FLEX XC 3401 VRG polishers aka The BEAST! - Then you better get one while the getting is good.
If do buy one, or if you already own one - I highly recommend you stock up on spare backing plates. The tool will outlive you. But the backing plates are "Wear Items". This means they do wear out. Currently Autogeek and I think all of North America is OUT OF STOCK when it comes to the 5.5" factory BEAST backing plate.
But... there is a shipment coming in the next few weeks. Again - get one or two while the getting is good.
Flex XC 3401 VRG 5.5 inch Backing Plate