More...
After about 4 section passes most products are going to become clear films on the surface, if you over use any product then you'll still see lots of product on the paint, so be careful not to over use or under use product.
See this article,
Wet Buffing Technique
Wet film behind your path-of-travel
Originally Posted by
fordlexus 
It seemed like it was hard to buff off the megs with a MF cloth when i was done even the lotion. So i wasnt sure if i worked it too long or vice versa.
Meguiar's M02 can be a little gummy to wipe off if worked too long with a DA on paint so watch to make sure you don't go to a dry buff and when you go to wipe it or any stubborn product off take little swipes off instead of trying to wipe off huge chunks, your microfiber towel will have more leverage over the hold the product has on the paint making wiping off any product easier. (I show wiping techniques in all our classes)
Originally Posted by
fordlexus
I believe im using the right amount of product, i prime the pad with product first, then put the amount shown on the videos on the pad.
If you prime your pad first then you don't need to place a circle pattern or x-pattern of product on the face of the pad, just use 3-4 pea sized or dime sized drops or dollops of product.
See this article,
How to prime a foam pad when using a DA Polisher
Excerpt...
Adding "Working Product" to the primed pad
Some people will recommend 3 to 4 pea size drops of product as the proper amount of product to use and this can be correct for
concentrated products or working small sections and if you follow this advice make sure you are not
under-lubricating the surface being worked.
Pea size drops of product
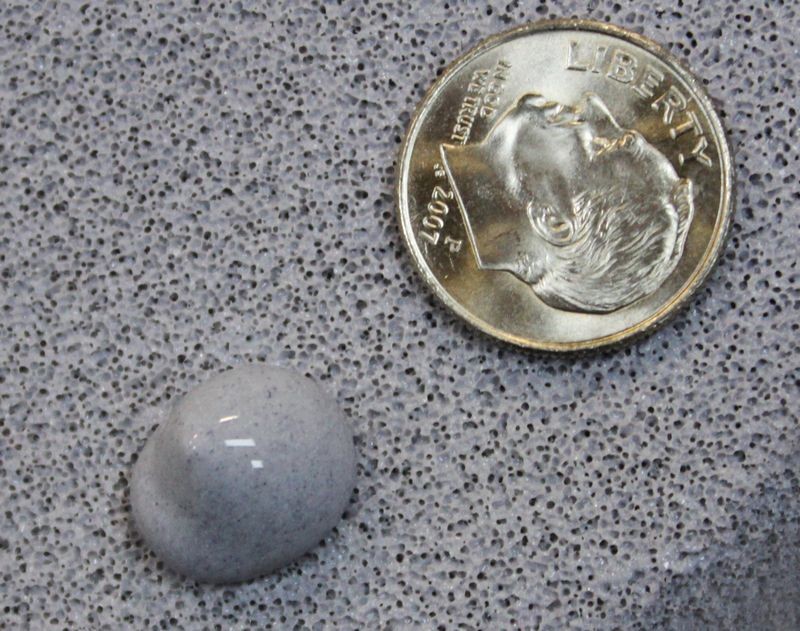
For some products and paint conditions, you may want more product on the surface working for you. Here's an example of dime size drops of product.
Dime size drops of product
Originally Posted by
fordlexus
Is one application of product on the pad good for one whole section pass or do i need to add more as im going? Thanks in advance.
After working a section, wipe the residue off and inspect the paint. If the defects are removed to your satisfaction then you can move on. If you still see some room for improvement, then,
- Repeat the process
- Switch to a more aggressive pad
- Switch to a more aggressive product
The most important thing you can do is a Test Spot, that is test out your "process" to one section of paint and make sure you can make this one section of paint look GREAT!
If you can, then repeat the process to the entire car. If you can't, then come back here and tell us what you're experiencing and we'll see you through to success. (kind of like what you're doing now)
Also see this article, I posted it yesterday...
DA Polisher Articles - Help for Newbies to Machine Polishing
Here's an excerpt...
Removing swirls and polishing to a high gloss
Typical speeds for most procedures using most DA Polishers
5-6 Speed setting for removing swirls
4-5 Speed setting for polishing after swirls are removed
3-4 Speed setting for machine applying a wax.
For your test spot I always recommend using a
Tape-Line when doing your testing as it will make it very easy for your eyes to detect changes, which usually mean improvements in the test area and gauge how effectively your pads, products, tool and techniques are working on this particular paint system.
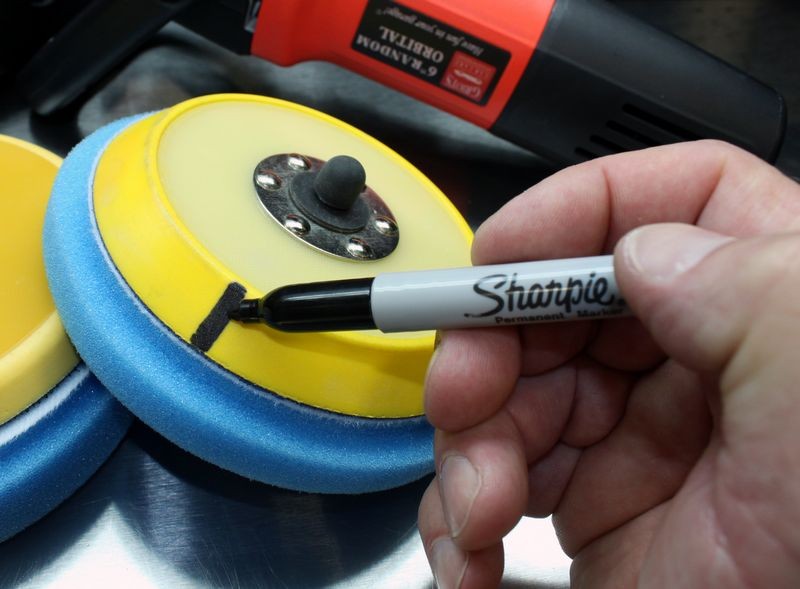
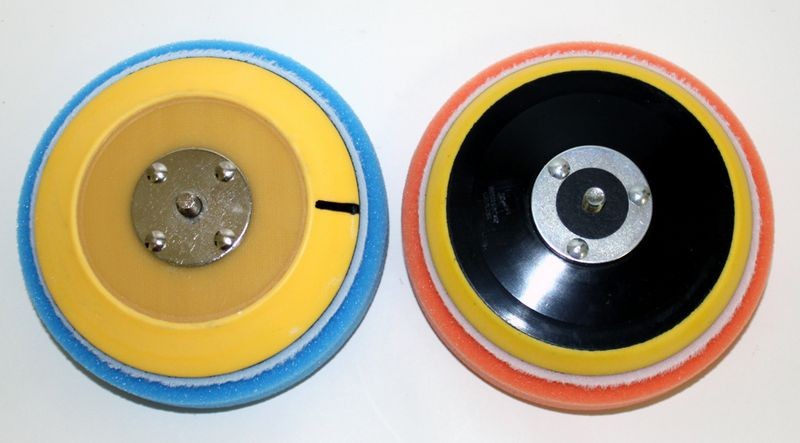
Also, mark the back of your backing plate with a black felt marker like you see below as this will help you to see when the pad is rotating or just vibrating. When you're trying to remove swirls you need the pad rotating.
")