Newbie with single stage paint

daryl_keys

New member
Joined
Apr 23, 2013
Messages
2
Reaction score
0
Hello, I am brand new to this site. I have done some searching, but can't find exactly what I am looking for so I will roll it out to the team. I have little to no experience in auto detailing. I have a '68 Firebird with single stage burgandy paint. It appears to have a metal flake in it (could only see that after clay bar and wax). It is oxidized with moderate swirl marks. The paint has dings and scratches in it that I am not worried about. What I want to do is work on technique while I have the old paint so that I can maintain it when I get it painted. If I screw something up, so be it.

So, I am looking to get a DA but want some advice on what compounds/polishes I should be looking for to use on the single stage paint. I am hoping there is a kit I can buy from here as opposed to piecemeal, but whatever it takes.

Can I get some reccomendations on tools/polishes to take me through the different steps from swirl removal, polish, wax etc.
 
I'm on my phone so I can't find it fast, but look up Mike's guide to single stage paint. It worked for my car and gives great results if you follow his steps.

Sent from my Dell Streak using AG Online
 
Hello, I am brand new to this site. I have done some searching, but can't find exactly what I am looking for so I will roll it out to the team. I have little to no experience in auto detailing. I have a '68 Firebird with single stage burgandy paint. It appears to have a metal flake in it (could only see that after clay bar and wax). It is oxidized with moderate swirl marks. The paint has dings and scratches in it that I am not worried about. What I want to do is work on technique while I have the old paint so that I can maintain it when I get it painted. If I screw something up, so be it.

So, I am looking to get a DA but want some advice on what compounds/polishes I should be looking for to use on the single stage paint. I am hoping there is a kit I can buy from here as opposed to piecemeal, but whatever it takes.

Can I get some reccomendations on tools/polishes to take me through the different steps from swirl removal, polish, wax etc.


Hi Daryl,

The article referenced above, is actually the only article of it's kind and that's because all my life it's been my passion to restore the original paint on antique cars to preserve the paint instead of having to repaint the car.


The Secret to Removing Oxidation and Restoring a Show Car Finish to Antique Single Stage Paints


Here's the key portion but the entire article is an indepth read on this topic. This is especially true for single stage metallic paints which I point out in the very beginning of the article.


Removing Oxidation Without Abrasives
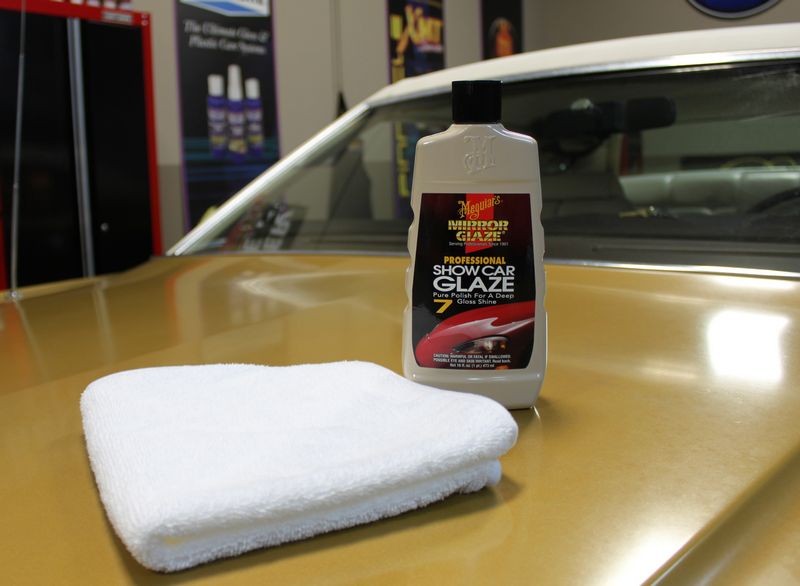
Now that all the bonded contaminants have been removed off the top of the paint it's time to remove the dead oxidized paint off the surface and to some degree some of the embedded dirt and oxidation below the surface. To do this we're going to use a plush, microfiber polishing towel with some Meguiar's #7 Show Car Glaze.


Always fold your microfiber towels 4 ways
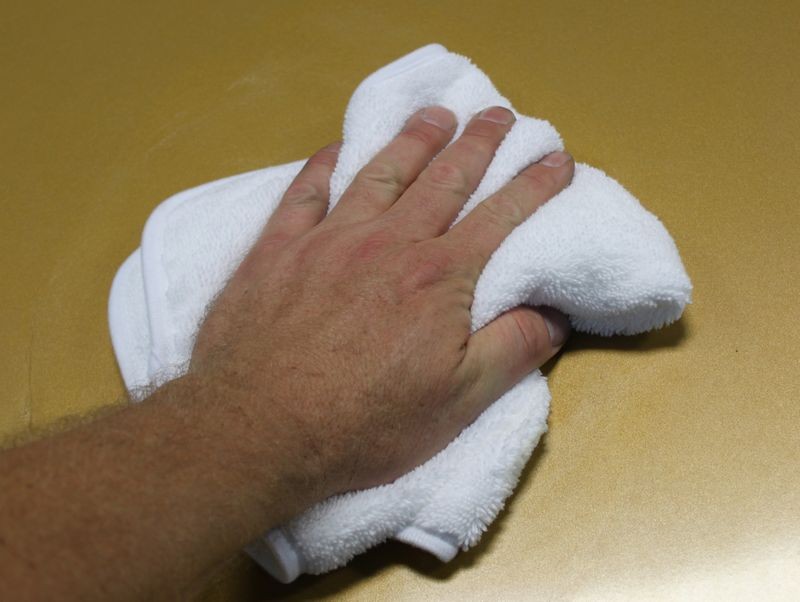
What you want to do is take your polishing towel and fold it 4 ways to create a working cloth that is large enough you can place you hand on it when working the #7 over the paint. Folding the cloth 4 ways will also provide plenty of cushion to spread out the pressure of your fingers and palm. This enables you to work gently and safely on antique, fragile paints and will also help you to avoid instilling fingermarks.

NonAbrasiveMethod011.jpg


Non-abrasive abrasives...
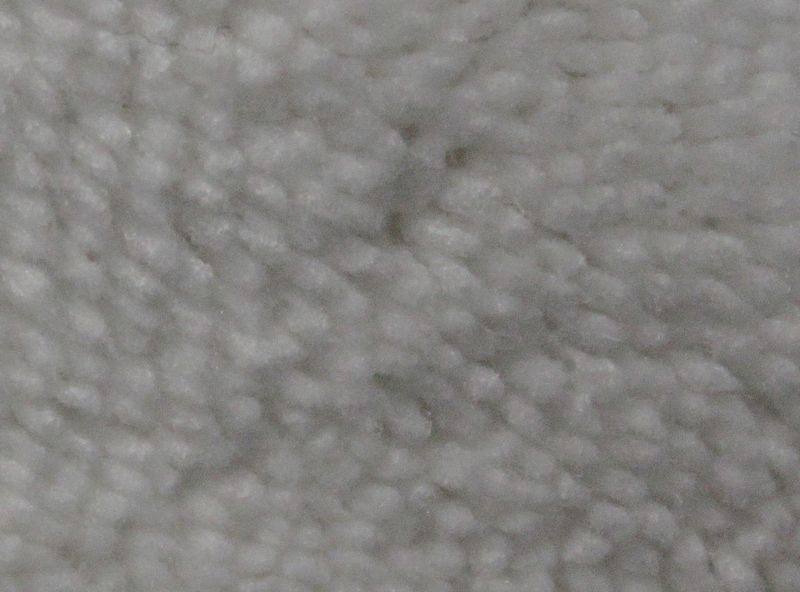
Here's a close-up of the tufts of microfibers that make up the working face of this microfiber polishing towel. When used dry this microfiber polishing towel is soft and absorbent. The way we're going to use it however, it will still be soft and gentle to the paint except that I'm going to put a little passion behind my hand as I move this microfiber towel over the paint and the pressure I apply is going to engage the microfibers with the paint and provide a very gentle scrubbing and even abrading action.


Tufts of microfiber threads... these are your abrasives...
NonAbrasiveMethod034.jpg


Shake well before using
Shake your bottle of #7 up exceedingly well. One of the reasons #7 used to come in clear glass bottles and later clear plastic bottles was so that you could see that the product had separated out and the hope was that as a thinking human being you would see the product had separated in the bottle and thus shake the bottle till the product had a uniform color and consistency.

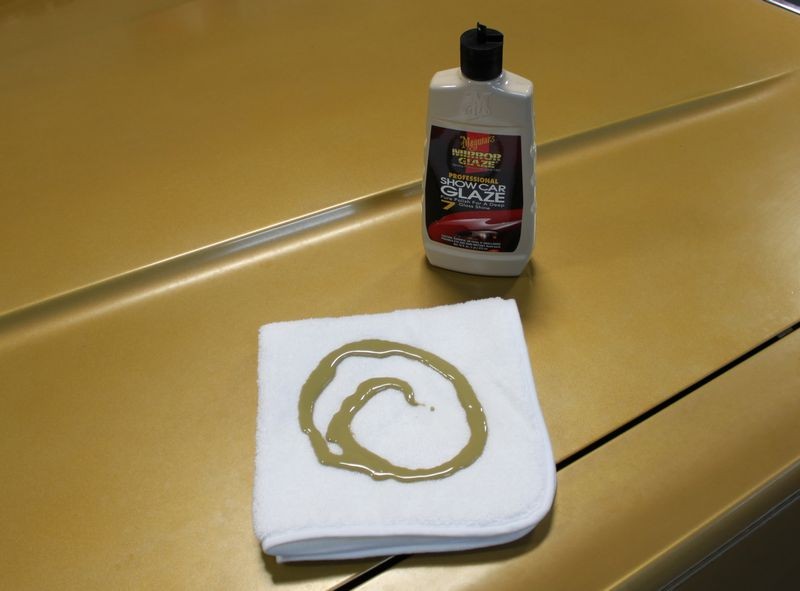
After you shake the product up well you want to pour a generous amount of product out onto the face of just one side of your folded microfiber towel and note that you're going to use this one side for each panel over the entire car.

The words or terms for how much product you use goes like this,

Use the product heavy or wet

Because this is important, let me repeat these instructions...

Use the product heavy or wet!

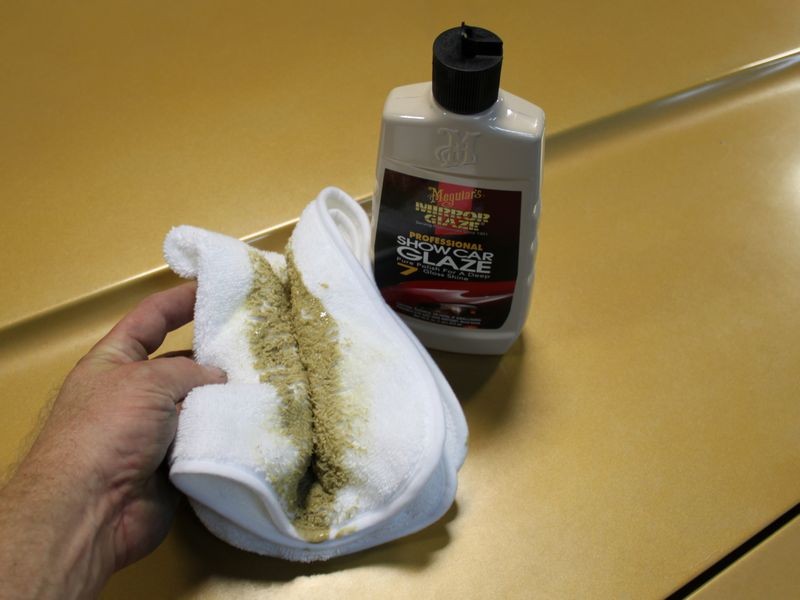
This means you use a lot of product, you want the surface wet with product as you're working a section. You're trying to saturate the paint to gorge it with the rich polishing oils found in the #7 but you're also trying to emulsify and loosen any embedded dirt or oxidation off and out of the paint. For this car I used one full bottle on just the hood and the top of the trunk lid and most of another bottle for the passenger and driver's sides. The horizontal surfaces are always the worst because they are exposed to direct sunlight, water from rain and air-borne pollution and contaminants and thus always require the most work to clean, revitalize and restore.

NonAbrasiveMethod012.jpg


Fold the cloth into itself to spread the product out and wet the face of the cloth.
NonAbrasiveMethod013.jpg


"It ain't braggin' if you can back it up" -Dizzy Dean

Now comes the passion: Start working the #7 Show Car Glaze over and into the paint in a vigorous manner. I'm in pretty good shape as I work out at the local gym and lead an active lifestyle that includes rubbing out cars both by hand and by machine.

I also dare say I'm pretty good at rubbing out cars by hand. I'm not bragging, just stating a fact that I can back up. It's more work than most people think and my point is this, rubbing this behemoth of a vehicle out by hand vigorously got me breathing hard and made my hands and arms tired.

Here's the point I'm trying to make...

If you're not breathing hard and you're not getting tired then you're not working the product over the paint vigorously enough.

Out of all the steps, this is the hardest, most time-consuming and most important step there is to do and it is this step that will determine your end results. If you don't remove the topical oxidation and embedded dirt and oxidation during this step then it will still be there when you make the final wipe to remove the wax. So put your heart and soul into this step. If you need to, take a break in-between panels.


It is vital that you work the #7 against the paint vigorously...
NonAbrasiveMethod014.jpg


Rub out one panel at a time
After you work a small section, about 20" squarish or so, stop, re-apply fresh product and move onto a new section and be sure to overlap a little into the previous section.

  • Panel = a door, the hood, the roof, etc.
  • Section - a portion of a panel
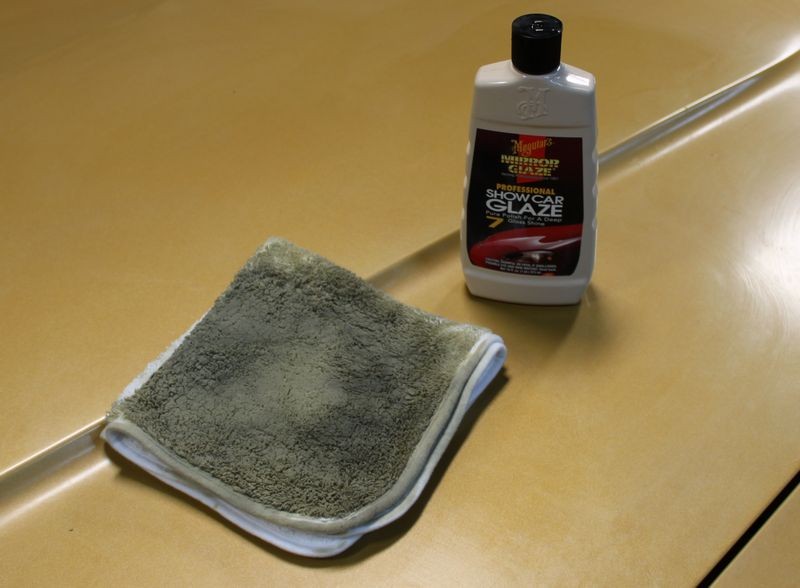
Note the color being transferred onto the cloth. Part of the color you see is the color of the #7. The other part of the color is the dirt coming off and out of the paint and part of the color is the oxidation coming off the aluminum flakes.

NonAbrasiveMethod015.jpg


Work a panel at a time, section by section
Continue working your way around one major panel until you've worked the entire panel. In this example


This is key...
Saturation Application --> The First Application
This is a mostly unknown technique and that is to let the first application penetrate and soak into the paint for up to 24 hours before wiping the product off. The idea being to really apply the product wet and work it in really well and the walk away.

The idea is to allow the heavy concentration of oils to penetrate and seep into the paint for maximum saturation before removing the product and continuing with the process. In this case I finished applying the first application of #7 around 9:00 pm and then left the #7 to soak in until the next day. I started wiping the product off then next morning right about 10:00am.

Some will argue if this works or not but my experience is that with a porous single stage paint it does in fact help. One thing for sure it can't hurt.

Paper Test for Capillary Action
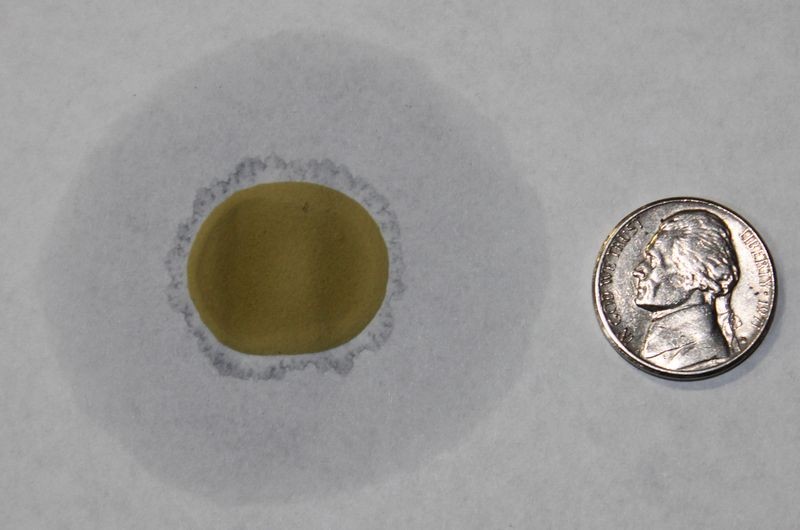
If you place a few drops of #7 onto a piece of paper and then monitor it over a few days you will see the oils in the #7 migrate or seep away from the actual drop of product. It does this through capillary action and the same thing can work to your car's paints' advantage if it's a single stage lacquer or enamel paint.

I placed a few drops about the size of a nickel on a piece of standard printer paper around 3:00pm.

7CapillaryAction01.jpg


The next day I took these pictures at approximately 10:00am, (19 hours later), note how the oils in the drops of #7 have migrated outward via capillary action.

7CapillaryAction02.jpg


Feeder Oils penetrate or feed the paint
This same effect can take place in a single stage paint but not only will the oils travel horizontally, they will also travel vertically, that they will penetrate downward "into" your car's paint and this is where the term feeder oils comes from as the oils penetrate into or feed the paint. The result is they will condition the paint restoring some level of workability as compared to just working on old dry paint, and they will also bring out the full richness of color, something that will showcase the beauty of your car's paint.

:)
 
Last week I used this same technique for Wayne Carini on a car he's been chasing since he was 16 years old. I have not had time to put up the pictures showing,

  • Before
  • Process
  • After
Hope to get to it soon. Here's the car when I first arrived...


All Original 1954 Hudson Hornet
This is a 1954 Hudson Hornet that Wayne has been chasing since he was 16 years old, that's over 40 years that he's been chasing this one-owner car and his persistence finally paid off.

One of the things Wayne had me do while I was there was to show him my method for restoring antique, original single stage paint like on this Hudson Hornet. The paint is old, dry and brittle and what most "detailers" do is attack it with a compound and destroy the paint causing the owner to have to re-paint the car which is the last thing they want to do. Later I'll share some pictures of how this beauty came out...
Wayne_Carini_Shop_Call_Autogeek_018.jpg


Wayne_Carini_Shop_Call_Autogeek_019.jpg


You can also find the above article published on AutoTraderClassic.com


Articles Published on AutoTraderClassic.com

Polishing Old School Aluminum Slotted Mag Wheels

Restoring Single Stage Paint


Too often a person will simply scan the article and miss the point of the article, I would recommend taking some time to thoroughly read through it if preserving the original paint is important to you.


:)
 
It is oxidized with moderate swirl marks. The paint has dings and scratches in it that I am not worried about. What I want to do is work on technique while I have the old paint so that I can maintain it when I get it painted. If I screw something up, so be it.

And that's the point of my article here...

"Taking your car's paint to it's maximum potential"


So, I am looking to get a DA but want some advice on what compounds/polishes I should be looking for to use on the single stage paint. I am hoping there is a kit I can buy from here as opposed to piecemeal, but whatever it takes.

Can I get some recommendations on tools/polishes to take me through the different steps from swirl removal, polish, wax etc.


I'd recommend getting the PC with 5.5" Flat Pads. This is what I recommend in the first and now second edition of my how to book for anyone moving up to machine polishing.


Mike Phillips’ The Complete Guide to a Show Car Shine Paperback Book

Second_Edition_How_To_Book.jpg


Get Orange, White and Black foam pads, as many of the orange and white as your budge allows. More pads is always better at least for the first step of removing oxidation.


I used Pinnacle Advanced Swirl Remover and Advanced Finishing Polish followed by Pinnacle Souveran Paste wax on Wayne's 1954 Hudson Hornet.


Wayne Carini 1954 Hudson Hornet Original Paint Restored by Mike Phillips

Mike_Phillips_Wayne_Carini_006.jpg


:)
 
WOW! Thanks for the info. I read the articles. Now I will need to go back and re-read to make sure I am comprehending things fully. I'm sure I'll be back to ask a further question here or there.
 
WOW! Thanks for the info. I read the articles. Now I will need to go back and re-read to make sure I am comprehending things fully. I'm sure I'll be back to ask a further question here or there.


Sounds good Daryl,


I get a lot of PM's and e-mails about my article on restoring single stage paint and one of the more common things I see is people don't read the part about this technique being for

Antique original singles stage paints or simply older single stage paints, where the car and the paint are IMPORTANT to the owner to preserver. Thus they are willing to do "extra" steps in their effort to restore and preserve the paint.


For newer single stage paints a lot of guys just compound them and bring them back and that's perfectly fine, but they're not the people nor are "their" projects the people I wrote the article for...


:D
 
I am easily confused, so bear with me on my stupid question on the order of things. Does it go: Clean it, clay bar it, 7 it multiple times, polish it (if you dare), then wax it? "It" is an '82 Z28 in dark blue metallic. It's in really good shape as I purchased it, but it could benefit from brightening up. However, I don't want to make it worse.
 
I am easily confused, so bear with me on my stupid question on the order of things. Does it go: Clean it, clay bar it, 7 it multiple times, polish it (if you dare), then wax it? "It" is an '82 Z28 in dark blue metallic. It's in really good shape as I purchased it, but it could benefit from brightening up. However, I don't want to make it worse.

Better to ask than make a mistake. You have the steps correct. If you think your paint is already in good condition, then you may only apply the M#7 once or twice. It isn't set in stone.
 
Better to ask than make a mistake. You have the steps correct. If you think your paint is already in good condition, then you may only apply the M#7 once or twice. It isn't set in stone.

I appreciate it!

I am a novice at this, pretty much. I have done some work on a couple clear coat cars, but never done anything on a single stage metallic car. Do you think I should stay away from trying to polish it? Or stay away from it altogether, and let a pro do it?

I just haven't had good luck with the local guys. I figured, if it's going to get screwed up, I might be happier if I only had myself to blame! If you do think I am ok to take a crack at it, what kind of polish would be appropriate? It has some oxidation/water marks I noticed, but not to a significant degree. Hopefully they will not be too difficult to take care of.

I would wait until you've applied a couple coats of the M#7 before deciding if it needs polish or if you want to go straight to a wax/sealant. You can always try polishing a small section by hand to start with.
You'll read a lot on here about using the least aggressive method first. If polishing with a DA, use a light cut polish on a finishing pad and check the results.

Several brands to choose from. M205 is a basic polish which AG sells or can be purchased at local stores. At this point, it's not so much the product as it is the technique.

I can't tell you if you should have a pro do it or not. If we never try then we never learn. Take it easy and go light near the edges.

Thanks again! Fingers crossed that the #7 does the trick. Polishing scares me! I may try to get some good before pics, and post them in here. I'd love to hear any opinions about how to proceed. I'm looking forward to this project, but I don't want to end up regretting it!
 
I am easily confused, so bear with me on my stupid question on the order of things. Does it go: Clean it, clay bar it, 7 it multiple times, polish it (if you dare), then wax it?

That will work but if it were me and it is truly oxidized single stage paint then I would

Clean it
#7 it
Wax it

You can clay it but if it's single stage paint the clay bar will simply load up with dead paint. Not a bad thing but chances are rubbing multiple times with #7 will remove most contaminants because as you rub off the dead paint the contaminants will come off with the dead paint.

"It" is an '82 Z28 in dark blue metallic.

The first domestic built car to get a basecoat/clearcoat paint job was the Corvette in 1982.

IF you have a copy The art of Detailing look on pages 7 and 8.

If you have a copy of The Complete Guide to a Show Car Shine look on pages 5 and 6.


I document this in both of these books with pictures of me working on a 1980 Corvette as the guest speaker for the NCRS or National Corvette Restoration Society.


It's in really good shape as I purchased it, but it could benefit from brightening up. However, I don't want to make it worse.

IF it's single stage then #7 will bring out the full richness of color and wax will seal the surface and max out the gloss and shine.

If it's a basecoat/clearcoat paint system then the #7 will likely help if the clearcoat is old.

Have you tested the paint to confirm if it's single stage or clearcoated?

How to Test for Single Stage or Clear Coat Paint


As long as your careful you shouldn't have any problems hand polishing the paint on this car or using really safe machines like the Porter Cable 7414XP

See this thread,

It's not that hard...


:)
 
That will work but if it were me and it is truly oxidized single stage paint then I would

Clean it
#7 it
Wax it

You can clay it but if it's single stage paint the clay bar will simply load up with dead paint. Not a bad thing but chances are rubbing multiple times with #7 will remove most contaminants because as you rub off the dead paint the contaminants will come off with the dead paint.


The first domestic built car to get a basecoat/clearcoat paint job was the Corvette in 1982.

IF you have a copy The art of Detailing look on pages 7 and 8.

If you have a copy of The Complete Guide to a Show Car Shine look on pages 5 and 6.


I document this in both of these books with pictures of me working on a 1980 Corvette as the guest speaker for the NCRS or National Corvette Restoration Society.


IF it's single stage then #7 will bring out the full richness of color and wax will seal the surface and max out the gloss and shine.

If it's a basecoat/clearcoat paint system then the #7 will likely help if the clearcoat is old.

Have you tested the paint to confirm if it's single stage or clearcoated?

How to Test for Single Stage or Clear Coat Paint


As long as your careful you shouldn't have any problems hand polishing the paint on this car or using really safe machines like the Porter Cable 7414XP

See this thread,

It's not that hard...


:)


Mike I know you preach #7 for single stage paint jobs.

I wanted to ask you what is the benefit to using #7 over a fine polish like menzerna 3500 or menzerna 3800?
 
Daryl, another thing mentioned that surprised me some years ago on my very first single stage job was the color of the paint will be seen on your towels, pads etc. DON'T BE ALARMED (as i was!). Its a function of that single stage paint being exposed to what you are doing with it. The same thing actually happens to clearcoated finishes but because the clear does not have pigment, you don't see it.
 
That will work but if it were me and it is truly oxidized single stage paint then I would

Clean it
#7 it
Wax it

You can clay it but if it's single stage paint the clay bar will simply load up with dead paint. Not a bad thing but chances are rubbing multiple times with #7 will remove most contaminants because as you rub off the dead paint the contaminants will come off with the dead paint.


The first domestic built car to get a basecoat/clearcoat paint job was the Corvette in 1982.

IF you have a copy The art of Detailing look on pages 7 and 8.

If you have a copy of The Complete Guide to a Show Car Shine look on pages 5 and 6.


I document this in both of these books with pictures of me working on a 1980 Corvette as the guest speaker for the NCRS or National Corvette Restoration Society.


IF it's single stage then #7 will bring out the full richness of color and wax will seal the surface and max out the gloss and shine.

If it's a basecoat/clearcoat paint system then the #7 will likely help if the clearcoat is old.

Have you tested the paint to confirm if it's single stage or clearcoated?

How to Test for Single Stage or Clear Coat Paint


As long as your careful you shouldn't have any problems hand polishing the paint on this car or using really safe machines like the Porter Cable 7414XP

See this thread,

It's not that hard...


:)

Thanks Mike! I did test it to make sure it was single stage (because I was praying it wasn't), and unless I screwed up the test, it is. The paint doesn't feel rough at all to my fingertips, but with the plastic bag on my hand, the bumps are easy to feel. I do like the idea of seeing if the #7 does the job as you said. That would be very nice. If it ends up not removing the imperfections, can I then go back and clay bar it without problems and start over? I plan to try your plan first anyway. The paint really isn't in bad shape at all. Does just the first coat need to sit the 12-24 hours, or should each coat be done that way? Is there a Dodo Juice color you recommend for dark blue paint, or another wax you recommend for this paint?

I took some before pictures. I doubt they are very high quality. I will post them once I figure out how!

Thanks again guys.
 
Back
Top