Not getting any results

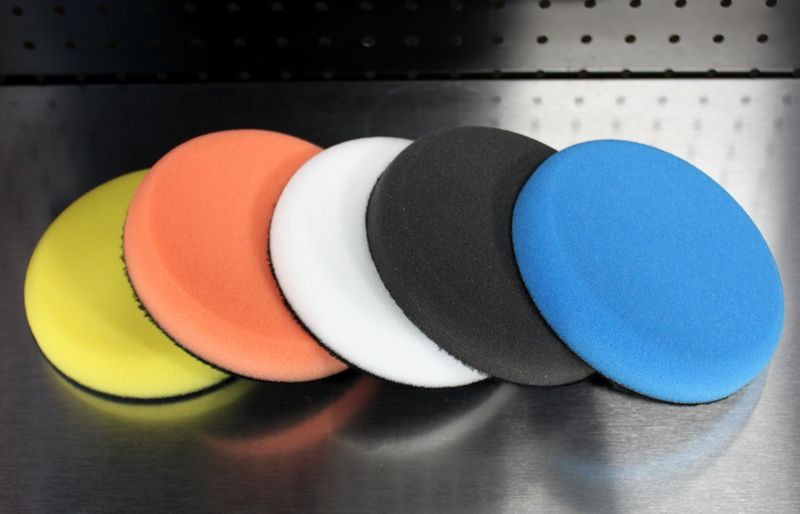
Trust me VW paint is really hard. I used Chemical Guys V34 with an orange pad to remove swirls from a Blue Golf R recently. It removed the surface swirls, but didn't touch the scratches. On my car I use Wolfgang UC and it works really well combined with an orange pad. You just need to go more aggressive with your combo is all.
 
Well it looks like I'm going to try again this weekend using more pressure and working a smaller area, and if need be, upping it to the m105. Thanks so much for all of your help guys! I'll update afterwards with the results.


Sent from my iPhone using Tapatalk
 
I don't know about every one else but I really don't like UP or UC. I once used the UP when I was just starting out and didn't really know what I was doing and really saw no results. I just did a paint correction on my truck and didn't have any compound so I used the UP again. Now that I know what I'm doing I figured the first time I used it I had no success because I didn't know the right way to do things so it should work this time. Nope same thing. I mean I got it to work but it took forever even with a MF cutting pad. Try m105.

Sent from my HTC6435LVW using AG Online

I think the results may differ based on paint. I've been able to get good results on soft Toyota and Subaru paint with just UP on a white pad.

Trust me VW paint is really hard. I used Chemical Guys V34 with an orange pad to remove swirls from a Blue Golf R recently. It removed the surface swirls, but didn't touch the scratches. On my car I use Wolfgang UC and it works really well combined with an orange pad. You just need to go more aggressive with your combo is all.

Agree. I did my VW this weekend and to correct the worst of the swirls and random scratches, I had to hit it with Blackfire SRC Compound on an orange pad. I believe that product is pretty similar to the Wolfgang UC. Minor swirls came out with the SRC Finishing Polish, but the deeper stuff took a more aggressive approach.
 
Most VW's have very hard paint. Generally speaking, an orange pad is overrated as far as cut. It's nothing more than a heavy polishing pad. You need to reduce your backing plate size to 5" with use of 5.5" MF pads and a good compound. This will help for sure.

I will say, to see NO improvement after UC and an orange pad, I think technique factors in a bit.

Where do you live?


Would you suggest the yellow pad for cutting then? I have a 3.5" BP and 4" pads as well. And I know now that my technique was off, I wasn't applying enough pressure to the polisher. I'm in the northwest Chicago suburbs btw


Sent from my iPhone using Tapatalk
 
Well the thing is, you can use a more aggressive cutting pad for a faster cut. However, you should still be able to get results, albeit at a slower rate, with a stiff foam pad. Me thinks products are only half the equation, modifying your technique can be the other half.

Once you get into MF pads, you have other variables. The fibers have to be clean and fluffed up and the pads may be more sensitive to getting destroyed by heat - maybe not the best thing for a noob. Also, foam will likely finish better than MF - all things being equal.

If it was me and you were asking my advice, I would tell you to go slower, shrink your area, and stick with foam if your a noob and working on your own cars. Learn on foam - then move up to MF if you want to work faster in the future.
 
With a 6.5" pad on a PCXP, you're not going to be able to apply a good amount of pressure without the pad stalling or stopping. At that point, you're getting no correction anyway. Just make sure you're still getting pad rotation with the amount of pressure you're using. It doesn't have to spin super fast.

Well the thing is, you can use a more aggressive cutting pad for a faster cut. However, you should still be able to get results, albeit at a slower rate, with a stiff foam pad. Me thinks products are only half the equation, modifying your technique can be the other half. Crank it up to speed 6 for sure!

Once you get into MF pads, you have other variables. The fibers have to be clean and fluffed up and the pads may be more sensitive to getting destroyed by heat - maybe not the best thing for a noob. Also, foam will likely finish better than MF - all things being equal.

If it was me and you were asking my advice, I would tell you to go slower, shrink your area, and stick with foam if your a noob and working on your own cars. Learn on foam - then move up to MF if you want to work faster in the future.
Good advice.
 
Read through this, make sure you're not making any of the common mistakes...


DA Polisher Trouble Shooting Guide


Tyler, age 15 removing swirls using a Porter Cable 7424XP Dual Action Polisher
1965Plymouth035.jpg


When you're first starting out machine polishing and learning to use a DA Polisher it's common to have questions about your results and your results are directly tied to your technique.

Here's a list of the most common problems,

1. Trying to work too large of an area at one time.

2. Moving the polisher too fast over the surface.

3. Using too low of speed setting for removing swirls.

4. Using too little downward pressure on the head of the polisher.

5. Using too much downward pressure on the head of the polisher so the pad quits rotating.

6. Not holding the polisher in a way to keep the pad flat while working your compound or polish.

7. Using too much product or using too little product.

8. Not cleaning the pad often enough.
Here's a list of the solutions in matching order,

1. Trying to work too large of an area at one time.
Shrink the size of your work area down. You can't tackle to large of an area at one time. The average size work area should be around 20" by 20". Most generic recommendations say to work an area 2' by 2' but for the correction step, that's too large. You have to do some experimenting, (called a Test Spot), to find out how easy or how hard the defects are coming out of your car's paint system and then adjust your work area to the results of your Test Spot. The harder the paint the smaller the area you want to work.


2. Moving the polisher too fast over the surface.
For removing defects out of the paint you want to use what we call a Slow Arm Speed. It's easy and actually natural for most people new to machine polishing to move the polisher quickly over the paint but that's the wrong technique. One reason I think people move the polisher too quickly over the paint is because they hear the sound of the motor spinning fast and this has psychological effect which causes them to match their arm movement to the perceived fast speed of the polisher's motor.

Another reason people move the polisher too quickly over the paint is because they think like this,

"If I move the polisher quickly, I'll get done faster"

But it doesn't work that way. Anytime you're trying to remove swirls, scratches, water spots or oxidation using a DA Polisher you need to move the polisher s-l-o-w-l-y over the paint.


3. Using too low of speed setting for removing swirls.
When first starting out many people are scared of burning or swirling their paint, so they take the safe route of running the polisher at too low of a speed setting but this won't work. The action of the polisher is already g-e-n-t-l-e, you need the speed and specifically the pad oscillating and rotating over the paint as well as the combination of time, (slow arm speed), together with the abrasives, the pad aggressiveness, and the downward pressure to remove small particles of paint which is how your remove below surface defects like swirls or scratches.

Removing below surface defects is a leveling process where you need the abrasives to take little bites out of the paint and to get the abrasives to take these little bites with a tool that uses a Free Floating Spindle Bearing Assembly you need all of the above factors working for you including a high speed setting.


4. Using too little downward pressure on the head of the polisher.
For the same reason as stated in #3, people are scared, or perhaps a better word is apprehensive, to apply too much downward pressure to the polisher and the result of too little pressure is no paint is removed thus no swirls are removed.


5. Using too much downward pressure on the head of the polisher so the pad quits rotating.
If you push too hard you will slow down the rotating movement of the pad and the abrasives won't be effectively worked against the paint. You need to apply firm pressure to engage the abrasives against the paint but no so much that the pad is barely rotating. This is where it's a good idea to use a permanent black marker to make a mark on the back of your backing plate so your eyes can easily see if the pad is rotating or not and this will help you to adjust your downward pressure accordingly.

Correct technique means finding a balance of applying enough downward pressure to remove defects but not too much downward pressure as to stop the rotating movement of the pad.

This balance is affected by a lot of factors like the lubricity of the product you're using, some compounds and polishes provide more lubrication than others and this makes it easier to maintain pad rotation under pressure.

Another factor that can affect pad rotation are raised body lines, edges and curved surfaces as anytime you have uneven pressure on just a portion of the face of the pad it can slow or stop pad rotation. This is where experience comes into play and experience comes from time spent behind the polisher.


6. Not holding the polisher in a way to keep the pad flat while working your compound or polish.
Applying pressure in such a way as to put too much pressure to one edge of the pad will cause it to stop rotating and thus decrease abrading ability.


7. Using too much product or using too little product.
Too much product hyper-lubricates the surface and the result is that abrasives won't effectively bite into the paint but instead will tend to skim over the surface. Overusing product will also accelerate pad saturation as well increase the potential for slinging splatter onto adjacent panels.

Too little product will means too little lubrication and this can interfere with pad rotation.

Again there needs to be a balance between too much product and too little product and finding this balance comes from reading articles like this one, watching videos an most important, going out into the garage and putting in time behind the polisher and as you're buffing with specific product and pad combinations, pay attention to pad rotation.


8. Not cleaning the pad often enough.
Most people simply don't clean their pad often enough to maximize the effectiveness of their DA Polisher. Anytime you're abrading the paint you have two things building up on the face of your buffing pad,
  • Removed paint
  • Spent product
As these to things build up on the face of the pad they become gummy and this has a negative affect on pad rotating plus makes wiping the leftover residue on the paint more difficult. To maintain good pad rotation you want to clean your pad often and always wipe-off any leftover product residue off the paint after working a section. Never add fresh product to your pad and work a section that still has leftover product residue on it.


Pad Cleaning Articles

Why it's important to clean your pads often...

How to clean your foam pad on the fly


:)
 
With a 6.5" pad on a PCXP, you're not going to be able to apply a good amount of pressure without the pad stalling or stopping. At that point, you're getting no correction anyway. Just make sure you're still getting pad rotation with the amount of pressure you're using. It doesn't have to spin super fast.


Good advice.


Cool, we'll see how it goes. Thanks again for the tips guys


Sent from my iPhone using Tapatalk
 
Here's a phrase I coined as it relates to dual action polisher like the PC and various spin-offs.....


Thin is in.....

That is thinner pads rotate better as do smaller diameter pads. Want proof? Check out how thin Meguiar's Xtra Cut Microfiber Pads are.... Megs does their homework before they launch a product and Jason Rose and team all know that in order to get cutting power that will reduce the need for the "industry" to quit using rotary buffers and swirling out cars in the production detailing world they need a way to take advantage of ALL the available power in tools like their G110v2, the Porter Cable 7424XP, the Griot's Garage dual action polisher etc. etc. etc...


Here's probably one of the top 10 article I share on the forum and it's because no matter what PC or PC style polisher you purchase you're joint to want and need to buy a 5" backing plate.


Check it out here,

5 inch Backing Plates on Meguiar's, Griot's and Porter Cable DA Polishers


Here's some pictures showing the size of different backing plates on the popular Meguiar's Griot's and Porter Cable DA Polishers.

The Griot's and Meguiar's DA Polishers come with 6" backing plates and the Porter Cable by itself does not come with a backing plate.

If you want to use 5.5" foam pads on any of these tools you'll need to remember to order a separate backing plate when your order your polishers.


From left to right...

Factory Griot's 6" BP, Lake Country 5" BP, Meguiar's 5" BP and 5" Black Heavy Duty BP
5inchbackingpatesonDAPs001.jpg


Lake Country 5" DA Backing Plate <-- Get this one as the Velcro will match Lake Country Pads


Get the below pads to maximize the efficiency of any dual action polisher.


Lake Country

5.5" Flat Pads
5_5FlatPads01.jpg


The outer edge of the face of these pads is tapered so they are actually a little under 5" in diameter
5_5FlatPads02.jpg


5_5FlatPads03.jpg


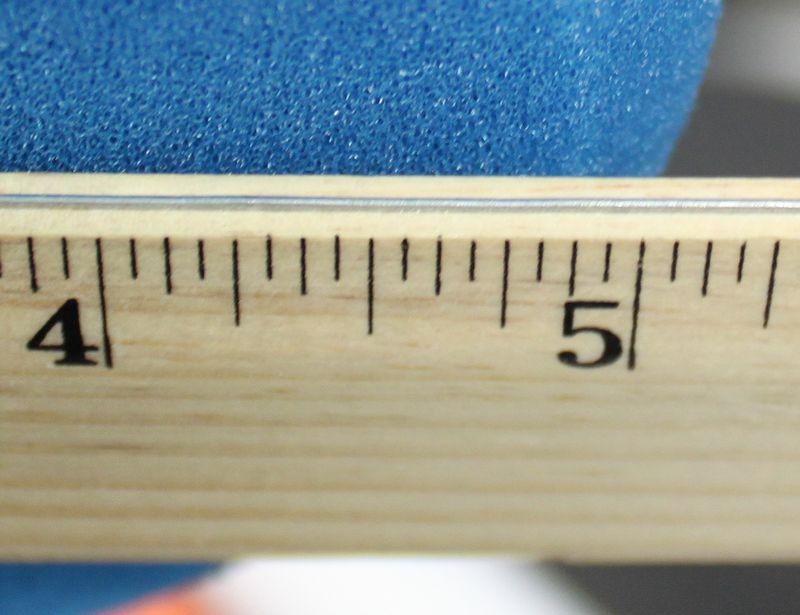
Approximately 7/8" thick
5_5FlatPads04.jpg


Thin is in....


:)
 
Read through this, make sure you're not making any of the common mistakes...


DA Polisher Trouble Shooting Guide


Tyler, age 15 removing swirls using a Porter Cable 7424XP Dual Action Polisher
1965Plymouth035.jpg


When you're first starting out machine polishing and learning to use a DA Polisher it's common to have questions about your results and your results are directly tied to your technique.

Here's a list of the most common problems,

1. Trying to work too large of an area at one time.

2. Moving the polisher too fast over the surface.

3. Using too low of speed setting for removing swirls.

4. Using too little downward pressure on the head of the polisher.

5. Using too much downward pressure on the head of the polisher so the pad quits rotating.

6. Not holding the polisher in a way to keep the pad flat while working your compound or polish.

7. Using too much product or using too little product.

8. Not cleaning the pad often enough.
Here's a list of the solutions in matching order,

1. Trying to work too large of an area at one time.
Shrink the size of your work area down. You can't tackle to large of an area at one time. The average size work area should be around 20" by 20". Most generic recommendations say to work an area 2' by 2' but for the correction step, that's too large. You have to do some experimenting, (called a Test Spot), to find out how easy or how hard the defects are coming out of your car's paint system and then adjust your work area to the results of your Test Spot. The harder the paint the smaller the area you want to work.


2. Moving the polisher too fast over the surface.
For removing defects out of the paint you want to use what we call a Slow Arm Speed. It's easy and actually natural for most people new to machine polishing to move the polisher quickly over the paint but that's the wrong technique. One reason I think people move the polisher too quickly over the paint is because they hear the sound of the motor spinning fast and this has psychological effect which causes them to match their arm movement to the perceived fast speed of the polisher's motor.

Another reason people move the polisher too quickly over the paint is because they think like this,

"If I move the polisher quickly, I'll get done faster"

But it doesn't work that way. Anytime you're trying to remove swirls, scratches, water spots or oxidation using a DA Polisher you need to move the polisher s-l-o-w-l-y over the paint.


3. Using too low of speed setting for removing swirls.
When first starting out many people are scared of burning or swirling their paint, so they take the safe route of running the polisher at too low of a speed setting but this won't work. The action of the polisher is already g-e-n-t-l-e, you need the speed and specifically the pad oscillating and rotating over the paint as well as the combination of time, (slow arm speed), together with the abrasives, the pad aggressiveness, and the downward pressure to remove small particles of paint which is how your remove below surface defects like swirls or scratches.

Removing below surface defects is a leveling process where you need the abrasives to take little bites out of the paint and to get the abrasives to take these little bites with a tool that uses a Free Floating Spindle Bearing Assembly you need all of the above factors working for you including a high speed setting.


4. Using too little downward pressure on the head of the polisher.
For the same reason as stated in #3, people are scared, or perhaps a better word is apprehensive, to apply too much downward pressure to the polisher and the result of too little pressure is no paint is removed thus no swirls are removed.


5. Using too much downward pressure on the head of the polisher so the pad quits rotating.
If you push too hard you will slow down the rotating movement of the pad and the abrasives won't be effectively worked against the paint. You need to apply firm pressure to engage the abrasives against the paint but no so much that the pad is barely rotating. This is where it's a good idea to use a permanent black marker to make a mark on the back of your backing plate so your eyes can easily see if the pad is rotating or not and this will help you to adjust your downward pressure accordingly.

Correct technique means finding a balance of applying enough downward pressure to remove defects but not too much downward pressure as to stop the rotating movement of the pad.

This balance is affected by a lot of factors like the lubricity of the product you're using, some compounds and polishes provide more lubrication than others and this makes it easier to maintain pad rotation under pressure.

Another factor that can affect pad rotation are raised body lines, edges and curved surfaces as anytime you have uneven pressure on just a portion of the face of the pad it can slow or stop pad rotation. This is where experience comes into play and experience comes from time spent behind the polisher.


6. Not holding the polisher in a way to keep the pad flat while working your compound or polish.
Applying pressure in such a way as to put too much pressure to one edge of the pad will cause it to stop rotating and thus decrease abrading ability.


7. Using too much product or using too little product.
Too much product hyper-lubricates the surface and the result is that abrasives won't effectively bite into the paint but instead will tend to skim over the surface. Overusing product will also accelerate pad saturation as well increase the potential for slinging splatter onto adjacent panels.

Too little product will means too little lubrication and this can interfere with pad rotation.

Again there needs to be a balance between too much product and too little product and finding this balance comes from reading articles like this one, watching videos an most important, going out into the garage and putting in time behind the polisher and as you're buffing with specific product and pad combinations, pay attention to pad rotation.


8. Not cleaning the pad often enough.
Most people simply don't clean their pad often enough to maximize the effectiveness of their DA Polisher. Anytime you're abrading the paint you have two things building up on the face of your buffing pad,
  • Removed paint
  • Spent product
As these to things build up on the face of the pad they become gummy and this has a negative affect on pad rotating plus makes wiping the leftover residue on the paint more difficult. To maintain good pad rotation you want to clean your pad often and always wipe-off any leftover product residue off the paint after working a section. Never add fresh product to your pad and work a section that still has leftover product residue on it.


Pad Cleaning Articles

Why it's important to clean your pads often...

How to clean your foam pad on the fly


:)
:dblthumb2: :props: :dblthumb2: :buffing:
 
Read through this, make sure you're not making any of the common mistakes...


DA Polisher Trouble Shooting Guide


Tyler, age 15 removing swirls using a Porter Cable 7424XP Dual Action Polisher
1965Plymouth035.jpg


When you're first starting out machine polishing and learning to use a DA Polisher it's common to have questions about your results and your results are directly tied to your technique.

Here's a list of the most common problems,

1. Trying to work too large of an area at one time.

2. Moving the polisher too fast over the surface.

3. Using too low of speed setting for removing swirls.

4. Using too little downward pressure on the head of the polisher.

5. Using too much downward pressure on the head of the polisher so the pad quits rotating.

6. Not holding the polisher in a way to keep the pad flat while working your compound or polish.

7. Using too much product or using too little product.

8. Not cleaning the pad often enough.
Here's a list of the solutions in matching order,

1. Trying to work too large of an area at one time.
Shrink the size of your work area down. You can't tackle to large of an area at one time. The average size work area should be around 20" by 20". Most generic recommendations say to work an area 2' by 2' but for the correction step, that's too large. You have to do some experimenting, (called a Test Spot), to find out how easy or how hard the defects are coming out of your car's paint system and then adjust your work area to the results of your Test Spot. The harder the paint the smaller the area you want to work.


2. Moving the polisher too fast over the surface.
For removing defects out of the paint you want to use what we call a Slow Arm Speed. It's easy and actually natural for most people new to machine polishing to move the polisher quickly over the paint but that's the wrong technique. One reason I think people move the polisher too quickly over the paint is because they hear the sound of the motor spinning fast and this has psychological effect which causes them to match their arm movement to the perceived fast speed of the polisher's motor.

Another reason people move the polisher too quickly over the paint is because they think like this,

"If I move the polisher quickly, I'll get done faster"

But it doesn't work that way. Anytime you're trying to remove swirls, scratches, water spots or oxidation using a DA Polisher you need to move the polisher s-l-o-w-l-y over the paint.


3. Using too low of speed setting for removing swirls.
When first starting out many people are scared of burning or swirling their paint, so they take the safe route of running the polisher at too low of a speed setting but this won't work. The action of the polisher is already g-e-n-t-l-e, you need the speed and specifically the pad oscillating and rotating over the paint as well as the combination of time, (slow arm speed), together with the abrasives, the pad aggressiveness, and the downward pressure to remove small particles of paint which is how your remove below surface defects like swirls or scratches.

Removing below surface defects is a leveling process where you need the abrasives to take little bites out of the paint and to get the abrasives to take these little bites with a tool that uses a Free Floating Spindle Bearing Assembly you need all of the above factors working for you including a high speed setting.


4. Using too little downward pressure on the head of the polisher.
For the same reason as stated in #3, people are scared, or perhaps a better word is apprehensive, to apply too much downward pressure to the polisher and the result of too little pressure is no paint is removed thus no swirls are removed.


5. Using too much downward pressure on the head of the polisher so the pad quits rotating.
If you push too hard you will slow down the rotating movement of the pad and the abrasives won't be effectively worked against the paint. You need to apply firm pressure to engage the abrasives against the paint but no so much that the pad is barely rotating. This is where it's a good idea to use a permanent black marker to make a mark on the back of your backing plate so your eyes can easily see if the pad is rotating or not and this will help you to adjust your downward pressure accordingly.

Correct technique means finding a balance of applying enough downward pressure to remove defects but not too much downward pressure as to stop the rotating movement of the pad.

This balance is affected by a lot of factors like the lubricity of the product you're using, some compounds and polishes provide more lubrication than others and this makes it easier to maintain pad rotation under pressure.

Another factor that can affect pad rotation are raised body lines, edges and curved surfaces as anytime you have uneven pressure on just a portion of the face of the pad it can slow or stop pad rotation. This is where experience comes into play and experience comes from time spent behind the polisher.


6. Not holding the polisher in a way to keep the pad flat while working your compound or polish.
Applying pressure in such a way as to put too much pressure to one edge of the pad will cause it to stop rotating and thus decrease abrading ability.


7. Using too much product or using too little product.
Too much product hyper-lubricates the surface and the result is that abrasives won't effectively bite into the paint but instead will tend to skim over the surface. Overusing product will also accelerate pad saturation as well increase the potential for slinging splatter onto adjacent panels.

Too little product will means too little lubrication and this can interfere with pad rotation.

Again there needs to be a balance between too much product and too little product and finding this balance comes from reading articles like this one, watching videos an most important, going out into the garage and putting in time behind the polisher and as you're buffing with specific product and pad combinations, pay attention to pad rotation.


8. Not cleaning the pad often enough.
Most people simply don't clean their pad often enough to maximize the effectiveness of their DA Polisher. Anytime you're abrading the paint you have two things building up on the face of your buffing pad,
  • Removed paint
  • Spent product
As these to things build up on the face of the pad they become gummy and this has a negative affect on pad rotating plus makes wiping the leftover residue on the paint more difficult. To maintain good pad rotation you want to clean your pad often and always wipe-off any leftover product residue off the paint after working a section. Never add fresh product to your pad and work a section that still has leftover product residue on it.


Pad Cleaning Articles

Why it's important to clean your pads often...

How to clean your foam pad on the fly


:)


Wow, I'm guilty of a couple of these. I'm definetly going to shrink my working area and use more pressure, as well as clean my pad more frequently.


Sent from my iPhone using Tapatalk
 
Do you think I'm wasting my time using the 6.5" pads? Is it still possible to get good results with them? My only thing is I'm really trying to avoid buying new products right now (already spent more than I wanted to this month on detail supplies). If need be I guess I have no choice. Again, I do have 3.5" BP/4" pad setup as well.. Could this be of use for correcting? Or is it too small?


Sent from my iPhone using Tapatalk
 
You can use 4" pads to correct, but it'll take a lot longer because you're lacking coverage area.

Use what you have to its best potential. Use all the pressure you can while still keeping pad rotation. Shrink your work area. Clean pad often.
 
You can use 4" pads to correct, but it'll take a lot longer because you're lacking coverage area.

Use what you have to its best potential. Use all the pressure you can while still keeping pad rotation. Shrink your work area. Clean pad often.


Sounds good. Thanks again for all the advice!


Sent from my iPhone using Tapatalk
 
Sounds good. Thanks again for all the advice!


Sent from my iPhone using Tapatalk

No problem.

Also, when using a new pad, start with an X of polish across the pad. After, only use 3-4 pea sized drops of polish.


Sent from my iPhone using Tapatalk
 
Back
Top