Painted Calipers and Rotor Hats

CEE DOG

New member
Joined
Jul 12, 2009
Messages
7,358
Reaction score
0
I'm a little short on words due to time. That probably won't bother most people a bit

Will post some details of the adventure in a later reply maybe.

SOME OF THE TOOLS

01-Tools.JPG


WHEELS OFF! SKY IS IN THE SKY

02-All_Wheels_Off.JPG


03-All_Wheels_Off.JPG


04-All_Wheels_Off.JPG


05-All_Wheels_Off.JPG


06-All_Wheels_Off.JPG


INSIDE OF TIRES WASHED WITH ARO AND TIRE SCRUB BRUSH
INSIDE OF RIMS WASHED WITH SONAX WHEEL CLEANER USING E-Z BRUSH AND SWISSVAX WHEEL BRUSH FOR THE INDENTIONS AND LUG AREAS.

07-Cleaning_Wheels.JPG


SKYBABY WRAPPED FROM THE IMPURITIES HEADED HER WAY

08-Wrapped_Sky.JPG


09-Wrapped_Sky.JPG


10-Wrapped_Sky1.JPG


LABELED WHEELS

11-Labeled_Wheels.JPG


MOVED WHEELS TO GARAGE

12-Moved_Wheels_to_Garage.JPG


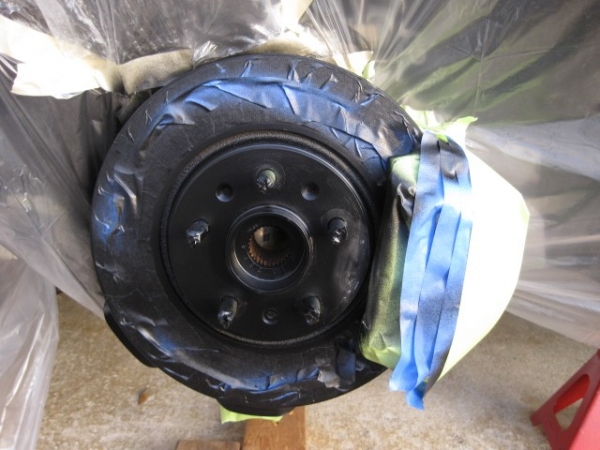
ROTORS AND CALIPERS BEFORE

13-Before.JPG


14-Before.JPG


15-Before.JPG


16-Before.JPG


17-Before.JPG


18-Before.JPG


19-Wrapped.JPG


20-Wrapped1.JPG


21-Wrapped.JPG


22-Wrapped.JPG


23-Wrapped.JPG


Running out of time so no pics taken but I sanded and ground a lot of rust off. Then I used 3 cans of Brake Cleaner (Thanks for the tip on getting extra Adam!)

Rotors painted with 3 coats of Black Grill Spray Paint (withstands 1200 deg F.)


24-Rotor_Hats_Painted1.JPG


25-Rotor_Hats_Painted.JPG


26-Rotor_Hats_Painted.JPG


Calipers painted with 3 coats of "G2" (2 part) epoxy (900 deg. F)
Plastic being removed

27-Calipers_Painted.JPG


28-Calipers_Painted.JPG


29-Calipers_Painted1.JPG


3rd coat is on the calipers and plastic is off the car

30-1130pm.JPG


31-1130PM.JPG


Its a HOVERCRAFT!

32-Its_a_Hovercraft.JPG


Painted but not touched up at all yet.

33-After_Painting.JPG


34-After_Painting.JPG


35-After_Painting.JPG


36-After_Painting.JPG


37-After_Painting.JPG


38-After_Painting.JPG


39-After_Painting.JPG


40-After_Painting.JPG


All 4 Wheels and tires sealed with Ultima TTG

42-Wheels_and_tires_Sealed_with_UTTG.JPG


1/2 way through a midnight Ultima Waterless wash bath to remove all the condensation mixed with the dust that had been on there before hand


43-Condenstaion-Waterless_wash_50-50.JPG


44-Condenstaion-Waterless_wash_50-50.JPG


After removing most of the little boo boos with laquer thinner and a piece of wire. Still need to do a touch up here or there.

45-After_Drivers_Front.JPG


46-After_Drivers_Front.JPG


47-After_Drivers_Rear.JPG


48-After_Passenger_Front.JPG


49-After_Passenger_Rear.JPG
 
A few weeks later:
I didn't get to wash my beauty this weekend but I snapped a few more picks anyway.
IMG_4589.JPG

IMG_4590.JPG

IMG_4593.JPG

IMG_4596.JPG

IMG_4592.JPG
 
Looks great Corey soon you won't have anything left to do too the SkyBaby
 
Sweet Corey she looks great!!!! I've been wanting to paint my calipers red on my truck but I'm being lazy haha
 
Great job buddy. Fortunately for me, the XLR calipers are painted at the factory. Really turned out awesome!
 
Looks great...Wow, a lot of work!...Ever thought about having calipers powder coated?...I know someone who did and they just looked amazing much like yours.
 
Awesome job! The G2 Brake Caliper Paint is a really good product. It's very durable and does not fade like most of the other brands out there.
 
Wow, that looks great! :props: Where does one get the caliper painting kit? And you didn't have to take the caliper off?
 
Very nice work and great documentation Corey! :props:

They really stand out when everything is all together giving it that custom look....:dblthumb2:
 
Looks great! I guess u won't doing a review on Kleen Wheels Dust Shields now.....LOL
 
These look great, didn't know it was so simple to do.. then again I never really looked into it.
 
[QUOTE=Flash Gordon;414446]Wow, now theres a name I haven't heard in years. Wonder if they are still in business[/QUOTE]

Yes they are. Surprising to me too.
 
Back
Top