lawrenceSA
New member
- Feb 7, 2012
- 1,713
- 0
Who doesn't love a red Mk2 Gti....and I had not detailed one as yet, so this was a really enjoyable detail for me spread out over 2 weekends (and a few hours in the evenings during the week between). All in all I spent 45 hours on it.
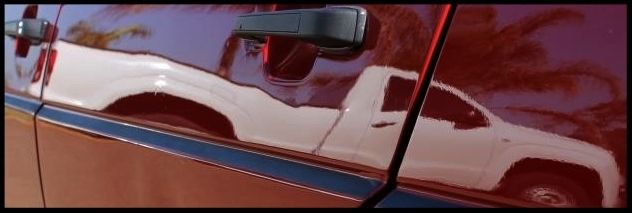
This is a '89 version and really needed some love from the years of neglect. The previous owner had replace 3 doors (both on the driver side and the front on the passenger side) and they had been painted in single stage paint with oxidation leaving them white, and plenty of swirls and scratches left the OEM paint looking dull and lifeless. The trim was faded. The leather tired and overall it was just begging to be detailed.
So I obliged :grin:
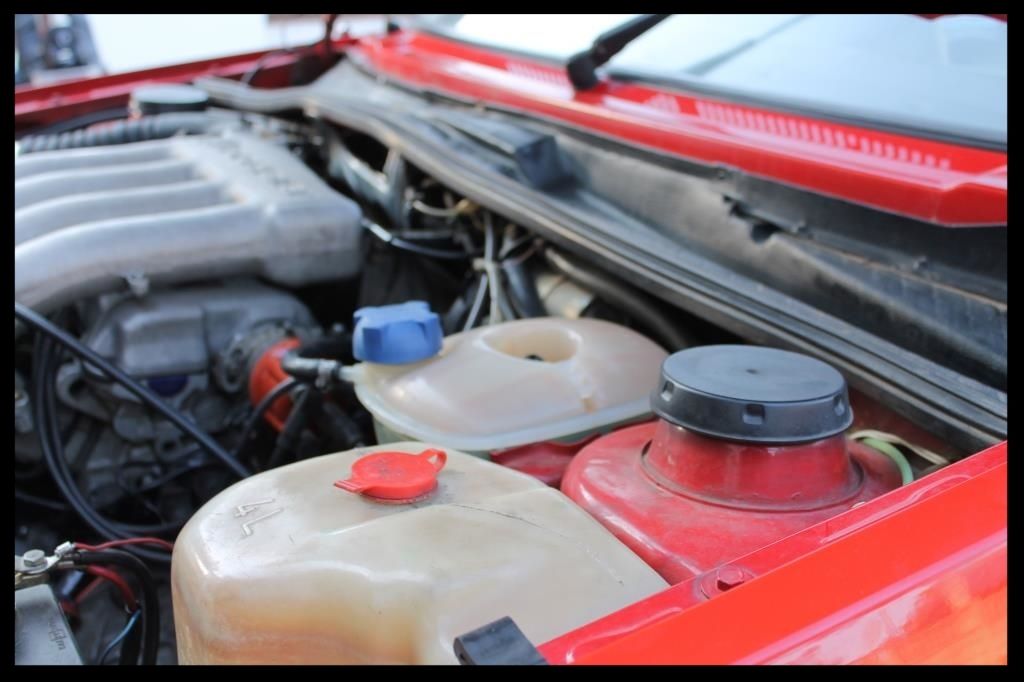
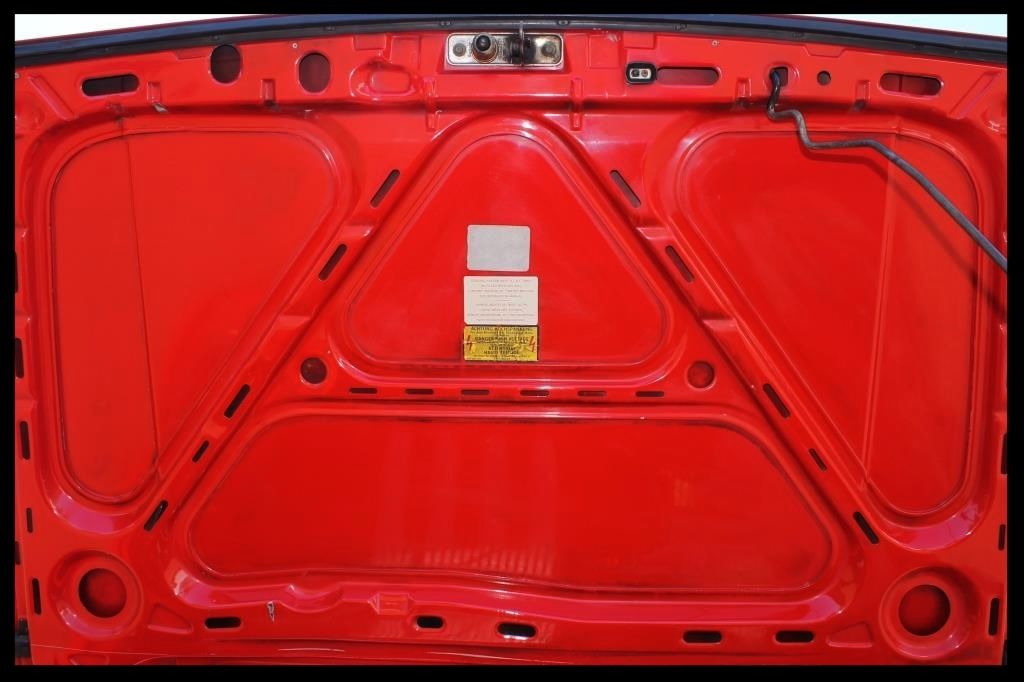
First up the - the business end.
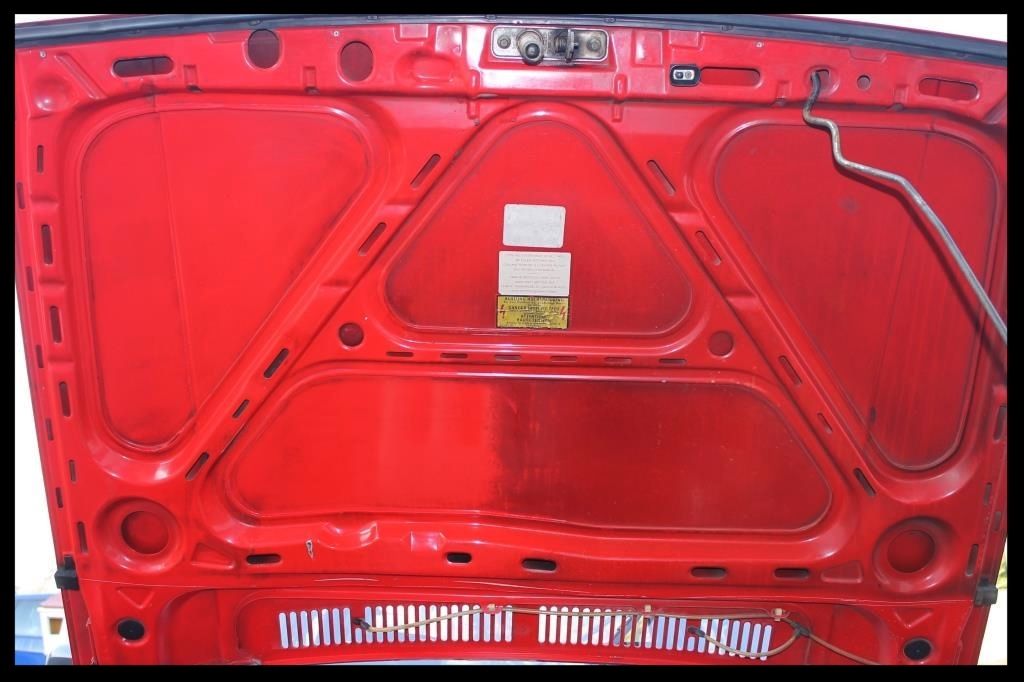
Internals, headwork, cams etc ensure the car is quick enough to keep the owner happy but the engine bay didn't look the part. The cold startup on Sat morning was rather enjoyable and it made me really miss the sound of a lumpy idle in my garage Not wanting to introduce any water into the engine bay, I opted for some Carchem APC, MF Towels, Brushes and an electric blower to get this dirt cleaned off. Autofinesse Dressel would be used to dress the bay.
Here I had started cleaning up under the bonnet using Autofinesse Tripple on a MF Applicator pad to see how well it would clean up.
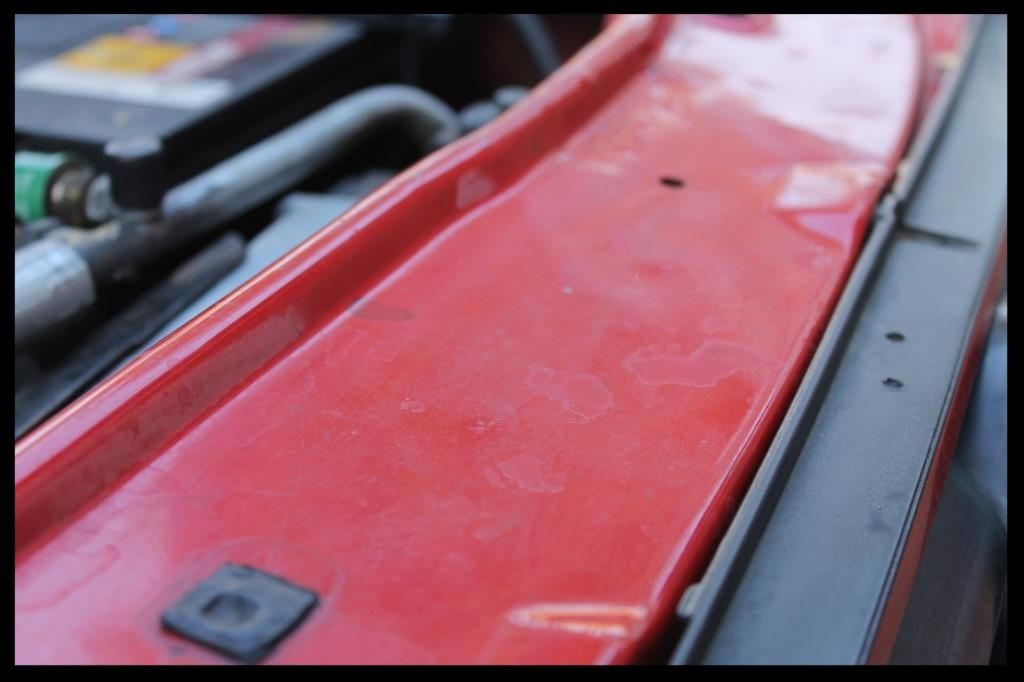
The same approach was used on all the painted areas in the bay like this which had a few water spots.
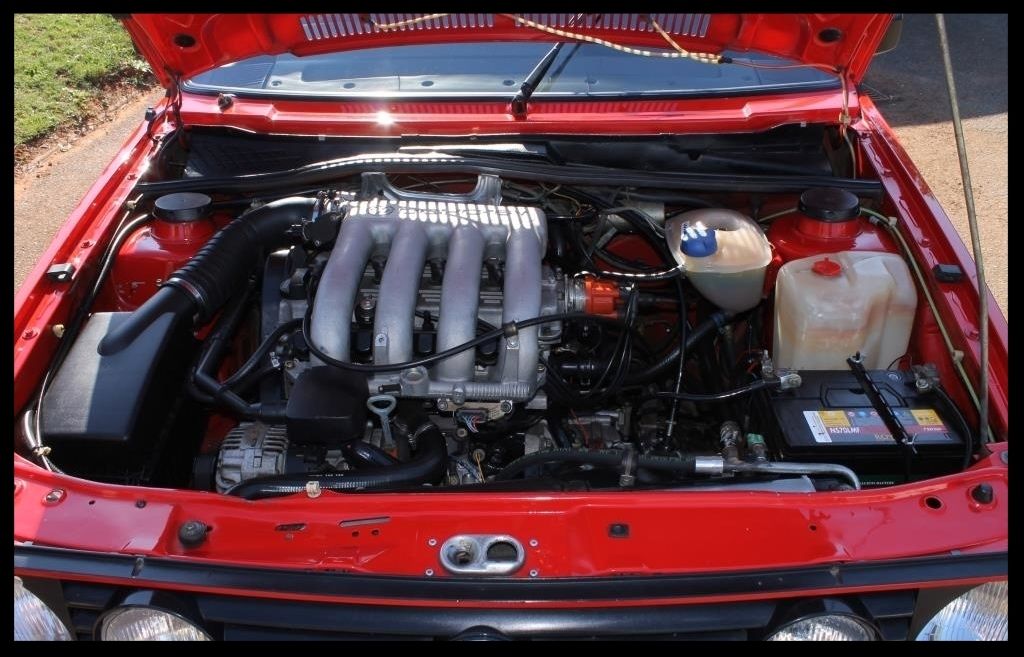
The end results
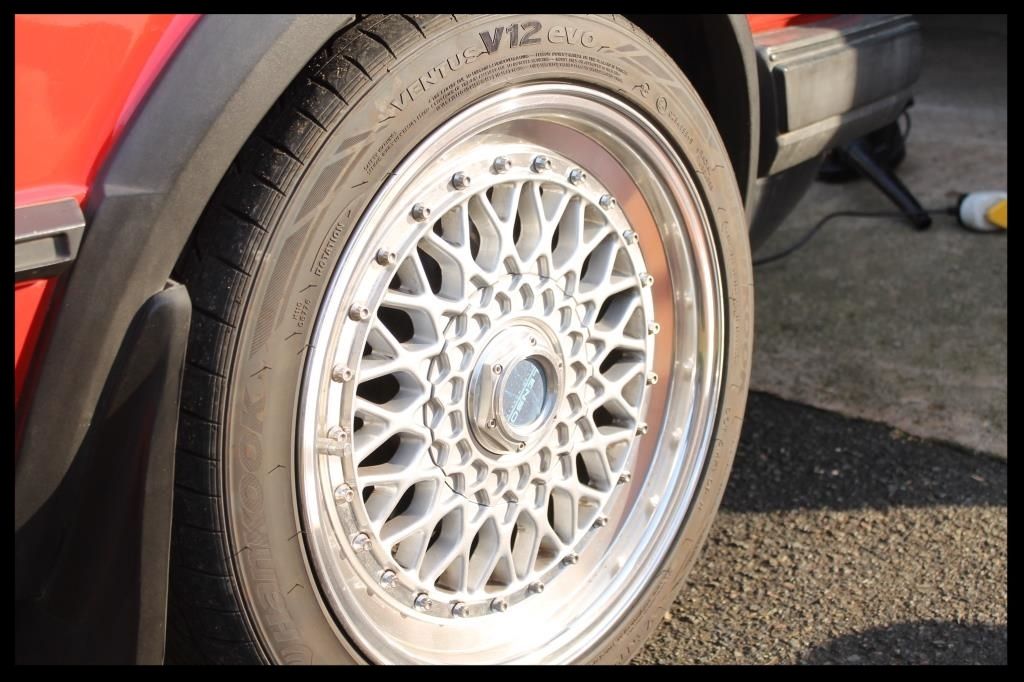
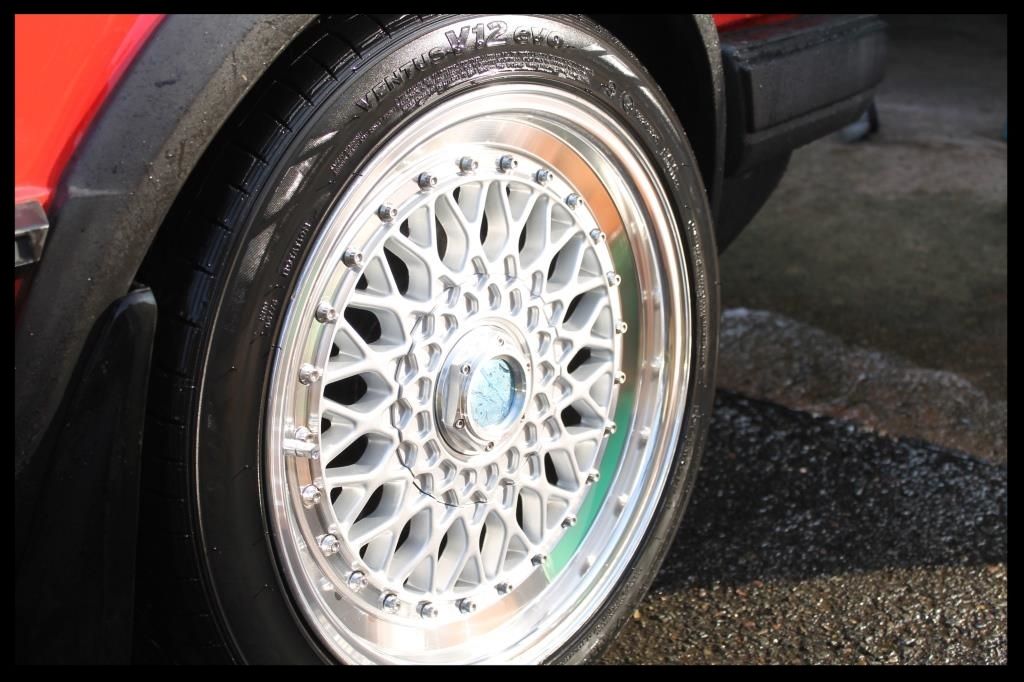
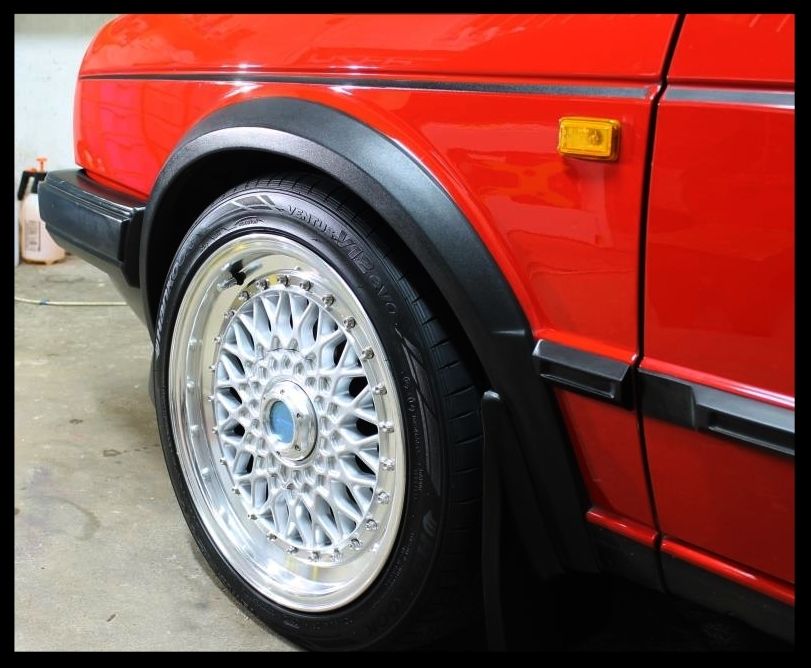
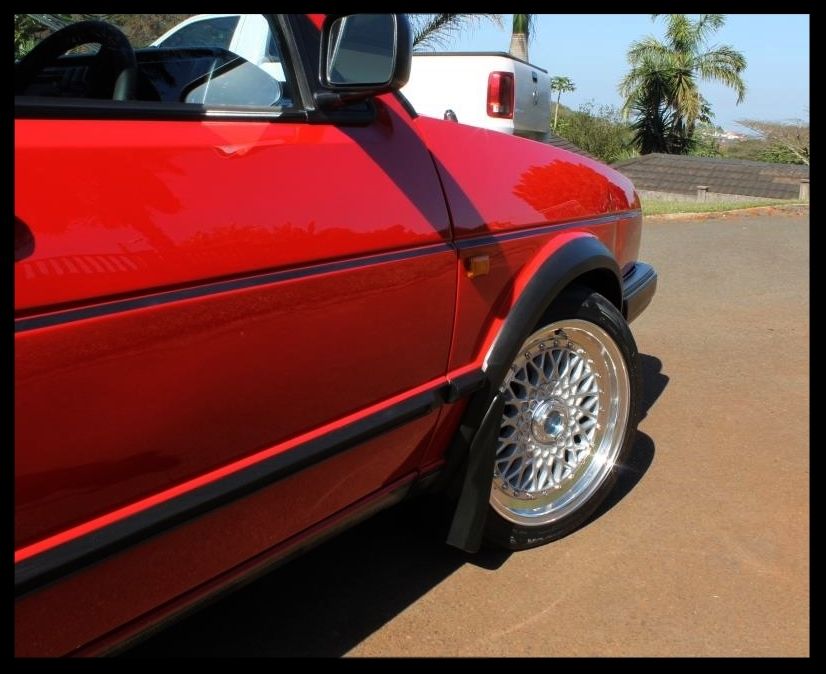
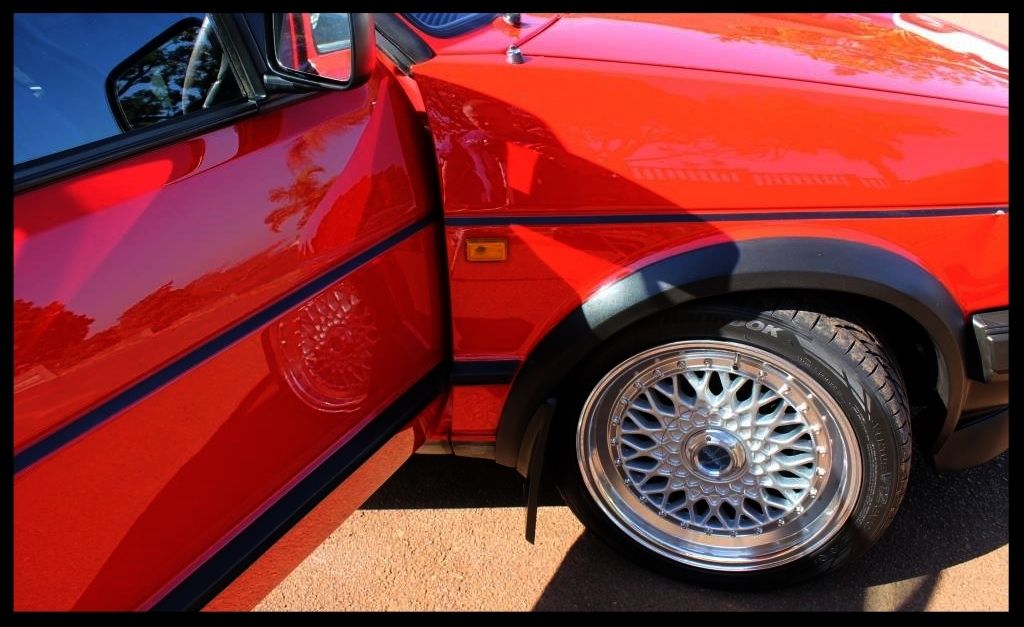
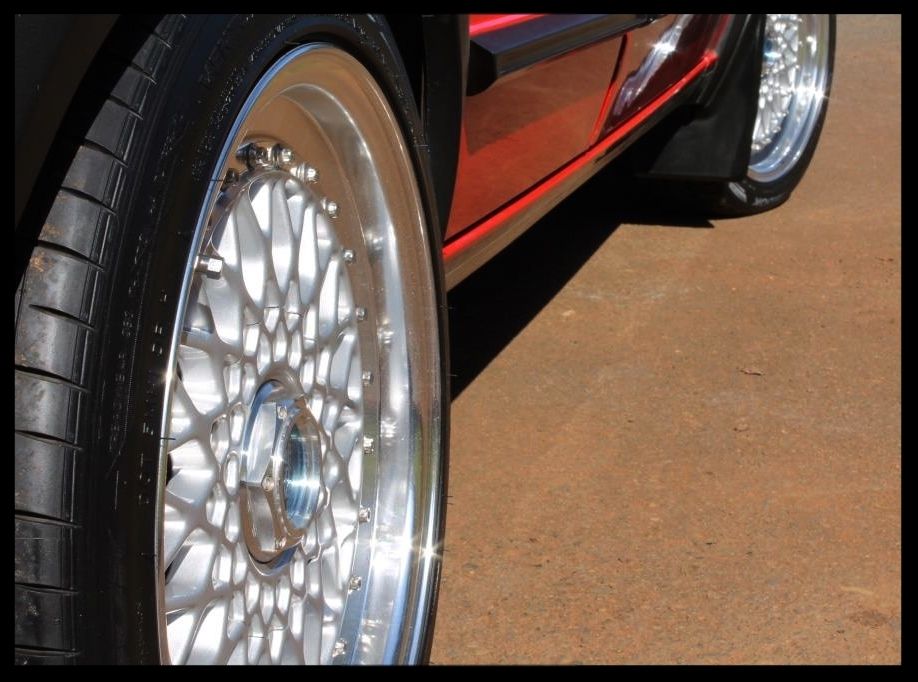
Then it was on to the wheels, which weren't too bad themselves
The tires were rather dirty though.
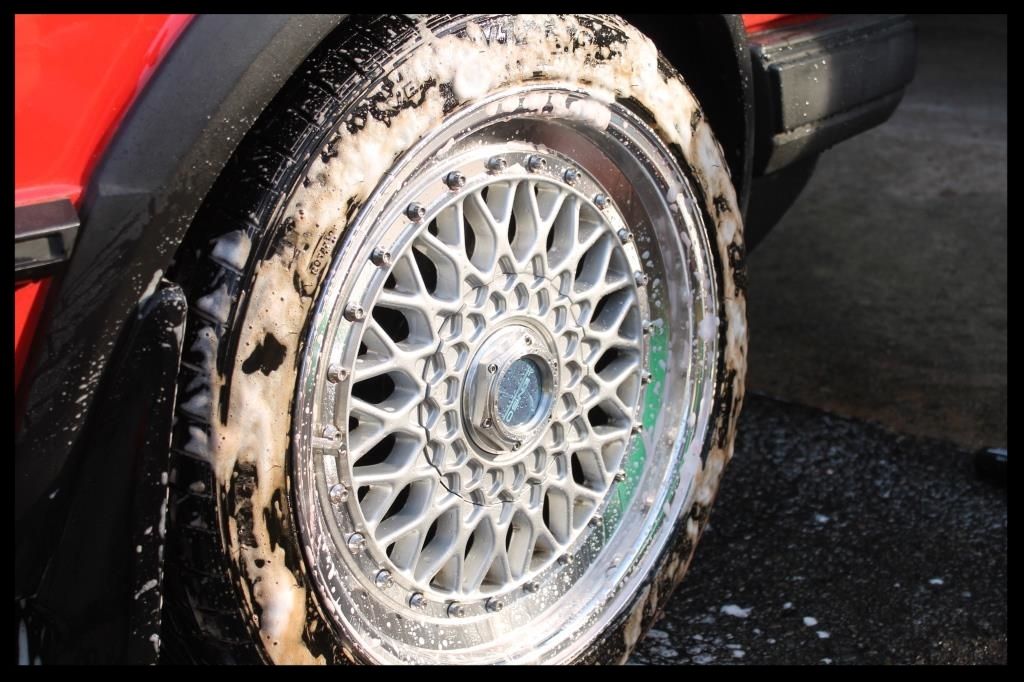
After thoroughly washing the fender wells, tires and wheels and decontaminating the wheels, this is what they looked like.
Fender Wells
-HP rinse
-Apply Carchem Citrus APC, let it dwell then agitate using a Mothers Fenderwell Brush
-HP rinse
-Later these would be dressed with Autofinesse Dressel
Tires
-Clean tires with Valet Pro Billbery Wheel Cleaner @ 1:6 and a Mothers Tire brush.
-HP rinse
-Repeat tire cleaning
-HP rinse
-Dressed with 2 coats of Carchem Tire and Trim Dressing
Wheels
-HP rinse
-VP Bilberry Wheel Cleaner @ 1:6, Daytona and Daytona Jnr brushes and Valet Pro Boars Hair Brushes
-HP rinse
-Dry
-Remove tar using VP Citrus Tar Remover
-Spray with Carchem Citrus APC and HP Rinse
-Dry
-Remove bonded and embedded ferrous contaminants with Valet Pro Dragon's Breath, Daytona (big and small) brushes and Valet Pro Boars Hair Brushes
-HP rinse
-Dry
-Optimum Optiseal
At this point I would typically begin the process of pre-rinsing, pre-foaming, pre-washing and then 2BM washing the car, however on this car, I wanted to avoid the possibility of getting water into any part of the vehicle where it may sit and accelerate the onset of rust. So instead I opted for a rinseless wash using Optimum No Rinse. The paintwork itself was pretty clean to boot, with only some light dirt on the car - a perfect candidate for a rinseless wash.
With no visible tar spots and no chance of using an iron remover without seriously getting the car wet, decontamination was only done by claying using Shield Heavy Duty Clay and ONR as lube.
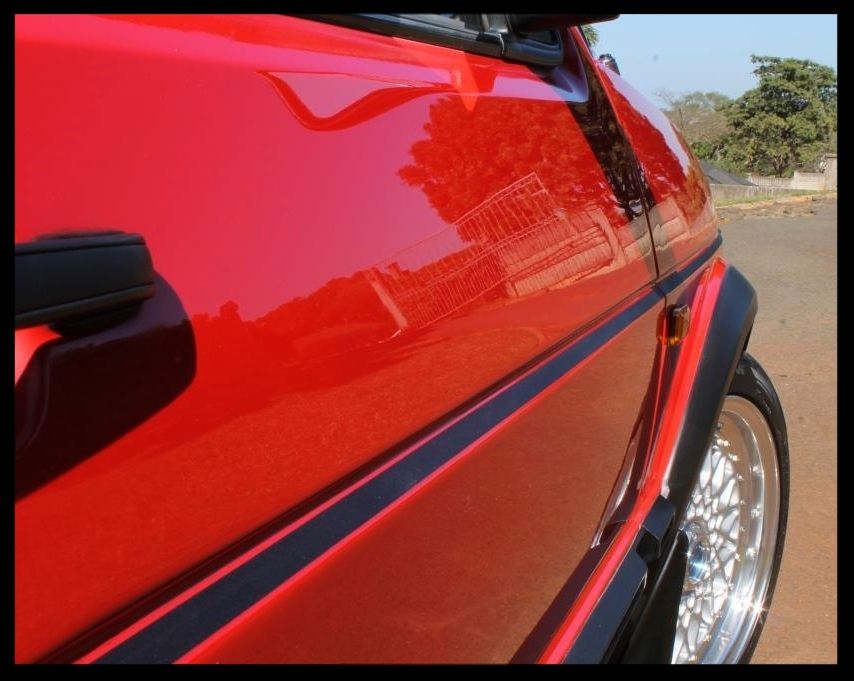
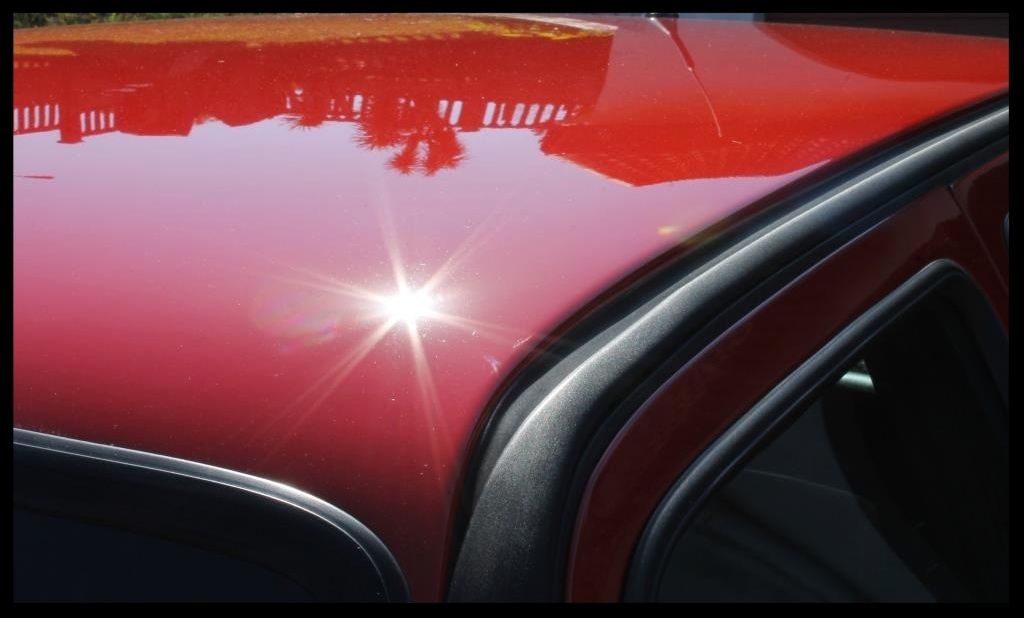
So on to the paintwork. Like mentioned there were 2 types of paint on the car.
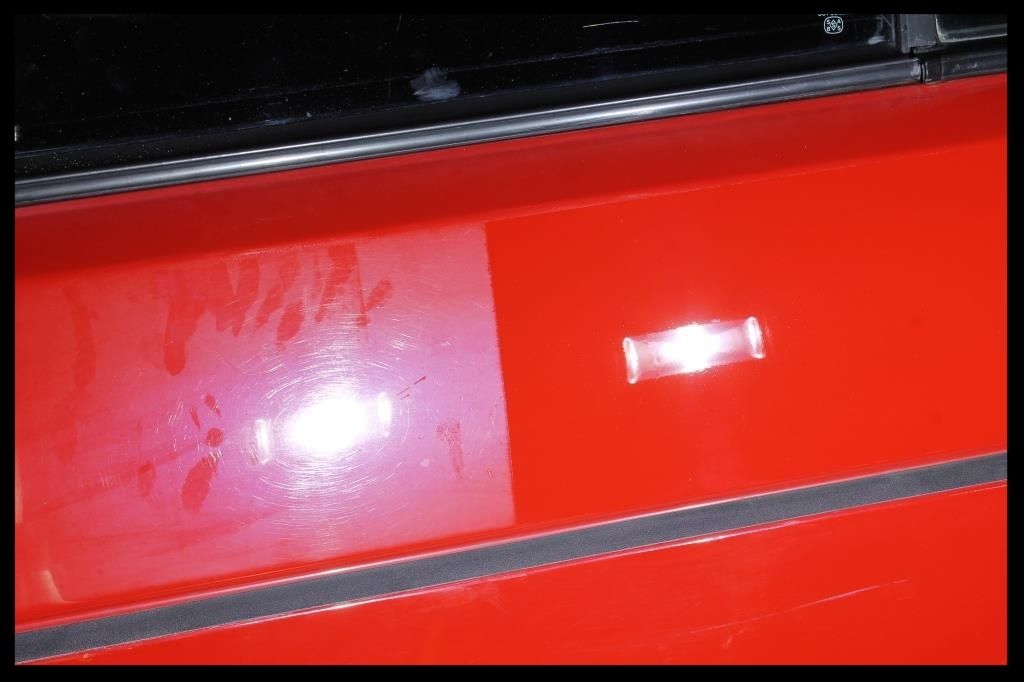
The OEM paint that looked like this
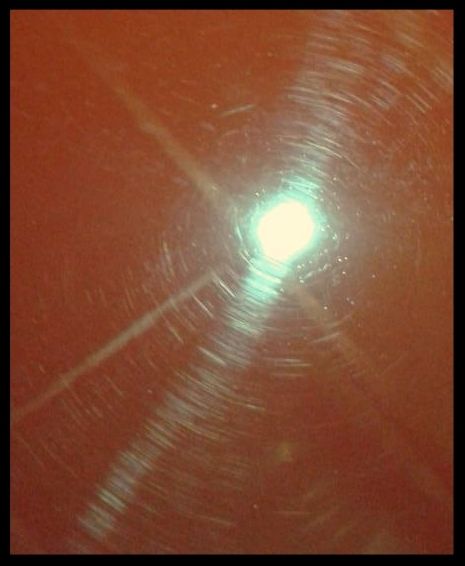
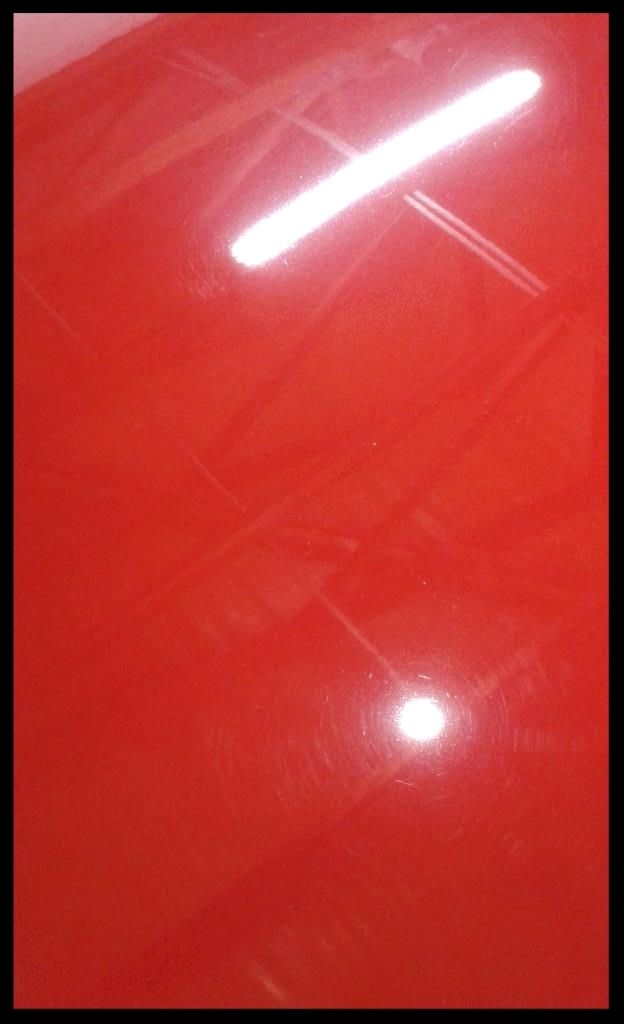
And next to it, the single stage stuff
Let's take a better look
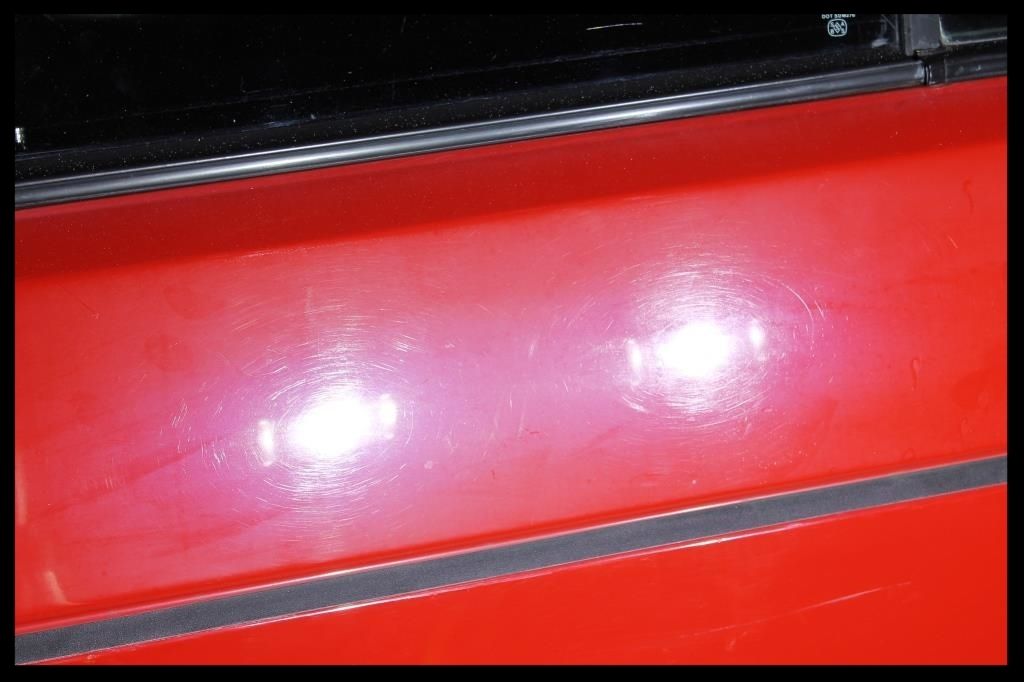
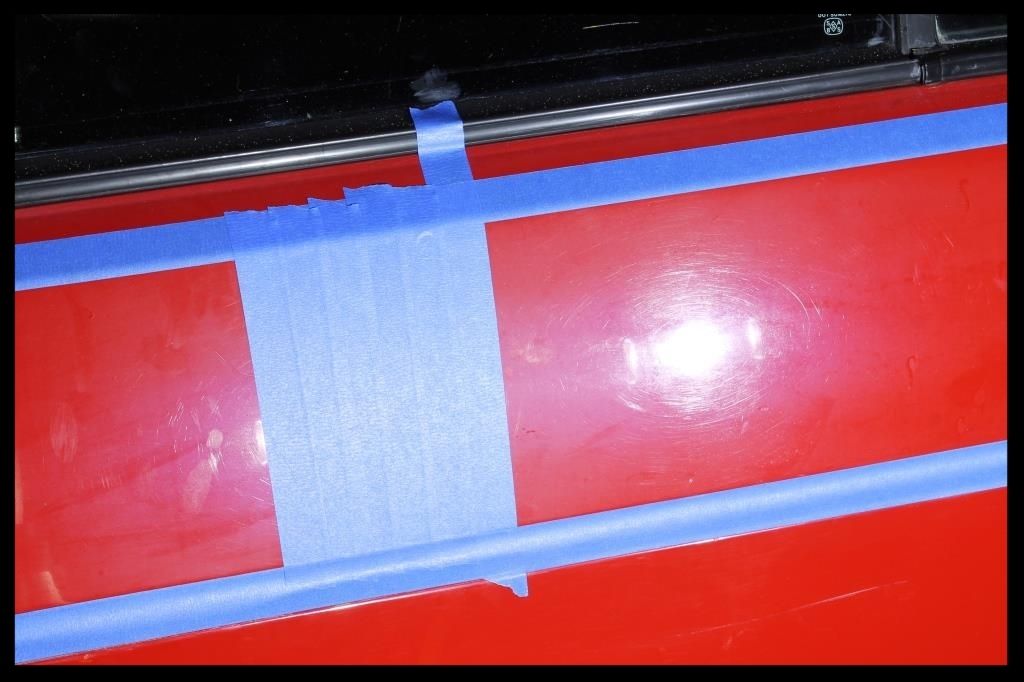
So tape up all the sharp edges and trim (This has got to be one of the most difficult vehicles to polish properly [i.e. taping off edges etc] and I used 4 and half rolls of tape where I would typically not even use 1. I do not want to think about how many long hours I spent taping)
Add some Menzerna PF2300 onto a White Lake Country Hybrid Pad, put it on the Flex 3401 and use it to chop out the oxidation and swirls, then follow it up with Menzerna SF4000 on a Black Lake Country Hybrid Pad
.... and what to do you get....?
This
And this
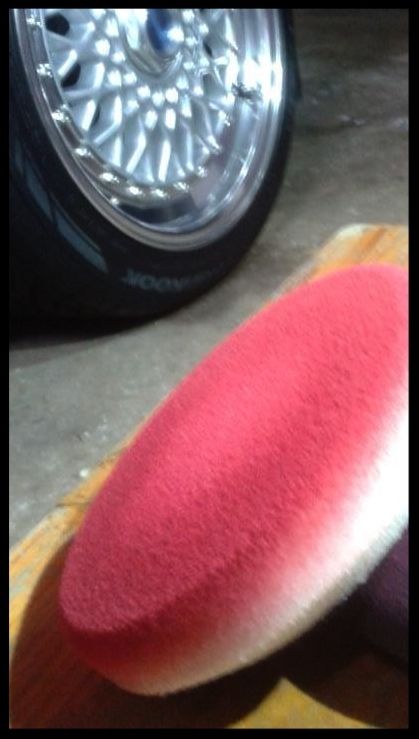
For any of you who have ever used an abrasive substance to polish your car, this pic really shows what is happening. As you engage the abrasives with the paint [in this case using a white foam buffing pad] the paint that is on the car is sanded off and embeds itself onto/into the pad. Its really easy to see the red paint residue on the pad..... but what about when you are polishing a modern car with clear coat on.... well.... the EXACT SAME thing is happening.... it is just that you cannot SEE the paint on the pad because it is clear.... but it IS there.
So frequent pad cleaning is paramount if you want to prevent using that residue to re-scour the surface of car.
And as luck would have it the exact same combo worked wonders for the rest of the vehicle :hurray:
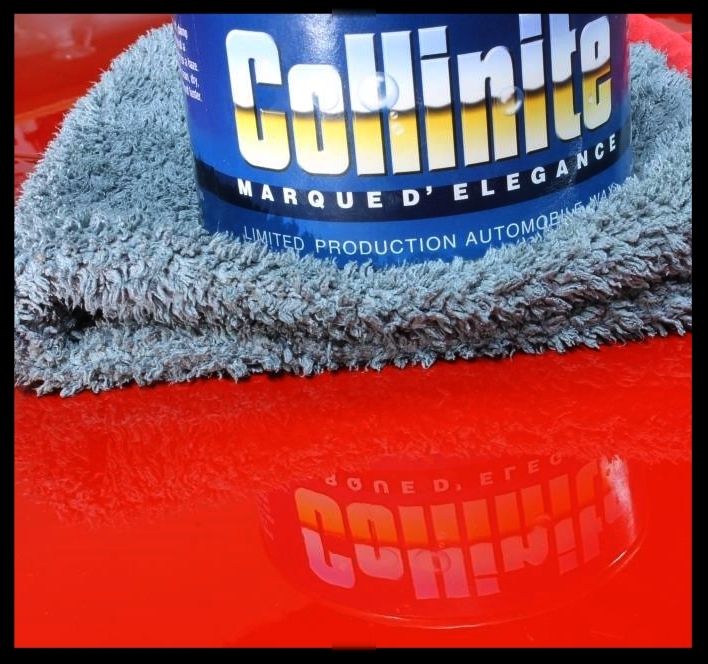
It was then protected with....
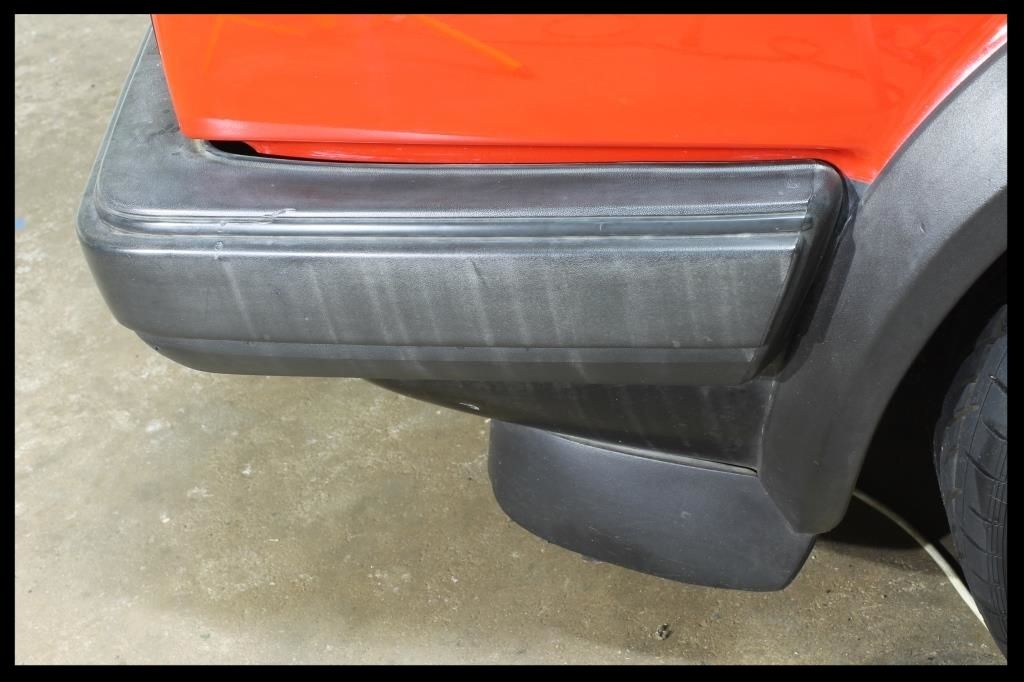
Over the course of the detail I initially cleaned all the trim using Shield Heavy Duty Vinyl and Rubber Cleaner and then applied 4 coats of Carchem Tire and Trim Dressing, allowing each coat to soak in overnight.
How it started
After coat 1
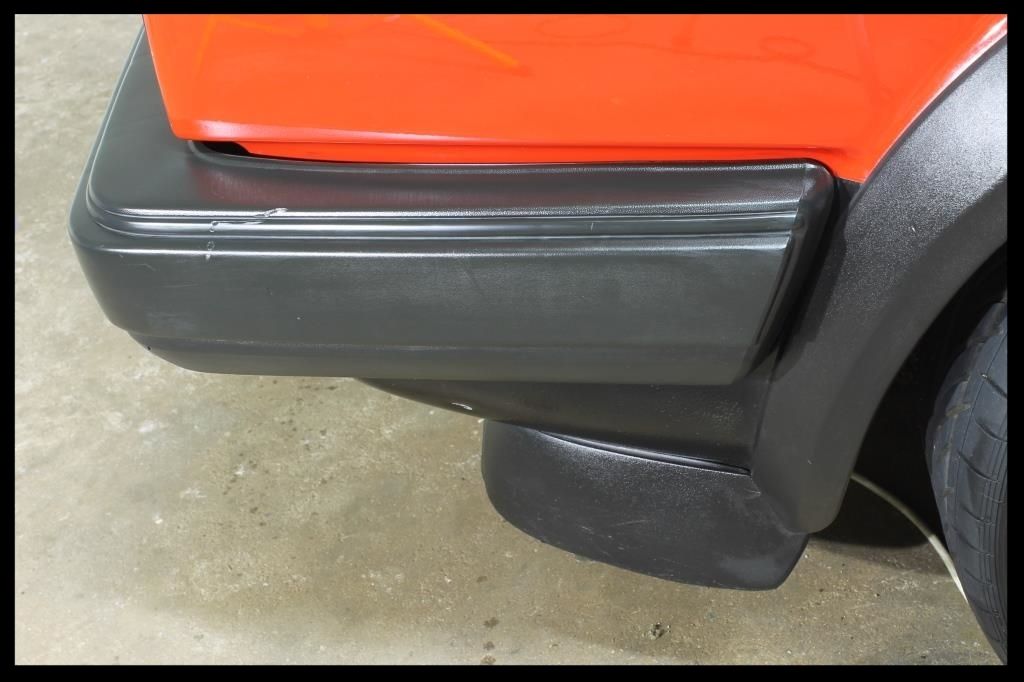
After coat 2
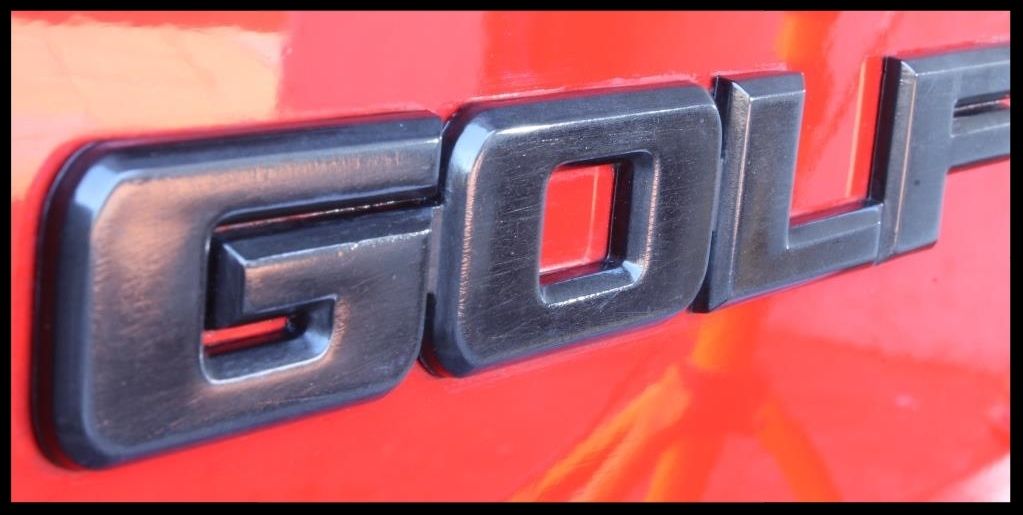
The badges were looking very very sad.
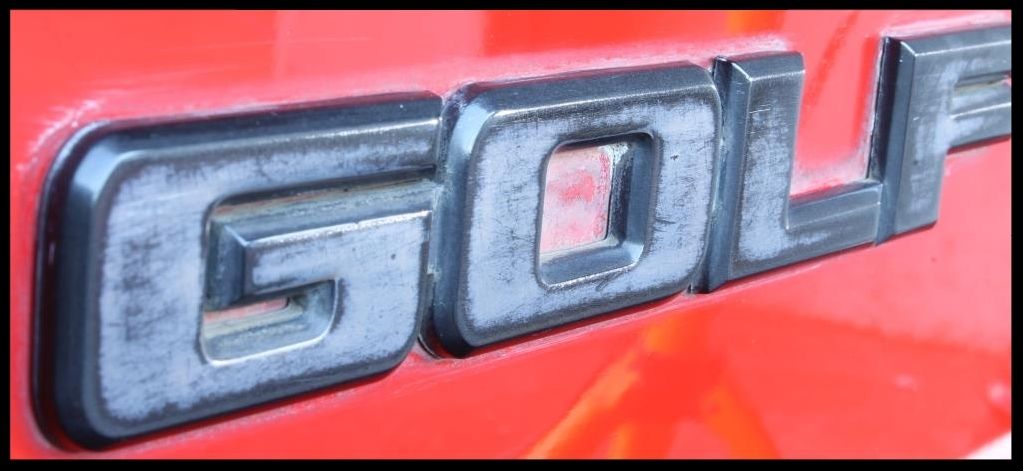
Many, many q-tips and some Autofinesse Tripple made a huge difference....
I was asked to remove some tape that had been holding a backboard in place during the cleaning of the seats, which was done using Carchem APC

The seats went from this
[URL=http://s1217.photobucket.com/user/polo_playa/media/Detailing%20-%20Manog%20Golf%202%20Gti/IMG_0936_zpsbb1lcasv.jpg.html]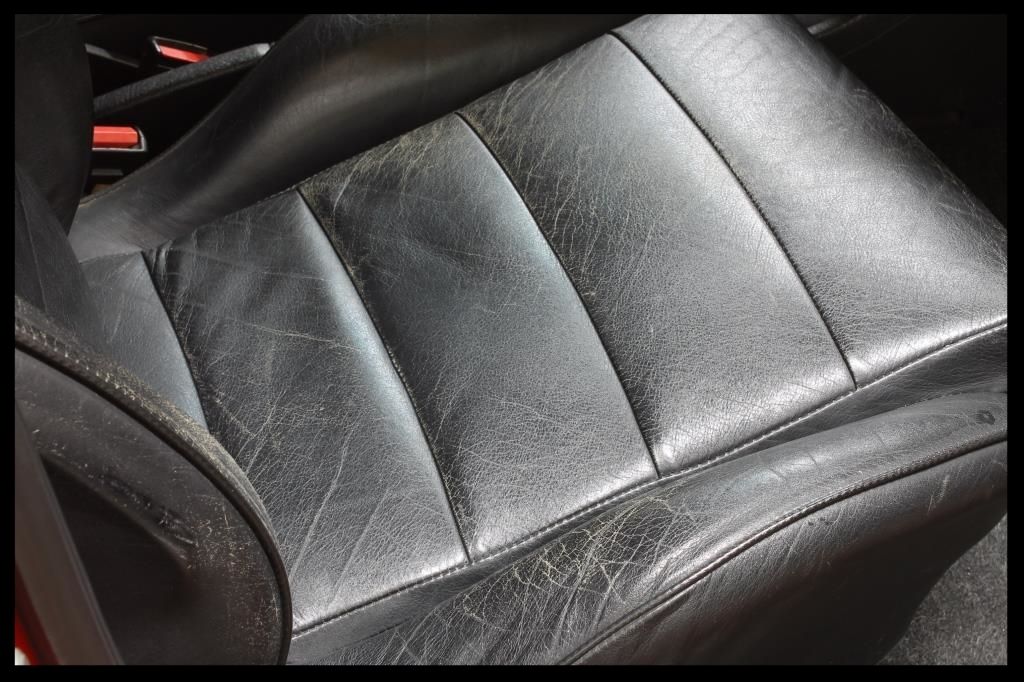
To this just from the cleaning
[URL=http://s1217.photobucket.com/user/polo_playa/media/Detailing%20-%20Manog%20Golf%202%20Gti/IMG_0937_zpshbkhlqhi.jpg.html]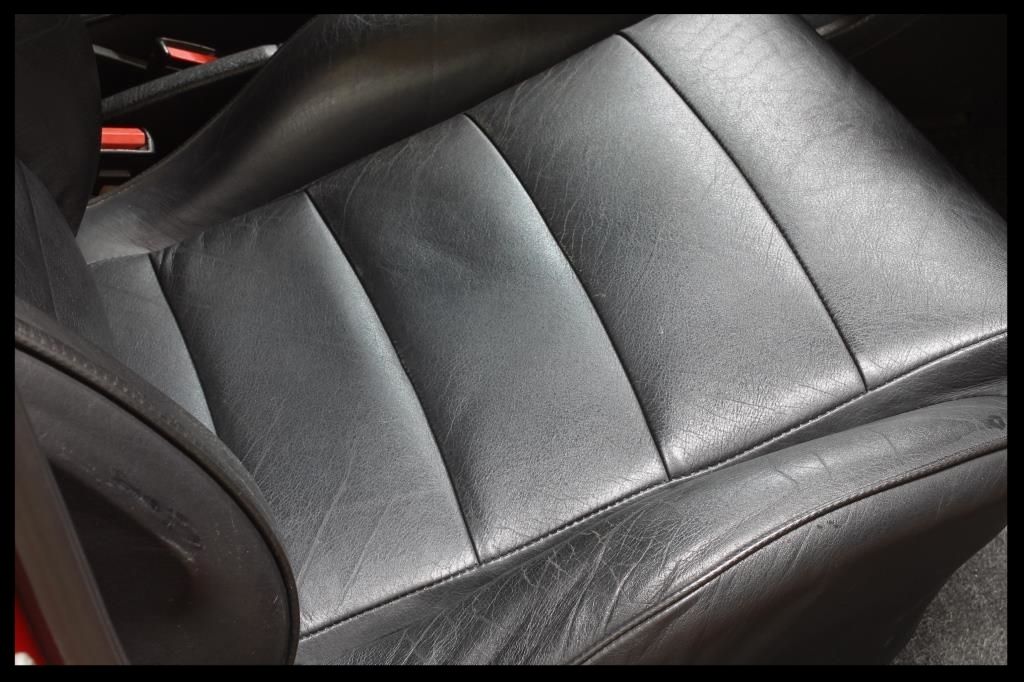
Seeing how badly cracked and dry they were I gorged them with 3 coats of Glossworx Leather Conditioner spread out over a few days to rejuvenate them - not something I would do on a more modern car with coated (and uncracked) leather seats.
The door and window rubbers were cleaned using Shield Heavy Duty Vinyl and Rubber Cleaner and protected using Aerospace 303. The interior was blown free of loose dust, the carpets vacuumed using a Flex vacuum cleaner. The plastics were cleaned using Shield Heavy Duty Vinyl and Rubber Cleaner and then given a final wipe using Autofinesse Spritz. Lastly the glass was cleaned using Glossworx Glass Cleaner, and Gyeon Repel applied to the front and rear windscreens.
The door and boot shuts were polished using Autofinesse Tripple and a MF applicator pad. The exhaust tip was cleaned using Carchem APC and then polished using Meguiars NXT All Metal Polish, a Mothers Powerball mini and MF towels
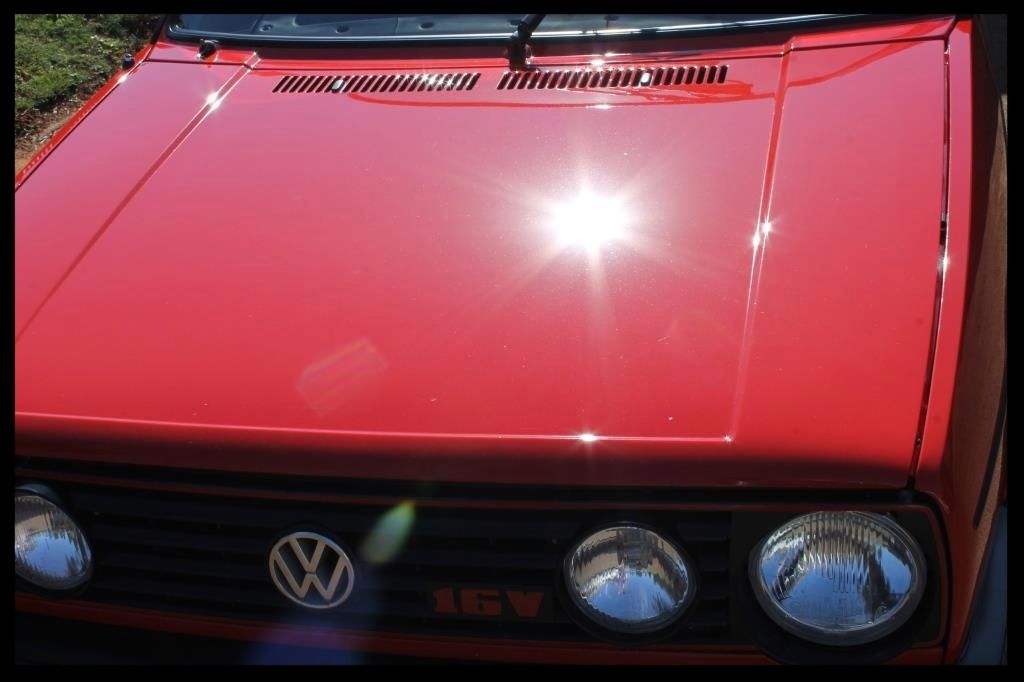
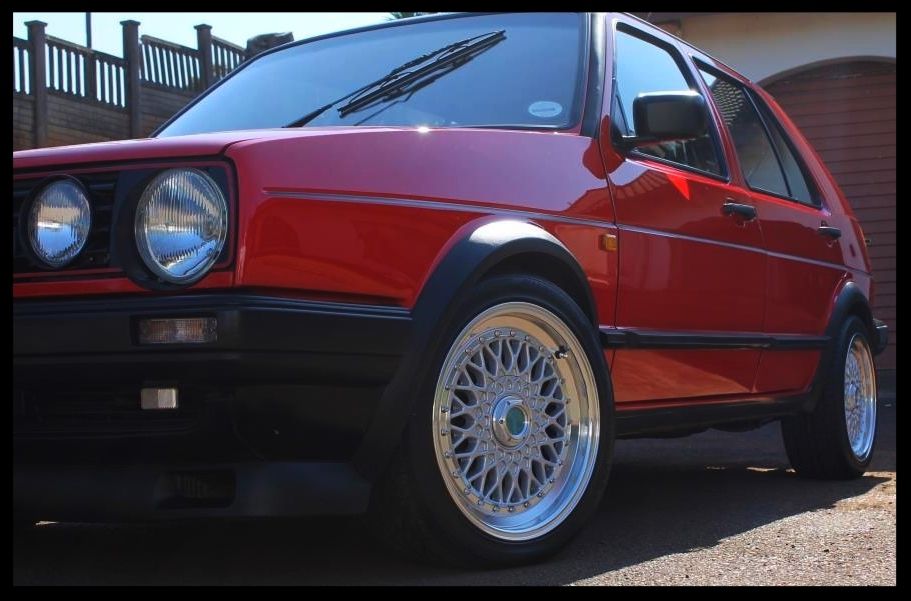
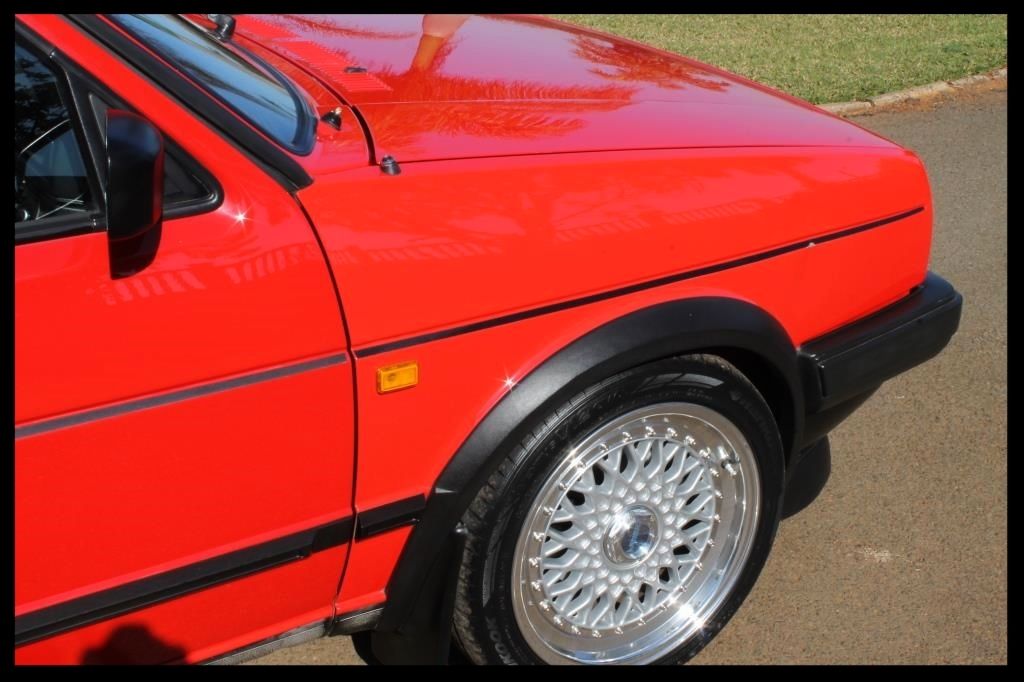
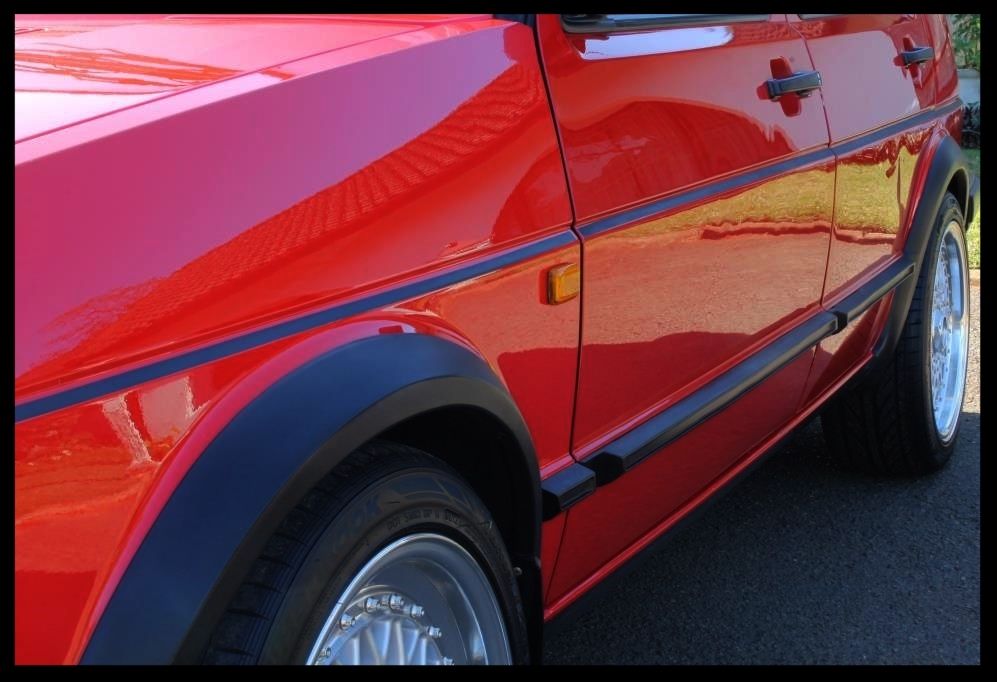
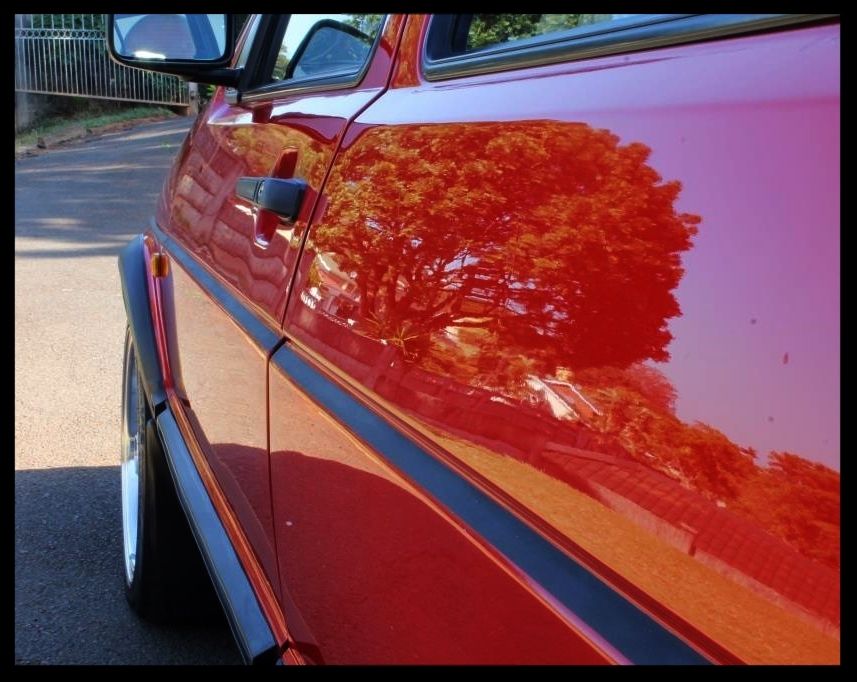
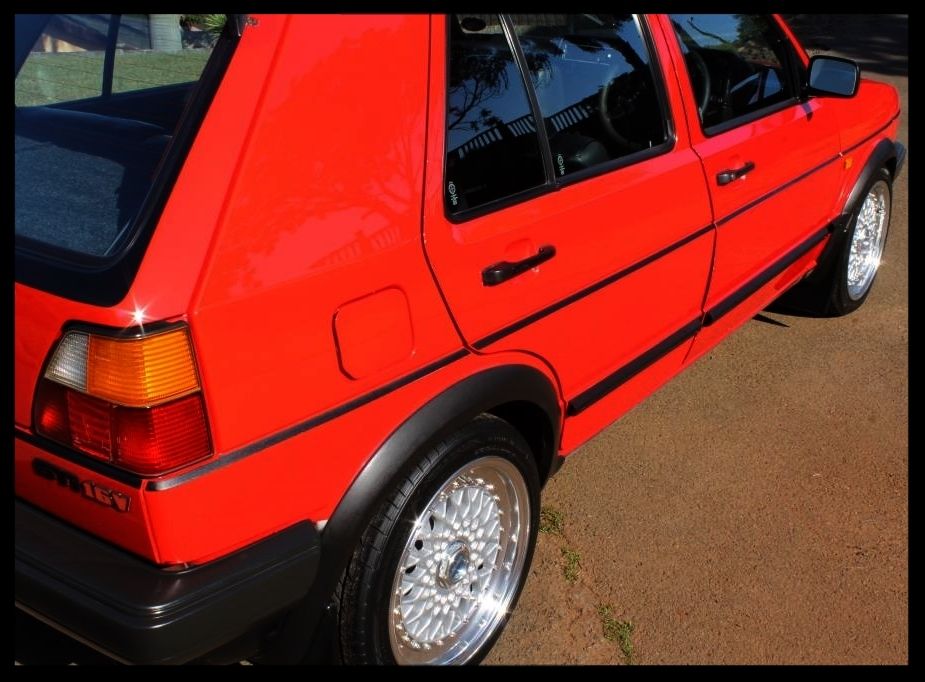
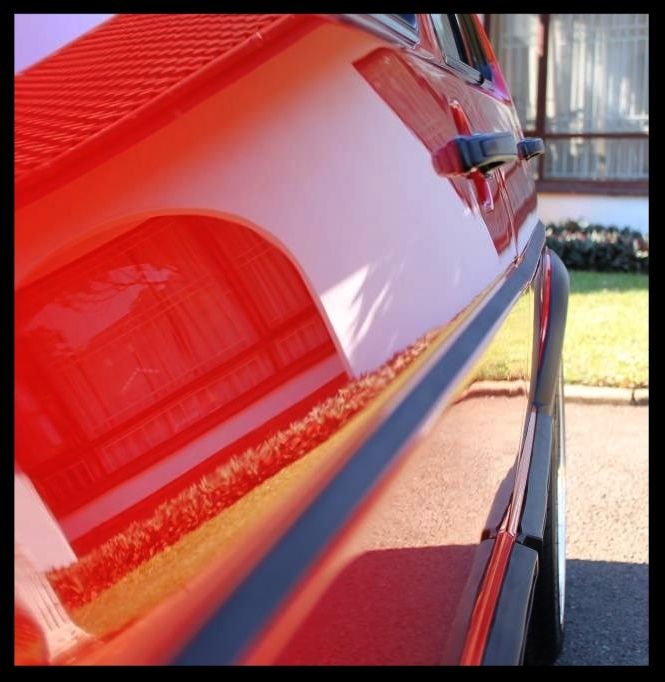
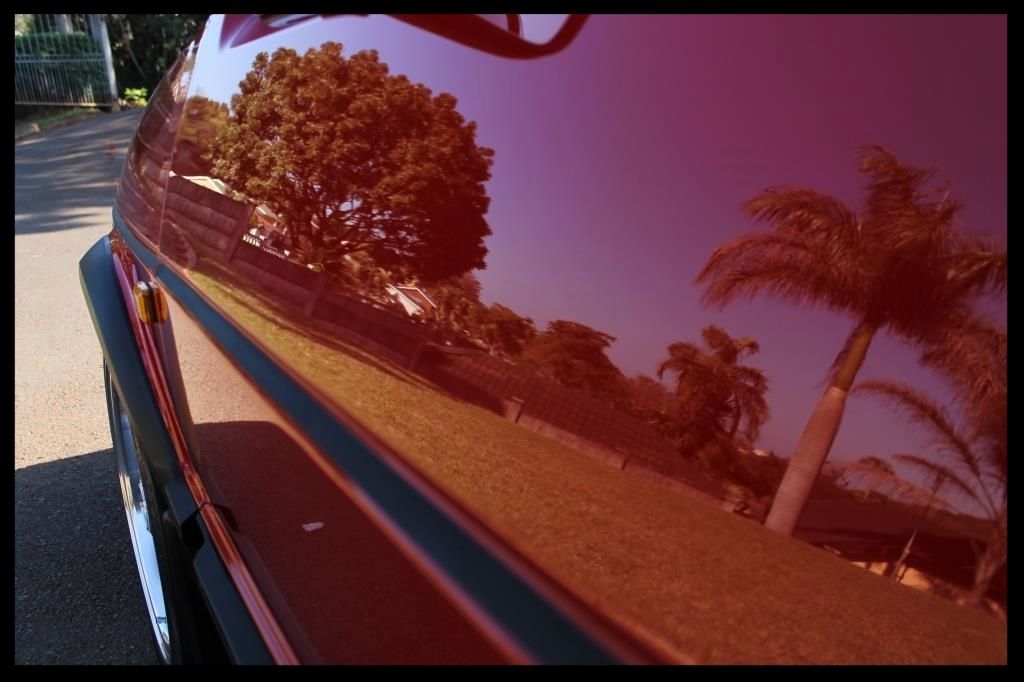
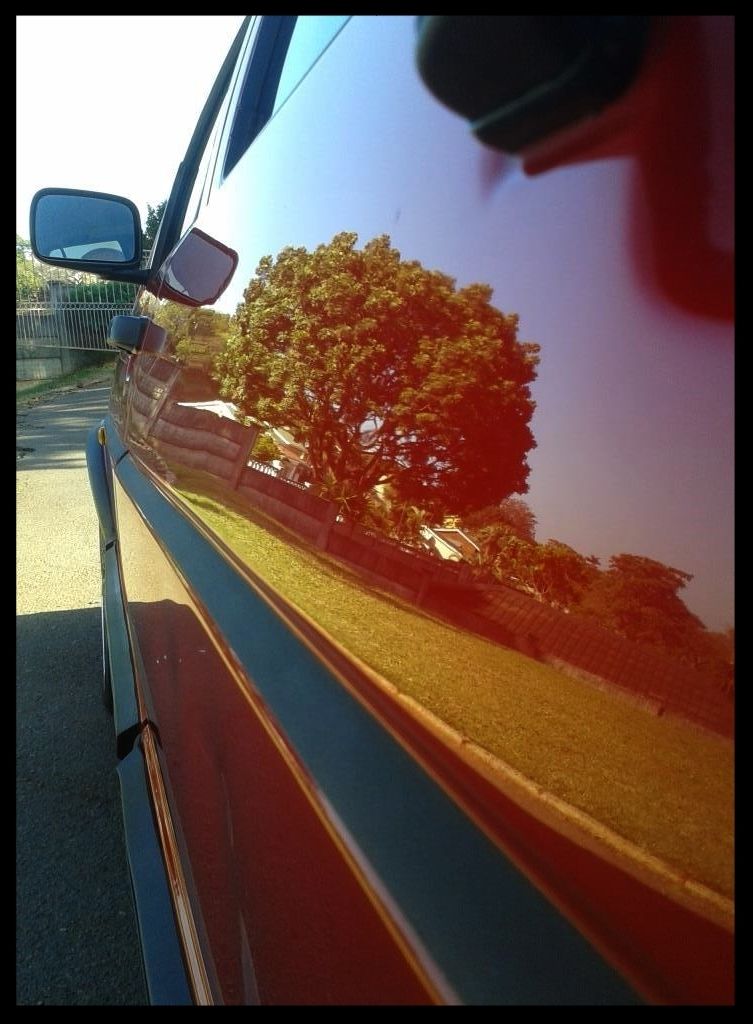
And that leaves us with the after pictures....


Thanks for looking and as always any questions or comments are welcome
:hug:
This is a '89 version and really needed some love from the years of neglect. The previous owner had replace 3 doors (both on the driver side and the front on the passenger side) and they had been painted in single stage paint with oxidation leaving them white, and plenty of swirls and scratches left the OEM paint looking dull and lifeless. The trim was faded. The leather tired and overall it was just begging to be detailed.
So I obliged :grin:
First up the - the business end.
Internals, headwork, cams etc ensure the car is quick enough to keep the owner happy but the engine bay didn't look the part. The cold startup on Sat morning was rather enjoyable and it made me really miss the sound of a lumpy idle in my garage
Not wanting to introduce any water into the engine bay, I opted for some Carchem APC, MF Towels, Brushes and an electric blower to get this dirt cleaned off. Autofinesse Dressel would be used to dress the bay.
Here I had started cleaning up under the bonnet using Autofinesse Tripple on a MF Applicator pad to see how well it would clean up.
The same approach was used on all the painted areas in the bay like this which had a few water spots.
The end results
Then it was on to the wheels, which weren't too bad themselves
The tires were rather dirty though.
After thoroughly washing the fender wells, tires and wheels and decontaminating the wheels, this is what they looked like.
Fender Wells
-HP rinse
-Apply Carchem Citrus APC, let it dwell then agitate using a Mothers Fenderwell Brush
-HP rinse
-Later these would be dressed with Autofinesse Dressel
Tires
-Clean tires with Valet Pro Billbery Wheel Cleaner @ 1:6 and a Mothers Tire brush.
-HP rinse
-Repeat tire cleaning
-HP rinse
-Dressed with 2 coats of Carchem Tire and Trim Dressing
Wheels
-HP rinse
-VP Bilberry Wheel Cleaner @ 1:6, Daytona and Daytona Jnr brushes and Valet Pro Boars Hair Brushes
-HP rinse
-Dry
-Remove tar using VP Citrus Tar Remover
-Spray with Carchem Citrus APC and HP Rinse
-Dry
-Remove bonded and embedded ferrous contaminants with Valet Pro Dragon's Breath, Daytona (big and small) brushes and Valet Pro Boars Hair Brushes
-HP rinse
-Dry
-Optimum Optiseal
At this point I would typically begin the process of pre-rinsing, pre-foaming, pre-washing and then 2BM washing the car, however on this car, I wanted to avoid the possibility of getting water into any part of the vehicle where it may sit and accelerate the onset of rust. So instead I opted for a rinseless wash using Optimum No Rinse. The paintwork itself was pretty clean to boot, with only some light dirt on the car - a perfect candidate for a rinseless wash.
With no visible tar spots and no chance of using an iron remover without seriously getting the car wet, decontamination was only done by claying using Shield Heavy Duty Clay and ONR as lube.
So on to the paintwork. Like mentioned there were 2 types of paint on the car.
The OEM paint that looked like this
And next to it, the single stage stuff
Let's take a better look
So tape up all the sharp edges and trim (This has got to be one of the most difficult vehicles to polish properly [i.e. taping off edges etc] and I used 4 and half rolls of tape where I would typically not even use 1. I do not want to think about how many long hours I spent taping)
Add some Menzerna PF2300 onto a White Lake Country Hybrid Pad, put it on the Flex 3401 and use it to chop out the oxidation and swirls, then follow it up with Menzerna SF4000 on a Black Lake Country Hybrid Pad
.... and what to do you get....?
This
And this
For any of you who have ever used an abrasive substance to polish your car, this pic really shows what is happening. As you engage the abrasives with the paint [in this case using a white foam buffing pad] the paint that is on the car is sanded off and embeds itself onto/into the pad. Its really easy to see the red paint residue on the pad..... but what about when you are polishing a modern car with clear coat on.... well.... the EXACT SAME thing is happening.... it is just that you cannot SEE the paint on the pad because it is clear.... but it IS there.
So frequent pad cleaning is paramount if you want to prevent using that residue to re-scour the surface of car.
And as luck would have it the exact same combo worked wonders for the rest of the vehicle :hurray:
It was then protected with....
Over the course of the detail I initially cleaned all the trim using Shield Heavy Duty Vinyl and Rubber Cleaner and then applied 4 coats of Carchem Tire and Trim Dressing, allowing each coat to soak in overnight.
How it started
After coat 1
After coat 2
The badges were looking very very sad.

Many, many q-tips and some Autofinesse Tripple made a huge difference....
I was asked to remove some tape that had been holding a backboard in place during the cleaning of the seats, which was done using Carchem APC
The seats went from this
[URL=http://s1217.photobucket.com/user/polo_playa/media/Detailing%20-%20Manog%20Golf%202%20Gti/IMG_0936_zpsbb1lcasv.jpg.html]
To this just from the cleaning
[URL=http://s1217.photobucket.com/user/polo_playa/media/Detailing%20-%20Manog%20Golf%202%20Gti/IMG_0937_zpshbkhlqhi.jpg.html]
Seeing how badly cracked and dry they were I gorged them with 3 coats of Glossworx Leather Conditioner spread out over a few days to rejuvenate them - not something I would do on a more modern car with coated (and uncracked) leather seats.
The door and window rubbers were cleaned using Shield Heavy Duty Vinyl and Rubber Cleaner and protected using Aerospace 303. The interior was blown free of loose dust, the carpets vacuumed using a Flex vacuum cleaner. The plastics were cleaned using Shield Heavy Duty Vinyl and Rubber Cleaner and then given a final wipe using Autofinesse Spritz. Lastly the glass was cleaned using Glossworx Glass Cleaner, and Gyeon Repel applied to the front and rear windscreens.
The door and boot shuts were polished using Autofinesse Tripple and a MF applicator pad. The exhaust tip was cleaned using Carchem APC and then polished using Meguiars NXT All Metal Polish, a Mothers Powerball mini and MF towels
And that leaves us with the after pictures....
Thanks for looking and as always any questions or comments are welcome
:hug:
 rops: Wow! What stunning workmanship mate. Seeing the attention to detail you put into your "details" makes me happy I became part of this forum! You my friend are at the the top of my "must read" list.