Rupes side by side detail - 1955 Crown Victoria

Document the time it takes to do each side. I don't need to know, but I'm sure there are those that would like to know so that they can choose their polisher of choice.

That thing is going to look awesome when you're done, Mike.


I'm going to place the garage clock in a place that will show the time as I progress around the car. Regardless of the start time I'll move the clock hands to the straight-up noon position for each half to make it easier to document the actual time for each side.

My guess is that there's not going to be a huge time difference because just like most tools, you still move this tool slowly over the surface for the major correction step. That is you use a slow arm speed for removing defects, i.e. removing a small portion of the clear coat.

Guess we'll see...


Have to tackle a few hot projects first and then I'll get started.


:)
 
That is you use a slow arm speed for removing defects, i.e. removing a small portion of the clear coat.
This is a VERY good point! I got away from this for a while. I wasn't moving the polisher light speed, but I've slowed it down a lot!! It really does help remove defects more efficiently!
 
Okay.... all set-up and ready to go...


Prepping the car
Had to remove the hood ornament, side mirrors and dummy spotlights as well as the fender skirts. I removed the skirts to make it easier to place wheel maskers over the wheels and tires. I'll polish these out separately but they won't be included in the time capture.


Decontaminating the paint
Then I had to decontaminate the entire car including both horizontal surfaces, glass, stainless steel trim and the vertical panels. I also decontaminated the fender skirts too.

To remove the above surface bonded contaminants I used a brand new product. Took some picture and I'll post those later.

As I was removing contaminants I found some overspray on the lower portions of the passenger side.


Reaching the roof
I'm just under 6' tall and even with my reach I can't manage the roof without a little lift so I've folded the legs under the Wagner work platform and this gave me enough height to efficiently manage the roof.


Time-Lapse Video
Yancy has the GoPro camera setup so we're going to try to do a time laps video of this project. Once I start the plan is I'm not stopping till I get all the way through the project.


Test Spot
I'm going to tackle each side, doing a three step project. I did a test spot at the front middle of the hood working both sides equally so as to keep things fair as far as time goes. I found the clear coat paint on this custom paint job to be on the hard side so I'm going to start with the blue foam cutting pad and the Zephir Gloss Coarse Compound and follow this with the Keramik Gloss Fine Cut Polish with the yellow foam pad.

8 Section Passes
I found I was able to remove 98% of the below surface defects making 8 section passes with the compound and cutting pad and a very controlled, slow arm speed. For all you old school guys, you really need to focus on the task at hand and slow your arm speed down, that is how fast you move the polisher over the surface.

You also don't want to bare down on the tool. For the cutting step I'm guessing I'm applying between 5-7 pounds of downward pressure. Part of this is to maintain a smooth buffing action between the paint and the pad so there's no fluttering or buffer hop. The other part is to engage the abrasives with the paint so they take bites out of it. I find myself using much less pressure for the polishing step. One thing for sure, the section I did the test spot to already glistens!


LSP
After this I'm letting Nick choose the wax to be machine applied and I'll apply it by machine, with the Rupes and the white finishing pads. I'm a machine guy so I try to do every step by machine.


Plan of attack
So all three steps to one side and then I'll remove the tape-line and knock out the other side doing all three steps.

Garage Clock
I have a clock taped to the windshield and for each step I'll move the clock hands and set them to 12:00 Noon to make it real easy to see and track how long each side took using the two different size tool.


Marking the sides
I'll place a printed sheet of paper on each side of the windshield to make it easy to see which side is the 21 side and which side is the 15 side.


RUPES LHR75 Mini Random Orbital Polisher
I have the RUPES LHR75 Mini Random Orbital Polisher set up and I've adjusted the air pressure to 90 PSI at the gauge with the tool under pressure for working the small and tight areas of paint.


If
IF the time-lapse video comes out okay and we load the video onto YouTube you'll see the technique I use to apply product to the pad. Works great.


Stay tuned...


:xyxthumbs:
 
She's already to buff. Found quite a bit of contamination all over the entire car. Kind of surprised me as the horizontal surfaces didn't feel horribly bad but whatever it was it covered all the vertical and horizontal surface including all the glass and chrome.

Gave me a chance to test out a brand new product from Autoscrub...

Decontaminating a 1955 Ford Crown Victoria - Brilliant Shine Autoscrub Kit

AutoScrub_Kit_014.jpg


Had to set up the garage for private class tomorrow and didn't feel I would have the time to give each square inch of paint on this beauty proper time to correctly massage the paint back to perfection with the Rupes polishers so will do the side-by-side test first thing Monday.


:)
 
Subscribed!

I'm guessing a good 20% reduction in time....the larger 7" pads cover 36% more surface area than the 6" pads so I figure it's a good guess. :)
 
Aww man, Mike. I Bennett waiting all day to see the end results. Guess I can wait til Monday. Hope you enjoy some of the weekend. :)

Sent from my SAMSUNG-SGH-I897 using AG Online
 
For the cutting step I'm guessing I'm applying between 5-7 pounds of downward pressure. Part of this is to maintain a smooth buffing action between the paint and the pad so there's no fluttering or buffer hop.
Yep! I noticed when I didn't add *any* pressure, the 21mm was less smooth compared to when I applied just a little pressure. No need to bare down!
 
Aww man, Mike. I Bennett waiting all day to see the end results. Guess I can wait til Monday.


Yeah, sorry about that but I just had too many other hot project to get finished by EOD Friday. Didn't want to start and then get interrupted while doing a time lapse video capture, it would kind of ruin the effect.


Hope you enjoy some of the weekend. :)

Thank you sir, going to work on my own projects...


Be back on Monday for the 55 Crown Victoria...


:)
 
***Update***


Half way done and now taking a break while Yancy charges the GoPro Battery.

I've buffed out the entire passenger side of this 1955 Ford Crown Victoria two times. I compounded it first and then followed with the ultra fine polish. I used the Rupes 21 for the large flat panels on the passenger side and the RUPES LHR75 Mini Random Orbital Polisher for the thin panel and tight areas.

Took me right at 2 hours and 20 minutes.


I didn't take the below picture till 10 minutes later after setting up for the driver's side but the GoPro should show 2:20 as I stood by the clock on the windshield and pointed at the time.

Something interesting I found out as I buffed out this car, the white portions are clear coated and on the passenger side the driver's door is clear coated but the front and back fender as well as the roof are single stage.

Just goes to show you never know what you're working on till you actually start buffing...


Here's a couple of pictures...

1955_Ford_Crown_Victoria_032.jpg


1955_Ford_Crown_Victoria_031.jpg


Also, found that even on the 6 speed setting on curved panels with pressure to just a portion of the face of the pad the pad can slow down and sometimes even stop rotating just like you see with Porter Cables, Meguiar's and Griot's DA Polisher.


Next up is the Rupes 15 for the driver's side, it will be interesting to see if I see less of a pad rotation stoppage due to the smaller size pad thus less leverage from the pad.

I'm going to stick with the Zephir Gloss Coarse Compound as it's doing a great job of removing the swirls, scratches and oxidation out of both the single stage and clear coat paint systems but I'm going to try out the Keramik Gloss Fine Cut Polish with the yellow foam polishing pad for the driver's side.

Just to note, the Diamond Ultra Fine Cut Polish worked perfectly to maximize the gloss and clarity after the Zephir compound. I know some of you will want to know if that's too big a jump and normally I would think it would be but the compound and blue foam cutting pad are actually finishing out really nice on both types of paint.

I'm making approximately 7-8 section passes for each section I buff, not sure if that will correctly show up in the time lapse as I think Yancy has it set up to take a picture every 2 minutes.


Back to work...


:)
 
Mike Phillips said:
"Also, found that even on the 6 speed setting on curved panels with pressure to just a portion of the face of the pad the pad can slow down and sometimes even stop rotating just like you see with Porter Cables, Meguiar's and Griot's DA Polisher."

Isn't this eliminated by adding the spacer washer as recommended and tested by Kevin Brown??
 
The washer makes it more like a forced rotation machine.

I'm sure Mike is using it "out of the box" as the manufacturer intended.
 
I'm sure Mike is using it "out of the box" as the manufacturer intended.


Precisely.

This is the first entire car I've buffed out from start to finish and I'm using both the Rupes 21 and the Rupes 15 and even the Rupes LHR75 Mini Random Orbital Polisher exactly as provided by the manufacture and as recommended by the manufacturer.

Keep in mind a part of my responsibilities is to showcase pads, products, tools and techniques that are in keeping with the manufacturer's "message".

This is true whether using Optimum product, Meguiar's products or Wolfgang products, and "yes", Rupes products.

I think most of you reading this would agree as far as "jobs" go in this world, I have a pretty cool job. Heck I'm at work on a Monday buffing out a classic 1955 Ford Crown Victoria watching a big screen TV in an air conditioned studio with a tool that everyone is interested in. I've had a lot worse jobs in my life that's for sure.

I didn't get my job by being lucky and I certainly didn't get it from years of mis-representing companies. My position here at Autogeek comes with very definitive responsibilities, which for the most part and for most of the time I adhere to.


That all said... I have a fun job...


:)
 
Here's my fresh out of the studio update...

Yancy walked out to check on the battery in the GoPro and he said at some point while I was buffing out the driver's side the battery died.

Kind of doesn't matter because for BOTH SIDES I started the clock at noon straight up to make it easy to document the time it took me to do all the machine correction and polishing work.

Before starting the second side I took a lunch break while Yancy charged the battery.

After starting the second side, at around 1:45 ON THE CLOCK taped to the driver's side of the windshield I took at least a 10 minute break to drink some water and take a phone call.

At 2:35 ON THE CLOCK taped to the driver's side of the windshield Yancy removed the battery and went to go charge it.

I took the below two pictures to show where I'm at with the last machine polishing step for the driver's side. All I have left to do is,

Polish the lower portion of the driver's front fender
Do a little polishing in tight areas using the Rupes Mini Polisher.

So in other words, I have about 10 - 15 minutes of polishing work max before I'm ready to machine wax this car.

Here's two pictures I just took not how beautiful the paint is looking in that it's incredibly clear, bright and glossy.


1955_Ford_Crown_Victoria_033.jpg


1955_Ford_Crown_Victoria_034.jpg


The passenger side took me 2 hours and 20 minutes to compound and polish. And this passenger side is taking me, time corrected for the break I took, (I never took a break for the passenger side), approximately 2 hours and 45 minutes.


That means there's about a 25 minute time difference between buffing out one side with the larger stroke, larger pad and the smaller stroke, smaller pads Rupes polishers.

Before I started I think I posted that I didn't think there would be a huge difference in time and I'm correct. I wouldn't choose one tool over the other for time reasons.


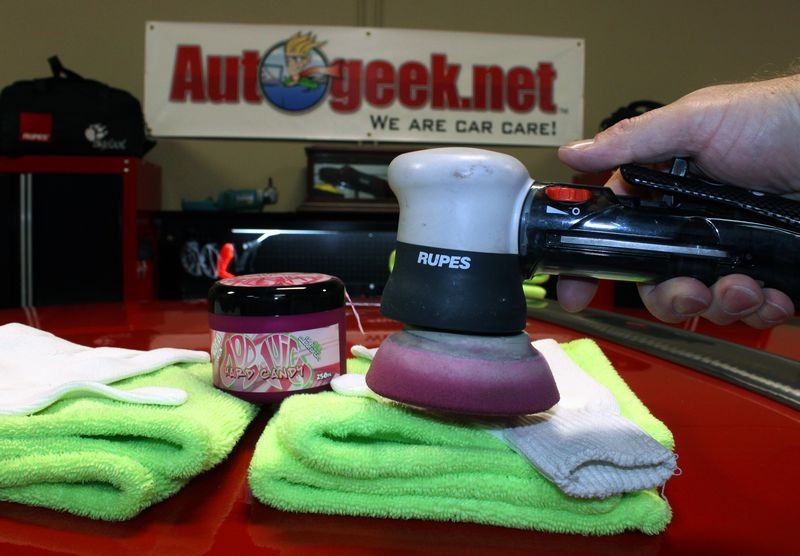
Yancy is standing at my door, that means the battery is ready to go back in and I'll finish the machine polishing and call this time-lapse video done.

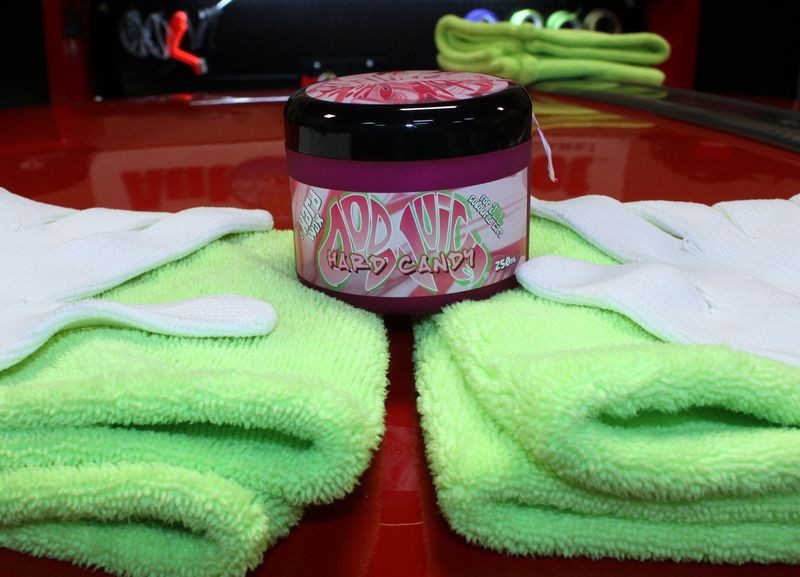
I am going to machine wax the paint using a Dodo Juice Carnauba Wax.


Hang tight...


:)
 
Yes sir you do!! Reading your book, everything is so well documented, pictures and info, I see why you are the man when it comes down to detailing. I can't thank you enough for helping us all. Heck, I am sure all companies out there are dying to give you some of their new products for you to try it out! It's Mike Philips, you are a brand my friend!
 
Hi Mike, Great work and thanks for the effort.

You said you used the LHR75 on some of the panels on the passenger side. Did you use the LHR75 on the same panels on the driver side? How did and how often did you clean your pads as you worked?

I polished a couple of panels and the hood of my Prius Saturday and had to keep reminding myself I wasn't "Hurting" it using the yellow RUPES pads. This is one smooth machine. I have the 15.

I am picking up an order at AG tomorrow and will try to say hi to you and Meghan. I've seen Nick a couple of times the last couple of weeks, busy guy.
 
Yes sir you do!! Reading your book, everything is so well documented, pictures and info, I see why you are the man when it comes down to detailing. I can't thank you enough for helping us all. Heck, I am sure all companies out there are dying to give you some of their new products for you to try it out! It's Mike Philip's, you are a brand my friend!


Thanks for the kind words, I'm glad you like my how-to book. I did my best to make it very thorough, in-depth and detailed. And as my usual style, I picked my words very carefully. I find I'm usually held to a higher standard in all my work in the detail world and I don't mind one bit as it drives me to work harder all the time...


Hi Mike, Great work and thanks for the effort.

You said you used the LHR75 on some of the panels on the passenger side. Did you use the LHR75 on the same panels on the driver side? How did and how often did you clean your pads as you worked?

I polished a couple of panels and the hood of my Prius Saturday and had to keep reminding myself I wasn't "Hurting" it using the yellow RUPES pads. This is one smooth machine. I have the 15.

I am picking up an order at AG tomorrow and will try to say hi to you and Meghan. I've seen Nick a couple of times the last couple of weeks, busy guy.

I'll get to your questions tomorrow, I need to get out of here for the day...

Going to post two more pictures and then log-out. Definitely let me know when you're here tomorrow...


:)
 
***Update***


Just finished machine waxing the entire car with Dodo Juice Hard Candy...


1955_Ford_Crown_Victoria_035.jpg


And because I'm a machine guy, I machine applied the Hard Candy using the Rupes Mini Polisher. So except for wiping clean decontaminating the paint, all the rest of the steps were all done my machine.


1955_Ford_Crown_Victoria_036.jpg


Tomorrow Yancy will get the video up and I'll take some beauty shots before this beauty has to be returned to the owner.


:xyxthumbs:
 
Mike--You certainly do have a fun job and you execute it extremely well. I respect your insight and wisdom or otherwise wouldn't have asked the question re the washer mode. I meant no offense and apologize if my question was taken that way.
 
Back
Top