Buckskincolt
New member
- Aug 11, 2009
- 1,585
- 0
Yup they said that was a public 1 day only sale. Two different promotions!:xyxthumbs:Oh, I saw a banner on the store site counting down less than an hour now, maybe that is for non forum members.
Follow along with the video below to see how to install our site as a web app on your home screen.
Note: This feature may not be available in some browsers.
Yup they said that was a public 1 day only sale. Two different promotions!:xyxthumbs:Oh, I saw a banner on the store site counting down less than an hour now, maybe that is for non forum members.
You also might take a look at the Mequiars 105/205 combo. Lots of people like them the best of all polishes and you can get lots of help for their use here because of their popularity.
Never used 83 and 80 so I can't help you with them. 105/205 work well, I just have a hard time getting a hologram free finish and end up using something to finish them off. Remember to use a test spot so you get it down then all speed will do is make you job less work but you have to get the final product you want as well. I'm going to have to work more with the 105/205 and try to get them down, I have seen guys do awesome work with it. It's like anything else, time spent equals results acheived....I just have not spent the time because I found the WG combo and it gives me what I'm looking for without any trouble.:dblthumb2:I'm a little hesitant to use the 105 based on just how effective and fast people say it can be. I understand once someone knows what they're doing that fast and effective is what you want... but I'd rather start out with something that doesn't work quite as fast. From what I've read #83 and #80 might be better (although slightly lower performance) for me.
Finally pulled the trigger (missed the 20%, but did get the AGO free shipping).
Here's what I got:
1. GG 6" DA Polisher
2. Optimum Hyper Polish Spray
3. Optimum Finish Polish
4. LC Hydro-tech pads, two tangerine & one crimson
5. Also got some additional duragloss products that I need to refill (#105, #601, #271, and #951)
Thanks for all the advice! I ended up just sticking with the 6" pad for now. And I know the 3 pads I got might not be enough, but I'm going to just give it a shot. I'm looking forward to doing some polishing this weekend.
If you have very deep swirls you will end up needing a couple cyan pads as well. The Tangerine's don't have that much cut......We will see, haven't used the Optimum polish sprays but so far they get good reviews. You've got a basic start but a good one and you can build from here. post some pictures and let us know how it goes.
")
 rops?
rops?Mike Phillips said:How To use: G110 - G220 - G100 - PC/Porter Cable - UDM
If you're moving up to machine polishing, be sure to read the below thread before starting...
Tips & Techniques for using the G110, G100, G220 and the PC Dual Action Polisher
(These are all similar tools)
Here's a list of the most common problemsHere's a list of the solutions in matching order,
- Trying to work too large of an area at one time.
- Move the polisher too fast over the surface.
- Too low of speed setting for removing swirls.
- Too little pressure on the head of the unit.
- Too much pressure on the head of the unit so the pad quits rotating.
- Not keeping the pad flat while working your product.
- Too much product, too little product.
- Not cleaning the pad often enough.
The first 4 are the most common.
- Shrink your work area down, the harder the paint the smaller the area you can work. The average area should be and average of about 16" by 16" up to 20" by 20" or so. You have to do some experimenting, (called a Test Spot), to find out how easy or how hard the defects are coming out of your car's paint system and then adjust your work area to the results of your Test Spot.
- For removing defects out of the paint you want to use what we call a Slow Arm Speed. It's really easy to move the polisher too quickly because the sound of the motor spinning fast has a psychological effect to for some reason want to make people move the polisher fast. Also the way most people think is that, "If I move the polisher quickly, I'll get done faster", but it doesn't work that way.
- When first starting out many people are scared of burning or swirling their paint, so they take the safe route of running the polisher at too low of a speed setting, again... this won't work. The action of the polisher is already g-e-n-t-l-e, you need the speed and specifically the pad rotating over the paint as well as the combination of time, (slow arm speed), together with the diminishing abrasives, the foam type, and the pressure to remove small particles of paint which is how your remove below surface defects like swirls or scratches. It's a leveling process that's somewhat difficult because the tool is safe/gentle while in most cases, modern clear coat paints are harder than traditional single stage paints and this makes them hard to work on. This is also why people get frustrated, they don't understand paint technology, all they know is their paint swirls easy and getting the swirls out is difficult and thus frustrating.
- For the same reason as stated in #3, people are scared, or perhaps a better word is apprehensive, to apply too much pressure and the result of too little pressure is no paint is removed thus no swirls are removed.
- Just the opposite of item #4, people think that by pushing harder on the polisher they can work faster and be more aggressive, but the truth is the clutch in the tool is a safety mechanism to prevent burning and will cause the pad to stop rotating, thus less cleaning or abrading action and once in a while this will lead a person to then post on the forum something like this, "Hey my pad doesn't rotate". There needs to be a balance of enough pressure to remove defects and keep the pad rotating but yet not too much pressure as to stop the rotating action. This balance is affected by a lot of things, things like type of chemical, some chemicals provide more lubrication and the pad will spin easier, curved surfaces or any raise in body lines will tend to stop the pad from rotating. This is where experience on how to address these areas comes into play or you do the best you can and move on. It's not a perfect tool, nor a perfect system, but it's almost always better than working/cleaning by hand.
- Applying pressure in such a way as to put too much pressure to one side of the pad will cause it to stop rotating and thus decrease cleaning ability.
- Too much product over lubricates the surface and this won't allow the diminishing abrasives to do their job plus it will increase the potential for messy splatter as well as cause pad saturation. Too little product will keep the pad from rotating due to no lubrication and there won't be enough diminishing abrasives to do any work. Again it's a balance that comes with experience, or another way of saying this would be it's a balance that comes with hours of buffing out a car to learn what to do and what not to do. Information like what you're reading here is just an edge to decrease your learning curve. Hope this is helping.
- Most people don't clean their pad often enough and most of the time the reason for this is because they don't know they're supposed to clean their pad often and they don't know how to clean their pad. Again, that's why this forum is here to help you with both of these things. You should clean your pad after every application of product or every other application of product, your choice, most of the time cleaning your pad after every other application of product works pretty well. It enables you to work clean and enables the foam pad, the polisher and the next application of fresh product too all work effectively. How to clean your pad will be addressed below sooner versus later, but not at the time of this posting. (Sorry, I'm behind a keyboard, not a video camera
Mike or Buckskincolt, if retrying what I've got (tangerine HT w/Hyper Polish Spray) with improved technique doesn't yield the results I want, would trying Meg's ultimate compound with the tangerine pads be an acceptable option?
Or should I just bite the bullet and get a more aggressive pad to go with the Hyper Polish? (and I take from no responses about it that the ScratchX 2.0 is a no-go with a DA?)
If you read all the people here who use the Meg 105/205 they use different pads to change the cut. The SMAT compounds don't break down as you use it so what you start cutting with is what you end cutting with. So the only ways to increase cut is by technique change (more pressure on the pad at a higher speed to keep it rotating) or a more aggressive pad.Thank you all for the solid points to improve on. On to the pad/product options: Buckskincolt, I am hesitant (as you suspected) to use a too aggressive pad. The conventional wisdom here seems to be go more aggressive on the product and less on the pad. Is this not true with more modern SMAT products?
First let me say Mike is the expert here and you should listen to him, I'm just a hobbyist that enjoys detailing and making cars look like they should. I have no experience with ScratchX but I would think you can use it with a DA. Hopefully Mike will chime in here, I don't know how the Hyper Polish Spray cut compares to the cut of Meg's Ultimate compound, and what the gain would be?Mike or Buckskincolt, if retrying what I've got (tangerine HT w/Hyper Polish Spray) with improved technique doesn't yield the results I want, would trying Meg's ultimate compound with the tangerine pads be an acceptable option? Or should I just bite the bullet and get a more aggressive pad to go with the Hyper Polish? (and I take from no responses about it that the ScratchX 2.0 is a no-go with a DA?)
I still maintain you need Cyan pads for the Hyper Compound and Tangerine for the OFS, but a good technique test spot will confirm this. When you use the crimson pad with the OFS you are only using the cut of the spray the Crimson pad has no cut so at best this would be a final Jeweling process to get that last little bit of shine.One more thing I forgot... is the crimson HT pad not a good match with Optimum Finish - should I be using it with a tangerine pad?
Mike,
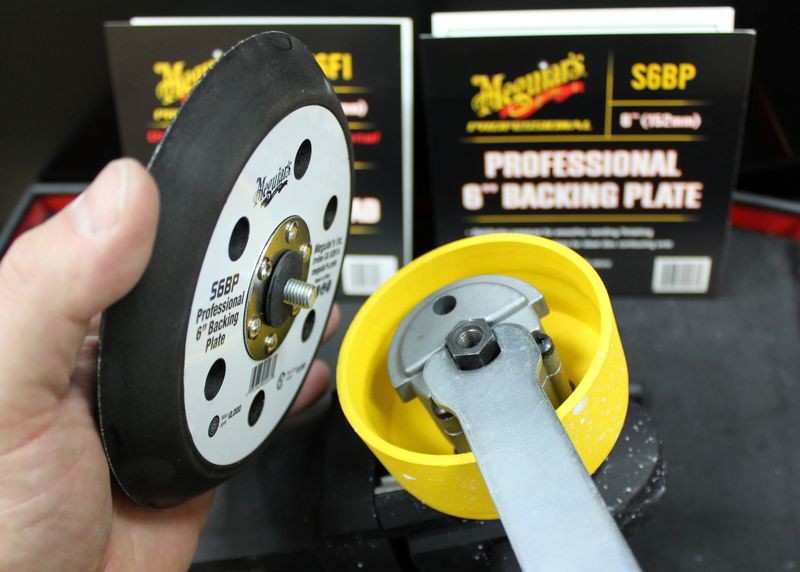
Based on this advice, I ordered this backing plate and a variety of 5.5 inch pad, and just received my order, and I'm a bit puzzled.
The Griot 6" polisher's pad is secured with 4 screws - the 5" backing plate has a 5/16" spindle - is there a way to use the plate on this polisher?
If so, can you tell me how to do it?
Thanks