First post, although I've been reading this forum for quite some time. I've now read the initial article in this thread and all 15 pages of comments and, believe it or not, I still have questions about how to care for my 1975 Corvette.
Hi Larry and welcome to AutogeekOnline! :welcome:
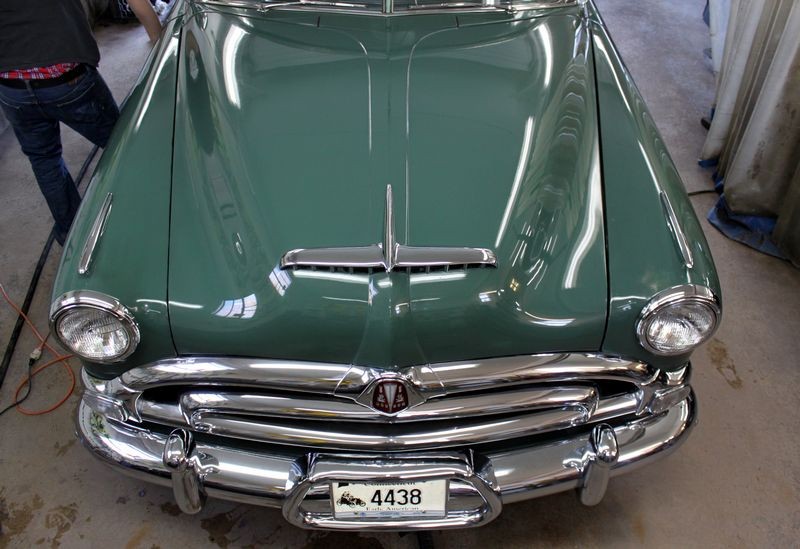
The car is always garaged, and covered, and the original lacquer (I believe) paint actually shines quite well (it is Classic White per Chevrolet). But the paint is nearly 40 years old and pretty badly checked in some areas (worst on the rear deck lid), has some chipping (I try to keep up by going on Chip Patrol regularly) and due to both age and many washes/waxes, is very thin in spots (worst where the driver/passenger would rest his/her arm when the window is down).
What you describe as far as the current condition is completely normal for single stage paint this old.
First, what I have learned.
One, the car will never again see a hose and a bucket of car wash. Waterless wash from now on.
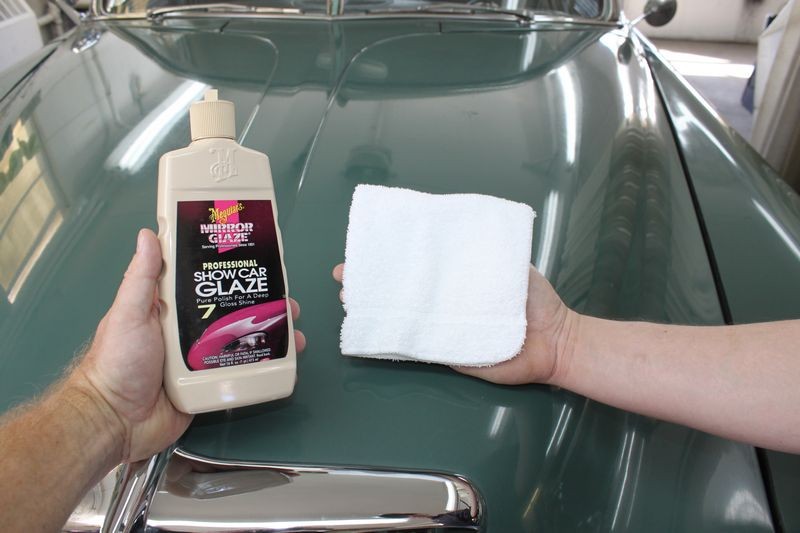
Second, Meguiar's #7 Show Car Glaze is magic stuff.
Third, when used appropriately, a microfiber cloth can act as an abrasive.
Technically it's
100% Cotton Terrycloth that can and will work best as a gentle form of abrasive.
Autogeek doesn't sell 100% terrycloth wash cloths or towels, I wish we did because I think we would sell a lot of them.
So in the original article I used and showed a microfiber towel that we USED to carry because it was kind of like terry cloth with a LARGE loopy nap. We no longer stock it.
For me and my projects though, I actually use 100% Cotton Terrycloth. Heck go to Wal-Mart, Target or any similar store and buy a pack of cotton wash cloths for a few bucks.
LOTS of info here,
http://www.autogeekonline.net/forum...ips/77052-detailing-1954-chevy-bel-air-2.html
In my article, I use and recommend terry cloth wash cloths to apply the #7 and the reason for this is because the nap, that is the tiny little cotton loops will work to not only agitate, loosen and abrade dead paint off the car they also help to really work the oils into the paint.
Microfiber towels would be too gentle. Microfiber towels would however be the right tool to remove the future polish and wax we apply.
Microfiber can be used but it's so dang soft and gentle. If you want soft and gentle than go with microfiber but if have dead paint to remove then go with terrycloth.
Now the questions.
The No. 7 bottle says to apply sparingly and not to let it dry, but everything here says to put it on wet and let it stay on overnight.
As a guy that used to write the directions for the labels on Meguiar's products, I can tell you that the directions on the label are CORRECT when using it as the label intends and that is on paint in great shape.
My article and thus my directions are for old single stage paint and that's is why they are different than the directions on the label.
Make sense?
I'm much more inclined to follow the recommendations found on this forum but is there any chance that the formulation has changed and it should be used sparingly and not left on? ("Just because your paranoid doesn't mean they're NOT after you!").
Here's what makes #7 so unique in the Car World. It's been around since the time of the Model T and the formula is
UNCHANGED. That's a good thing.
If you read my how-to book, I document that we've only been driving cars for a little over 100 years. Before that we rode horses.
There were no Car PAINT companies back in the early days of the AUTOMOBILE and they coated the wood and steel with Shellac, Varnish and Lacquer paints from the WOOD FURNITURE INDUSTRY.
Then companies started coming out with paints specifically developed for CARS.
Here's the link to my how-to book, I explain all of this and a lot more....
Detailing How-To Book and Detailing How-To E-book by Mike Phillips
The formula is unchanged. There's a saying, goes like this...
If it ain't broke... don't fix it....
I hope they never change it.
With the No. 7, it is best to avoid the areas immediately surrounding chips so as to not promote further lifting of the paint, or (gently?) treat them with the 7?
Gently treat them with the #7, key word gently. #7 is not a "cleaner" but rubbing anything creamy over paint has a cleaning and polishing effect and will maintain the health and shine of the paint.
What would be the recommendation for sealant/wax after the #7?
The #7 bottle says follow up with Meguiar's Mirror Glaze Yellow Wax (#26), which I have and could certainly use.
This wax has been around since the 1970s BUT the formula has been changed because it's been improved over the years. It's a non-abrasive pure wax and also a very clear wax.
But I also have Meguiar's Deep Crystal Carnauba Wax which I like quite a bit.
Deep Crystal Carnauba Wax is the CONSUMER version of M26.
I also was recently introduced to Blackfire products and have used their Crystal Seal on my newer cars. I'm not all that familiar with the newer polymer products - would they be recommended for older single stage paint?
For taking care of old single stage paint I would stick with a traditional Carnauba wax.
Wayne Carini's Thumb of Approval
In this shot you can see Wayne's hand as he's walking down the side of the car inspecting the results and giving the paint a final wipe....
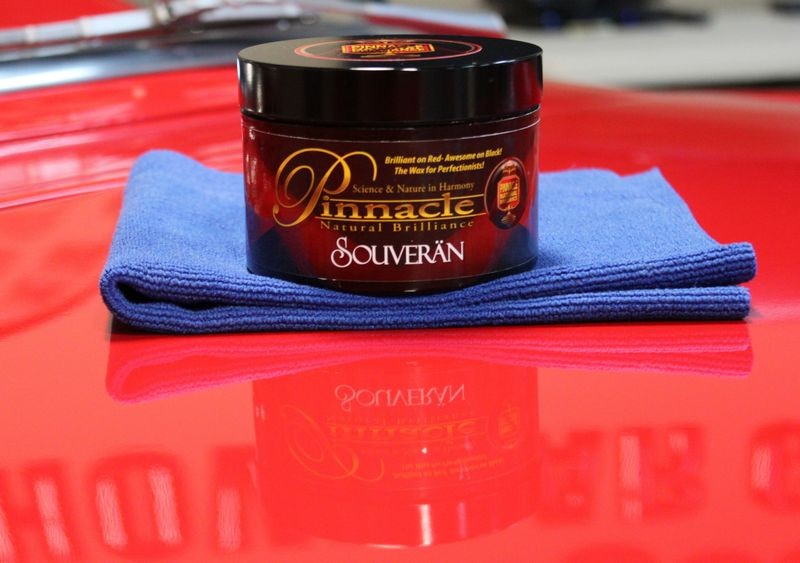
And this my friends is one of the most rewarding pictures I've ever taken. This shot was taken after we finished polishing every square inch of paint and then applying a coat of
Souveran Paste Wax.
This is what I'm talking about....
Get a jar of the Pinnacle Souveran Paste Wax, I use it on so many show cars that do nothing but win first place after first place after first place.
You will love it.
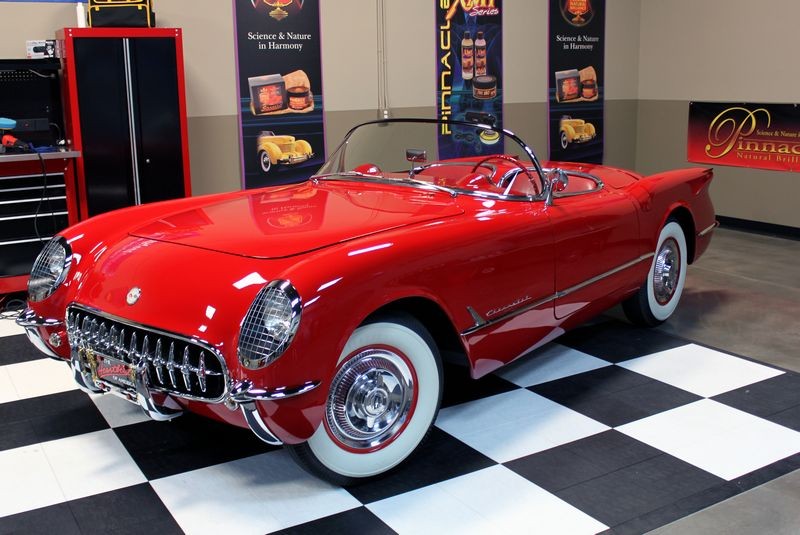
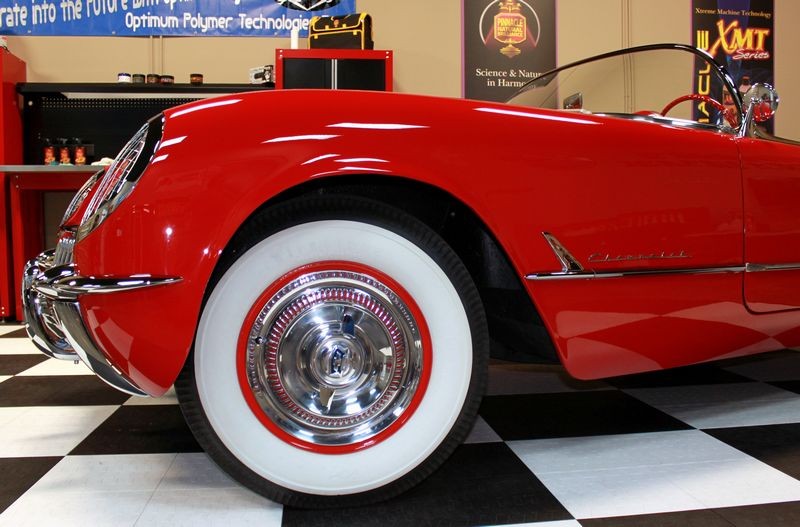
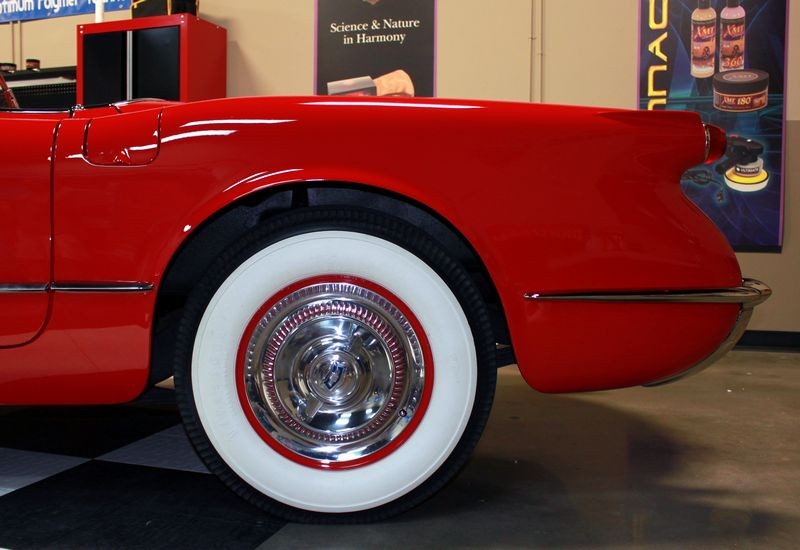
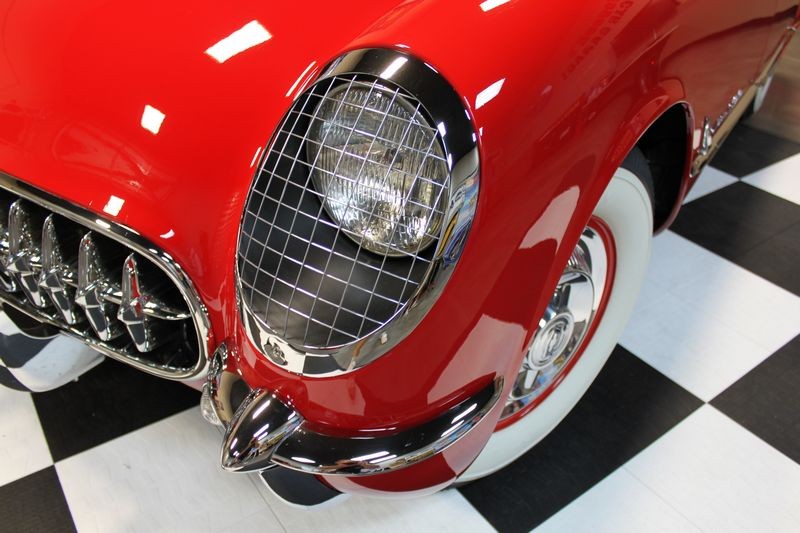
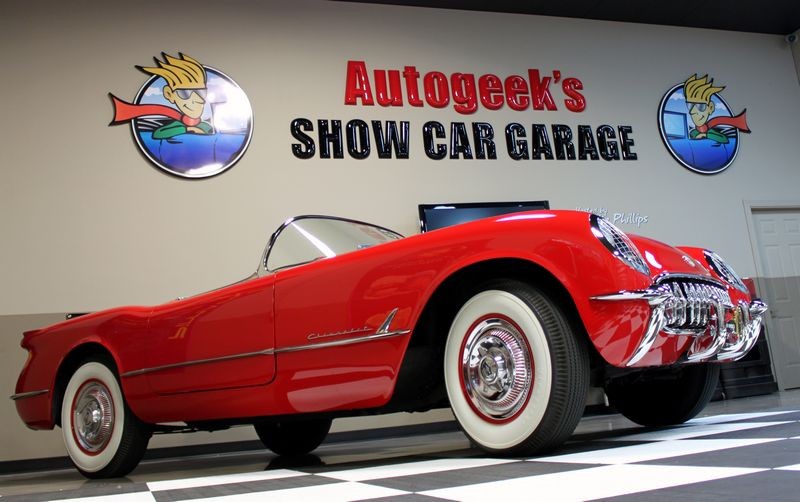
Here's a Corvette a few years older than your sporting Pinnacle Souveran Paste Wax
")