Type II Water spot help

keo

New member
Joined
Jun 25, 2014
Messages
8
Reaction score
0
Hi all,

I need some direction / advice on how to remove Type II water spots on the trunk panel of my 2003 Z06.

So far I've done:

1. Wash / Clay
2. Polish with Griots Machine Polish 1 with a LC Yellow pad
3. Polish with Griots Machine Polish 2 with a LC Orange pad
4. Polish with Griots Machine Polish 3 with a LC Orange pad
5. Polish with Griots Machine Polish 4 with a LC White pad
6. Glaze with Griots Paint Glaze with a LC Black pad

Buffer is a PC 7424.

Pics after the above:

https://plus.google.com/photos/1049...ms/6028954660345195825?authkey=CMDUyciPmLe6Fg

I'm not sure how best to proceed. I do know how to wet sand but am not sure if I need to as I can't get a finger nail into the spot, just see it.

Thanks in advance,
KEO
 
Hi all,

I need some direction / advice on how to remove Type II water spots on the trunk panel of my 2003 Z06.

So far I've done:

1. Wash / Clay
2. Polish with Griots Machine Polish 1 with a LC Yellow pad
3. Polish with Griots Machine Polish 2 with a LC Orange pad
4. Polish with Griots Machine Polish 3 with a LC Orange pad
5. Polish with Griots Machine Polish 4 with a LC White pad
6. Glaze with Griots Paint Glaze with a LC Black pad

Buffer is a PC 7424.

After using all of the above and you're not removing enough clearcoat paint to remove the imprints and etching shown below then it must be your technique?


watermark.php


watermark.php


Hang on....


:)
 
First and foremost, answer these quick questions....

What size are the pads? 5.5" thin pads or the larger 6.5" pads?

First generation PC 7424 or newer PC 7424XP?

Are you running the PC on the 6 speed setting?

Are you pushing down on the head of the polisher with firm pressure?

Did you mark your backing plate so you can visually tell that the pad is rotating as you buff?


Video: Mark your backing plate to make it easy to see pad rotation


MarkYourBackingPlate01.jpg


Here's a quick video that show how and why to mark your backing plate to see and monitor pad rotation while doing any correction or polishing steps.


[video=youtube_share;QM8PnDooZP8&hd=1"]How To Check Pad Rotation on a DA Polisher -...[/video]​


:)
 
Keo, before attempting the more aggressive route, again. Try Carpro Spotless. I had bad spots as well and Spotless wiped them away with ease.
 
Hi Mike,

Thanks for the response. Answers:

What size are the pads? 5.5" thin pads or the larger 6.5" pads? The Yellow and one Orange pad was the old 6.5" CCS type.
The second Orange pad was the new 6.5" pad.
The White pad is the old 6.5" CCS type.
The Black was the newer 6.5" pad.

First generation PC 7424 or newer PC 7424XP?
First generation.

Are you running the PC on the 6 speed setting?
Yes

Are you pushing down on the head of the polisher with firm pressure?
Not the whole time.

Did you mark your backing plate so you can visually tell that the pad is rotating as you buff?
No.

I'll watch the video this evening.
 
Keo, before attempting the more aggressive route, again. Try Carpro Spotless. I had bad spots as well and Spotless wiped them away with ease.

Interesting... I'll check it out. Thanks!!!
 
So after the wash / clay / Spotless treatment, the spots was still etching in the clear coat and that's where the Nanoskin came in?

Yeah I'm not sure if clay would have enough grunt to assist in removing the water spots.

Move the car into the shade. Spray the area with spotless then spray a foam wax applicator with spotless and use it kinda like you are waxing a car. Go in up and down motions then side to side then in circular motions. Make sure you are using enough product to keep the area wet. Do this for about 30 sec - 1min in a 2'x2' section or at least near that size. Hose the area down to remove the acid then saturate with clay lube and use the nanoskin. The paint will feel rough. Use the nanoskin for around the same amount of time (30sec-1min). Wipe with clean dry MF and inspect. Repeat till desired results are achieved.


Sent from my HTC6435LVW using AG Online
 
This would be a good time to watch Mike's excellent presentation on wet-sanding with the Griot's 3" polisher. I've lost the link. It's on the forum someplace. You'd fix this good as new in like 30 minutes.
 
Yeah I'm not sure if clay would have enough grunt to assist in removing the water spots.

Move the car into the shade. Spray the area with spotless then spray a foam wax applicator with spotless and use it kinda like you are waxing a car. Go in up and down motions then side to side then in circular motions. Make sure you are using enough product to keep the area wet. Do this for about 30 sec - 1min in a 2'x2' section or at least near that size. Hose the area down to remove the acid then saturate with clay lube and use the nanoskin. The paint will feel rough. Use the nanoskin for around the same amount of time (30sec-1min). Wipe with clean dry MF and inspect. Repeat till desired results are achieved.


Sent from my HTC6435LVW using AG Online

Ok, so that's what I didn't understand about your post and still don't after this above explanation. Is the acid supposed to eat the clear or is that done with the Nanoskin? I can't feel anything on the paint, meaning my paint is polished smooth but the spots are still there.

The post from TundraPower about wet sanding makes more sense to me to remove clear and thus the etched water spot stains.

Sorry for my confusion in advance.
 
Lots of advise but everyone will agree an original PC and 6.5" pads aren't going to make a dent in it unless you have superb technique. For spot repairs I'd go to a smaller pad like 4". 5.5" is good for all around work. Wet sanding would be my last resort.

I'm fortunate to have several polishers. See if someone near you has one you can borrow or that they might be willing to help you out. My PC wears small pass with an extension permenantly for those thought to reach areas. I pretty much use Flex polishers for everything else (DAs & RB).
 
Ok, so that's what I didn't understand about your post and still don't after this above explanation. Is the acid supposed to eat the clear or is that done with the Nanoskin? I can't feel anything on the paint, meaning my paint is polished smooth but the spots are still there.

The post from TundraPower about wet sanding makes more sense to me to remove clear and thus the etched water spot stains.

Sorry for my confusion in advance.

Nothing wrong with Car Pro Spotless, it certainly works, I'm just not into the "acid" part. That's just how I roll. Wet sand this with Trizact 5000. If that doesn't work try 3000 then finish back with 5000. Polish back to gloss with whatever you like. It might take 30 minutes.
 
Does a PC7424XP help at all? I have access to one but don't have any 5.5" pads past LC white. Seems like I would still need something heavier. I also have Menzurna PG, IP, and FF if that would doing anything here.

I get that either I need to go down the Spotless / Nanoskin route or wet sanding but it sounds like my PC isn't enough to do either. Do I need a Flex or would something like the GG 3" work?

You can wet sand with a PC7424XP but I wouldn't recommend it for this. GG 3" is superb for "spot" wet sanding and in small spaces. It is also very forgiving for beginners. As I said before, use Trizact 5000 on speed 3, maybe 4, no more. If that doesn't work use 3000 then 5000. (On this note, do not wet sand with any of the Rupes polishers unless you really know what you're doing. They cut fast fast fast even with only 3000 paper. Proceed at your own risk.)
 
That's hugely helpful. Thanks!

What kind of solution do I use with the Trizact? Normally when I wet sand by hand I use soap and water.

I'll post up pics afterwards.
 
Does a PC7424XP help at all? I have access to one but don't have any 5.5" pads past LC white. Seems like I would still need something heavier. I also have Menzurna PG, IP, and FF if that would doing anything here.

I get that either I need to go down the Spotless / Nanoskin route or wet sanding but it sounds like my PC isn't enough to do either. Do I need a Flex or would something like the GG 3" work?

I strongly suggest you first try the Spotless before even considering wet sanding! Hell, you should try compounding before wet sanding!
 
Hi Mike,

Thanks for the response. Answers:

What size are the pads? 5.5" thin pads or the larger 6.5" pads?

The Yellow and one Orange pad was the old 6.5" CCS type.
The second Orange pad was the new 6.5" pad.
The White pad is the old 6.5" CCS type.
The Black was the newer 6.5" pad.

First generation PC 7424 or newer PC 7424XP?

First generation.

As others eluded to, the large diameter 6.5" pads PLUS how thick they are doesn't work very well with first generation Porter Cable polishers. The fact is,

Thin is in...

Whether you just want to fix these imprint rings this one time or down the road you're going to want to buff out your car, you need to get a 5" backing plate and then get some 5.5" thin pads like the Lake Country 5.5" flat pads. These are the simplest of pads and also the most effective.


Click and read this link,

5 inch Backing Plates on Meguiar's, Griot's and Porter Cable DA Polishers


Are you running the PC on the 6 speed setting?

Yes

Are you pushing down on the head of the polisher with firm pressure?

Not the whole time.

Did you mark your backing plate so you can visually tell that the pad is rotating as you buff?

No.


The above is all technique related but all the great technique in the world won't make big thick foam pads work better on anemic tools.


:)
 
Lots of great suggestions by our members so far...


Here's the deal though... if the paint is physically changed do to whatever corrosive elements were in the water that caused this problem then the only way to remove or repair the changed portion of the paint is to re-level the surface.

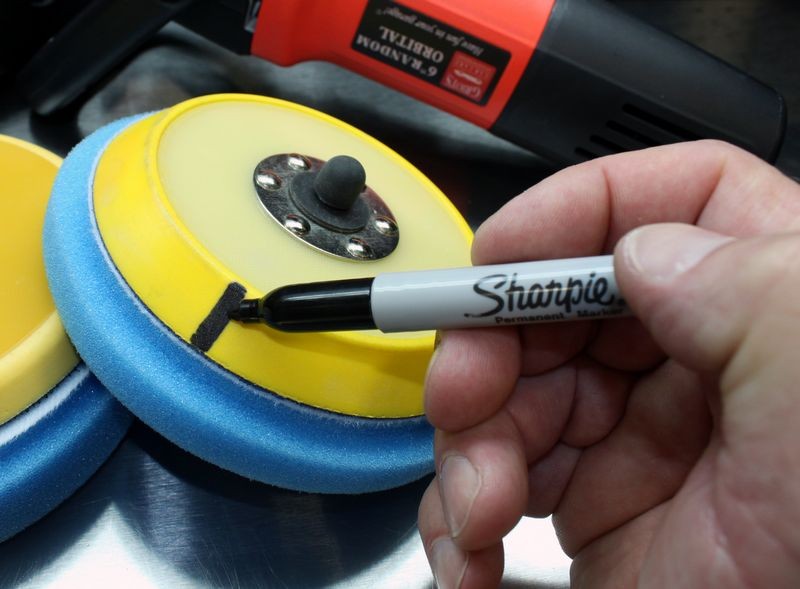
To do this you're going to need pads that will rotate on your First Generation Porter Cable 7424XP.

Next you're going to probably need a Medium Cut Polish or an Aggressive Compound.


Here's an article I wrong over three years ago and it has pictures and remedies for all types of water spots...

Here's' the article,


3 - Types of Water Spots - Type I, Type II and Type III


And if you scroll down the page a ways you'll find this...


Imprint Rings
These water spots look like they're established water spots, that is, every time it rains, or a sprinkler goes off, the water pools in the same place giving any corrosive substances repeated opportunity to etch into the paint.

SprinklerSpotsS003.jpg


SprinklerSpotsS004.jpg


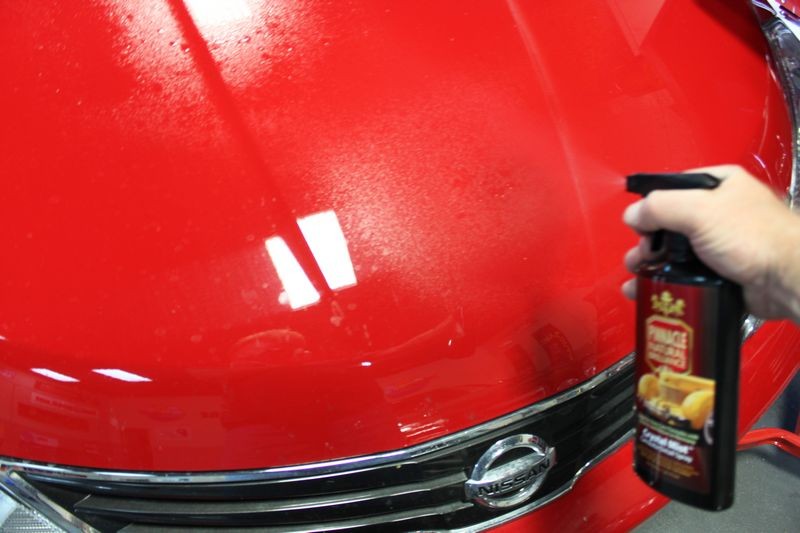
Visually, I can tell the paint is likely etched in this instance but I won't know till I get the surface clean. The first step is to wash or wipe the finish, in this instance I'm going to repeat wiping process I used on the Mercedes-Benz with a spray detailer.

SprinklerSpotsS007.jpg


SprinklerSpotsS008.jpg


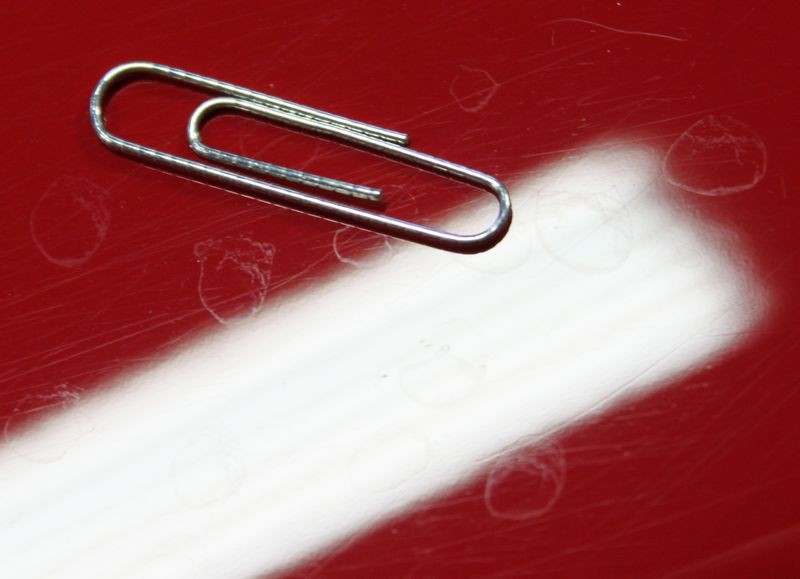
After wiping the paint clean, there are water spot imprints remaining in the paint.

WaterSpotImprints01.jpg


WaterSpotImprints02.jpg


WaterSpotImprints03.jpg


The imprint rings you see in the clear layer of paint over the red basecoat layer of paint are physical changes in the paint by something corrosive in the water that landed on the paint.


To remove these and use the least aggressive product to get the job done I'm going to use a light paint cleaner with a microfiber applicator pad to gentle clean the paint.

SprinklerSpotsS009.jpg


SprinklerSpotsS010.jpg


SprinklerSpotsS011.jpg


If you want to take some of the work out of the cleaning step as an option you can use a machine polisher to apply and work the paint cleaner, this can save a lot of elbow grease and speed up the process especially if the water spots are over the entire car.

SprinklerSpotsS012.jpg


If you opt to machine apply the paint cleaner and you're starting with a clean, dry pad, be sure to prime the pad by spreading the paint cleaner over the entire face of the pad, by doing this 100% of the face of the pad will be working for you from the very first moment you turn the polisher on and begin buffing.

SprinklerSpotsS013.jpg


SprinklerSpotsS014.jpg


Remove the paint cleaner residue by wiping gently using a fresh, clean microfiber towel and then apply a coat of wax or paint sealant as the paint cleaner will effectively remove everything off the surface including any previously applied wax or paint sealant.

SprinklerSpotsS015.jpg


In keeping with the philosophy of using the least aggressive product to get the job done, if washing or wiping the paint doesn't remove the water spots the next step would be using a light paint cleaner. If the light paint cleaner didn't work you could then test a light finishing polish and if that wasn't working fast enough and/or effectively enough then you could try a more aggressive product. The goal being to remove the water spots using the least aggressive product and by doing so leaving the most amount of paint on the body panels to last over the service life of the car.

SprinklerSpotsS016.jpg


Water Spots and Sprinkler Water Spots Successfully Removed
SprinklerSpotsS017.jpg


One bit of advice... try to avoid parking near sprinklers when their placement is known... in the example of the Mercedes-Benz, the water spots simply wiped off; I have seen instances of Sprinkler Water Spots that have etched round craters into clear coat paints and removing these Type II Water Spots can be not only time consuming but it will require you to remove a measurable amount of the clear layer in order to completely remove the spots.


:)
 
Back
Top