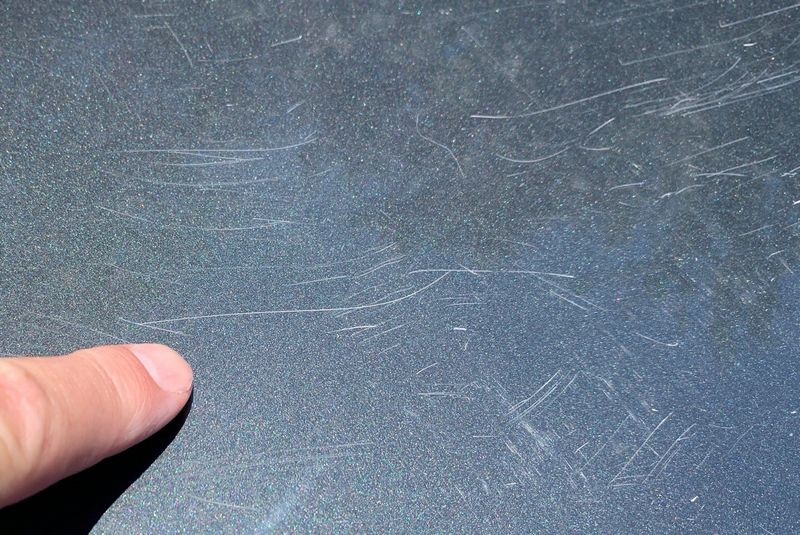
When to stop buffing - Or - How far should you go to remove swirls and scratches?

And it is for this type of horrible experience that most people, especially if working on a daily driver, shouldn't try to remove each and every single scratch out of the paint.


:dblthumb2:

Because its hard to tell wether the defect is just into the clear and not deeper into the base
 
Mike you are so wise. I was one of those who thought I had to get all scratch’s and swirls out. You brought me back to the real world. Most of these cars being detailed are daily driver’s so keep it simple and don’t go to far repaint isn’t cheap! Just remember how thin the paint is on these daily drivers, it’s post note thin!
I personally think it’s money well spent investing in a paint meter like a Defelsko because you don’t know who detailed the car before you at least you will know what you have to work with having that meter could save your butt.
 
Really good article. Thanks. I started getting more serious about paint correction last year and found my perfect "test spot" to try out a lot of the products and techniques suggested by the posts and how to articles on AG. That being my 20 yr old Craftsman garden tractor. It's now the shiniest garden tractor in the neighborhood.
 
Mike Phillips said:
And it is for this type of horrible experience that most people, especially if working on a daily driver, shouldn't try to remove each and every single scratch out of the paint.


Because its hard to tell wether the defect is just into the clear and not deeper into the base


Yes, exactly for this reason and simply because the FACTORY clear layer of paint, (what most people are working on i.e. factory clearcoat), is so thin that EVEN if you're able to VISUALLY make a scratch disappear out of the factory clear layer of paint - you will have likely left the clear paint in that area that you now risk clearcoat failure moving into the future - OR anytime you work on that area in the future you could buff through what's left of the clear layer.


And this topic goes directly to this article. This has to be one of the most common articles I reference in the online world and the real world.

Clearcoats are thin by Mike Phillips

watermark.php


Great question - thank you for asking.


:xyxthumbs:
 
Great read. I love when older articles pop up I missed. It’s a reason I really find the forum useful as the content doesn’t disappear over time.

One thing that kind of ties in with this article is using products with fillers. I know fillers are a taboo with the keyboard detailers but in real life they are OK in my book on some instances. For example when you are working on a vehicle that may have some age and has been “detailed” an unknown amount of times or someone who uses their vehicle off road where it will eventually get scratched up again.
Bottom line is, you can’t keep removing clear without eventual failure. So a quick product with fillers makes the vehicle glossy and shiny again is actually the best course of action for the future of the vehicle.
 
Wow Thanks Mike! I came her for info about polishing glass but got side tracked here. So do you have different levels of interior packages as well? Is there an article on this? Where do you typically do a test spot?

Sent from my SM-G975U using Autogeekonline mobile app
 
Wow Thanks Mike!

I came her for info about polishing glass but got side tracked here. So do you have different levels of interior packages as well?

Is there an article on this? Where do you typically do a test spot?


In my original VIF - Vehicle Inspection Form - I share that just like exterior packages, a person should have interior packages. These are based on the time it takes to do the work and the time is based upon the degree of neglect or dirtiness of the interior.

In my car detailing classes, I teach what I practice myself and that is, if someone brings you a car interior that NEEDS to be cleaned, the word NEEDS sends up a RED FLAG and this is where you say,

I would love to clean your car's interior but I'm afraid my schedule if full. Here's the phone number go my buddy Jim, he's great at interior detailing, give him a call.


The lesson or point is, don't take on unprofitable work that is also NOT enjoyable. If someone NEEDS their car's interior cleaned, perhaps because the kids puked or the dog urinated on the carpet, I don't want to do this type of work in the first place.

I don't like doing interior work in the first place and if I do take the job it's only for interiors that are NOT in bad condition. Here's a great recent example,

How to use 303 Aerospace Protectant to Restore Vinyl Seats by Mike Phillips


303_Multi_Aerospace_004.JPG


The interior of this Camaro was lightly dirty, as in dirt on the floor carpet, easy enough to clean. The main thing was the vinyl interior just had not been taken care of probably since it was installed. So easy work. Took me about 3 hours from start to finish. I like to aim for $100.00 per hour.


People that take my car detailing classes learn how to make money, not waste their time. They learn to send the crap jobs down the road. I tell them let the people that haven't taken my classes and learned the hard lessons from my class - to have the blessing of learning all these types of lessons on their own.


:)
This is really good info for me. I genuinely appreciate your response Mike! I wish I'd learned this a long time ago.

Sent from my SM-G975U using Autogeekonline mobile app
 
The information you posted below was interesting, thank you. I've never done ceramic before but I just ordered my first ceramic kit from AG yesterday (CQuartz + Reload).

For my typical past correction processes, after polishing I usually go over the car with some sort of cleaning agent. I used to use 50/50 IPA however I eventually realized there's better dedicated products for this (I have DP Prep Spray here currently) which do claim to have 'some' lubrication built it, so that's better I suppose. The idea of this step is to remove polishing oils so the LCP can adhere to the surface. But I never really thought of that wipe down process actually inducing new marks into the paint. When I'm applying a 'normal' LCP with a buffer (i.e. typical wax/sealant product), maybe that process helps hide any new micro-marring I may have introduced during wipe down. But now with my first ceramic application, I'm applying it right after the wipe down by hand, no buffing action as it's applied with a small hand applicator. And the ceramic coating is essentially 'locking in' the current paint condition, and it needs to be applied to a clean surface to properly bond.

So I'm kind of confused as to how I should be ideally doing this. I'm still very much a rookie, so perhaps there is a step I'm missing or misunderstanding. My general process was going to be :
1) Wash
2) Decon
3) Correct to the extent deemed necessary (I planned to use the Griots BOSS creams)
4) Wipe Down
5) Apply CQuartz
6) Apply Reload
7) Cure for 24hrs

Am I missing something? I'm now starting to second guess the correct approach to go from post-polish to ceramic application. Are you saying there are polishes that already contain some sort of ceramics so you can skip the wipe-down step and go straight from polish to ceramic application?

Thanks for any feedback you can give a newbie that's here to learn :)


EDIT: Been reading up on this all morning, and may have answered my own question. I see there are some polishes that leave either an SIO2 base behind that you can apply the ceramic directly to (i.e. CarPro Essence). Not sure if I still skip wipe down but at even if I do wipe down at least it's against some sort of protection layer and not bare clear coat. OR there are polishes that are "prep polishes" that do the work of a polish, yet are water based and do not leave oils behind, thus eliminating the prep wipe down step (I see prep polishes from both DP and McKee's).

I've heard the Griots creams leave behind more of a watery/milky residue behind rather than oily. So not sure if those would work like the prep polish, and I was planning to use Griot's. But I do see AG has the DP on sale, so perhaps I ought to just grab a bottle of that for the shelf since it's only $14 right now.

Sorry, was typing fast, think I mentioned I typed out the article in 25 minutes or less. You can't even find an article like this typed out on a Facebook group. :laughing:


When I described Package 3 that was focused on the correction aspect as the context of this article is about chasing after swirls and scratches. After you posted this, I added this to the first sentence in the description of Package 3


followed by polishing, chemically stripping and then installing a ceramic coating.


On the topic of using a polish that contains ceramic in it, currently these are more or less known as

Primers


The idea being for a product that,

  1. Removes fine defects - in other words is an actual fine cut or ultra fine cut polish.
  2. Somehow uses ingredients that will NOT affect the bonding of a true ceramic coating.
  3. Also LEAVES BEHIND ceramic coating as a part of the application process.


That's a lot to ask from a single product, kind of like a traditional cleaner/wax or cleaner/sealant or AIO.

I have tried a number of these that are on the market but have not entirely made the switch yet to use one of these as my last step polishing product before installing a coating. I'm looking forward to the future however as I expect to see the market move this direction.

AND - this is a good thing because in my experience and opinion, I don't think most people, or at least the average person possess either the skills or enough microfiber towels that are in perfect condition to chemically strip paint. I probably have more factual information written on the process of chemically stripping paint than anyone breathing. It's not addressed in detail that I know of by all the experts and gurus, at least not like I address it.

Simple point being, panel wipes or any solvent that is able to dissolve polishing oils and other substances is also NOT a great lubricant. Thus the act of chemically stripping paint is the act of marring paint. You might not see it on white or light colors but you can see it on black. And common sense states that if it's happening to black paint it's happening to all paint it's just the human eyeballs cannot easily see marring on light colors. Add to this most do-it-yourselfgers DON'T own great hand held lights so they can't inspect their work properly anyways.

:)
 
EDIT: Been reading up on this all morning, and may have answered my own question.

I see there are some polishes that leave either an SIO2 base behind that you can apply the ceramic directly to (i.e. CarPro Essence). Not sure if I still skip wipe down but at even if I do wipe down at least it's against some sort of protection layer and not bare clear coat.

OR there are polishes that are "prep polishes" that do the work of a polish, yet are water based and do not leave oils behind, thus eliminating the prep wipe down step (I see prep polishes from both DP and McKee's).

I've heard the Griots creams leave behind more of a watery/milky residue behind rather than oily. So not sure if those would work like the prep polish, and I was planning to use Griot's. But I do see AG has the DP on sale, so perhaps I ought to just grab a bottle of that for the shelf since it's only $14 right now.


First - I appreciate anyone that invests the time to educate themselves on this forum and this is one reason I always try my hardest to answer their questions in DETAIL. Pun intended. :)

You have it close above - there are a few products on the market where the manufacturer claims after using their products you can go straight to applying their coating or other brands of coating without doing the step of CHEMICALLY STRIPPING THE PAINT.

Besides a small handful of these types of product - ANY other compound, polish, paint cleaner or prep polish - you should plan on doing the step of chemically stripping the paint before applying a coating.


Sorry for the late reply - technically I'm off work on vacation but I don't enjoy seeing new members (or any members), questions linger without answers.


Offline - July 1st through July 13th - Please hold down the Cyber Fort


:)
 
Appreciate the reply sir, especially being on vacation.

I'm torn between the primers that leave a silica base (I.e. CarPro essence) and the primers that just leave a bare prepped surface (I.e. DP prep polish). To keep my limited shelf space simple, I'm leaning towards the DP product as it can essentially just be my go to polish for everything moving forward. A dedicated polish (not an AIO polish) will always be followed with a form of protection. Whether I decide to follow it with a wax, sealant, or ceramic doesn't matter. They all benefit from a clean oil free prepped surface. So by just using this as my go to polish (replacing my current M205 once it runs out, and I'd skip buying the Griots Boss perfecting cream then), its a win win for me as its still priced very reasonably, performs the job of a polish, and i essentially can forget about the chemical wipe down step which saves me time. And also saves me money as i don't need to purchase as much wipe down product (I.e. Eraser).

The only real use I see for me for products like Essence is if i use them as part of a basic single step AIO service that leaves behind sio2 based protection which should outlast conventional AIO's I currently use such as D166 or Speed.

Thanks again for the replies, it really helps newbies like myself who are trying to absorb all of this!

EDIT:
Once again I've been reading into this more quite a bit today. I think the plan I laid out above is flawed. These Prep Polishes appear to not be very abrasive and more so can polish out slight surface contaminates but any sort of actual minor swirl removal will be purely performed by the pad as these polishes are just not very abrasive at all. So probably not a great idea to think I can just switch over from M205 to this DP Prep Polish for my go to polishing cream. So for me, for now, I think I'll stick with my normal polishing regiment and just stick to a thorough chemical wipe down post polish, prior to coating/sealing/waxing. I understand it's not 'perfect' as it could introduce some new micro markings during that wipe down, but really at my level for now, I'm not going to over think it and will just keep it simple, and also just be aware of the risk of adding new scratches and just do my best being careful during the chemical wipe down step. As I get up there in experience and skill level, perhaps at that time I will review and alter my process. But for now at my level with basic off the shelf sealants, and basic level ceramic coatings (Standard CQuartz and CQuartz Lite), I think I'll be fine for now.

Appreciate all the insight again!
 
My guess - they can be mostly removed, but some of the ones that are parallel to the rear window are too deep. Looks like damage from a purse to me.
 
I guess what I've learned is that my typical orange LC foam pad + compound regiment is pretty good, but still leaves a lot left on the table when it comes to more serious correction. I'm going to stick with this regiment, but I have a uro-fiber pad coming for those cases where I feel like I need more. Still being some what of a rookie, I am scared to go too deep, and I feel like the orange pad helps me not go overboard while still getting pretty good correction results. It's a great balance for me. For those times I feel like I need to go a little further, I'll have the Uro-Fiber pad as my back-up plan. But I don't plan to use that very much.
 
Back
Top