1986 Bronco II product testing: Ongoing Project, Thread 1

Ted S.

New member
Joined
Feb 10, 2011
Messages
1,746
Reaction score
0
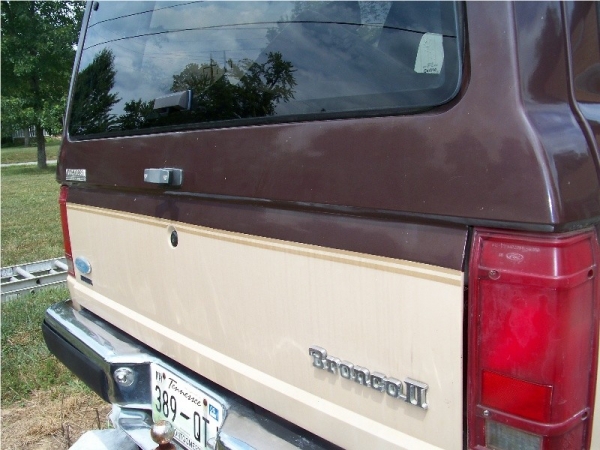
I was testing out Meg's #7 on the old Bronco II, just for fun, and decided to try out the SF 4500 (PO85RD), and the WGDGPS that I received on my last order. This is not necessarily a product review, just some hobby-testing of a few products.

Background info

Picture 2 years ago. Note the purple hue on the brown paint.
random_011.JPG


The Bronco II has been much neglected over it's life. My older brother bought it of some guy about three or four years ago, and he tried to clean up the interior a bit. Not nearly how much I've done thus far; but that's for a future thread way on down the line. Right now the interior is pretty much gutted, so it you see the inside through the windows; it's a mess.

Notice the absence of the bumper. This photo was taken for an Art 1010 photo project, hence the monochromatic coloration.
2010-09-22_15_15_20.jpg


Anyhow, my brother gifted me this vehicle after he returned from basic training and AIT, after he bought a newer vehicle. It's my on-going hobby/experimental truck. I did some experiments with aerosol paint cans on the front end last summer....that's all I will comment on that. If been consulting with Oscar (93fox) on and off about the proper materials so I can later repaint this beast the right way; no more rattle cans…Maybe I’ll get to it next summer.

Green and white aerosol "rattle can" on front fender. Photo taken last summer.
passenger_fender.jpg


I originally took care of it, before I knew how to properly care for a paint finish. I used cotton terry towels and NuFinish...no comment. That was two years ago. For about a year and a half I had kind of given up on the finish, until I purchased some Meg’s #7 for use on a friend’s car. Then I remembered a great thread by Michael Phillips about caring for neglected single stage paint: http://www.autogeekonline.net/forum/how-articles/25304-secret-removing-oxidation-restoring-show-car-finish-antique-single-stage-paints.html. I wanted to try this technique for quite a while. I had some free time, and thought “Ah, what the hell.”

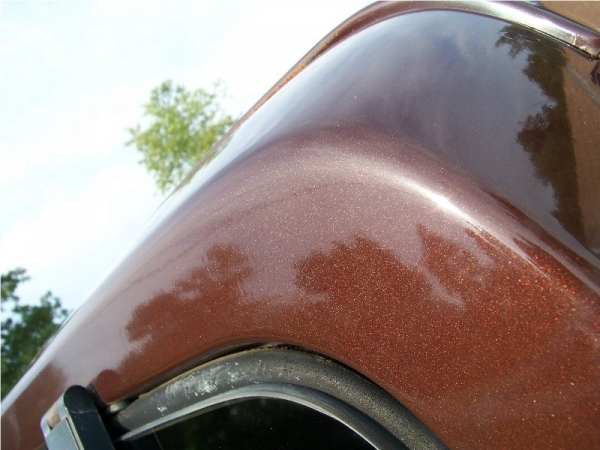
#7 "soaking in" to the single stage paint. About 3o seconds after application.

205_2900.JPG


About 50 minutes after application.
205_2902.JPG


Meguiar’s #7

After a good Dawn wash, I waited a day for the paint to dry. The paint is in no way considered “good” or even “decent” condition. It’s ridded with chips, scratches, RIDS, and all sorts of defects. I used #7 on most of the paint, but I will only showcase a few panels.

205_2899.JPG


205_2893.JPG


205_2892.JPG


205_2891.JPG


Application was very easy. I used a cotton terry towl and applied a vew heavy applications to the paint, working the #7 into the paint. I then let it soak into the paint for about two hours.

205_2901.JPG


205_2910.JPG


205_2905.JPG


205_2909.JPG


205_2908.JPG


205_2924.JPG


After a few hours, I wiped the excess #7 with a clean towel. Keep in mind that the goal of this was more of a test than a job for perfection.

205_2923.JPG


205_2922.JPG


205_2920.JPG


205_2921.JPG


205_2919.JPG


205_2918.JPG


A few WGDGPS after using SF 4500 (PO85RD) coming shortly.:props:
 
SF 4500/WGDGPS
After the step using #7 is finished, which cleaned up the paint a lot, I used my PC to polish the paint with Menzerna SF 4500, which was an amazing product. My new favorite polish, that is to say! It applies like butter, but has way more cut than the Meg’s UP that I had been using, and the SF 4500 finishes way better too. I waited until the next day and applied the WGDGPS. And another day passed, so I finally got out to take some more pictures:
205_2931.JPG


This is an especially important photo to note: The tan paint has NEVER had a reflection.
205_2930.JPG


205_2929.JPG


205_2925.JPG


205_2928.JPG


Hopefully I can follow up this thread if their is enough interest. Thanks for looking.:dblthumb2:
 
SF4500 does not have more cut than UP. It is probably one of the finest polishes out there!
 
SF4500 does not have more cut than UP. It is probably one of the finest polishes out there!

Perhaps it is because I've only used UP on a clear coat? I did not take that into mind.
 
Welcome to the Congregation, my brother! You are now are now a brethren in the "Disciples of Mike Phillips", Chapter #7!
Seriously, I rate reading and following Mike's article as the most significant event in my detailing hobby since my initial encounter with a clay bar. I was ready to write off the paint on my '87 El Camino "survivor" as unrestorable until I followed Mike's tutorial. I've used #7 for over 30 years, but it was the process detailed in the article that made a world of difference. Two judged shows and two trophies later, I'm once again proud to drive the old girl. Don't hesitate to rub on it a bit more with another oil-rich product, Meguiars' #80 Speed Glaze.
Props to you for having the nerve to tear into it and congrats on your progress.

Bill
 
Keep going...your experiment is putting some serious life into that Bronco! Good job. :xyxthumbs:
 
pretty cool test.....im interested

I'll try and keep going.:dblthumb2:

Welcome to the Congregation, my brother! You are now are now a brethren in the "Disciples of Mike Phillips", Chapter #7!
Seriously, I rate reading and following Mike's article as the most significant event in my detailing hobby since my initial encounter with a clay bar. I was ready to write off the paint on my '87 El Camino "survivor" as unrestorable until I followed Mike's tutorial. I've used #7 for over 30 years, but it was the process detailed in the article that made a world of difference. Two judged shows and two trophies later, I'm once again proud to drive the old girl. Don't hesitate to rub on it a bit more with another oil-rich product, Meguiars' #80 Speed Glaze.
Props to you for having the nerve to tear into it and congrats on your progress.

Bill

I have to agree, Bill. Mikes articles usually note things about detailing than people just don't think of. So far, my favorite article of his is the one on white paint. If you haven't read it yet I can pm you a link.:props:

I'll pick up the #80 if it is available locally. I'm not looking to put another AG order in until I have my school and insurance paid for!

Keep going...your experiment is putting some serious life into that Bronco! Good job. :xyxthumbs:

I intend to, Kris. Most of it'll look good. But it still needs a repaint.I was originally going to go for a dark green w/ coarse metel flake, but now that the true color is brought back, I think I'll go with the same color.
 
Great improvement!!! Keep posting the progress you make on the Bronco!!! I'm interested.
 
Did you see that flake pop in this picture...
205_2921.JPG


...wow!

I wonder how much more life you could breath into her if you followed Mike's article a bit closer with more applications and longer dwell times in between? Fantastic so far...:xyxthumbs:
 
behold the power of #7. Looks great Ted. Just keep in mind that you are working on SS paint.......so as you said, keep that in mind b4 you think 85rd has more cut than UP. Great project vehicle and thanks for sharing! :props:
 
Mr. Phillips should link this thread, or at least the pictures like the one below, to his thread for demonstration purposes.
205_2902.JPG


That's even more graphic than showing how #7 works on paper. This after 50 minutes dwell time...wow! Talk about feeding the paint...it was starved to death.
 
Did you see that flake pop in this picture...
205_2921.JPG


...wow!

I wonder how much more life you could breath into her if you followed Mike's article a bit closer with more applications and longer dwell times in between? Fantastic so far...:xyxthumbs:

Mr. Phillips should link this thread, or at least the pictures like the one below, to his thread for demonstration purposes.
205_2902.JPG


That's even more graphic than showing how #7 works on paper. This after 50 minutes dwell time...wow! Talk about feeding the paint...it was starved to death.

I think I will try out some further dwell times to see what happens. I am now very interested to see what this product can do once pushed. I think the Cotton terry towel is the the key to application, as you can work a heavier amound of the product into the paint than when used with a DA.

behold the power of #7. Looks great Ted. Just keep in mind that you are working on SS paint.......so as you said, keep that in mind b4 you think 85rd has more cut than UP. Great project vehicle and thanks for sharing! :props:

Yup, the thing that tripped me up was how easily it removed some 2k grit scratches that were left over from last month. I'm going to try the PO85RD on some clear as soon as I get a chance between school and work; I'd like to write a review.
 
Just gonna bump this before I hit the sheets so the mornin' crowd can take a look!:props:
 
I was testing out Meg's #7 on the old Bronco II, just for fun,


205_2908.JPG


205_2924.JPG


After a few hours, I wiped the excess #7 with a clean towel. Keep in mind that the goal of this was more of a test than a job for perfection.


Ted...It is fun bringing vehicle paint back to life again! Been using Meg's # 7 for many years (decades worth)...Glad you've been introduced to its incredible abilities.

Your progress so far is impressive indeed. Good job!:dblthumb2:


Just Curious (from looking at the above cloth):
Where and from whom did your Brother purchase this Bronco?
Could this cloth contain contamination consisting of some left-over paint residue from a re-spray of O.J.'s? :D


Keep us posted with your further efforts.:)

Bob

He bought it from some guy up the road. It had been rotting under some tree for quite a while, a couple years. It has an Emblem of an Alabama Ford dealer on it, and I believe I remember pulling out a 15+ year old receipt from a Nashville auto shop.

When I rattle canned the driver side fender, I discovered a lot of Bondo After sanding it down. I removed much of the Bondo and gave it a better repair.

I was removing the carpet on the driver side, their was a lot of broken safety-glass. I'm convinced this thing was in a wreck at one point.:dunno:
 
Very well done and with fine results at that. Looking forward to the continuation of this. How does the green and white look?:laughing:
 
Very well done and with fine results at that. Looking forward to the continuation of this. How does the green and white look?:laughing:

Green and white looks like crap compared to the oem paint, now that it's getting restored.
 
Back
Top