lane5515
New member
- Mar 3, 2013
- 660
- 0
The owner of this 2000 Pontiac Trans Am was a referral from a past client. There’s nothing better than referrals from others. The owner wanted the full complement of services for the exterior.
The overall condition of the TA was pretty good but it needed some attention in a lot of overlooked areas of a complete detail.
Condition upon delivery


The paint had the typical tunnel wash scratches and swirls and several rids – some were not worth chasing.
I started this project with the engine bay using M37 Engine Degreaser along with various size Wheel Woolies brushes. The bay was then blown dry with my Metro Master Blaster. When dry I misted with Blackfire Total Trim & Tire Sealant, wiped down with a mf towel and blew out excess product with my Metro Side Kick equipped with the Vac N Blo 3 ft hose. That hose makes using the Side Kick so much nicer.
Before

After

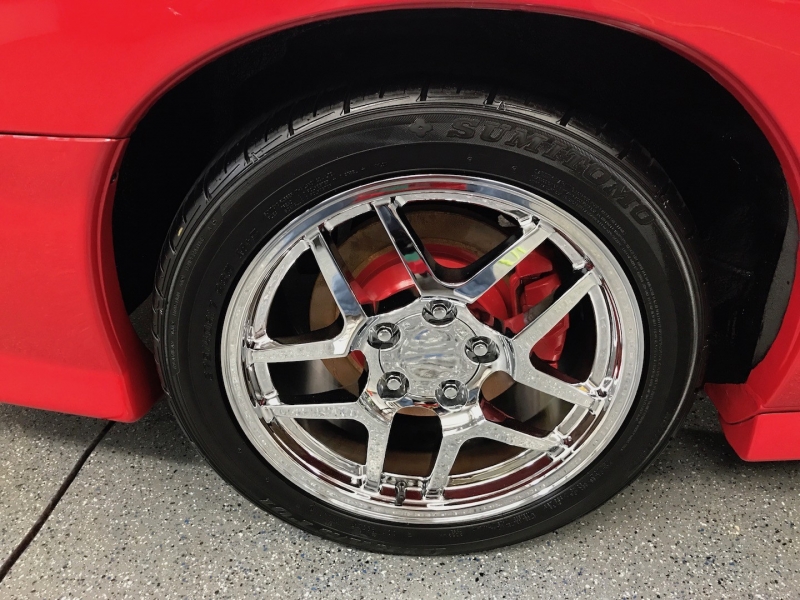
Next I moved on to the Tires, Wheels and Wells
Tires - Shine Supply Wise Guy 1:3 and Tuff Shine Brush.
Wheels - GG HD Wheel Cleaner, Wheel Woolies and CP IncrediFlair Mitt.
Wells - Shine Supply Wise Guy 1:3 and various brushes.
Tires were dressed with GG Black Tire Shine and Wheels sealed with CP Hydr02.
Before

After

Next I moved on to washing and decontaminating the paintwork.
Wash
- 2BM with Optimum Car Wash, Adams Wash Pad, various brushes.
Decon
- IronX
- NanoSkin Medium Grade Wash Mitt
Dried with Metro Master Blaster and GG PFM Towel
After the wash and decon, all lights/markers and vent covers were removed. They were caked with old polish/wax residue.

The plastics were cleaned with M37 APC, various brushes, toothpicks and qtips. The black vent inserts were then dried and sprayed with M37 Trim Detailer.

Lights – before, during and after

50/50


Polishing the Paintwork
Step 1 – compounding
- GG Fast Correcting Cream
- Scholl Concepts Blue Spider Pads (5” and 3.5”)
- CP 2” MF pads
- Flex 3401, Rupes Mini and Nano
- Wipe down with CP Eraser
Step 2 – polishing
- CP Essence
- CP Gloss Pads – 5”, 3.5”, 2”
The Nano got a workout on the bumpers, mirrors and side vent areas. I don’t know how I would have been able to get some of those areas without it.
Examples of the Nano’s work
Mirrors were both beat up pretty bad.
Before

After

Pillars Before

After

Front Hood Vents Before

After

Random Before/After shots of various areas
Before

After

Before

After

Before

After

Rear Bumper Before

After

LSP
- CQuartz Coating
All Rubber and hard plastics were also treated with Sonax Rubber Protectant (GummiPfleger) and WETS
GummiPfleger 50/50

WETS 50/50

Finished Pics (It was raining outside so no outdoor pictures)


Thanks for looking! All comments and criticism is appreciated.
The overall condition of the TA was pretty good but it needed some attention in a lot of overlooked areas of a complete detail.
Condition upon delivery
The paint had the typical tunnel wash scratches and swirls and several rids – some were not worth chasing.
I started this project with the engine bay using M37 Engine Degreaser along with various size Wheel Woolies brushes. The bay was then blown dry with my Metro Master Blaster. When dry I misted with Blackfire Total Trim & Tire Sealant, wiped down with a mf towel and blew out excess product with my Metro Side Kick equipped with the Vac N Blo 3 ft hose. That hose makes using the Side Kick so much nicer.
Before
After
Next I moved on to the Tires, Wheels and Wells
Tires - Shine Supply Wise Guy 1:3 and Tuff Shine Brush.
Wheels - GG HD Wheel Cleaner, Wheel Woolies and CP IncrediFlair Mitt.
Wells - Shine Supply Wise Guy 1:3 and various brushes.
Tires were dressed with GG Black Tire Shine and Wheels sealed with CP Hydr02.
Before
After
Next I moved on to washing and decontaminating the paintwork.
Wash
- 2BM with Optimum Car Wash, Adams Wash Pad, various brushes.
Decon
- IronX
- NanoSkin Medium Grade Wash Mitt
Dried with Metro Master Blaster and GG PFM Towel
After the wash and decon, all lights/markers and vent covers were removed. They were caked with old polish/wax residue.
The plastics were cleaned with M37 APC, various brushes, toothpicks and qtips. The black vent inserts were then dried and sprayed with M37 Trim Detailer.
Lights – before, during and after
50/50
Polishing the Paintwork
Step 1 – compounding
- GG Fast Correcting Cream
- Scholl Concepts Blue Spider Pads (5” and 3.5”)
- CP 2” MF pads
- Flex 3401, Rupes Mini and Nano
- Wipe down with CP Eraser
Step 2 – polishing
- CP Essence
- CP Gloss Pads – 5”, 3.5”, 2”
The Nano got a workout on the bumpers, mirrors and side vent areas. I don’t know how I would have been able to get some of those areas without it.
Examples of the Nano’s work
Mirrors were both beat up pretty bad.
Before
After
Pillars Before
After
Front Hood Vents Before
After
Random Before/After shots of various areas
Before
After
Before
After
Before
After
Rear Bumper Before
After
LSP
- CQuartz Coating
All Rubber and hard plastics were also treated with Sonax Rubber Protectant (GummiPfleger) and WETS
GummiPfleger 50/50
WETS 50/50
Finished Pics (It was raining outside so no outdoor pictures)
Thanks for looking! All comments and criticism is appreciated.
")