Best video ever on how to machine buff a car from start to finish

I watched it twice.

Me too. Made the wife watch it with me. :)


The first time concentrating on what was being said. The second time focusing on physical things such as pad rotation, compression, speed, etc. We're so used to "instant results" these days. The video makes it clear just how much time and focus goes into a start to finish job on one vehicle.

Really tried hard to put a lot of correct info into this video.


When I first contemplated buying a DA, I honestly thought I could probably polish out a car in an hour (I knew absolutely nothing about the process, nor had I thought much about it).

And I think that's a common perception. It's awesome for people to see videos like this so they know more about what's involved before jumping in.

A lot of the frustration one might encounter when first starting out can be generally avoided with realistic expectations. And this video does a great job showing what is involved.


I try to share how long it takes to machine buff out a car in a lot of different venues I work in including on this forum and what I tell people is this as an example.

If you were buff out an average size passenger car, something like a 4-door Honda Accord. Assuming the paint was filled with swirls and scratches and the goal was 95% of perfection, then the compounding alone would take at least 6 hours. And that's for someone that's good at this type of work. Read the word good to mean experienced.

If a person plays on their phone or stops buffing for any other reason then it will take longer.


That also means getting in there and getting busy. By this I mean get to buffing and don't stop till you're done. No phone breaks, maybe a water break or two but no goofing off.

The compounding step takes the longest because you cannot simply move the polisher FASTER in order to get the job done quicker.

You must divide larger panels into smaller sections and buff each section out independently.

You must move the polisher slowly over the surface making controlled section passes over each section of paint.


I also tell car owners this one of the ways you can tell a good job from a bad job. If a detailer tell you he can wash and detail your car in a few hours he's probably doing more damage than good.


Thank you for watching the video and for sharing your comments.


:)
 
What a great video....

as I was trying to acquire knowledge on polishing and compounding I was really mystified why a video like this didn't exist.

Most of the information can be found in bit and parts in various videos, some of which you also produced, but I have yet to find something as comprehensive and watchable as this video.

Excellent work.

I did have one unique take away with regard to the use of 10 lbs of downward pressure when using the DA, very helpful information.

Looking forward to putting all this knowledge to use soon, cheers!!


:)
 
What a great video....

as I was trying to acquire knowledge on polishing and compounding I was really mystified why a video like this didn't exist.

Most of the information can be found in bit and parts in various videos, some of which you also produced, but I have yet to find something as comprehensive and watchable as this video.

Excellent work.

Thank you for your feedback, it's greatly appreciated.


I did have one unique take away with regard to the use of 10 lbs of downward pressure when using the DA, very helpful information.

Looking forward to putting all this knowledge to use soon, cheers!!


:)


Hi True North,


The 10 pounds of downward pressure for short orbit stroke orbital polishers like the Porter Cable 7424XP, the Griot's Garage 6" DA polisher, the Meguiar's MT300 and even the FLEX 3401, (these all have an 8 millimeter orbit stroke length), is to obtain effective cutting or abrading of the surface.


I know it can be hard for some to believe, but I started writing and teaching others to use this much downward pressure back when the Porter Cable polisher was first introduced to the consumer market. This had to have been in the late 1980's.

Later when the Internet was invented and then discussion forum software was invented I took some pictures and wrote an article as a way of showing and teaching this practice.

Here's one article on this topic on this forum, scroll down to post #9

Downward Pressure....What is "Moderate"?


Here's the original article I wrote in 2004 - Note that the Meguiar's forum was brought up brand new in January of 2004, I know I posted the first thread.


Using the G-100 to remove swirls with the Professional Line

Also note the G100 was the part number Meguiar's gave the first generation Porter Cable 7424.


In that article, as well as in the classes I taught for Meguiar's at their Irvine, California corporate office, I shared that in order to get good correction out of a free spinning tool you needed a number of different factors working for you.

One of those factors was downward pressure.


To help people understand how much pressure without physically being in the same room as them where I could place my hand on top of their hands and they were running the buffer, (do press down and show them how hard to press down), I took the bathroom scale out of our house and covered it with some thick clear plastic.

The plastic would enable me to run the buffer ON the scale with actual product on the pad to accurately demonstrate real-world polishing.

Then I took pictures....

210pounds.jpg


15 pounds of pressure on the head of the polisher

215poundsM83dacp.jpg


Point being, back then the information shared by others was to use a little more than the weight of the tool when using this type of tool.


I knew from hands-on experience that this wouldn't work. A person would be buffing out the hood of a car FOREVER if they only used the weight of the tool.

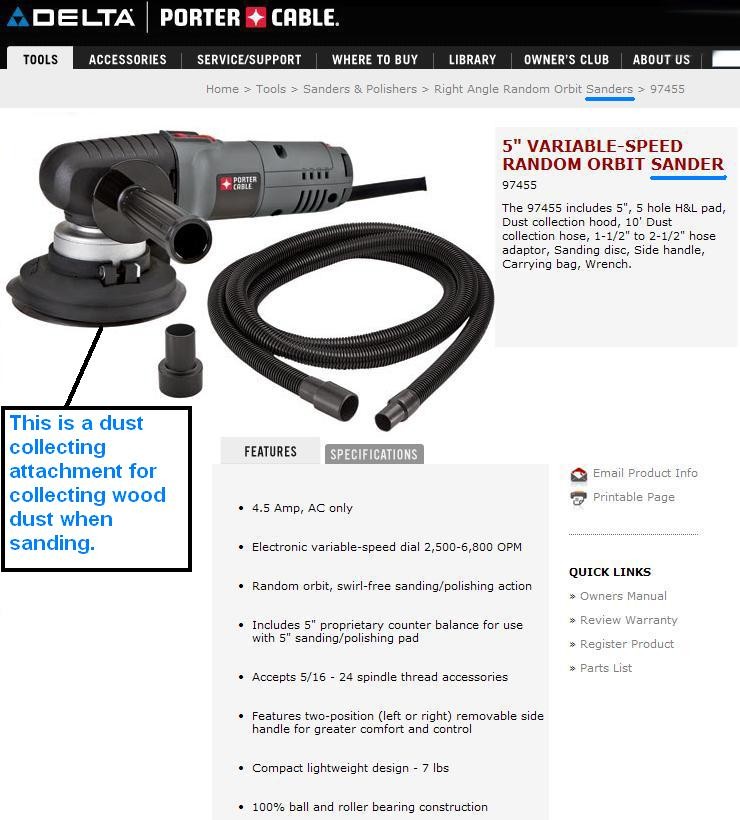
So posted the truth. I took pictures to show what really was required to get this wood sander to remove swirls, scratches and water spots out of car paint.


And as the saying goes...


That's the rest of the story...


:)
 
I took pictures to show what really was required to get this wood sander to remove swirls, scratches and water spots out of car paint.


If anyone is wondering what I meant by referring to the PC as a wood sander, I documented this in this article,


The Free Floating Spindle Bearing Assembly - The Story Behind The Story...


portercableSANDER.jpg


There's a huge difference when it comes to the PC and versions of the PC like the Griot's and Meguiar's polishers to rotate and oscillate a thin sanding disc as compared to rotating and oscillating a foam pad.

Especially when early foam pads were about 1 1/2" thick.


Thus the saying...

Thin is in...


While the PC started the dual action polisher revolution, now days, I'd recommend getting the Griot's Garage 6" dual action polisher.

  1. More power
  2. Better warranty
  3. Much better speed dial
  4. Easy grip rubber over mold on the head of the unit

That's just to name a few features off the top of my head. Overall it's a much better and more powerful tool.

In the future, I'm hoping we can make a new video showing all the things you can do with the Griot's 6" DA Polisher.


Available on Autogeek.com


Griot's Garage 6 Inch Heavy Duty Random Orbital Polisher


;)
 
Thank you and thank you to everyone that "liked" it on our YouTube Channel.


I wrote about it back in 1993 or 1994 on Usenet Newsgroups in rec.autos.misc


:dblthumb2:


wow have not been on a usenet group in a LONG time
 
Anyone else having trouble with the link?
 
Do you mean the embedded video in the first post of this thread?

I should show up as a Video player with an image and graphics and the YouTube "play button" in the middle.


If you don't see this.... what browser are you using to view the forum?


:)
Ahhh, I was clicking on the highlighted sentence. The play arrow was sort of obscured, so I missed it.
 
I'd say so, I know when I bring it up I get the deer in the headlights look.


So watched the video and here's the few things I enjoyed (besides all of it). And things I wish it showed.

1. The first time you clayed the car it would have been nice to see the dirt it took off. I know it's shown later but it would have been nice to see it at that point.

2.i wish you showed cleaning on the fly with a Terry cloth towel as well, it's good to know.

3. I'm very happy to see that you left in some bloopers, like when you stumble on your speech when your about to start your test spot. I feel it added character to the video.

4. While it wouldn't have been the best example to use for the car you were working, introducing or talking/showing a paint gauge meter would have been nice to see or know about for newbies.

5. Explanation of why you didn't tape your edges or trim would have been beneficial so that those that are new don't take it as a never needed step.

6. A bit more explanation on how many pads to use, just a simple mention of " on average 1 pad per panel/S depending on..." I feel would have been a good addition.

7 more of a personal thing but my eyes were drawn to the buttons on your shirt and winding if they ever made contact with the paint.

8. Some scenes you are seen touching the paint with gloves and then in others without gloves. Just one of those things in consistency that I noticed.


Overall this is an amazing video and a great place for someone who has never polished a car to learn from the beginning to end on how to do it and the small things that are over looked (cleaning the pad after a pass, test spots)I really hope we can expect more excellent videos like this one this upcoming year.

Thanks AG once again

Sent from my Pixel using Tapatalk


Great points and feedback. Thank you!


:)
 
Great video! Many will appreciate this true how to video. A few questions I had were answered with the numerous posts. However, I do still have a couple of questions.

Once you determined the white pad and swirl remover was not aggressive enough, you moved on to compound and an orange pad. When switching to compound, do you ever use a different color pad? I was curious why orange vs yellow or even white.

What towels did you use for this process? You mentioned edge rolled towels. It looked like you used two different types of towels. Could you share a link?

I'm a little envious of those painted stripes. My 2007 Shelby has vinyl and it is always a fight. Any tips for working with and around them would be appreciated.
 
what can you say, another great informative video by Mike Phillips. I've been watching Mike's video's for a few years now, he never disappoints!
 
Great video, thanks for all the free information Mike. This is why I only buy from autogeek!
 
Best video ever on how to machine buff a car from start to finish


I've made a lot of videos in my life. Last summer Yancy and I made a brand new video series for our ROKU channel. After they were edited and placed on our ROKU channel I never got around to actually watching them. Last week I watched this video on exterior car detailing for the first time. In my my opinion, it's our best video ever on the topic of machine polishing and EVERYTHING related to machine polishing is included in the video.


Do me a favor please

Grab your favorite beverage, hot coffee, cold soda and expand the video to fill the entire screen and give it a watch and the if you would be so kind, reply to this thread with what you think about the content and presentation of the subject matter.


I also think this demonstrates Yancy's incredible skill as our "Creative Director". Nice work Yancy.


Thank you and enjoy.


:)

Vey helpful video.. thanks for sharing it to us. <3
 
***Bump***


The best video on how to machine polish. I guarantee it.

I wrote the definition for Section Passes and the definition for Test Spot, so I'm pretty confident I was accurate in how I demonstrated how to do both in this video.


The definition of a pass
There are two definitions of the word pass as it relates to machine polishing with any type of machine.


Single Pass
A single pass is just that. It's when you move the polisher from one side of the section you're buffing to the other side of the section you're buffing. That's a single pass.


Section Pass
A section pass is when you move the polisher back and forth, or front to back with enough single overlapping passes to cover the entire section one time. That's a section pass.

In most cases if you're removing any substantial below surface defects you're going to make 6-8 section passes to the section you’re working before you either feel comfortable you've removed the defects or you're at the end of the buffing cycle for the product you're using.


Test Spot - The story behind the story...

How To Do a Test Spot


Here's another good article everyone should read BEFORE using a polisher for the first time.


DA Polisher Trouble Shooting Guide


:)
 
Enjoyed the video very well done.

Excellent primer for my annual polish / wax of my daily driver. I always come here to refresh in my mind what I need to do.

Mentioning taping off a car was the only thing I could think of that could be possibly added for someone that's never done this before.

Thanks to you and Autogeek.


:)


Thank you for your feedback and we're glad you like the video and it helps you as that is the primary goal of the info in the video.


:)
 
Back
Top