Alcohol and chemicals in general will dull and wear off any wipe on sealant that is not chemical resistant. Varnishes are soft coatings, so they can be damaged by chemicals like glass cleaners, engine degreasers, bug removers, spills from engine coolant, brake fluid, transmission fluid, ect. and varnishes also scratch easily, so hopefully the customer does not frequent automatic car washes causing scratch marks. New headlights have a hard, glass like sealant, so tough you can't scratch them rubbing your fingernails across the lens no matter how hard you try. This way they stay clear no matter what attacks them.
Navigation
Install the app
How to install the app on iOS
Follow along with the video below to see how to install our site as a web app on your home screen.
Note: This feature may not be available in some browsers.
More options
Style variation
You are using an out of date browser. It may not display this or other websites correctly.
You should upgrade or use an alternative browser.
You should upgrade or use an alternative browser.
Headlight Restoration-new UV sealant idea
- Thread starter HotRod
- Start date
I'm guessing that if you wiped/cleaned your headlights with alcohol every week......it DEFINITELY WOULD remove ANY type of sealant/finish that was applied. Just use a mild soap and water to clean the lights. (Just my two cents)
Thanks for the info, appreciate it.
kaimanson
New member
- Jan 5, 2013
- 13
- 0
Wow, well what can I say, after a few weeks reading the whole 107 pages and taking notes, and trying the method a few time. Thanks for everybody specially to Part-Timer and Ray for all the tech information.
After reading these pages, I think we all should be getting an autogeek certification soon =D:xyxthumbs: in headlight restoration.
After reading these pages, I think we all should be getting an autogeek certification soon =D:xyxthumbs: in headlight restoration.
crash93ssei
New member
- Mar 26, 2008
- 304
- 0
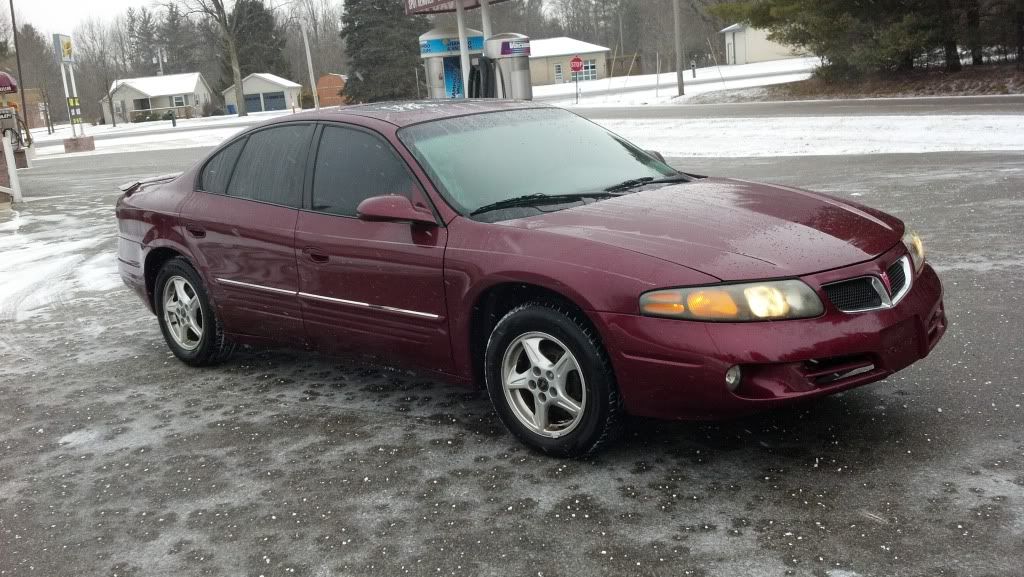
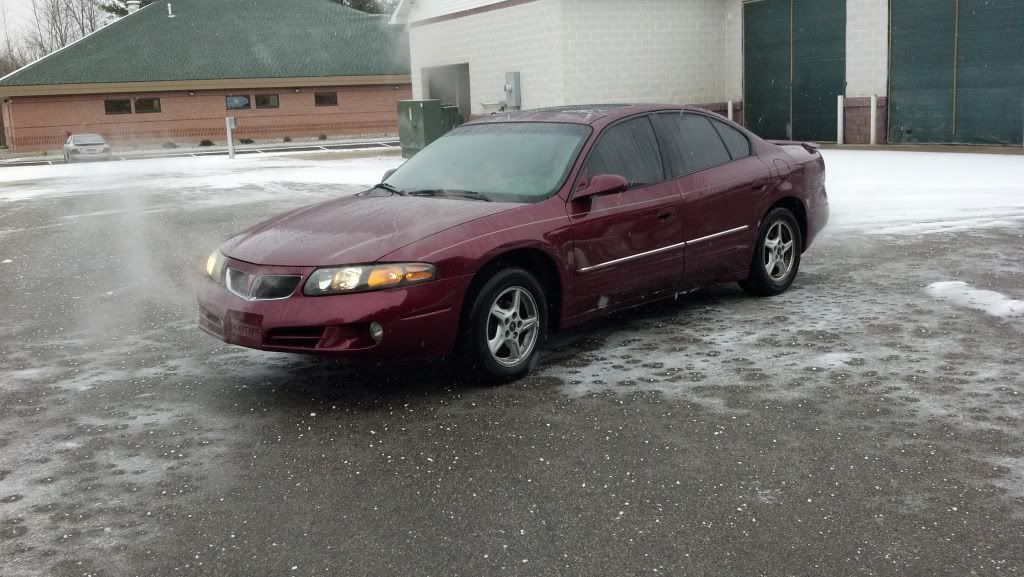
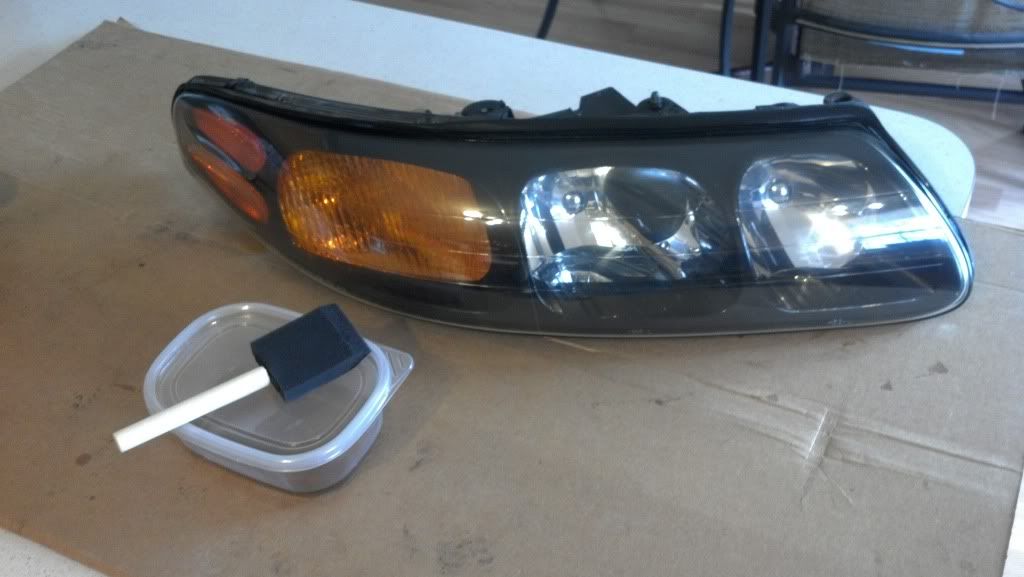
Tried out the spar urethane / mineral spirits on a headlight for a car I just picked up. Snagged this car for $500, the lady couldn't get it running and wanted it out of her driveway... a half hour after I got it home I had it running and have been driving it for a couple days now ")
Cloudy headlight on passenger side
Newer headlight on drivers side
Before
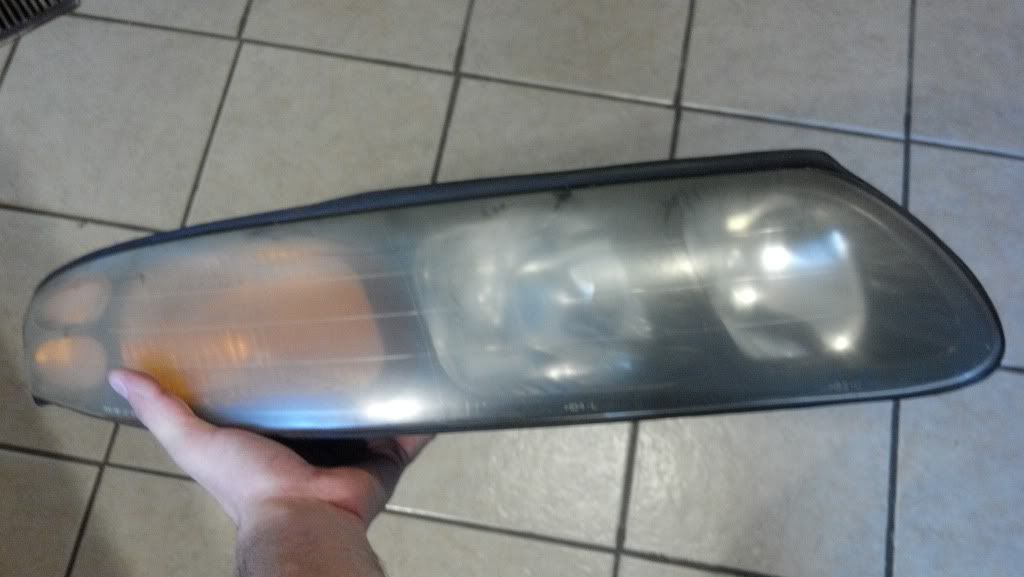
After wetsanding
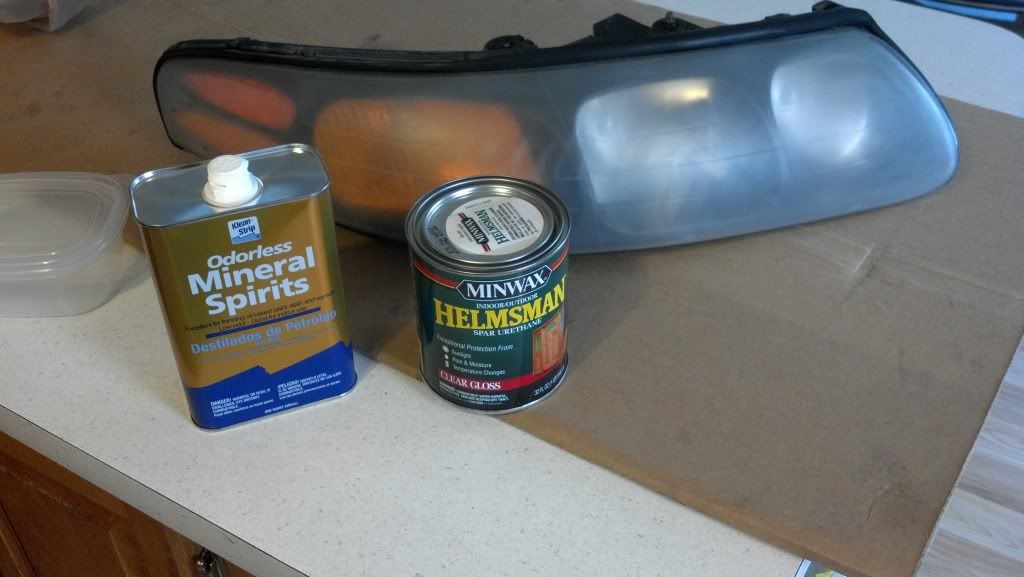
After application
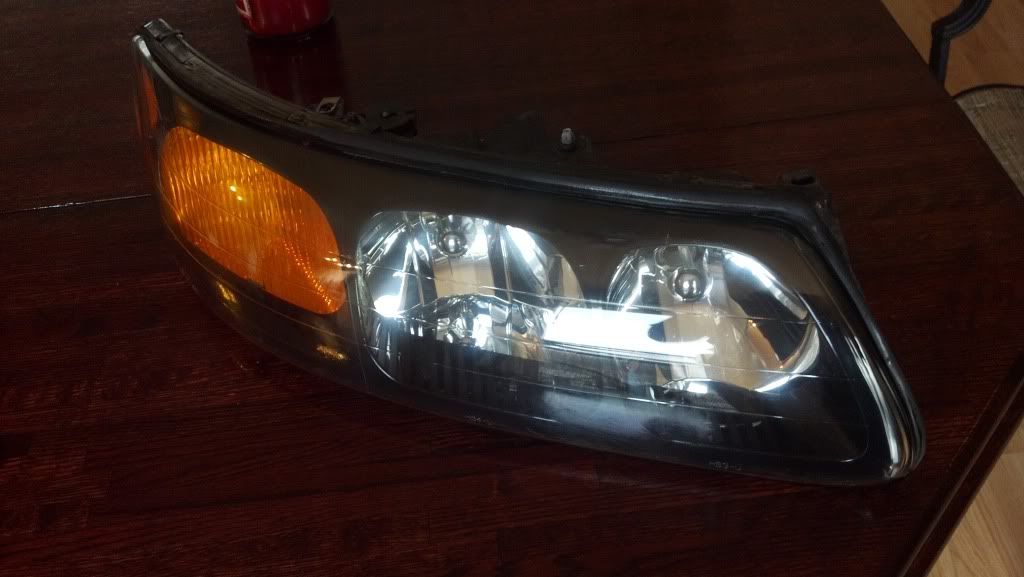
I let it sit in the house all day while at work, then put it in the car when I got home tonight. We will see how this stuff holds up to wind chills of 20 below 0 tonight and nasty road salt spray for the rest of the winter!
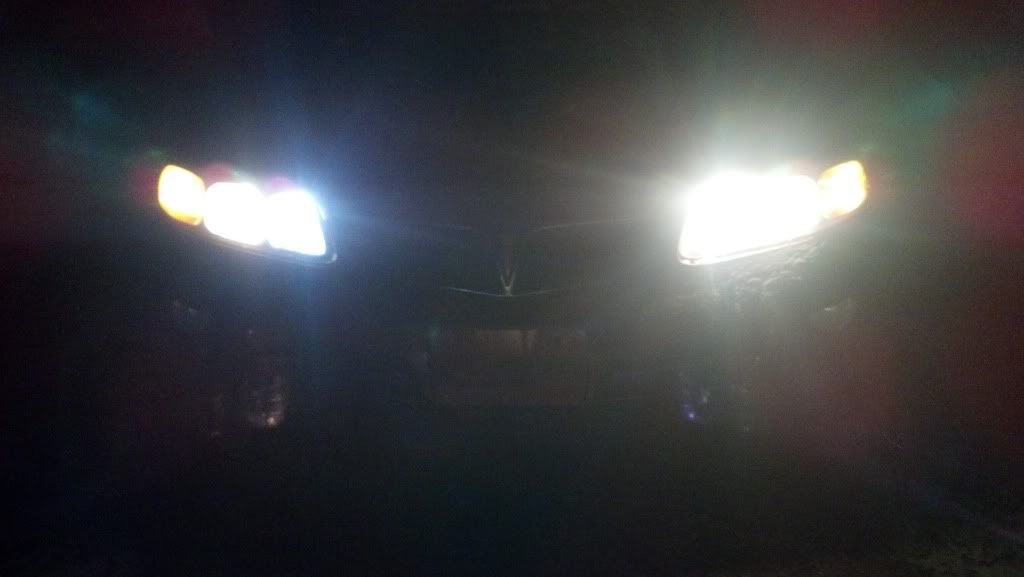
Some pics of the headlight with the lights on. Micro cracking in both lenses, obviously unrepairable, also some hazing / fog on the inside of the lens I restored. Ugly blue bulb for the bright on the passenger side was messing with the camera too...
Drivers side headlight, untouched, was clear to begin with.
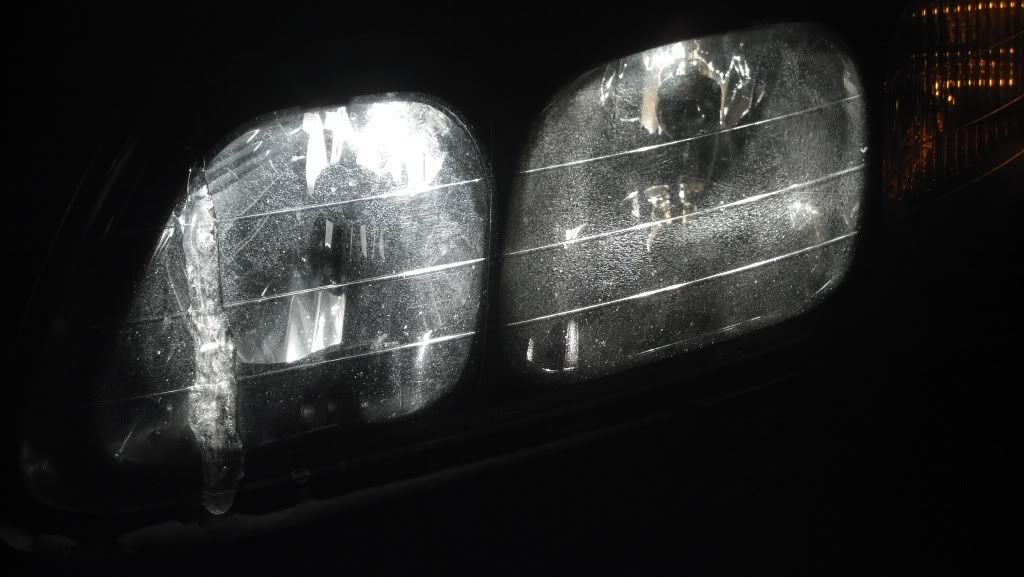
Passenger side after spar
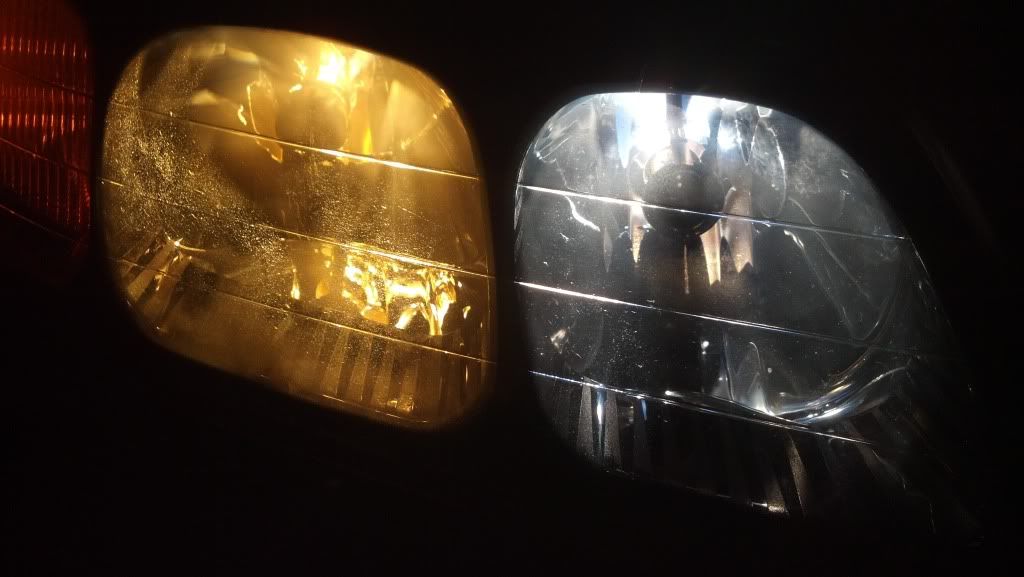
Passenger dim
Passenger bright
Drivers bright
Drivers dim
I will never go back to just polishing again! Thanks for the idea rops:
rops:
Cloudy headlight on passenger side
Newer headlight on drivers side
Before
After wetsanding
After application
I let it sit in the house all day while at work, then put it in the car when I got home tonight. We will see how this stuff holds up to wind chills of 20 below 0 tonight and nasty road salt spray for the rest of the winter!
Some pics of the headlight with the lights on. Micro cracking in both lenses, obviously unrepairable, also some hazing / fog on the inside of the lens I restored. Ugly blue bulb for the bright on the passenger side was messing with the camera too...
Drivers side headlight, untouched, was clear to begin with.
Passenger side after spar
Passenger dim
Passenger bright
Drivers bright
Drivers dim
I will never go back to just polishing again! Thanks for the idea
rops:Just a thought. How would this work on rubber/vinyl trim?
I did my headlights with this method about 6 months ago and its holding up strong. But i noticed that when I did, i also got some of this mixture on the rubber surrounding the light. 6 months later this rubber still looks new. Kinda reminds me of a C4 application??
The other day I detailed my wifes CRV and ran out of C4, so finished off the rear spare tire cover (Vinyl Factory Honda type) with this mixture and 2 weeks later it still looks awesome.
Any down sides to this?
Setec Astronomy
Well-known member
- Aug 31, 2010
- 17,164
- 1,462
I did my headlights with this method about 6 months ago and its holding up strong. But i noticed that when I did, i also got some of this mixture on the rubber surrounding the light. 6 months later this rubber still looks new. Kinda reminds me of a C4 application??
I was doing some black plastic adjacent to the window on the back door of a sedan with C4, and got some on the rubber around the window...I thought it would wear off pretty quickly but it hasn't, and it looked good. So I don't know about Spar on rubber, but the C4 seems to work pretty well.
Part-timer
New member
- May 30, 2011
- 219
- 0
Wow, well what can I say, after a few weeks reading the whole 107 pages and taking notes, and trying the method a few time. Thanks for everybody specially to Part-Timer and Ray for all the tech information.
After reading these pages, I think we all should be getting an autogeek certification soon =D:xyxthumbs: in headlight restoration.
Thank you for the mention but, I learned most of what I now know from the collaborative efforts of everyone's input to this thread. They ALL deserve a big THANKS!!! :xyxthumbs:
rops:Im the MANkaimanson
New member
- Jan 5, 2013
- 13
- 0
Good to see u around part timer! Thanks for sharing ur experience with this method. Im starting my business too here in so-flo. Any updates regarding ur headlights from 2009?...i read the whole 107 pages, but didnt hear anything else than ur 2 years update. Once again thanks!
Part-timer
New member
- May 30, 2011
- 219
- 0
Good to see u around part timer! Thanks for sharing ur experience with this method. Im starting my business too here in so-flo. Any updates regarding ur headlights from 2009?...i read the whole 107 pages, but didnt hear anything else than ur 2 years update. Once again thanks!
The only real update I have is that now I am mixing at around 70/30. In my experiences....the higher the concentration of spar.....the longer it seems to last. That being said, I am still plugging away at my two used car lots here in Daytona Beach. I still wet sand everything by hand using different combinations of grits, depending on the degree of deterioration of the lens. Preferably 800, 1500, 3000(or compound) then spar. I have had to dip as low as 220 before though...lol. Most of the restorations I get look brand new except the top 1/5th of the lens....but my dealers want them to look perfect....so they have me do them. It's great! Their whole lots look fantastic. I never understood why the other lots would put one great car next to one with trashed lenses....but they do. To me, it sends the message to any potential buyers that none of their cars are well taken care of....even if just one looks bad...and $40 seems a small price to pay for the reputation of the whole lot. Its been pretty busy right now. They like to load up on vehicles before the tax season rush.
Anyway, thats about it for now.....best of luck to you with your new business. ALWAYS seek out and learn.
kaimanson
New member
- Jan 5, 2013
- 13
- 0
Part Timer, thanks for taking the time to replay my questions jejej I'm using also 70/30 (following your instructions) from a few pages back (due to our weather in florida). I had a ford escape today that had some crazy spider web cracks every where in the front of the headlight. How do you treat those?...I started (by hand all the way) with a 400 all the way till 2000. I couldn't do so much damage to the little cracks, also the factory coating was a bit ok (but with spider web cracks in some areas) in the lower part. I was able to sand it a bit but couldn't get to the bare plastic under the coating...due to the fact that was a friend and he was ok with it. I bet you have seen some crazy stuff @ those dealerships you work with. I was thinking, maybe the only way to do it would have been with a machine :buffing:
I read you do it all the way by hand, but wasn't sure if sometime you use a machine or something. Thanks a lot for the help =D I have a few more questions but I may PM later tomorrow.
I read you do it all the way by hand, but wasn't sure if sometime you use a machine or something. Thanks a lot for the help =D I have a few more questions but I may PM later tomorrow.
light-bright
New member
- Feb 26, 2012
- 47
- 0
Haven't been on for a while, but I have been reading my email notifications.
Part-Timer has it right...
I too can not understand why I don't have dozens of dealers wanting this. I have one consistent one and a few onesie-twosie jobs.
I am still using a 50/50 mix here in AZ. If I get much more spar, I have issues with it leveling out. We don't usually have much humidity. I do not do this all by hand, I have been using a simple drill and 3" discs. I too usually go as low as 400 up to 3000. I do keep some 320 and 220 on hand but rarely use it. I find that in the case of Dodge, and some GM vehicles if there is an area where the OE clear is in tact, it helps me to get that removed faster. I always strip the entire lens due to my past attempts to avoid that have left visible lines where the old UV clear stopped. The reason I use a drill instead of a DA is that, the lens is not as particular as paint. You really can not see the swirl marks once the Spar is on, provided you truly remove the more course ones entirely as you work your way up to the 3000 grit. It's only when I haven't removed all the 320 or maybe 400 that I ever see scratches, but I know once I complete the 800 grit step.
Also, this may help...
I always finish my power sanding, then take the disc by hand and go horizontally across the entire lens until I only see scratches in that direction. This acts like a guide coat, for me. If I still see swirls, then I didn't use the drill in that area enough, so I can go back and touch up. Also, it allows me to get every little edge, or corner that the drill may not reach in fear of hitting paint, or going through the tape. (ALWAYS KEEP THAT IN MIND) You don't want to pay to touch up paint.
Back to the spar.... My personal car has been done on 9/12/2011. I go to the gas station car washes and I am not the best at taking care of that stuff although, I like to try. They still look great, and I use them as a showpiece when I talk to new clients. Of course I have tons of pics of before and after.
http://www.facebook.com/pages/Light-Bright-Headlight-Restoration/209280115777811?sk=photos_stream
^ if you want to see some.
Anyway....Hope that helps a bit.
Part-timer
New member
- May 30, 2011
- 219
- 0
Part Timer, thanks for taking the time to replay my questions jejej I'm using also 70/30 (following your instructions) from a few pages back (due to our weather in florida). I had a ford escape today that had some crazy spider web cracks every where in the front of the headlight. How do you treat those?...I started (by hand all the way) with a 400 all the way till 2000. I couldn't do so much damage to the little cracks, also the factory coating was a bit ok (but with spider web cracks in some areas) in the lower part. I was able to sand it a bit but couldn't get to the bare plastic under the coating...due to the fact that was a friend and he was ok with it. I bet you have seen some crazy stuff @ those dealerships you work with. I was thinking, maybe the only way to do it would have been with a machine :buffing:
I read you do it all the way by hand, but wasn't sure if sometime you use a machine or something. Thanks a lot for the help =D I have a few more questions but I may PM later tomorrow.
The ones that have the cracks in them......most of the time there is nothing you can do to fix that. At some point you have to just tell them its not worth trying to repair the lens. If the cracks are deep you also risk getting water inside the lens when you wet sand. Not a good thing!! Ya gotta be careful or you can make things worse than they were.
kaimanson
New member
- Jan 5, 2013
- 13
- 0
The ones that have the cracks in them......most of the time there is nothing you can do to fix that. At some point you have to just tell them its not worth trying to repair the lens. If the cracks are deep you also risk getting water inside the lens when you wet sand. Not a good thing!! Ya gotta be careful or you can make things worse than they were.
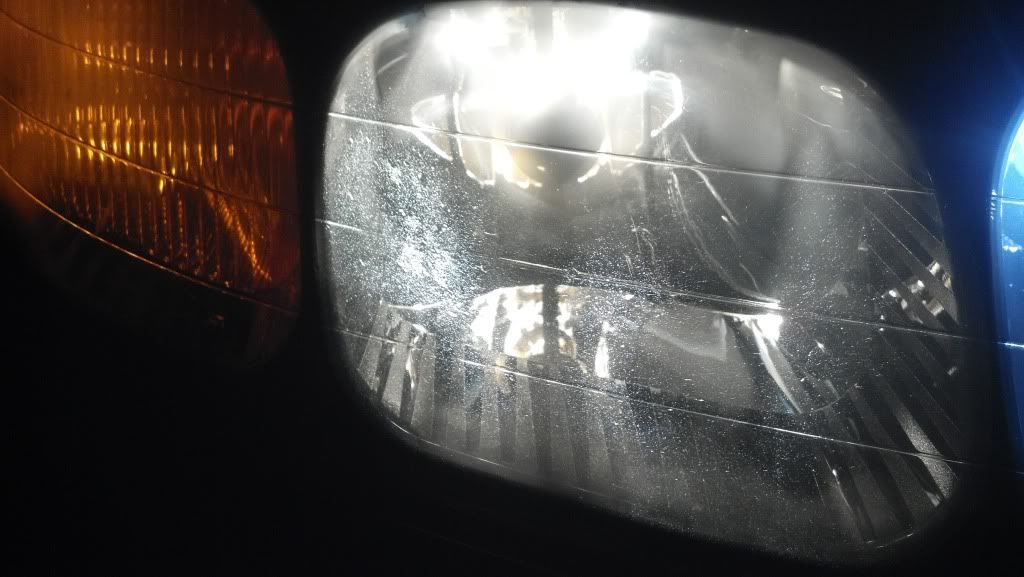
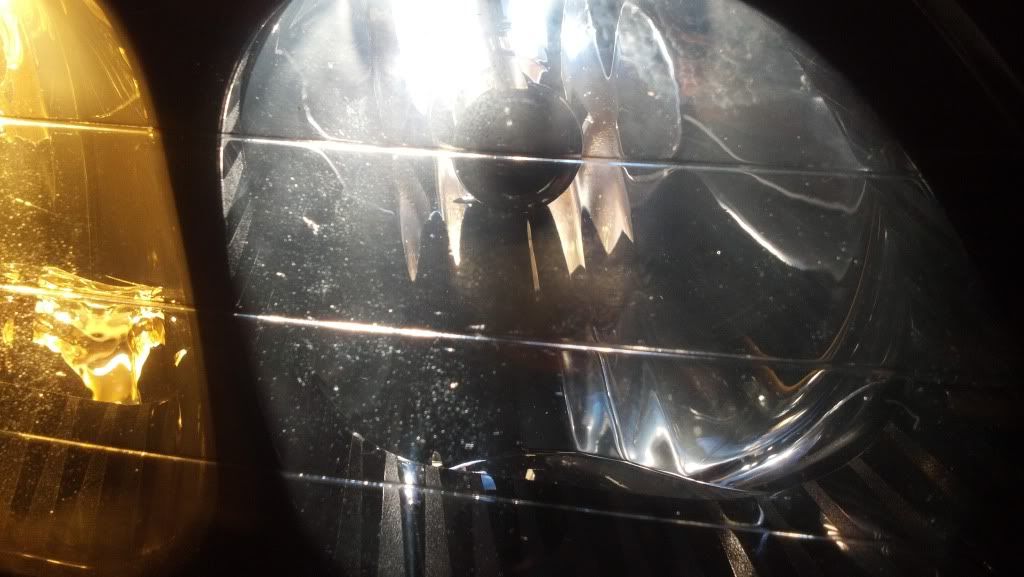
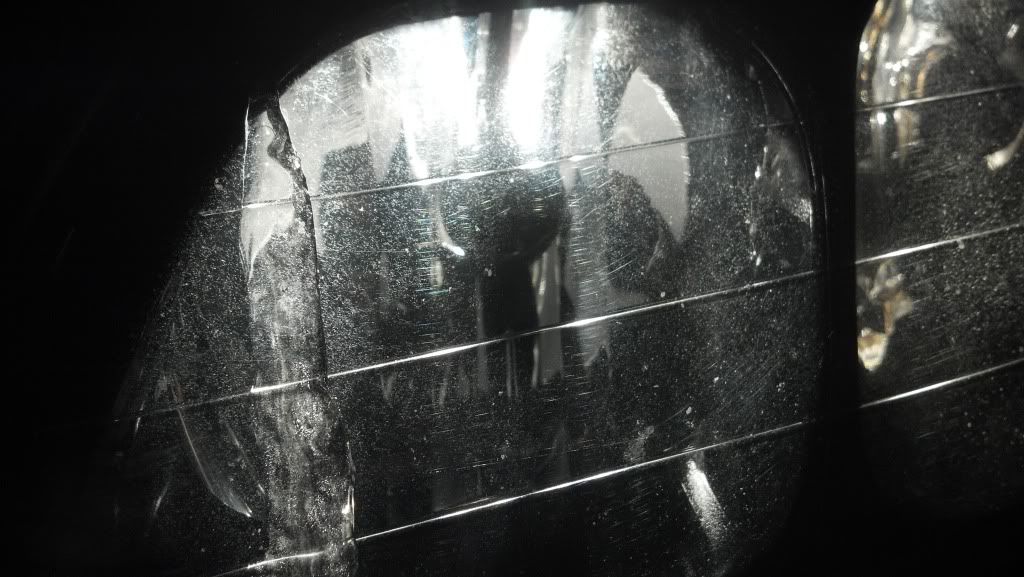
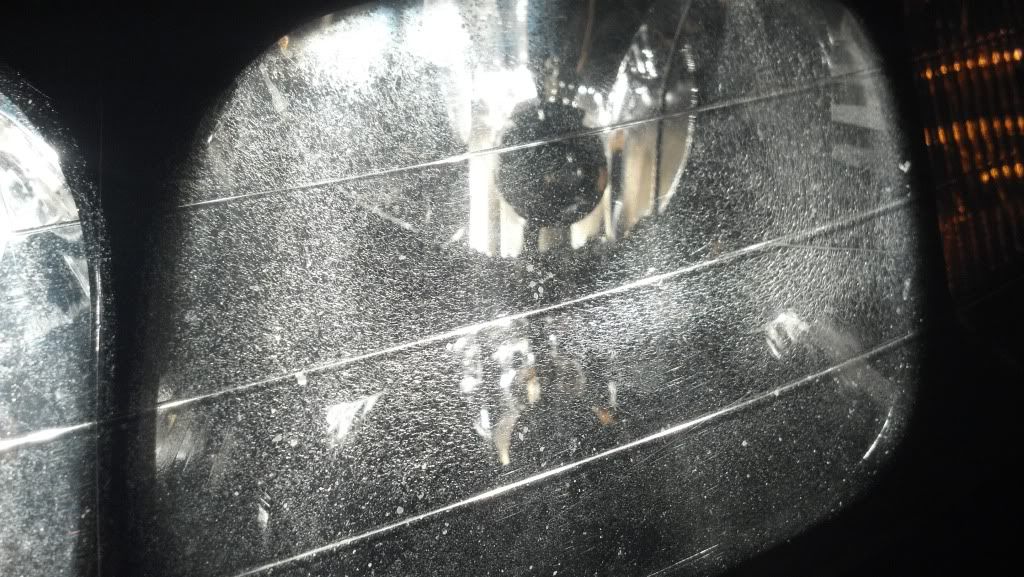
These are a couple of pics of the cracks i was telling you about, I think those cracks are whatever was left from the original coat...what would u do in this case? =
buffing:kaimanson
New member
- Jan 5, 2013
- 13
- 0
Haven't been on for a while, but I have been reading my email notifications.
Part-Timer has it right...
I too can not understand why I don't have dozens of dealers wanting this. I have one consistent one and a few onesie-twosie jobs.
I am still using a 50/50 mix here in AZ. If I get much more spar, I have issues with it leveling out. We don't usually have much humidity. I do not do this all by hand, I have been using a simple drill and 3" discs. I too usually go as low as 400 up to 3000. I do keep some 320 and 220 on hand but rarely use it. I find that in the case of Dodge, and some GM vehicles if there is an area where the OE clear is in tact, it helps me to get that removed faster. I always strip the entire lens due to my past attempts to avoid that have left visible lines where the old UV clear stopped. The reason I use a drill instead of a DA is that, the lens is not as particular as paint. You really can not see the swirl marks once the Spar is on, provided you truly remove the more course ones entirely as you work your way up to the 3000 grit. It's only when I haven't removed all the 320 or maybe 400 that I ever see scratches, but I know once I complete the 800 grit step.
Also, this may help...
I always finish my power sanding, then take the disc by hand and go horizontally across the entire lens until I only see scratches in that direction. This acts like a guide coat, for me. If I still see swirls, then I didn't use the drill in that area enough, so I can go back and touch up. Also, it allows me to get every little edge, or corner that the drill may not reach in fear of hitting paint, or going through the tape. (ALWAYS KEEP THAT IN MIND) You don't want to pay to touch up paint.
Back to the spar.... My personal car has been done on 9/12/2011. I go to the gas station car washes and I am not the best at taking care of that stuff although, I like to try. They still look great, and I use them as a showpiece when I talk to new clients. Of course I have tons of pics of before and after.
http://www.facebook.com/pages/Light-Bright-Headlight-Restoration/209280115777811?sk=photos_stream
^ if you want to see some.
Anyway....Hope that helps a bit.
Hi Rich, thanks a lot for the advices :dblthumb2: I'm just starting now doing it as an on the side job, maybe in the future a full time. A few questions regarding your pad and sandpaper. I have seen after reading all the 107 pages, that most of the guys here use as sanding pad the 3m 3" hookit, which one are u using?...also how much are the sand discs? and where did u get it?. Right now I'm doing it by hand with the meguiars sanding pad, together with those sandpaper sheet from autozone/advance auto part. I have a power drill that I use when I need to put some compound on the light...Maybe I can use a sanding pad when working on heavy duty coat (like the one on the escape) and then I do the rest by hand...
Once again thanks for the advices:xyxthumbs:
light-bright
New member
- Feb 26, 2012
- 47
- 0
These are a couple of pics of the cracks i was telling you about, I think those cracks are whatever was left from the original coat...what would u do in this case? =
Cracks like those will not be able to be repaired. I have done headlights like this before. One small trick you can use is to take OMS and wipe the headlight in front of the customer. This will make them temporarily clear, but still showing those cracks. You will be able to removed that cloudy appearance, and clear over those cracks to help seal them giving the customer some time before they absolutely need to be replaced. Make sure you tell them that it will not remove the cracks, but you will be able to make them more clear, provided they did become more clear with the OMS.
How, I like to phrase it is like this...
"I can clean up, and clear up whatever is on the outside of the lens. Cracks that go through the lens or any moisture issues from the inside, I will not be able to clear up."
Hi Rich, thanks a lot for the advices :dblthumb2: I'm just starting now doing it as an on the side job, maybe in the future a full time. A few questions regarding your pad and sandpaper. I have seen after reading all the 107 pages, that most of the guys here use as sanding pad the 3m 3" hookit, which one are u using?...also how much are the sand discs? and where did u get it?. Right now I'm doing it by hand with the meguiars sanding pad, together with those sandpaper sheet from autozone/advance auto part. I have a power drill that I use when I need to put some compound on the light...Maybe I can use a sanding pad when working on heavy duty coat (like the one on the escape) and then I do the rest by hand...
Once again thanks for the advices:xyxthumbs:
I buy my supplies from a local paint and body supply store. I use Norton for my dry sanding 400 and lower, I use 3M for my 800 + wet sanding. I also keep some sheets of 400wet and 800wet for hand sanding as needed. I buy my discs by the box and the prices vary a bit, starting at about $20 for a box of 50.
kaimanson
New member
- Jan 5, 2013
- 13
- 0
Awesome Rich!, like you were saying I told my friend it wasn't going to be like the other car I did for him, but it was going to be a little more clear. Cracks are hard to deal with, it can be hidden a bit but not that much. By any chance can you show me which sanding pad are you using with your drill?.
I really appreciate all the advices Rich :xyxthumbs:
I really appreciate all the advices Rich :xyxthumbs:
light-bright
New member
- Feb 26, 2012
- 47
- 0
Awesome Rich!, like you were saying I told my friend it wasn't going to be like the other car I did for him, but it was going to be a little more clear. Cracks are hard to deal with, it can be hidden a bit but not that much. By any chance can you show me which sanding pad are you using with your drill?.
I really appreciate all the advices Rich :xyxthumbs:
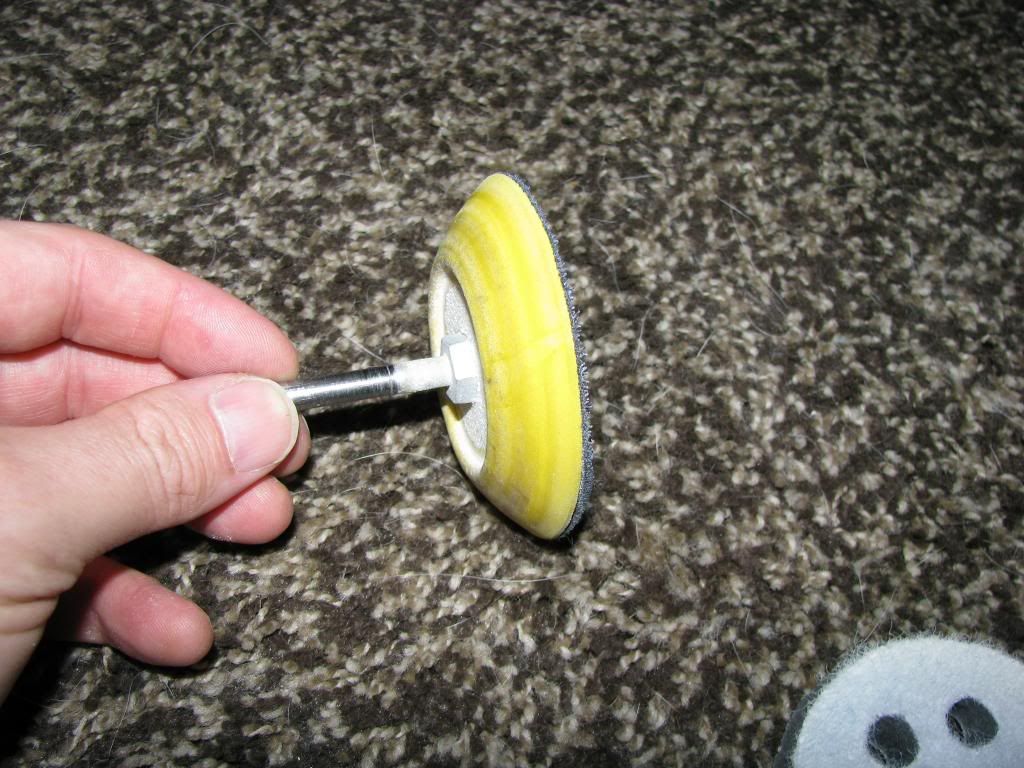
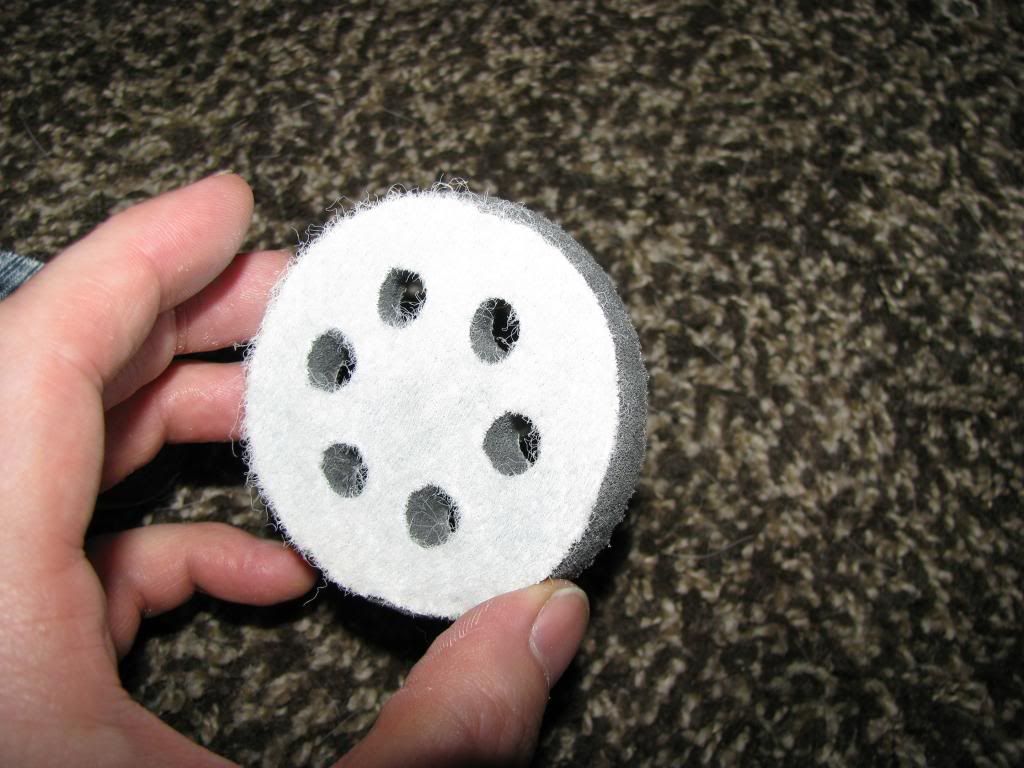
You're welcome.
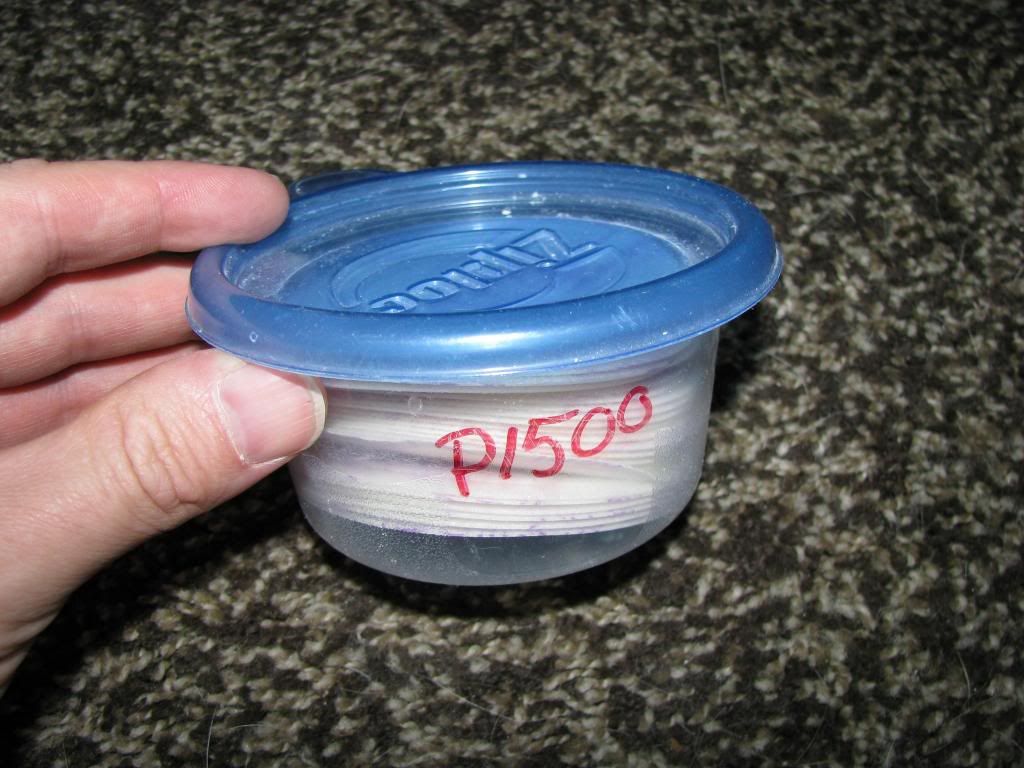
Here are some links to pics. I honestly do not recall the brand name of the backing plate or the intermediate pad. I got them both at that same paint supply shop. Also, Included is a pic of the "Glad Ziplock" containers that work perfectly. They hold a whole box of discs and I can just pull the top off while I work instead of dealing with the box. I also have a magnet in the bottom of each one. The dealership I go to lets me store a tool cart, and I magnet them in the drawer so I can open em all at once.
crash93ssei
New member
- Mar 26, 2008
- 304
- 0
Also, Included is a pic of the "Glad Ziplock" containers that work perfectly.
Actually, that is an SC Johnson Ziploc bowl, I make them at work lol. We don't make the Glad or any other brands, so keep buying the Ziploc
light-bright
New member
- Feb 26, 2012
- 47
- 0
Now that is just funny. Yes, use the SC Johnson ziploc, it works great and my discs are always fresh too.
Sent directly from my brain using AG Online
Sent directly from my brain using AG Online
crash93ssei
New member
- Mar 26, 2008
- 304
- 0
LOL just couldn't resist
I love this method, will never go back! Waiting for some somewhat better weather so I can do the headlights on my '96 Z71 truck. Those headlights are beat! 200,000 miles on them.
I love this method, will never go back! Waiting for some somewhat better weather so I can do the headlights on my '96 Z71 truck. Those headlights are beat! 200,000 miles on them.