Man versus Machine

  • Thread starter Thread starter Mike Phillips
  • Start date Start date
Nice work Mike. :props: Always great to hear from the Pro. :buffing: Hope you got some serious overtime for the project :work: Especially for the write up :urtheman:
 
Your Orange-handled Pad Brushes are on back-order. Any word on when these might be available again ?

So you use this Brush to scrape off the Pad's Build-up, right ?

If you don't remove this build-up off in time, does the residual crud do any damage, or is it just that the Foam can't do any more cutting, with it's pores all blocked with spent compound ?

Tell me more about this Build-up and the removal of it, please.

Many thanks in advance from a Canadian Customer.
 
Good Show Mike! Excellent write-up and as always great work.:dblthumb2:
 
So you use this Brush to scrape off the Pad's Build-up, right ?
Yes.

You can use that brush to clean any product residue off any foam pad. The way I was using it was to hold the pad in my hand and draw the bristles against it over a box.

You can also use it with a rotary buffer as the buffer's running. There's more information about cleaning your buffing pads in this thread.

How to clean your foam pad on the fly


If you don't remove this build-up off in time, does the residual crud do any damage, or is it just that the Foam can't do any more cutting, with it's pores all blocked with spent compound ?

Kind of a little bit of both.

First, if you're using a specific type of foam for it's characteristics, in this case a cutting foam to cut with, then you want the foam in contact with the paint, so you need to clean the residue build-up from off the face of the pad for this reason.

Second, you always want to work clean. Adding fresh product to spent product dilutes or adulterates the fresh product, so for this reason you want to remove spent product. If you think about it, the residue on the surface of the pad is a mixture of both spent product and removed paint particles, you don't want to keep rubbing this against the paint, so you want to clean any build-up off the face of the pad and also wipe your surface clean before working that section again, if you're going to work it more than once.


Tell me more about this Build-up and the removal of it, please.

The build-up is normal and you'll see it with any product you're applying and working against the paint. It's just a good practice to work clean, this applies if you're working by hand or by machine. It takes more time to stop the process, (by hand or machine), and clean you tools whatever they may be, but by working clean you're removing the potential for any problems because you've removed used-up product out of the process and you're enabling the pad of your choice to do it's job better because there's no spent product in the mix. Again, this would be true of working by hand or machine and applies to any product you're using to remove defects.

Not removing spent product can cause the process to become gummy and make wipe-off more difficult, this will slow you down and lower the quality of your end-results.

Can't stress enough the importance of always working clean.
 
Excellent write-up! Sure is nice to have you around. :urtheman:

I would like to hear the story of your first (running) car should you take the time to type it up.

I did something just like this as a youth except I didn't know what I was doing and I didn't have experienced people on a discussion forum to guide me, so I made a lot of mistakes. That's another story for another day but would be happy to post it should someone ask. It had to do with this car, my first car that actually ran and drove back when I was in high school in 1977

As long as it doesn't delay your Flex 3401 write-up! :poke:
Can't wait to hear your opinions on it, I sure love mine :D
 
Mike great write up. Your insane for even attempting to polish half of that boat by hand!
 
Hey Mike,great write up..

I was just curious as to what the meguiar's apron is made out of?I know you mentioned the Edge one to be the best and was MF.But I think I want to buy the meguiars one...
 
Hey Mike,great write up..

I was just curious as to what the Meguiar's apron is made out of?I know you mentioned the Edge one to be the best and was MF.But I think I want to buy the Meguiar's one...

It's cotton and the front of the apron is fairly soft, kind of like a brushed cotton. It's definitely the best looking apron around.

Two pockets up front also to put squeeze bottles or even 16 ounce bottles into.

I like the idea of the microfiber bonnets because we all know how gentle microfiber is to a car's finish in-case you have to lean on the car on purpose or by accident, but at the same time these Meguiar's aprons look nice and look professional.

:xyxthumbs:
 
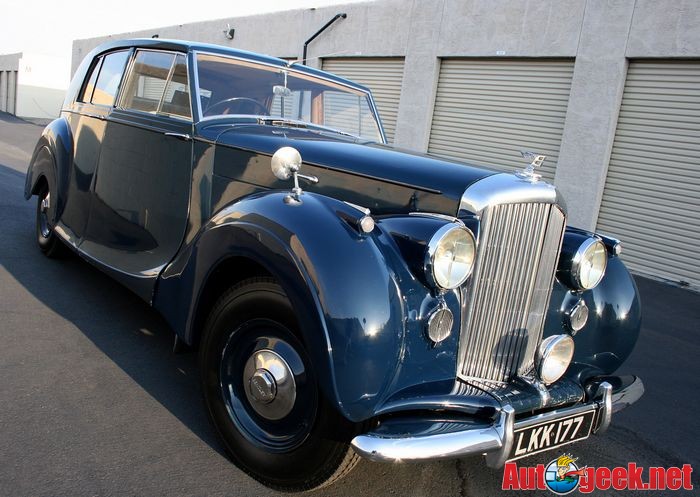
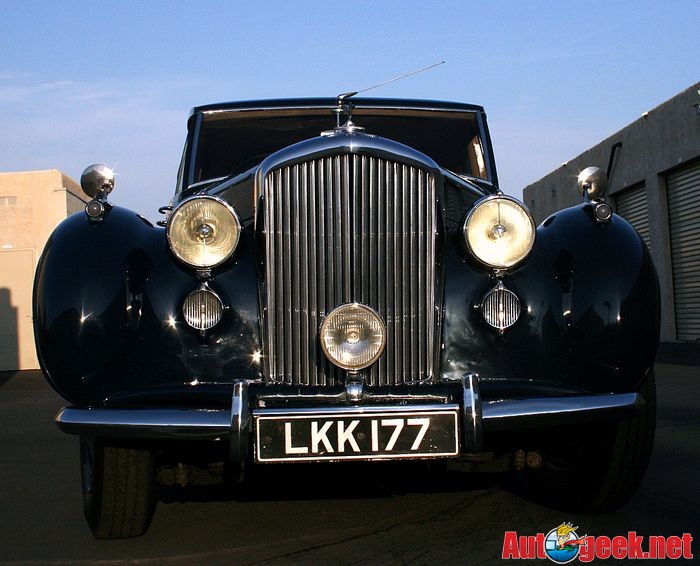
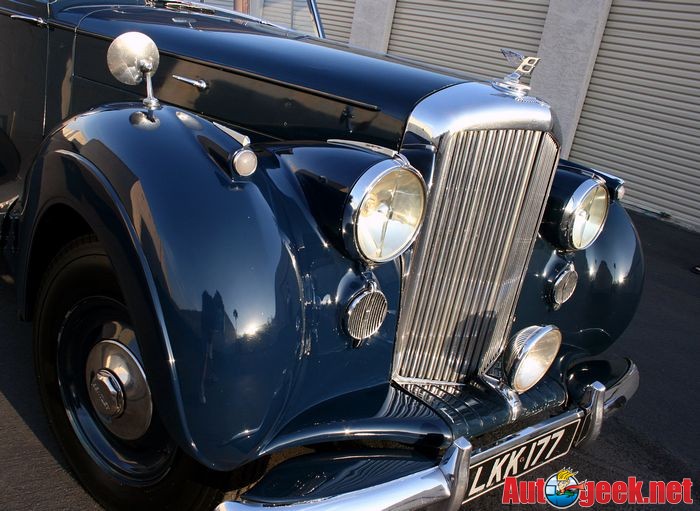
1948 Bentley - Hand Rubbed Lacquer Paint


Since this thread touches on the topic of rubbing paint out by hand I thought I would share this detail I did back in the summer of 2007

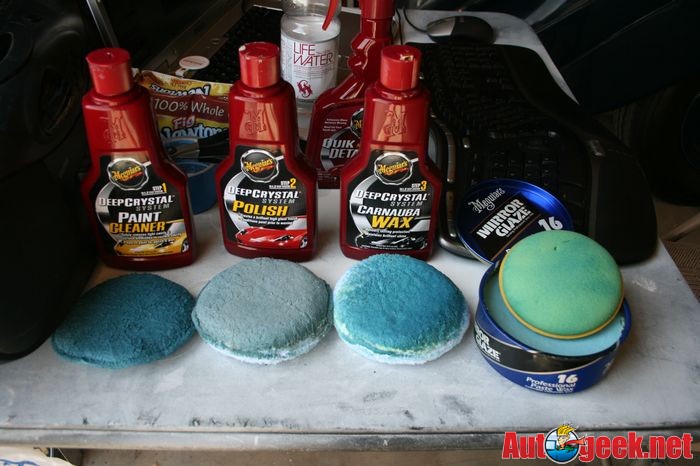
I used about $30.00 of OTC products and a lot of perspiration and passion behind the pad and it paid off very handsomely for one days work.

This is the most I've ever made for hand-rubbing out a finish.


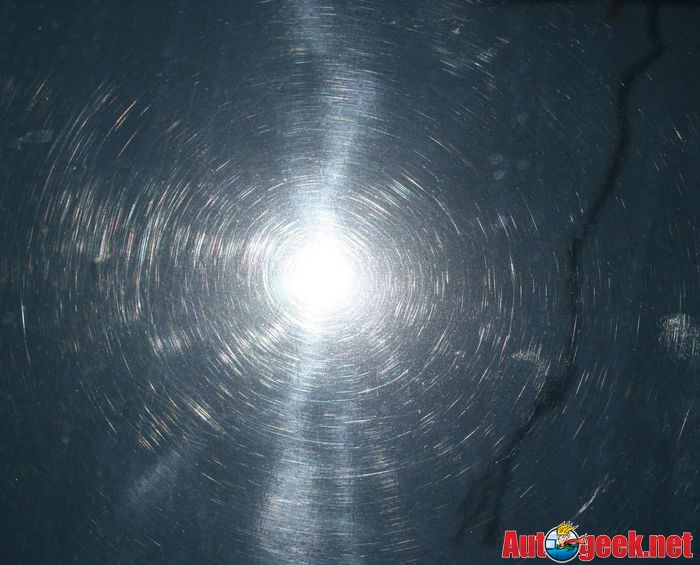
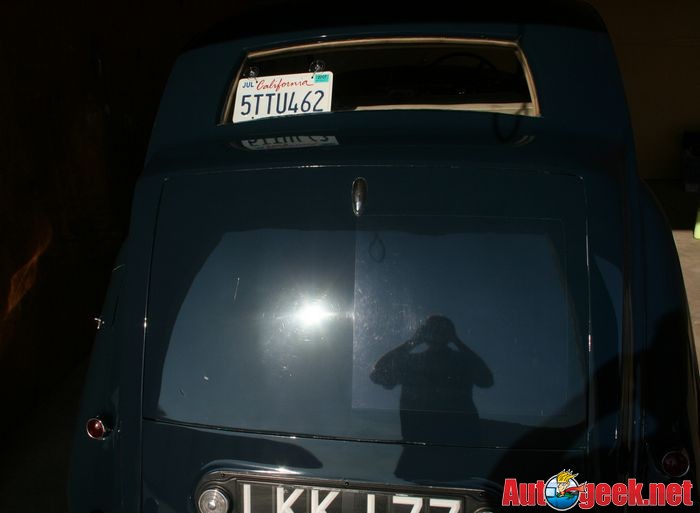
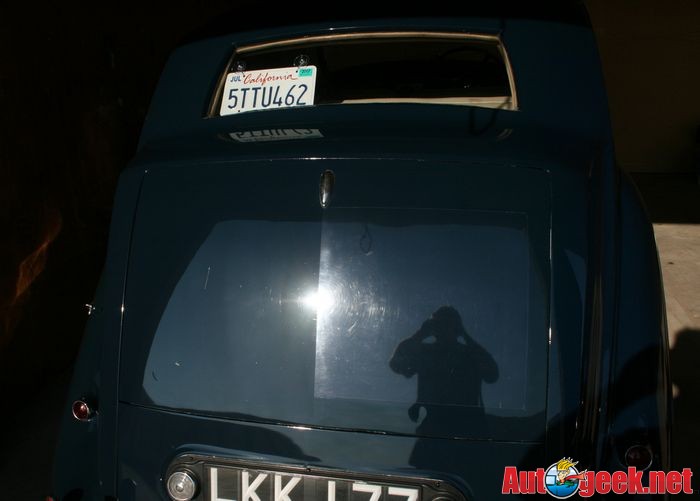
It looks good in this picture but when pulled out into the sun you could see the entire finish was filled with swirls and had a lifeless hazy look to it.

48Rolls001.jpg


Major swirls throughout the entire finish
48Rolls002.jpg


48Rolls003.jpg


Before and After
48Rolls004.jpg


48Rolls005.jpg


After shots - Lots of real-estate but it was a fun project!
48Rolls006.jpg


48Rolls007.jpg


48Rolls008.jpg


48Rolls009.jpg


You can expect to see some pigment transfer off onto your applicator pads. I used terry cloth applicator pads until I got to the waxing steps then I switched over to foam.

48Rolls010.jpg


$700.00 for the work and a $100.00 tip, not bad for a Saturday using OTC or Over The Counter Products.

48Rolls011.jpg


I'm currently looking for classic cars in the South Florida area for an extreme makeover project, they don't have to be this old but they do have to have single stage paint. Call or e-mail if you have a candidate. There won't be a charge if your car is selected as it will be used for training purposes.

:)
 
Mike,


How did the swirls come out so easily with something as light as Deep Crystal Paint Cleaner? Is single stage paint that easy to work on?
 
Mike,

How did the swirls come out so easily with something as light as Deep Crystal Paint Cleaner? Is single stage paint that easy to work on?

Most old lacquers are very soft and easy to work defects out of.

Note my pads are 100% cotton terry cloth, the nap, or little cotton loops act as form of gentle abrasive and give your choice of product more bite. This is all old school stuff, I wasn't around in the old days, I've just had the good fortune to have met a lot of old-timers and learned from them and also the good fortune to work on a lot of antique and original paints. In fact, I would say that not only is that my specialty, it's also my favorite thing to do in the paint polishing world, (restore original and antique paints).


I wrote an article back in 2002 or 2003 on Autopia that goes into paint hardness and specifically touches on single stage white paints. I see people posting stuff from this article all the time now days when the subject of paint hardness and white paint comes up. At the time I thought everyone would think the article was boring... well it is kind of...

Here you go, check it out, what I've typed here is actually the original title, DB changed it when he edited it and posted it.

The Lesson White Paint Teaches Us


I actually found a bunch of pictures of both the white Honda Prelude with the from bra on it and also the 1959 Flattop Cadillac used in that article.

That article is actually a single story in a book I wrote and sold for a very brief time in Oregon called,

TheArtofPolishingPaint.com
(This domain is parked for now)

I went to re-write it after the first successful sales and then never got it put back together. I actually have the original somewhere in a box. After meeting Barry Meguiar at the Cars & Cigars Party mentioned here, he asked me to send him 3-4 chapters from it, which I did and after that he hired me as his Corporate Writer and after a year of doing that job I kind of forged my own new position at Meguiar's running their forum and teaching their Saturday classes for which I'll always be thankful considering I'm just a blue collar dog detailer from a hick town in Oregon. Meguiar's has always been first class in my book.

Where MOL came from
A lot of people don't know where MOL came from but it came from ShowCarGarage.com which I brought up because I wanted a place to post my write-ups from cars I detailed and at the time Autopia was the only game in town and one thing led to another and SCG went up. Then one day the Vice President at Meguiar's asked me why I was always posting my detailing work on ShowCarGarage and I explained to him that it was because Meguiar's didn't have a forum.

You have to remember that forums like this one powered by vBulletin were still a new thing in 2002. See the below article,

Discussion Forums - A relatively "new" invention...


Anyway, after posting a very detailed write-up for an all original 1954 Oldsmobile Rocket 88 and putting a colored print-out of it in his in-box he walked over to me and handed me my write-up with his notes on it and that's when he asked me,

"Why are you always putting this on your website?"

I said,

"Because Meguiar's doesn't have a discussion forum. This is what I've been trying to explain to you"

He looked at me and said,

"Make it happen"

As they say, the rest is history and in about 3 weeks MOL went live, that was the last part of January, 2004, here's the first post.

Mini Coopers at Meguiar's NXT Generation Garage!


Meguiar's has always taught classes, I just joined the real-world together with the cyber-world by coordinating the classes via discussion forums. By the way, I still have the pictures of the 1954 Oldsmobile Rocket 88.


Man time flies when you're having fun...


Hope that wasn't boring... About the only other person that knows that story is 2hotford aka Tim Lingor as he was my Super Moderator on both TheArtofPolishingPaint.com and then ShowCarGarge.com


We have an exiting future ahead of us. Autogeek is great, everyone that works here is so tuned-in to their job and Max sees the future, he's truly the power and creative genius behind the scenes and he does everything he can to help everyone on his team to be the best they can be. It's fun working here, and it's a lot of hard work, but it's more fun than hard work.


:)
 
Mike,

Thank you for that post, lots of good info we all love to read.
 
This post (and the 1 step versus 3 steps) are a few of the most informative posts I have ever read on the detailing forum.

People often assert this works better than that, here is how you use this stuff, etc.

These posts really give some tangible proof, along with some tidbits of application methods as well.

Props to Mike, thank you.
 
Back from the past....this write up is great...especially with it covering polishing by hand...and also a little history on our beloved host Mr Mike. Awesome work...and info ...as always.
 
Nice reading that history, especially the bit about how MOL started. :>
 
Nice reading that history, especially the bit about how MOL started. :>


Yeah... since I'm the guy that lived the history I'm probably the only person that will remember it and share it as people tend to forget how things started...

I also started the TNOG's, the Extreme Makeover Classes and the Roadshow Classes plus a few other things... all driven by passion to show others how to detail cars...


:xyxthumbs:
 
Mike, this is a good read on the difference in time/effort involved in getting shiny paint! I am curious about a middle of the road option - using a 4" pad on a drill. I can't justify the $'s for a DA but did get a small drill adapter and a mix of pads with the intention of trying this as time permits. Would you (or other board members) recommend doing any significant correction with this set up? I've got UC/Swirl X and have tried a small area by hand. It ain't no fun and I didn't make much progress.
 
Yeah... since I'm the guy that lived the history I'm probably the only person that will remember it and share it as people tend to forget how things started...

I also started the TNOG's, the Extreme Makeover Classes and the Roadshow Classes plus a few other things... all driven by passion to show others how to detail cars...


:xyxthumbs:

Hey Mike...glad to see you respond. I put a post on the 'ask the expert' section of the forum directed at you ..thread title was ''Questions/Comments for Mr. Mike Phillips"...was mainly asking you about that story of your first ride and attempting to detail it that you made reference to in this article...if you have time to write that out :dblthumb2:

Mike, this is a good read on the difference in time/effort involved in getting shiny paint! I am curious about a middle of the road option - using a 4" pad on a drill. I can't justify the $'s for a DA but did get a small drill adapter and a mix of pads with the intention of trying this as time permits. Would you (or other board members) recommend doing any significant correction with this set up? I've got UC/Swirl X and have tried a small area by hand. It ain't no fun and I didn't make much progress.

Man you're in for a lot of work. Here is what I'd do...save up for a Griots polisher or search for USED DA's on c. list or ebay or even forums like this or MOL. You should be able to stay around $100 or so....maybe an extra $20 for some 5.5" pads. You'll save yourself trust me. The drill set up MIGHT be ok for some headlights...but i wouldn't go at a car with it. If it's a matter of 'JUSTIFYING' the $ for a DA...as in you have it but don't think it's worth it....in a phrase....IT IS. Trust me...the speed AND quality of your work, even as a newbie will be much better. Autopia has a 'classifieds' and 'good deals' thread where people often sell used gear and MOL has a 'for sale' thread....'subscribe' to them and check them often...you'll find a good deal. Amazon also frequently has great deals on GG for about $120 and includes polishes etc
 
Mike, this is a good read on the difference in time/effort involved in getting shiny paint! I am curious about a middle of the road option - using a 4" pad on a drill.


I've used a drill to polish paint back before the Porter Cable was introduced. Meguiar's sold a foam pad with a drill arbor permanently affixed to the plastic backing plate, I think the part number was A-6500 and it looked like this,

Here's a horrible picture of it I snagged off the Internet, I have a couple in my collection but no pictures of my own.

A6500.jpg


So I'm pretty familiar with buffing out cars using a drill. To your question...


Can you do "Spot Repair" using a 4" pad on a drill?

By all means "yes" and it does work better than working by hand.


:)
 
An Arsenal of info!!!!
Theory made practice to deliver the very best results!!!!!
Thanks for your dedication!!!!!:dblthumb2:
 
Back
Top