The Secret to Removing Oxidation and Restoring a Show Car Finish to Antique Single Stage Paints

Quick question, since metallic flake laquar/enamel has aluminum within thats oxidized. .are you able to use an aluminum polish/cleaner such as Gords to take out the aluminum oxidation prior to starting the M7 polish bath?
 
I did my first application and it looked really good, but I did not "seal" it because I figured it would need another application or two. When I came back to do more work on the car a week later you tell it had faded some or the oils had washed away.


Sometimes if left neglected too long the pigments and resins become unstable and the paint is now past the point of no return.

Only thing left you can do is to keep it polished with the #7 often and try to keep the car out of harsh sun and hot days.


I did one more application of #7 by itself. I was getting low on #7 and did not have enough for another full application. Then I took what I had left of it and mixed it with a partial bottle of #9 and finished it out that way.

That' will work. I'm not a huge fan of mixing products but this is a pretty safe mixture.


Then I sealed it with Souverän paste wax. It's been about two months since and still looks good.


That's great news!


:dblthumb2:
 
Quick question, since metallic flake laquar/enamel has aluminum within thats oxidized.

are you able to use an aluminum polish/cleaner such as Gords to take out the aluminum oxidation prior to starting the M7 polish bath?


Good question. Sorry to say the answer is "no".

The aluminum flakes are surrounded by paint resin so there's no way to get to only the actual aluminum flake to polish it.

My guess is if you tried you might damage the paint. (If it's old or antique).


The best you can do is just polish the paint. You'll see black come off and that's normal and there's really nothing you can do to change it.


What are you working on?


:)
 
Hi Mike, I remember seeing a thread of a late 80s - early 90s Bmw with schwarz (black) single stage paint you restored.
I have a 1991 325i schwarz ss and for sure will be treating it with m7. Since it is modern ss paint, would m205 suffice for the next step. Also, do you think it would benefit with Blackfire Black Ice wax? Or should i just stick w Megs products.
Does black SS paint require different regiments/products?


Sent from my iPhone using Tapatalk
 
Hi Mike, I remember seeing a thread of a late 80s - early 90s Bmw with schwarz (black) single stage paint you restored.

Are you talking about this BMW?


1991 e34 BMW M5

2600_bmwsidebyside2.jpg


2600_bmwbeforeandafter.jpg


I have a 1991 325i schwarz ss and for sure will be treating it with m7.

Since it is modern ss paint, would m205 suffice for the next step.

Yes M205 will work. I would highly recommend doing a test spot and 100% for sure dial in you pad and technique for using the M205 on single stage black paint.

Black single stage paint tends to be the softest paint there is due to the pigments used to make black paint. I think I talk about paint softness and hardness in this article,

The Lesson White Paint Teaches Us


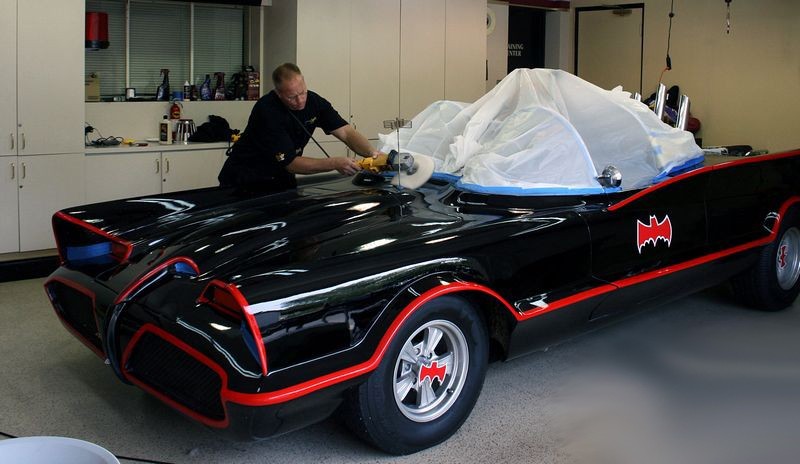
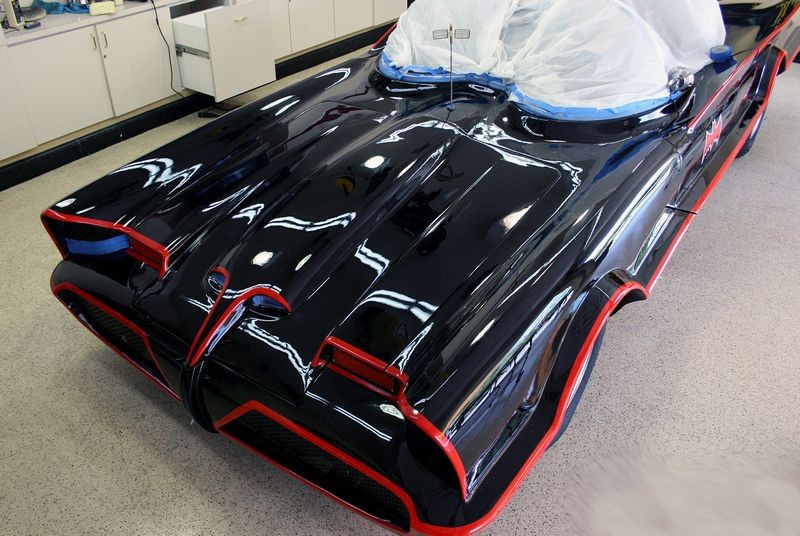
M205 is a great polish. When it was just a Lab Sample, the head chemist at Meguiar's personally walked over to the garage and gave me a sample to test out on another famous black car.
RotaryBufferBatmobile1.jpg


RotaryBufferBatmobile2.jpg


Even so... I have seen threads posted about micro-marring issues when M205 is used on soft paints. I'm sure it's more of a pad/technique issue than a product issue so be sure to do some testing first.


Also, do you think it would benefit with Blackfire Black Ice wax? Or should i just stick w Megs products.

BLACKFIRE BlackICE is a great wax. I used it to seal the paint on this old Pontiac. I saw the Pontiac at the last Tuesday Night Car show here at Autogeek, (last week), it still looks show car quality.


1978 Trans Am - Original Single Stage Lacquer Paint
This is the version that Burt Reynolds made famous in the movie Smokey and the Bandit. It was not in the movie but is the correct engine, transmission, T-tops, colors, wheels, etc that are the same as the car Burt drove in the movie.

watermark.php


watermark.php


watermark.php


watermark.php


watermark.php


watermark.php


watermark.php


watermark.php


watermark.php


watermark.php


watermark.php


watermark.php


watermark.php


Does black SS paint require different regiments/products?

Outside of the softness issue I'd say "no".

What I do if I don't know the history of the paint on a car is I'm uber careful around raised body lines and edges.

Why?

Because paint tends to be thin on these areas anyways due to gravity when the paint was sprayed.

But also because I don't know who buffed the car before me or how many times. I don't know if the other guys that buffed the car out were careful like I am?

Or if they used good products, pads and tools?

So outside of the paint being soft and not knowing the buffing history of the car, treat it like any paint.


:)
 
Yep that's the one, Mike. amazing work!
My car does have paint burn spot on the left front fender so I will be investing in the paint thickness gauge for sure.
I have a bit more of reading to do and maybe post pictures in another thread.

Thank you


Sent from my iPhone using Tapatalk
 
Yep that's the one, Mike. amazing work!


Talk about a blast from the past...

I did the work on the BMW way back in 2002 as I prepped half the car for display at the 2002 Bimmerfest in Santa Barbara, California.


The full write-up for this project was used for an article on removing RIDS back BEFORE we had cool tools like the RUPES TA50 and 1" and 2" machine sanding discs.


Here's the link to the full write-up...


RIDS and Feathersanding - A Highly Specialized Technique by Mike Phillips


2600_nikkensandpaperpieces.jpg


2600feathersandingrightside-med.jpg


:)
 
Absolutely brilliant write up, top notch work (but we all expect as much from you Mike) and brilliant finish.

.
.

X2 - got this page bookmarked!

Thanks for sharing all of this helpful info!

.
.
 
I have not seen the video but what I teach and practice myself is to use the least aggressive process to get the job done.

I don't know if the paint Larry was working on would be considered antique or original as I have not seen the video.

IF it was antique single stage paint I would not have wetsanded it but instead would have used the product and techniques I present in this article you're posting your question to.


The Secret to Removing Oxidation and Restoring a Show Car Finish to Antique Single Stage Paints


Rubbing oxidized antique paint down with #7 and a piece of cotton terry cloth is the least aggressive process I can think of to restore antique single stage paint.

Wetsanding antique single stage paint is the most aggressive process I can think of to restore antique single stage paint.

So if the car and the paint were antique I would not myself wetsand the paint or recommend it. If he was working on modern or recent paint then I personally would have probably not started out by wetsanding but I don't know the back story on the car, the paint or the project. I'm sure Larry did know the story and his procedure was spot on for his purposes.


If I go by just what you shared above, this part,


very old oxidized Porsche

Then I would personally would NOT wetsand the paint on the Porsche. I've been doing the #7 rub-down all my detailing life and I've been sharing this technique ever since I started posting to the Internet and I've been contacted by HUNDREDS if not THOUSANDS of people over the years that have followed the techniques I share for saving antique paint with nothing but glowing stories of success.

Rubbing with #7 and terry cloth and your elbow grease is very safe and very effective on this type of paint and that's what the goal is... safe and effective.

Wetsanding removes paint
Compounding to remove your sanding marks removes paint
Polishing to refine the results of compounding removes paint

That's just a little too much emphasis on removing paint for my taste when working on antique single stage paint and especially when it's someone else's car.

Read this write-up and look at the pictures and know that this antique single stage paint was saved by the simple approach.

Pictures: 1958 Cadillac Extreme Makeover- Original Single Stage Paint!


BEFORE
qhAtFa2.jpg


AFTER
uvYkbFu.jpg


And the above was done without wet sanding... just a little elbow grease, some cotton terry cloth and a product that's been around since the time of the Model T.


Where you at with this project? I'm confident you'll make the right decision and the car will come out looking beautiful!


:xyxthumbs:

Mike as always your answers are always so detailed and to the point. I will be going to look at the car sometime next week, He's a teacher and I wanted to wait until the end of the summer semester.

I wanted to get the research done before I made it over there with a huge question mark over my head. I will take pictures of the car next week and try the least aggressive method as you suggested.
 
Wow, I cannot believe I missed this great article Mike!

I picked up some #7 yesterday for the 1919 White truck I will be working on this weekend.

Thanks again Mike!:xyxthumbs:
 
Wow, I cannot believe I missed this great article Mike!

I picked up some #7 yesterday for the 1919 White truck I will be working on this weekend.

Thanks again Mike!:xyxthumbs:

WOW!

Pictures please.

Bill
 
Wow, I cannot believe I missed this great article Mike!

I picked up some #7 yesterday for the 1919 White truck I will be working on this weekend.

Thanks again Mike!:xyxthumbs:

WOW!

Pictures please.

Bill

I was mistaken, it was a 1918 White truck. It had been repainted in the early 1980's, and the paint is in good shape, but I applied the #7 anyway.
I will get some pics up soon. We are 'freshening it up' for possible resale.
 
I was mistaken, it was a 1918 White truck. It had been repainted in the early 1980's, and the paint is in good shape, but I applied the #7 anyway.

Can't hurt. Plus it helps to stave off future oxidation.


I will get some pics up soon.

We are 'freshening it up' for possible resale.


Already looking forward to the pics....


:xyxthumbs:
 
Well, I've got a project I did some testing on and will be scheduling soon. It's my buddy/neighbors 78 or 79 Lincoln Towncar. It was his grandfather's car that he bought brand new and got passed down. Going to be a TON of work, but I'm pretty excited to do it:

87f704a0d7e2b5a19055bf7497264c18.jpg


913eda9588a806873ac774beb3bcf46e.jpg


169b4de1c7b6da334b1a60e01221fb83.jpg


e678049abdd7db9a040e8869ab49c831.jpg


Did some testing on the trunk to try this method out and make sure the paint would come back and be worth doing:

1968ac5277e2ad92522f425fb0e5c30f.jpg


17620ffea30b5f3a484653e5db8cb2e2.jpg


05c9f722088c061f42e683260b4960c7.jpg


bf8cd208f8f4a768e8123f9796824430.jpg


I'd say it looks a little better
 
Thanks for this incredible thread Mike. I will be using this process to bring back and protect the single stage paint front bumper, on my 2008 Toyota Tacoma after years of neglect.
 
Mike,

I did your steps to remove the oxidation on my door handles, it was turning pink.

Would 105 be too aggressive to remove the swirls that are left behind with a DA polisher? I was thinking 205 with a white CCS pad might not be aggressive enough.

I also have Ultimate compound, Swirl-X, and Scratch-X. Not sure which is more appropriate vs the 105.

Thank you
Gary
 
Hi Mike and other single stage paint experts,

I'm still a bit puzzled by the hand buffing requirement for this process. I understand that one of the goals is to revitalise the paint by working in the oils in the Show Glaze but another is to also remove the oxidation with the abrasive action of the terry towel.
Couldn't this be done using the Show Glaze with a VERY soft (eg LC Gold CCS) pad on a 8mm throw DA at speed 2 or 3 with no pressure?

The main issue that I could think of is that you may need a lot of pads as they could quickly clog with the oxidized layer that is being removed.

Or does the following mean that you would use up a lot of product with the pad swaps as well (although the pads wouldn't absorb the oils the same way the towels do.

Your towel acts like a filter
Here I've unfolded the towel to show you what it looks like. As you can see the towel is completely saturated through and through with the polishing oils found in #7. The towel acts like a filter: as new product is placed onto the working face of the towel some product seeps through while the majority is worked into and over the paint after the towel reaches maximum saturation. The oils that filter through the towel are different than the original product that comes out of the bottle. If I were to refold the towel when applying the #7 I would be in essence changing the product as I would be introducing the fresh product out of the bottle to a different version of itself on a different fold of the towel. I could switch out the used towel for a fresh towel but then I would have to re-saturate the towel all over again and that would use up a lot of product.

I just like to understand the physical processes involved a little better.

Greg
 
Back
Top