Navigation
Install the app
How to install the app on iOS
Follow along with the video below to see how to install our site as a web app on your home screen.
Note: This feature may not be available in some browsers.
More options
Style variation
You are using an out of date browser. It may not display this or other websites correctly.
You should upgrade or use an alternative browser.
You should upgrade or use an alternative browser.
The Secret to Removing Oxidation and Restoring a Show Car Finish to Antique Single Stage Paints
- Thread starter Mike Phillips
- Start date
Roman92
New member
- Apr 23, 2014
- 84
- 0
I do the #7 soak every year on my Camino before show season. I've done exactly that, using #3, with a variety of pads and it works well when you don't need as aggressive of a process as #80.
Bill
Thanks! I'm actually doing my grandfathers truck. He passed a few years back and my grandmother passed earlier this year and my parents inherited his 88 ford ranger. I'm not certain restoring the paint on a truck like this will increase the value but I just wanted to detail it for sentimental purposes at the least. Anyway I got such good results after one round with #7 that I think the #3 should be aggressive enough
Before #7 soak
View attachment 38361
And after
View attachment 38362
Harsh
New member
- Sep 22, 2011
- 26
- 0
No. I would not use a paint cleaner after rubbing antique paint down with #7.
To put this in context and because so many people read this thread and too many people now days are "scanners" (not saying you are just saying people in general are scanners).
As a recap, the paint on this car I used for this write-up has single stage METALLIC paint.
What I wrote and what you quoted me as saying is VERY accurate.
What I mean is because the aluminum flake in the paint on this car bleeds BLACK RESIDUE I chose the LIGHT cleaner/wax to clean up any of the black residue on the surface and also because it does leave a dry, hard shine. Something I wanted for this paint and after all the oily applications of the #7.
In most cases and especially if the paint in question was NOT a metallic I would have sued a finishing wax. That is a wax without any cleaners or abrasives. Also called a show car wax.
:xyxthumbs:
Mike,
First of all, thank you for your responses, we are all very fortunate to have access to your knowledge via this Q&A.
I want to be sure I understand your answer completely, when you say you would use a Show CarWax after the #7, would you also skip the step of Wolfgang Finishing Glaze? Also, from what I have read and understood, the Fuzion Wax makes a car look great (a very deep shine) but it is not the most durable, that being said I usually use Deep Gloss Paint Sealant prior to the Fuzion.
Below I will revise my original steps to see if it matches what you are suggesting given my great condition original 1993 single stage paint and current stock of Wolfgang products. If you could review and let me know if I have understood you correctly, that would be great.
1. I plan to wash with Wolfgang Autobathe
2. Plastic baggy test - then Clay Bar with Wolfgang products
3. Meguiars Show Car Glaze #7, following your directions of leaving it sit over night.
5. Wolfgang Finishing Glaze with a foam pad.
6. Wolfgang Deep Gloss Paint Sealant 3.0.
7. Wolfgang Fuzion Wax.
Mike Phillips
Active member
- Dec 5, 2022
- 51,004
- 8
- Thread starter
- #225
Mike,
First of all, thank you for your responses, we are all very fortunate to have access to your knowledge via this Q&A.
Thank you. Just to note... while I'm a huge fan of Facebook the weak point of Facebook is the interface, that is the tiny little boxes everyone types in does not lend itself well for teaching. Teaching meaning relaying helpful information in the way of,
- Text - info
- Text - conversation
- Pictures
- Videos
- Future reference via Google search engine
I want to be sure I understand your answer completely, when you say you would use a Show Car Wax after the #7, would you also skip the step of Wolfgang Finishing Glaze?
That's something you decide. Here's how...
Look at the paint after you're all done with the #7 treatments. Ask yourself...
Does it look good?
Amy I happy with the results?
If so then simply seal the surface with a coat of wax or a synthetic paint sealant. Both do the same thing, they SEAL the surface. Choose one and go for it.
If you look at the paint and now the color is back but it still has BELOW SURFACE DEFECTS - that is swirls and scratches then if you like you can abrade the surface to remove some paint and thus level the top of the surface with the lowest depths of the defects you're trying to remove to make them visually disappear. Be careful, you don't have a lot of paint to work with.
Then re-polish with the #7 and seal with a wax or sealant.
Also, from what I have read and understood, the Fuzion Wax makes a car look great (a very deep shine) but it is not the most durable, that being said I usually use Deep Gloss Paint Sealant prior to the Fuzion.
My comment when people talk about how long a product lasts is always the same....
It depends on how the paint is "touched" into the future. Wash a car carefully using the careful approach and a wax will last a long time. Wash a car with a brick and no wax will last very long. It all comes down to micro-abrasion and that's what I mean in the forum world when I use the words or concept of "touching the paint".
Below I will revise my original steps to see if it matches what you are suggesting given my great condition original 1993 single stage paint and current stock of Wolfgang products. If you could review and let me know if I have understood you correctly, that would be great.
1. I plan to wash with Wolfgang Auto bathe
2. Plastic baggy test - then Clay Bar with Wolfgang products
3. Meguiars Show Car Glaze #7, following your directions of leaving it sit over night.
5. Wolfgang Finishing Glaze with a foam pad.
6. Wolfgang Deep Gloss Paint Sealant 3.0.
7. Wolfgang Fuzion Wax.
I would add an application of the #7 after the Finishing Glaze nd before the sealant.
Note: Wolfgang Finishing Glaze is NOT a glaze it's a fine cut polish. There are no laws regulating the words used to describe what a product is and what a product does in the car wax world. so you need forums like this to help you understand these types of issue.
Have fun...
")
Mike Phillips
Active member
- Dec 5, 2022
- 51,004
- 8
- Thread starter
- #227
thanks for the write up, Mike. one thing though, wiping off m7 after it dries of is TUFF. guess im getting old
It can be a little tacky to wipe off.
There's both a secret and a technique to removing #7
The Secret
The secret is to use clean soft terry cloth towels. What I do is find some really soft old 100 percent cotton terrycloth bath towels that have a larger loop or NAP and cut them up into smaller sections.
The nap or loop of cotton fiber will slice into the layer of #7 and break it up making it easier to wipe off.
The Technique
The technique is simple and goes against your normal inclination and habits. Real simple... don't try to remove 100 percent of the #7 film all at once. Just aim for about 80 percent removal.
Break open the layer of #7 and wipe most of it off and then move on. After you have gone around the car once go around it a second time and remove about 90 percent of what is left.
If you're going to re-apply a second, third or fourth application then it doesn't matter and it's not important to remove 100 percent. Don't be a "perfectionist" when doing this kind of rough work.
I'm writing a new book for this age-old process. Look for it in 2016
Mike Phillips
Active member
- Dec 5, 2022
- 51,004
- 8
- Thread starter
- #229
Perfect, thanks Mike for the personal attention.
My car is still in another state, but as soon as I get it in my hands I will start working on it and post some before and after photos.
That's how we roll on this forum!
:xyxthumbs:
1967 Cutlass
New member
- Oct 17, 2015
- 1
- 0
Hi Mike. I just got done studying your Restoring Single Stage Paint series, finally an expert instruction for my car exterior. I have a 1967 Oldsmobile Cutlass Supreme convertible with the original acrylic Provincial White (flat non-metallic) exterior. The exterior detraction is the 48 years of micro scratches, some deeper minor scratches and dings, some of them poorly touched up painted before I got it. There are no apparent thin spots. I wish keep the car as original as much as possible, so a repaint for now is not in the picture. I am satisfied with it being 10-footer without perfection for I drive it often during the summer. Several years ago, the exterior was clayed and then carnauba waxed. The exterior has not been managed since except for wiping it down after every drive with very frequently water-only wringed microfiber. I do not hose down the car. Finally, I am prepared to execute your Restoring Single Stage Paint process with the suggested products.
Before starting, I wish to address the scratches and dings, some with rust barely starting around some chips (probability from humidity) and some of the old chip paint repair is coming off.
My exterior questions are how and when do I repair the chips/scratches, before, during or after performing your Restoring Single Stage Paint technique? Also, what type of chip repair do you suggest for my original exterior? What is your carnauba wax recommendation for my finish?
Slightly off subject, what type of cleaning and preservation do you suggest for the original interior and convertible top to keep them pliable? Finally, what do you suggest for the chrome?
I will post before and after pixs when I get going.
Mike Phillips
Active member
- Dec 5, 2022
- 51,004
- 8
- Thread starter
- #231
Hi Mike. I just got done studying your Restoring Single Stage Paint series, finally an expert instruction for my car exterior.
I have a 1967 Oldsmobile Cutlass Supreme convertible with the original acrylic Provincial White (flat non-metallic) exterior. The exterior detraction is the 48 years of micro scratches, some deeper minor scratches and dings, some of them poorly touched up painted before I got it. There are no apparent thin spots.
I wish keep the car as original as much as possible, so a repaint for now is not in the picture. I am satisfied with it being 10-footer without perfection for I drive it often during the summer. Several years ago, the exterior was clayed and then carnauba waxed.
The exterior has not been managed since except for wiping it down after every drive with very frequently water-only wringed microfiber. I do not hose down the car.
Great intro to you car! Since this is your first post...
Welcome to AutogeekOnline! :welcome:
Finally, I am prepared to execute your Restoring Single Stage Paint process with the suggested products.
Before starting, I wish to address the scratches and dings, some with rust barely starting around some chips (probability from humidity) and some of the old chip paint repair is coming off.
My exterior questions are how and when do I repair the chips/scratches, before, during or after performing your Restoring Single Stage Paint technique?
After.
You need and want to bring what's left of the original paint back to its maximum potential and then take full inventory of where your at. Then start in with any repair work like touch-up paint.
I cover this question in this how to article here,
How to use the Dr. ColorChip Paint Chip Repair Systems
Also, what type of chip repair do you suggest for my original exterior?
Call Dr. Color Chip direct, tell them the year and color of the paint and see if they can help you get the right color. You really want to go with Dr. Color Chip because their system works so well. Read my above article (don't scan it), and I think you'll understand why I like their system and whey Autogeek sells their system.
What is your carnauba wax recommendation for my finish?
If this is a garage kept car which I'm sure it is, then I'd go with the Pinnacle Liquid Souveran Wax. Apply a thin coat. Let it dry for about 15 minutes and the wipe it off. The easiest wax you'll ever wipe off and it will make you paint slick and shiny.
Slightly off subject, what type of cleaning and preservation do you suggest for the original interior and convertible top to keep them pliable?
I'd get the Pinnacle Leather Cleaner & Conditioner. This is a liquid spray-on product but don't spray it onto the leather, spray it onto a microfiber applicator pad and then work it into the leather and then use a clean, dry microfiber towel to wipe off any excess. Start using it and keep using it and you'll take what's left of the original leather to its maximum potential.
For the top, if it's vinyl then get 303 Aerospace Protectant. Check out this article,
How To Restore and Protect a Vinyl Top using 303 Products
Finally, what do you suggest for the chrome?
I will post before and after pixs when I get going.
Get the Pinnacle Exhaust Cleaner & Brightener. We showed it today at our Cars & Coffee Tech Session. It will clean the chrome and restore the shine. Keep in mind if there are scratches in the chrome... nothing will remove them. Just shine up what's left.
I run a buffer over all chrome as it works better than working by hand. See my article here,
How to use a one-step cleaner/wax to maximize profits
Just want to say hello as a new member. I found this article and set out to bring back the paint on my 1973 Ford Bronco. I just started a thread detailing my progress as I run through these steps. Here is the thread http://www.autogeekonline.net/forum...stage-paint-1973-ford-bronco.html#post1365773
R/
Jim
R/
Jim
Mike Phillips
Active member
- Dec 5, 2022
- 51,004
- 8
- Thread starter
- #233
Just want to say hello as a new member.
I found this article and set out to bring back the paint on my 1973 Ford Bronco. I just started a thread detailing my progress as I run through these steps.
Here is the thread
Restoring Single Stage Paint on a 1973 Ford Bronco
R/
Jim
Thanks for posting to this thread Jim and sharing your write-up. I've been so busy with our TV show, Detail Fest and so many other projects it's hard to stay up on all the activity on the forum and I definitely like to be aware of any single stage paint restoration projects.
:dblthumb2:
Mike Phillips
Active member
- Dec 5, 2022
- 51,004
- 8
- Thread starter
- #235
Thank you Mike for your excellent write up.
I wanted to register and thank you for helping me make my Wolseley and beetle look much better.
You're quite welcome and thank you for joining the best car detailing forum on the net.
Welcome to AGO! :welcome:
One question I have is about the Meguiars ultimate compound. Is it similar to speed glaze #80?
No. It's nothing like the old M80 Speed Glaze.
M80 Speed Glaze was like #7 on steroids because it contained the same TS polishing oils that #7 contains PLUS some type of diminishing abrasive technology.
If you're restoring antique single stage paint or trying to maintain antique single stage paint then stick with #7.
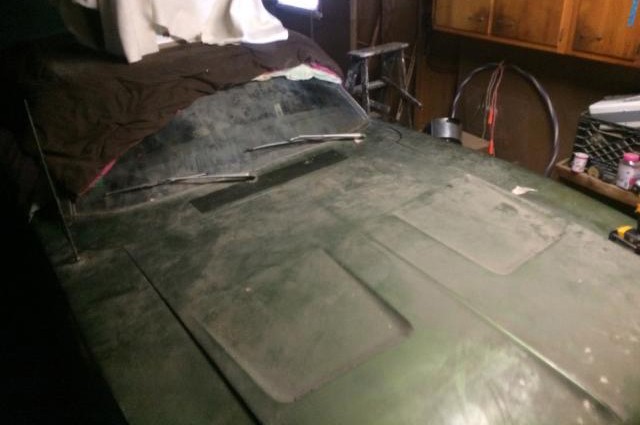
Awesome write up Mike! This is exactly what I needed for my next project, a 1968 Dodge Charger that has been sitting in the garage for just over 30 years. It has been my father in law's car since he was in high school, and it needs a few things to be road-worthy again, but for years he has believed that it needs new paint and body work. He is going on vacation next week, and I intend on surprising him when he gets home with a car that looks better than the day he bought it. I will post plenty of before/during/ and after photos once I start Tuesday after work. Since he doesn't know about this, I was only able to get a few pictures ahead of time, and they don't show too much.
View attachment 47059
View attachment 47060
View attachment 47061
Sorry for the quality of the pictures, once I get it outside I will take plenty more. I didn't even want to wipe away any of the dust yet. Hopefully when he sees what a nice car he actually has, he'll let me help him get it back on the road again.
r1lark
New member
- May 19, 2013
- 6
- 0
Hi Mike, have been using #7 for about 5 years to help maintain the early '70s cheap repaint on my '54 Studebaker (and on other cars way back to the '80s). About 4 years ago I purchased a couple of large jugs of #7 online for a really good price, and have been using them since. Recently (last year), knowing I was getting low, I ordered more #7 so I wouldn't run out. Had to break out the new stuff yesterday, and was shocked when I started using it. The newest #7 is white, instead of the familiar brownish-green color. It also does not seem to have as much 'oils' in it either, which is very obvious when applying it.
When I looked on the back and compared the ingredients, they are indeed different according to the label:
"old" bottle ingredients: water 7732-18-5, hydrotreated heavy naphtha 64742-48-49, diatomaceous earth 61790-53-2, hydrotreated middle distillate 64742-46-7, processed castor oil trade secret, glycerin 56-81-5, and conditioners trade secret
"new" bottle ingredients: water 7732-18-5, petroleum distillates 64742-14-9, calcined kaolin 92704-41-1, petroleum distillates 8042-47-5, conditioners trade secret, and glycerin 56-81-5
Surely others have noticed this? Mike, if I remember correctly the value of the #7 was from the oils it had that soaked into the paint. Have we lost our magic formula forever? The new white #7 sure doesn't bring the paint color back like the old brownish-green formula. I've attached a picture below showing the difference in color out of the two bottles..............
What happened to our #7 Mike?
View attachment 47302
Mike Phillips
Active member
- Dec 5, 2022
- 51,004
- 8
- Thread starter
- #238
Awesome write up Mike!
This is exactly what I needed for my next project, a 1968 Dodge Charger that has been sitting in the garage for just over 30 years.
Incredible!
What a cool car and an even cooler project! I'm so jealous!
Take your time and have fun with it. My recommendation would be to carefully remove the clutter BUT DON'T remove the decades of dust build-up. Get the best pictures you can of the car covered in dirt and dust. These are the before shots or the UGLY SHOTS.
These will make the AFTER shots so much more powerful. See my article here,
The power in the after shots is created in the before shots
It has been my father in law's car since he was in high school, and it needs a few things to be road-worthy again, but for years he has believed that it needs new paint and body work. He is going on vacation next week, and I intend on surprising him when he gets home with a car that looks better than the day he bought it.
I will post plenty of before/during/ and after photos once I start Tuesday after work. Since he doesn't know about this, I was only able to get a few pictures ahead of time, and they don't show too much.
View attachment 47059
View attachment 47060
View attachment 47061
Sorry for the quality of the pictures, once I get it outside I will take plenty more. I didn't even want to wipe away any of the dust yet. Hopefully when he sees what a nice car he actually has, he'll let me help him get it back on the road again.
Again... incredible story and incredible project.
Can't wait to see all the before and after pictures. I hope you can carve out the time to do a full write-up.
Mike Phillips
Active member
- Dec 5, 2022
- 51,004
- 8
- Thread starter
- #239
Mike, if I remember correctly the value of the #7 was from the oils it had that soaked into the paint.
Have we lost our magic formula forever? The new white #7 sure doesn't bring the paint color back like the old brownish-green formula. I've attached a picture below showing the difference in color out of the two bottles..............
What happened to our #7 Mike?
To answer your questions and lay your fears to rest you really need to read each word of this article I wrote to explain the change.
Meguiar's #7 Show Car Glaze - Goodbye to an old friend - hello to a new friend!
If I were truly concerned I would be rushing out to purchase every bottle of the old formula I could find in the stores across America. But I'm not concerned and I'm not rushing out hunting down bottles of the old formula. I take the word of my good friends at Meguiar's. They have always been my friends and I trust them and what they told me.
Click the link above and read what I've written.
It's all good....
Mike Phillips
Active member
- Dec 5, 2022
- 51,004
- 8
- Thread starter
- #240
Hey Bill,
Here's the full size version of your pictures uploaded to your free gallery here on AGO


Remember what I wrote above and keep us updated.
Here's the full size version of your pictures uploaded to your free gallery here on AGO
Remember what I wrote above and keep us updated.