Navigation
Install the app
How to install the app on iOS
Follow along with the video below to see how to install our site as a web app on your home screen.
Note: This feature may not be available in some browsers.
More options
Style variation
You are using an out of date browser. It may not display this or other websites correctly.
You should upgrade or use an alternative browser.
You should upgrade or use an alternative browser.
Bumblebee - Testing out the NEW DeWALT DWP849X
- Thread starter Mike Phillips
- Start date


Mike Phillips
Active member
- Dec 5, 2022
- 51,004
- 8
- Thread starter
- #22
Re: Bumblebee
Test Spot Results
Did 3 Test Spots starting with the least aggressive products and pads to get the job done...
After each section was buffed I then wiped the section clean using MS followed by IPA.
The percentages below are simply based upon experience from doing compound and polish testing. Usually it's timed, for this test I just counted to 6 section passes after 1 pass to spread the product out.
After the compounding on Test Spot 3 I then re-polished using the gray finishing pad with the Optimum Finish and chemically stripped again with both MS and IPA and the finish looked swirl free. The sun is too far down in the sky to pull the car out and inspect in the sun so all I used was the Brinkmann Swirl Finder Light.
Tried to take close-up shots across from where I marked the painter's tape with the numbers, 1, 2, and 3 but what I could see with my eyes I just couldn't capture with my camera.
")
Test Spot Results
Did 3 Test Spots starting with the least aggressive products and pads to get the job done...
After each section was buffed I then wiped the section clean using MS followed by IPA.
The percentages below are simply based upon experience from doing compound and polish testing. Usually it's timed, for this test I just counted to 6 section passes after 1 pass to spread the product out.
- Test Spot 1 - Optimum Finish with a Gray CS Finishing pad on 1000 RPM - 65% Swirl Removal
- Test Spot 2 - Optimum Polish II with White CS Polishing Pad at 1000 RPM - 80% Swirl Removal
- Test Spot 3 - Optimum Compound with an Orange CS Cutting Pad at 1000 RPM - 95% Swirl Removal
After the compounding on Test Spot 3 I then re-polished using the gray finishing pad with the Optimum Finish and chemically stripped again with both MS and IPA and the finish looked swirl free. The sun is too far down in the sky to pull the car out and inspect in the sun so all I used was the Brinkmann Swirl Finder Light.
Tried to take close-up shots across from where I marked the painter's tape with the numbers, 1, 2, and 3 but what I could see with my eyes I just couldn't capture with my camera.
IID
Well-known member
- Sep 11, 2010
- 2,207
- 25
Re: Bumblebee
Is AutoGeek (Max) going to be offering(selling) the beach towels? Would be a good idea,so we could all practice the "Beach Towel Tip"! Feed back please
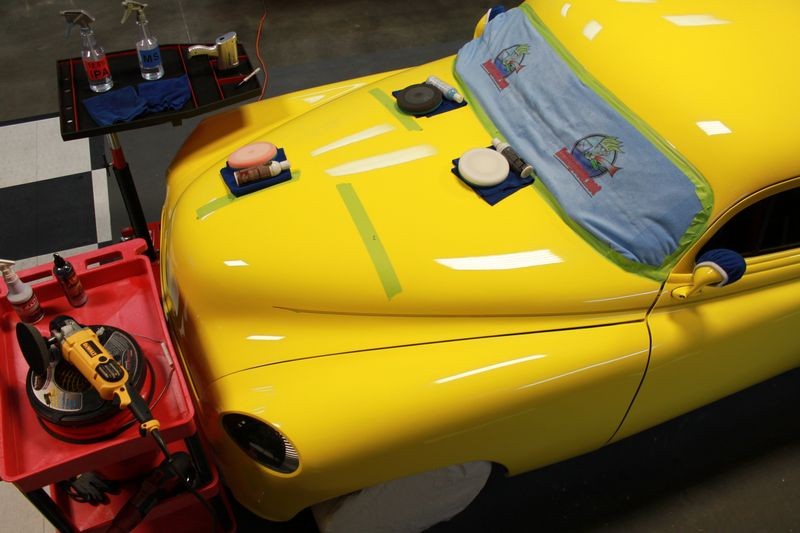
Actually, Max took my Beach Towel Tip idea and had soft, microfiber towels made up to use instead, they're soft and washable and easily folded or formed to fit the shape you're trying to cover. They came in on Thursday so this is the first time I've used them.
Is AutoGeek (Max) going to be offering(selling) the beach towels? Would be a good idea,so we could all practice the "Beach Towel Tip"! Feed back please
IID
Well-known member
- Sep 11, 2010
- 2,207
- 25
Mike Phillips
Active member
- Dec 5, 2022
- 51,004
- 8
- Thread starter
- #25
Re: Bumblebee
You can tackle the paint in-between the pinstripes by hand but if the paint is hard then removing swirls is going to be hard and you have to be careful not to leave Fingermarks behind at the same time.
A good best practice with foam pads is to hold the pad flat to the surface whenever you can hold the pad flat to the surface. In situations where you cannot hold the pad flat to the surface then as an option you can hold the pad on edge. You're choice, rub the swirls out by hand, (actually with a couple of fingers pushing against some type of applicator pad), or by machine and the risks that go along with it...

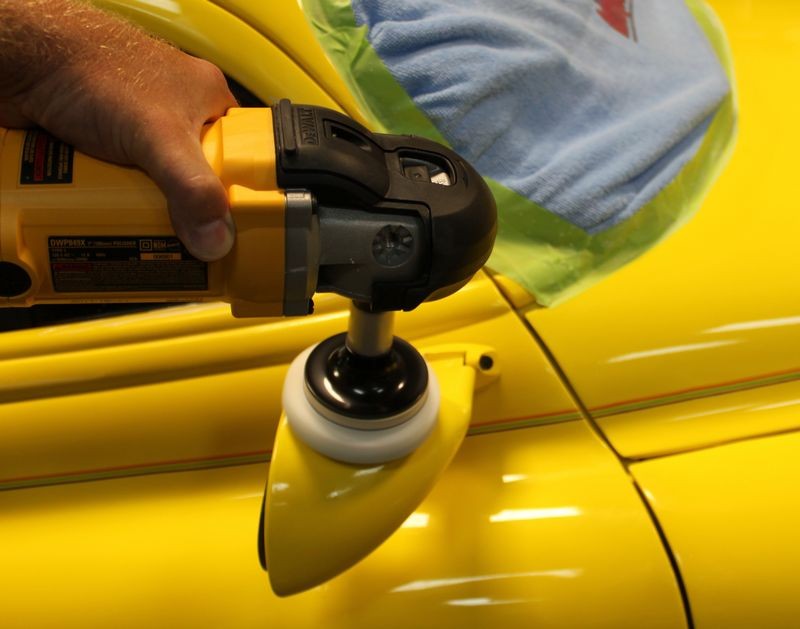
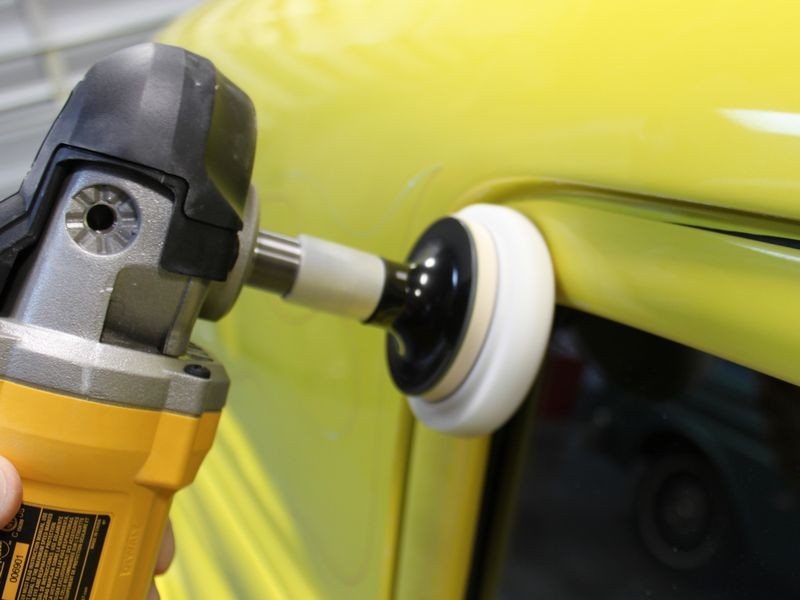

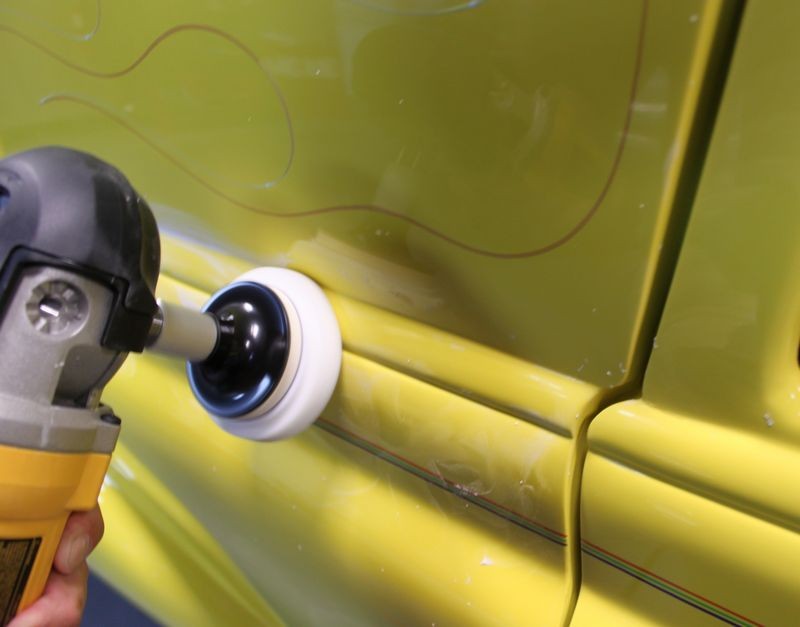
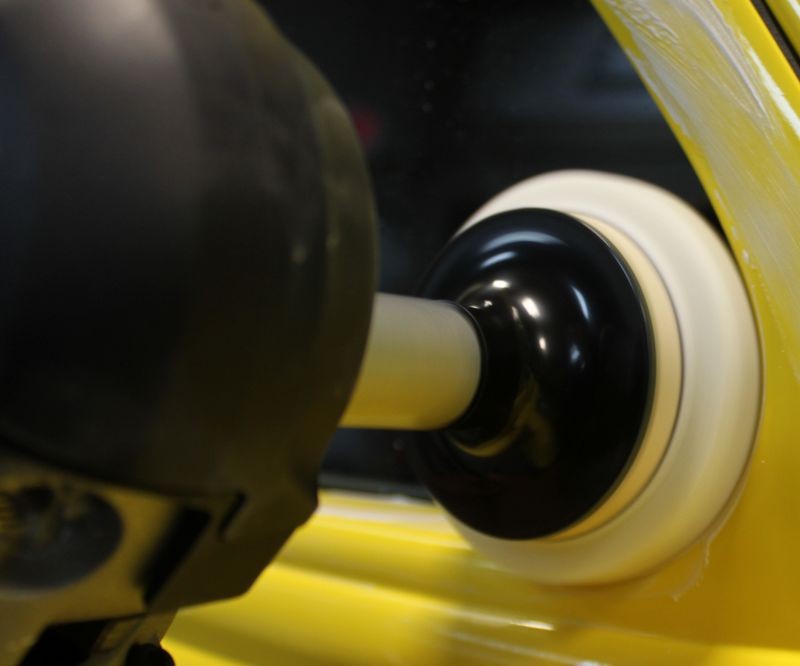
I have some 3" pads that are not actually available. I asked Eric Dunn for these late last year and have been using them with great results. You can also see I'm using an Optimum Optimum Double-Sided Rotary Adapter attached to a 2-3/4 inch Hook & Loop Rotary Backing Plate with these small rotary buffer pads.
The adapter acts as an extension which allows me to better see where the pads touching the paint as I buff and also works sometimes to give you enough clearance to buff into tight areas.

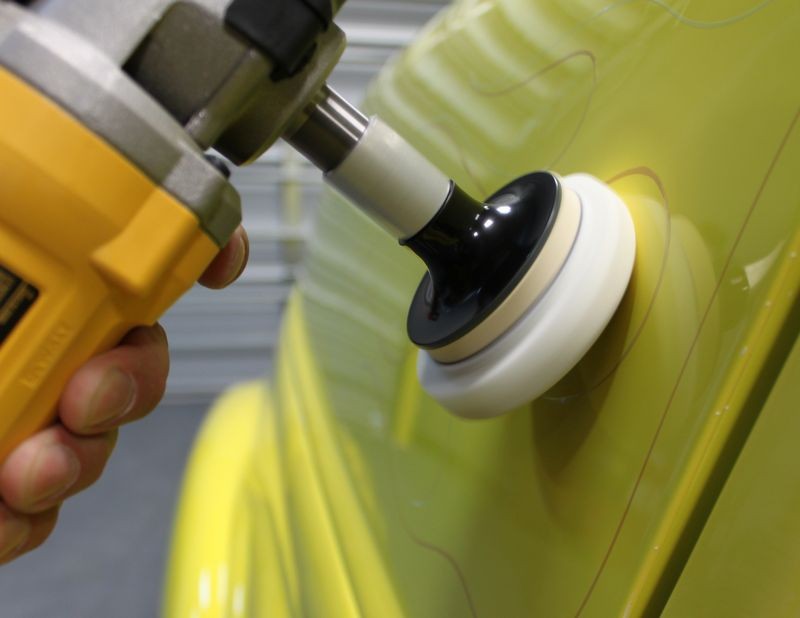
Before buffing out a tight, curved area like above you want to prime the outside of your buffing pad and then smear a little product on the paint itself with your finger as shown in this thread,
Also a question about the pin striping...thats something ive wondered about for a while...what do you do with the paint that is BETWEEN the striping/flames. I
ts such a small area that i wouldn't think a pad could get in there (or do you have some sort of technique you use?) or do you hand polish those areas?
You can tackle the paint in-between the pinstripes by hand but if the paint is hard then removing swirls is going to be hard and you have to be careful not to leave Fingermarks behind at the same time.
A good best practice with foam pads is to hold the pad flat to the surface whenever you can hold the pad flat to the surface. In situations where you cannot hold the pad flat to the surface then as an option you can hold the pad on edge. You're choice, rub the swirls out by hand, (actually with a couple of fingers pushing against some type of applicator pad), or by machine and the risks that go along with it...
I have some 3" pads that are not actually available. I asked Eric Dunn for these late last year and have been using them with great results. You can also see I'm using an Optimum Optimum Double-Sided Rotary Adapter attached to a 2-3/4 inch Hook & Loop Rotary Backing Plate with these small rotary buffer pads.
The adapter acts as an extension which allows me to better see where the pads touching the paint as I buff and also works sometimes to give you enough clearance to buff into tight areas.
Before buffing out a tight, curved area like above you want to prime the outside of your buffing pad and then smear a little product on the paint itself with your finger as shown in this thread,


Mike Phillips
Active member
- Dec 5, 2022
- 51,004
- 8
- Thread starter
- #26
Re: Bumblebee
I was given two of them to test out but I'm pretty sure they'll be available on the store site sometime in the future.
Is Autogeek (Max) going to be offering(selling) the beach towels? Would be a good idea,so we could all practice the "Beach Towel Tip"!
I was given two of them to test out but I'm pretty sure they'll be available on the store site sometime in the future.
Wills.WindowsAndWheels
New member
- Oct 31, 2009
- 1,682
- 0
Mike,
Great response to the questions i had regarding tight areas. I really like that extension for the rotary as i have a heck of a time at certain angles seeing where my pad is hitting...which can be a pain. I can also see how it would help get into tighter areas...areas like right under the side mirrors are always a pain for me.
Also the 'side pad' technique showed looks like a life saver too. Do you kick the speed down when doing that...and do you only use that technique with a rotary or would it work with a DA also...just thinking about it i can't see how it could work with a DA with the oscillation...MAYBE the Flex 3401?
The 3" pads are a nice touch too...i ordered some MF ones but some foam ones would be nice to get as well.
Good info as usual, hope you can go deeper into it
C. Charles Hahn
New member
- Aug 27, 2007
- 3,103
- 0
Interesting... I never thought the double sided pad adapters would work as spindle extensions for the rotary; I'm going to have to pick one of those up.
Flash Gordon
Well-known member
- Feb 6, 2010
- 11,462
- 465
Nice thread Mike :dblthumb2:
Mike Phillips
Active member
- Dec 5, 2022
- 51,004
- 8
- Thread starter
- #30
Also the 'side pad' technique showed looks like a life saver too. Do you kick the speed down when doing that...
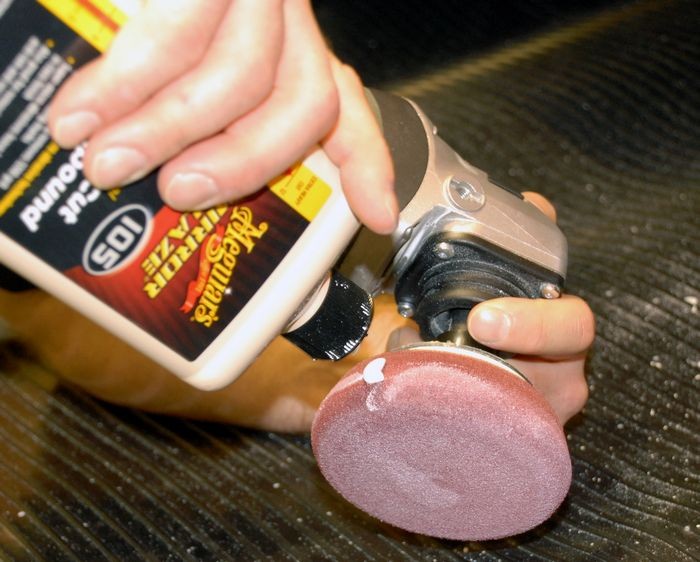
Yes to spread out the product to create an even film of working product over the area you're working and then increase your speed. Slowing the RPM's down to spread the product out is just a way of spreading the product out without splattering it on adjacent panels.
Around really thin panels like window frames or the raised body lines you see in the pictures above, I apply some product from the bottle and then simply just spread the product over the area to be buffed with my finger. This gets the abrasives spread over the area to be worked but also lubricates the paint at the same time.
and do you only use that technique with a rotary or would it work with a DA also...just thinking about it i can't see how it could work with a DA with the oscillation...MAYBE the Flex 3401?
Holding a pad on edge when buffing tight or small thin panels doesn't work very well with oscillating tools. You can try and sometimes all you can do is all you can do. In my book anytime I can work by machine I do work by machine. Sometimes you have to work by hand that's why it's important to have both skill sets, the ability to work by machine and the ability to work by hand.
Good info as usual, hope you can go deeper into it
When buffing complicated portions where you have to be ultra careful you want to make sure you have maximum control over the tool What I do and show others is to hold the tool close to your chest with your muscles tightened up.
With the rotary buffer closer to your body you have more leverage over the rotary buffer. The further you have your arms extended away from your body the more leverage the rotary buffer has over you and the less likely a whoops will happen.
I show this in all our advanced classes too... it's pretty easy to demonstrate. Have someone hold the rotary buffer away from themselves with their arms extended and instruct them to keep it directly in front of them. Then have someone grab the rotary buffer and try to move it side to side, it's hard for the person holding the rotary buffer to prevent them from controlling where they want to move the rotary buffer.
Next have the person holding the rotary buffer hold it closer to their chest and tighten up their stance, shoulder and arm muscles. Now have the other person try to move it side to side. The person holding the rotary buffer will now have more leverage over the buffer and will be able to much better control the rotary buffer.
Of course, anytime you're machine polishing with a rotary buffer you shouldn't have any clothes on that could become entangled in the spinning pad, or jewelry and if you have long hair it should be affixed behind your back. Don't get yourself into a panic situation.
polishdoc
New member
- Nov 15, 2008
- 85
- 0
Good point Mike :xyxthumbs:
Excellent write up by the way I still prefer the Flex PE over the DeWalt it's more user friendly and more ergonomically designed just my opinion of course !
I still have the heavy guns if I need more power and speed Festool Rap 180 much heavier than the Flex Mini Polisher !
Since I have been using the Flex PE 14-2-150 Rotary Polisher I do all major paint correction jobs with it so I am more than happy with it's performance ,power , and torque !
Mario
IID
Well-known member
- Sep 11, 2010
- 2,207
- 25
Re: Bumblebee
Thats good to hear Mike,Thank You.
The DeWalt DWP849X does seem like a good option to the Flex PE14-2-150 thou I've used my PE14-2-150 religiously for the past 12+ correction detail's,and I have had not 1 issue(yet).This is with the polisher running 5-10hrs each time.
The DeWalt DWP849X(I would think) should have no problems either but it's being offered at a much better price.
I appreciate my Flex line of polishers but if I were to ever have a replacement issue,this new Dewalt(X model) would most likely be considered.
I was given two of them to test out but I'm pretty sure they'll be available on the store site sometime in the future.
Thats good to hear Mike,Thank You.
The DeWalt DWP849X does seem like a good option to the Flex PE14-2-150 thou I've used my PE14-2-150 religiously for the past 12+ correction detail's,and I have had not 1 issue(yet).This is with the polisher running 5-10hrs each time.
The DeWalt DWP849X(I would think) should have no problems either but it's being offered at a much better price.
I appreciate my Flex line of polishers but if I were to ever have a replacement issue,this new Dewalt(X model) would most likely be considered.
Mike Phillips
Active member
- Dec 5, 2022
- 51,004
- 8
- Thread starter
- #33
Re: Bumblebee
Same here, mine has performed flawlessly and no issues.
I only compounded the the passenger side yesterday, working around the pinstriping took a clot of careful time... ugh.... never much liked pinstriping unless it's "under" the clearcoat.
I'm heading out to the Sandbar with the Starline but I'm going to try to compound the driver's side using the Flex tonight. I'm buffing out each side of the car with the two different rotary buffers to get a good feel for both of them. One characteristic of the DeWALT DWP849X is the way that when you pull the trigger it revs up to a higher speed than the dial is set to and then calms down. Not a complaint, just an observation.
I came in this morning to get some Gel Coat Labs products to test out on the boat and found this guy on the floor next to the Sedan Delivery, I don't know if he crawled out of it overnight or came from somewhere else but he's about the size of a half dollar and kind of creepy. He looked a little sluggish so I started to pick him up and about a second after I grabbed he came to life! So I scooped him up with a little cup and set him on the paint and took this picture.

The DeWalt DWP849X does seem like a good option to the Flex PE14-2-150 thou I've used my PE14-2-150 religiously for the past 12+ correction detail's,and I have had not 1 issue(yet).This is with the polisher running 5-10hrs each time.
Same here, mine has performed flawlessly and no issues.
I only compounded the the passenger side yesterday, working around the pinstriping took a clot of careful time... ugh.... never much liked pinstriping unless it's "under" the clearcoat.
I'm heading out to the Sandbar with the Starline but I'm going to try to compound the driver's side using the Flex tonight. I'm buffing out each side of the car with the two different rotary buffers to get a good feel for both of them. One characteristic of the DeWALT DWP849X is the way that when you pull the trigger it revs up to a higher speed than the dial is set to and then calms down. Not a complaint, just an observation.
I came in this morning to get some Gel Coat Labs products to test out on the boat and found this guy on the floor next to the Sedan Delivery, I don't know if he crawled out of it overnight or came from somewhere else but he's about the size of a half dollar and kind of creepy. He looked a little sluggish so I started to pick him up and about a second after I grabbed he came to life! So I scooped him up with a little cup and set him on the paint and took this picture.
Wills.WindowsAndWheels
New member
- Oct 31, 2009
- 1,682
- 0
Maybe he's a transformer too haha? You're braver than me...size of a 1/2 dollar...uh uh..i wouldn't kill him but i would have had a broom or something with a long pole to move him with lol. I guess ever creatures from the 8 legged world are fans of your work.
Mike Phillips
Active member
- Dec 5, 2022
- 51,004
- 8
- Thread starter
- #35
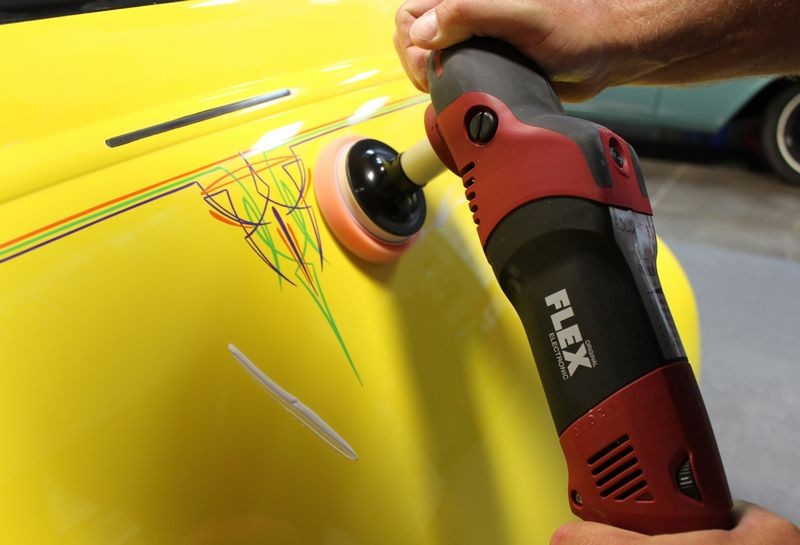
Previously all the compounding has been done using the new DeWALT DWP849X, now I'm switching over to the Flex PE14, already I like the smaller size and lighter weight, especially for any of the places where I have to be real careful.
These small, 3" foam pads work really well for buffing around,

Pinstriping paint tends to be more on the soft side versus hard side so you don't want to run your buffing pads over any pinstripes but you do want to buff as close to them as you can. In this picture I'm using an extension to position the pad a little farther away from the polisher so I can more easily see where the edge of my buffing pad is on the panel.
When buffing thin panels, or working next to edges, hold the rotary buffer with a firm grip and focus on the task at hand...

Edging - Buffing along an edge to knock it out before buffing out the rest of the major portions of the panel. By edging a panel first you don't have to buff near the edges as close when you switch over to a larger pad to buff out the panel.

These small, 3" foam pads work really well for buffing around,
- Delicate areas
- Thin panels
- Edges
Pinstriping paint tends to be more on the soft side versus hard side so you don't want to run your buffing pads over any pinstripes but you do want to buff as close to them as you can. In this picture I'm using an extension to position the pad a little farther away from the polisher so I can more easily see where the edge of my buffing pad is on the panel.
When buffing thin panels, or working next to edges, hold the rotary buffer with a firm grip and focus on the task at hand...
Edging - Buffing along an edge to knock it out before buffing out the rest of the major portions of the panel. By edging a panel first you don't have to buff near the edges as close when you switch over to a larger pad to buff out the panel.
kronos
New member
- Jul 7, 2009
- 1,408
- 0
These small, 3" foam pads work really well for buffing around,
- Delicate areas
- Thin panels
- Edges
Are the pads made by Menzerna?
Mike Phillips
Active member
- Dec 5, 2022
- 51,004
- 8
- Thread starter
- #37
kronos
New member
- Jul 7, 2009
- 1,408
- 0
Lake Country
Thanks Mike! Does AG carry them? It seems like every car I buff has at least a few areas that would suit a 3" pad perfectly.
Mike Phillips
Active member
- Dec 5, 2022
- 51,004
- 8
- Thread starter
- #39
Thanks Mike! Does AG carry them? It seems like every car I buff has at least a few areas that would suit a 3" pad perfectly.
Not at this time, maybe in the future... they sure are handy though...
:xyxthumbs:
Mike Phillips
Active member
- Dec 5, 2022
- 51,004
- 8
- Thread starter
- #40
As I've been working around the car I've been cleaning my pads in a Grit Guard Pad Washer using the new Grit Guard Universal Detailing Cart.
Grit Guard Pad Washer Cart
Love this cart!
You no longer have to bend over to clean you buffing pads!
By elevating the Grit Guard Pad Washer off the ground in a sturdy cart you no longer have to bend over to clean you buffing pads. The cart comes with 2 lockable wheels and if you lock them the cart stays in place as you run your polisher to clean the pads.
And of course the Grit Guard Pad Washer works great!
No camera flash shots...


With camera flash on... (same pad before and after shots)


You can see the compound residue building up around the inside top of the bucket via centrifugal force as you increase your RPM's to sling out excess cleaning solution and spent product.


If you machine buff cars for a living or often, you will love this cart and the pad washer...
Grit Guard Universal Detailing Cart
Grit Guard Pad Washer Cart
Love this cart!
You no longer have to bend over to clean you buffing pads!
By elevating the Grit Guard Pad Washer off the ground in a sturdy cart you no longer have to bend over to clean you buffing pads. The cart comes with 2 lockable wheels and if you lock them the cart stays in place as you run your polisher to clean the pads.
And of course the Grit Guard Pad Washer works great!
No camera flash shots...
With camera flash on... (same pad before and after shots)
You can see the compound residue building up around the inside top of the bucket via centrifugal force as you increase your RPM's to sling out excess cleaning solution and spent product.
If you machine buff cars for a living or often, you will love this cart and the pad washer...
Grit Guard Universal Detailing Cart