Bumblebee - Testing out the NEW DeWALT DWP849X

The Driver's side is all compounded using the Flex PE14 with the new CS Pads and the new Optimum Compound II

49SedanDelivery0034.jpg


49SedanDelivery0032.jpg


49SedanDelivery0033.jpg


Moving onto the polishing step...


:)
 
Opinion/Personal Preference - Flex PE14

Both are excellent tools though and you can't go wrong with either one.

Buffing out a special interest vehicle like this because of its size and large smooth panels gave me a really good feel for both rotary buffers. I put the paint through three machine processes, doing a half side of the car with each rotary buffer.

While both tools worked exceedingly well, after hours of holding both tools and working 3 different products, my personal preference at least for the type of polishing I was doing to this car would be for the Flex PE14. In fact by the time I got to the Jewelling step I finished off most of the car using the Flex rotary buffer.

I preferred the lighter weight and more compact size of the Flex to the DeWALT, especially when I was working around the pinstripes, raised or hard body lines and thin panels. I used both rotary buffers without handles.

49SedanDelivery0035.jpg


Rotary Buffer steps completed...
  • Compounding: 6.5" CS Orange Cutting Pad with Optimum Compound II at 1000 RPM
  • Polishing: 6.5" CS White Polishing Pads with Optimum Polish II at 1000 RPM
  • Jewelling: 6.5" CS Red Finishing Pads with Optimum Finish at 600 RPM
Resuts...

49SedanDelivery0036.jpg


49SedanDelivery0037.jpg


49SedanDelivery0038.jpg


Next step, seal the paint then dress the tires and polish the wheels.


:xyxthumbs:
 
Very nice review Mike. That Flex sure does have plenty of good things going for it. The only real negative seems to be the high initial cost.


The one remaining unanswered question I have is, can it be used for high volume paint correction work? The DeWalt looks heavy duty, like it was made for high volume work. Can the same be said of the Flex?
 
It does look beautiful indeed. No way i could swing that kinda cash for a rotary right now but its nice to have some input as to a comparison of the 2 polishers.

Quick question...what major differences do you see between the PE and the 3403 flex rotary?

Also to those who were interested in the 3" pads...AG does sell some...they are made by Griots...of course! They make the 3" DA remember? Thought i dont own..nor do i wish to own the 3" DA (i dont think its strong enough from what ive heard) i do have a 3" BP for my DA...and once i finally get a damn rotary i'll have a 3" BP for it too. Soooo, even though it isnt LC pads...its still a 3" pad...i don't know how well it works but...i'll hopefully be finding out soon enough once my nice big juicy order i made with AG today gets in :dblthumb2:

I must say that detailing cart looks super sweet....another wish list item...grrr....i wont buy it till i finally have a stationary place to do my detailing...too bulky for mobile detailing..im 25..i can still lean over to clean my pads lol.
 
Very nice review Mike. That Flex sure does have plenty of good things going for it. The only real negative seems to be the high initial cost.

Quality never costs money it makes money...


The one remaining unanswered question I have is, can it be used for high volume paint correction work? The DeWalt looks heavy duty, like it was made for high volume work. Can the same be said of the Flex?

According to Flex the answer is yes. They state that up to an 8" diameter pad can be used with the Flex PE14 but I prefer to stay a little smaller especially for wool pads.

More reciprocating mass creates more torque
My personal thoughts are that if you're going to be buffing out sanding marks all day long or removing oxidation from large boats all day long then a full size rotary buffer would be a better choice.

The gears are bigger in size as are the rest of the components in a full size rotary buffer and I think having more reciprocating mass creates more torque and this is something you would want if you're going to be doing heavy compounding and polishing with full size pads, (8" and larger), 6 days a week.


It does look beautiful indeed. No way i could swing that kinda cash for a rotary right now but its nice to have some input as to a comparison of the 2 polishers.

Quick question...what major differences do you see between the PE and the 3403 flex rotary?

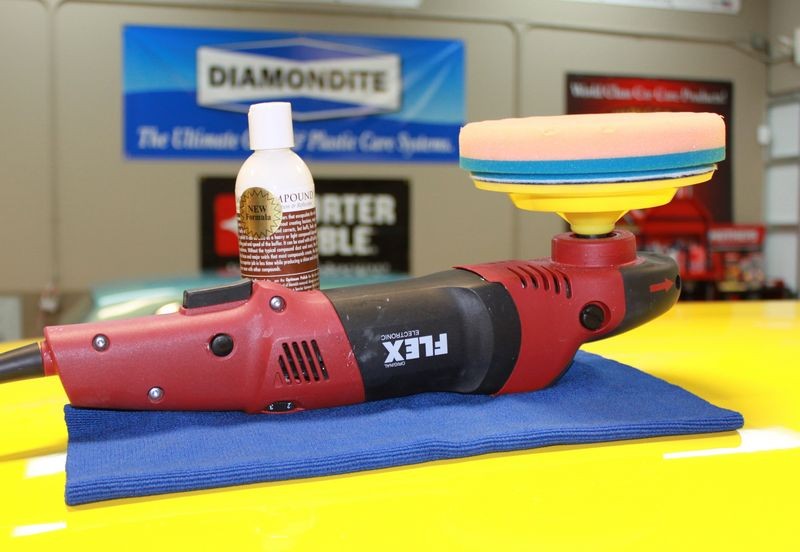
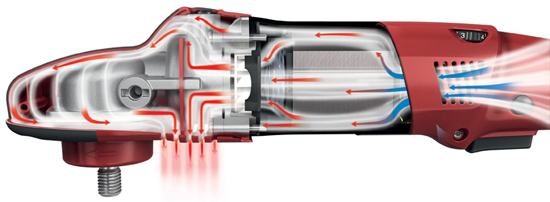
First major difference is the new Flex PE14 has the design that flushes the tool with air to help the tool run cooler.

More information and a video on this page,

The New FLEX PE14-2-150 Rotary Buffer

pe4-2-150-detail02.jpg


Also to those who were interested in the 3" pads...AG does sell some...they are made by Griots...of course!

Correct and these work well too. You can see them in action here,

Pictures + Video of 1932 Ford Highboy Extreme Makeover

32FordHighboy030.jpg


The 3" pads I'm using are some prototypes...


I must say that detailing cart looks super sweet....another wish list item...grrr....i wont buy it till i finally have a stationary place to do my detailing...too bulky for mobile detailing..im 25..i can still lean over to clean my pads LOL.

The cart is nice, it makes using the pad washer a lot easier plus gives you plenty of storage space for other related tools.


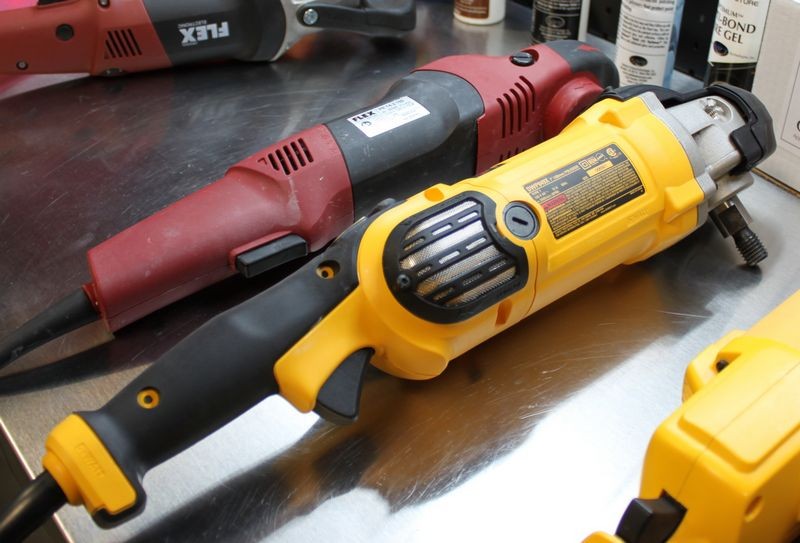
After about 6 hours of running both rotary buffers here's what I think, the new DeWALT is a great rotary buffer especially for the price. The 600 RPM low range is the most valuable feature. I also really like the rubber bumpers on the back side that enable you to set it down on a polished fender or hood without scratching the paint.

Apples to Oranges
Comparing the Flex PE14 to any of the full size DeWALT rotary buffers, or the Makita, or any other brand of full size rotary buffers is like comparing apples to oranges in that the Flex PE14 is a true compact rotary buffer and falls into the Compact Size category, while the DeWALT DWP849X falls into the Full Size category for rotary buffers.


Makita 9227C vs DeWALT DWP849X
A better comparison would be to compare the Makita 9227C with the DeWALT DWP849X as they are much more similar and my guess is that DeWALT introduced this new model to compete against the Makita rotary buffer. Both of these buffers, the Makita or the DeWALT would be great choices. I've always been a fan of Makita rotary buffers if for no other reason because I used one for years until it finally wore out having purchased it new in 1988.


The best of both worlds
In a perfect world a person would have at least two rotary buffers, a full size working dog for doing all of the grunt work and a compact, light-weight rotary buffer for when you need to dosurgical precision work. This way you can use the one that best fits the job at hand.


The compact size and low weight of the Flex PE14 plus the 600 RPM range are the features I'm most attracted to. It's light weight and small size make it really easy to control when doing intricate work. Perhaps we'll see the introduction of other compact, lightweight rotary buffers into the future.

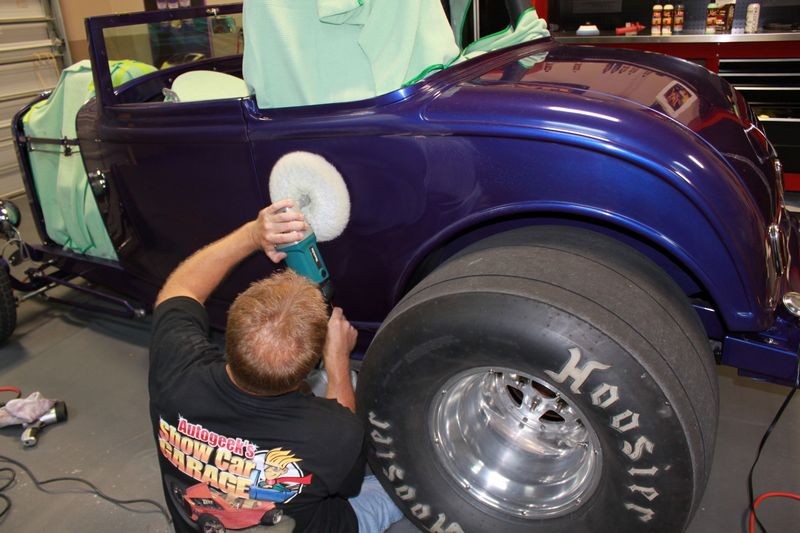
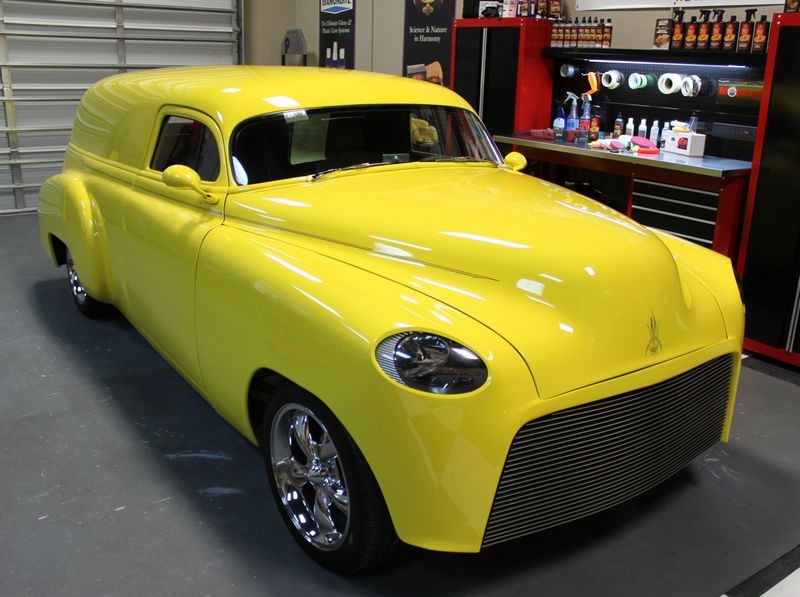
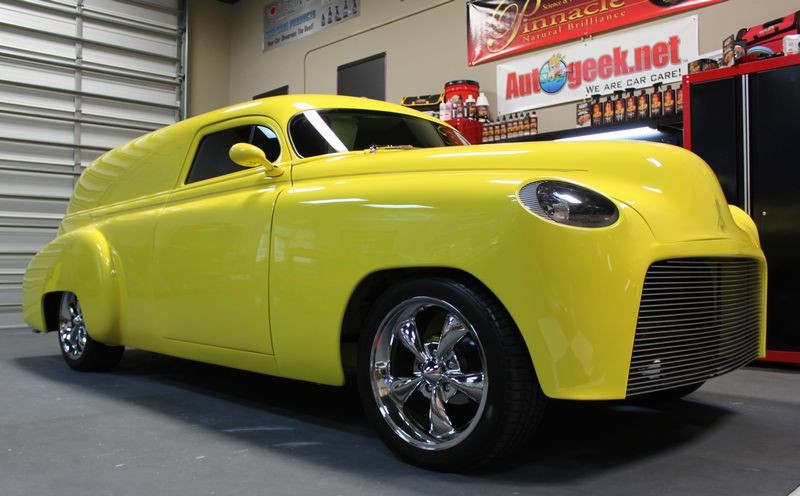
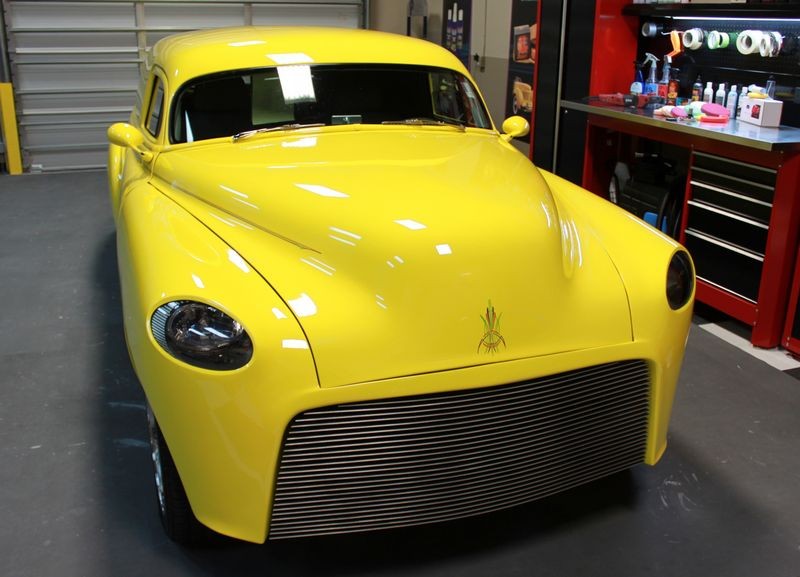
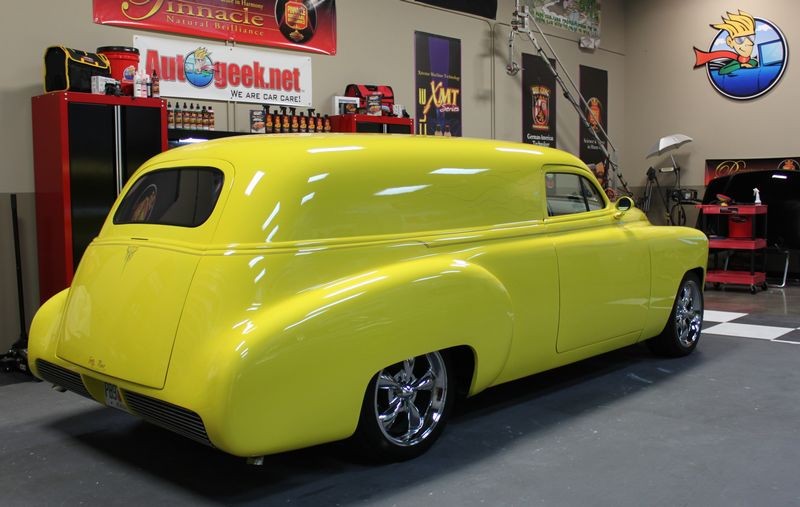
After the compounding the upper half of the 1949 Sedan Delivery, I just switched over to the Flex PE14 due to the light weight and compact size features. I could have used either for the rest of the job by my preference was for the easiest tool to work with as this streetrod has a lot of real-estate to buff.


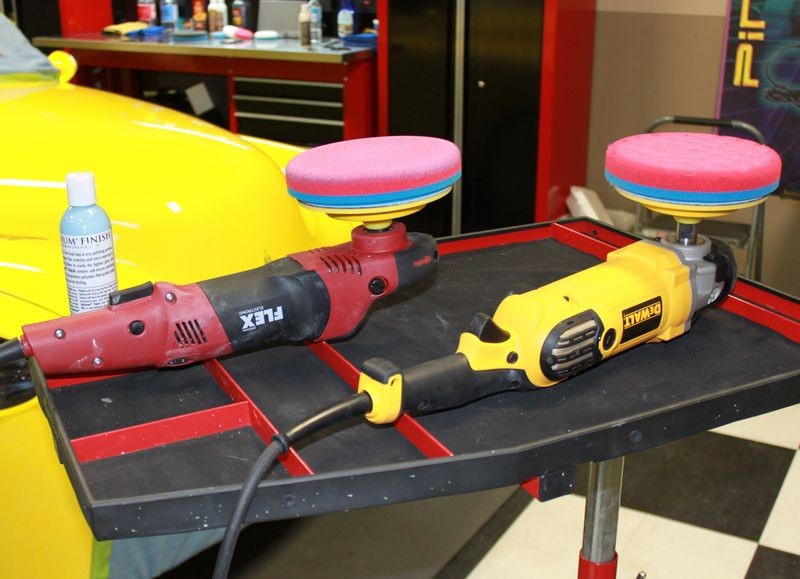
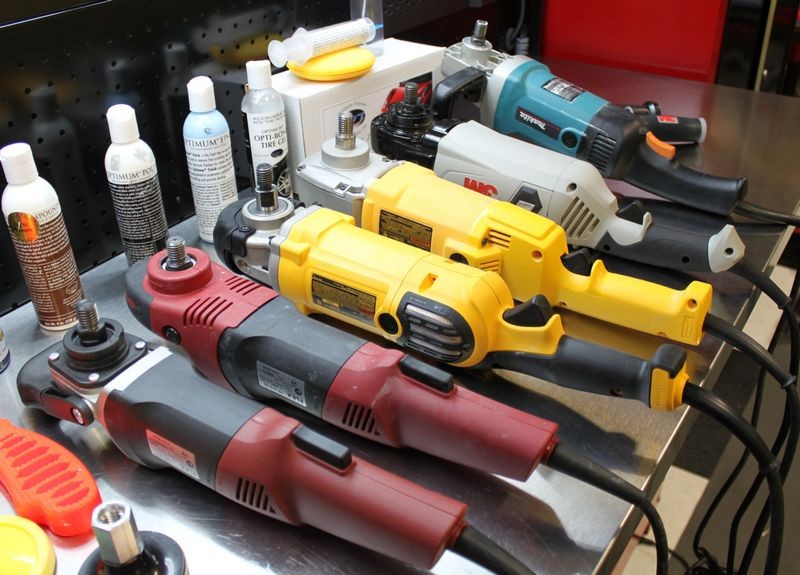
Here's some pictures to show relative sizes...

The two Flex rotary buffers on the left are in the Compact category while the other 4 rotary buffers are in the Full Size category. Comparing the compacts with the full size rotary buffers can be done but it trends towards the comparing applies to oranges analogy as in person and in use you can tell right away when you switch from a full size to a compact or visa-versa.
RotaryBuffersSizes01.jpg


RotaryBuffersSizes02.jpg


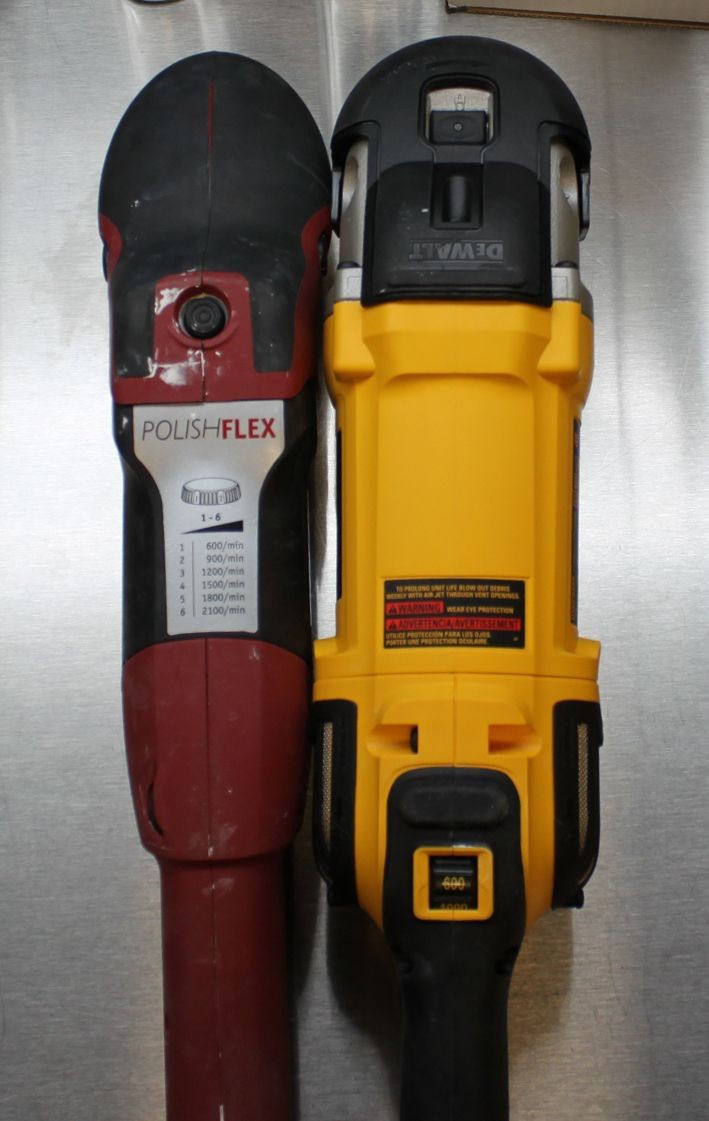
The new DeWALT DWP849X is wider and more bulky like the other full size rotary buffers in these pictures.
RotaryBuffersSizes03.jpg


You can that the Flex is more narrow from top to bottom...
RotaryBuffersSizes04.jpg


RotaryBuffersSizes05.jpg


RotaryBuffersSizes06.jpg


:buffing:
 
Did the 3 rotary steps yesterday, this morning I wiped the paint down very softly using a 12% IPA Solution and then applied Opti-Coat II

Here's how the finish started.... These next 4 pictures were taken at different places on the car, the swirls are pretty much the same over the entire finish. They don't look too deep so as long as the paint isn't too hard they should buff out pretty easy.


These first two pictures were taken on each of the vertical side panels...
49SedanDelivery004.jpg


49SedanDelivery005.jpg


These next two pictures were taken on the the horizontal panels of the front clip, I think one is on the hood and the other the top of the passenger fender, you can see little black contaminants on the paint and this is after I wiped the paint down with a spray detailer.
49SedanDelivery006.jpg


49SedanDelivery007.jpg


Here's some after shots....

49SedanDelivery0040.jpg


49SedanDelivery0041.jpg


49SedanDelivery0042.jpg


49SedanDelivery0043.jpg


49SedanDelivery0044.jpg


49SedanDelivery0045.jpg


49SedanDelivery0046.jpg


49SedanDelivery0048.jpg


:)
 
When this car first arrived, to most people the paint looked pretty good. Non-detailers would have thought it had a show car finish. Detailers would look at the paint and see the potential for how good the paint could look.

When I took this project on the primary purpose was to have plenty of real-estate to provide plenty of time to run two different rotary buffers to really be able to compare them and get a feel for their own unique characteristics.

At the same time I also needed to test out the new Optimum Compound, Polish and Finishing Polish as well as some new types of foam buffing pads. I could have just done a quickie using a number of different approaches but instead decided to buff the car out as though it were really my car. That is approached this detailing project as explained here,

The Mindset of a Professional Detailer


And I hope the pictures do the results justice as the paint is very smooth and clear and as a result it's now incredibly glossy.


Here's pretty much everything I used... I'll post a write-up for this project with more information about the products and process later... I will say that the new Optimum products worked exceedingly well as did the CS Pads.


49SedanDelivery0049.jpg


:)
 
Hey Mike, I just noticed something. Is the rubber grip at the front of your PE14 starting to come apart a bit along the seam? Or has it been like that all along?
 
Great turn out Mike. I like the comparison of the 2 rotaries...good stuff.

You said 8" wool pads are usually too big for you, what size/type is sort of your 'go to'?

Also one more question about body lines. When you tape off before using a rotary i know taping off panel lines is always smart and you try to stay away from those...but of course when you removed the tape those non polished areas stand out like sore thumbs (especially if you removed oxidation). I was wondering how you go about tackling those spots...do you use the DA on them or what? Would you do those spots after compounding/polishing the BULK of the car and then just do a compound/polish on those taped off areas last?

Thanks again man.
 
Great turn out Mike. I like the comparison of the 2 rotaries...good stuff.

You said 8" wool pads are usually too big for you, what size/type is sort of your 'go to'?

8" pads are not too big for me I use them whenever I'm using a full size rotary buffer like this,

32FordHighboy028.jpg


Since the Flex PE14 was introduced, "if" I do any compounding then I like to use this pad...

7.5 inch Hook & Loop DuroWool 100% Twisted Wool Cutting Pad


With the Meguiar's Solo Flexible Backing Plate seen here,

Flexible Backing Plates for Rotary Buffers


W66 Flexible Backing Plate on a 7.5" DuroWool 100% Twisted Wool Cutting Pad
FlexBackP008.jpg


FlexBackP009.jpg


And here's the above combo being used by a student at our last Detailing 101 Class...


Larry loves the Flex PE14 with a 7.5" Wool Cutting Pad and a Solo Flexible Backing Plate
Ma14class072.jpg


Reality is, it's easier to control and manage smaller pads whether they be foam or wool so I've made the switch to a 7.5 Wool Cutting pad with a flexible backing plate. Nice combo.


Also one more question about body lines. When you tape off before using a rotary i know taping off panel lines is always smart and you try to stay away from those...but of course when you removed the tape those non polished areas stand out like sore thumbs (especially if you removed oxidation). I was wondering how you go about tackling those spots...do you use the DA on them or what? Would you do those spots after compounding/polishing the BULK of the car and then just do a compound/polish on those taped off areas last?

Thanks again man.


For this 1949 Sedan Delivery, after removing the tape I lightly polished using a 3.5" foam polishing pad with the Optimum Finish.


You could also work these areas by hand. It's a pain and it's also called perfectionist detailing and most customers won't and don't understand the dilemma or how much work is involved.


:)
 
Reality is, it's easier to control and manage smaller pads whether they be foam or wool so I've made the switch to a 7.5 Wool Cutting pad with a flexible backing plate. Nice combo.

For this 1949 Sedan Delivery, after removing the tape I lightly polished using a 3.5" foam polishing pad with the Optimum Finish.

You could also work these areas by hand. It's a pain and it's also called perfectionist detailing and most customers won't and don't understand the dilemma or how much work is involved.


:)

I agree with smaller being easier to control. I recently got the 3401...and using a 7" Megs 2.0 was a bit of a hand full in certain areas...especially smaller areas...so i can imagine it would be even more difficult with a full blown rotary. I was comfortable with the 5.5" Hydro tech pads and got some really great results doing some edges with them where i had a little room to work with.

So for the very edges you can for the most part skip over compounding (unless dealing with heavy oxidation?) and just do a finishing polish on those taped edges?

I know it's a pain...and i also know that customers don't really understand the hassle and work and time it takes....but I still know those spots are there if I don't do them...so I feel obligated to MYSELF if no one else...to do them. Like the Highboy link you sent...i know those bars on the bottom, especially the back side of them...had to be one of the, if not THE most difficult spot(s) to do...and yet chances are almost no one will ever see them or know the difference....but you do em anyway :dblthumb2:

One more thing i'm curious about...is what type of pressure (if any) do you use when you are using a rotary...and does the amount of pressure you use change when using a wool or a foam pad. I'm assuming that the smaller the pad the less the pressure but I could use some info on that portion of using a rotary also.:props:
 
So for the very edges you can for the most part skip over compounding (unless dealing with heavy oxidation?) and just do a finishing polish on those taped edges?

You do what you have to do. If you promised to do perfectionist detailing then you do what you have to do to get the results you promised.

I didn't promise to do perfectionist detailing so I just polished away my tape-lines and restore the same gloss to a strip of paint about 1/8th of an inch on the trailing edge of the hood. Standing 2-3 feet away, (that's close, not far), it looks GREAT!

Put you nose down on that tiny little strip of paint and it's not as perfect as the rest of the entire vehicle.

I put the entire body through perfectionist buffing, every square inch of paint received the same amount of time and attention, that is compounding, polishing and then jewelling plus coated with Opti-Coat II

I would guess I have about 16 hours into the project spread out over 3 days, a little Friday night, a little Sunday afternoon and the majority of machine buffing and finishing on Monday.

So you do what you have to do and that goes back to what did you promise.


I know it's a pain...and i also know that customers don't really understand the hassle and work and time it takes....but I still know those spots are there if I don't do them...so I feel obligated to MYSELF if no one else...to do them. Like the Highboy link you sent...i know those bars on the bottom, especially the back side of them...had to be one of the, if not THE most difficult spot(s) to do...and yet chances are almost no one will ever see them or know the difference....but you do em anyway

I call it... if it has paint... it gets polished...

The pictures you don't see and won't see are the ones where I was laying on my side taking the rotary buffer to the bottom curves of the rear fenders...

One more thing i'm curious about...is what type of pressure (if any) do you use when you are using a rotary...and does the amount of pressure you use change when using a wool or a foam pad. I'm assuming that the smaller the pad the less the pressure but I could use some info on that portion of using a rotary also.:props:


That's a great question and I could probably type a few paragraphs on the topic but the nutshell version is,

When using a compound to remove deep paint defects you're going to use some firm pressure to start with but not get the paint hot. Then reduce your pressure as you finish out the buffing cycle.

Product lubricity and buffing cycle are HUGE factors and the affect everything including aggressiveness and non-aggressiveness of a product and process.

To play it safe, always practice on something nobody cares about...


:)
 
Mike, I have been reading your articles for about 7 years now and they never get old. I always seem to learn something new. Keep them coming, and I'll keep learning, one day I might be able to call myself a professional.
 
how did you like the new optimum products you used mike?
 
So Mike,

hopefully with the testing of the LC constant pressure pads we may see them in the AG line up some time soon?

I have been using them for 3 years now and prefer them over any other I have used. But what is your thoughts on them. and is this your first experience with them?
 
Mike, I have been reading your articles for about 7 years now and they never get old. I always seem to learn something new. Keep them coming, and I'll keep learning, one day I might be able to call myself a professional.

Gosh Mark... thanks for the kind words...


how did you like the new optimum products you used mike?

Really liked them. I have some feedback to Dr. David Ghodoussi already. All have a good buffing cycle and easy wipe off with excellent results.

I found the compound to wipe off easiest if you wiped it off immediately, so set your polisher down and wipe the residue off and it wipe off easy. Wait a little while and it can be a little harder to wipe off but still not bad.

I only used foam pads with all three products so I still need to do some cutting with the compound and wool pads but we'll have a chance to do this during this Sunday's Advanced Class as I usually have out 5 different brands for use with the rotary buffer and Optimum will be one of them.

The other two products worked very well, both finish out leaving a super clear, high gloss finish and while a lot of people might not understand, clarity is a top goal when working on clear coat paints. You need the clear coat clear in order to see the color coat under it and gloss comes from smoothness, so one of the primary goals of any machine buffing is to create smoothness and both products left a clear, high gloss finish, so they're reaching these two goals.


So Mike,

hopefully with the testing of the LC constant pressure pads we may see them in the AG line up some time soon?

I have been using them for 3 years now and prefer them over any other I have used. But what is your thoughts on them. and is this your first experience with them?

Yes, this was the first time I've used them and "yes" I like them very much. I tend to always use a flexible foam backing plate when using a rotary buffer, like these,

Flexible Backing Plates for Rotary Buffers


But to test these products out I used some backing plates from Lake Country that are flexible, but not with a foam core like shown in the above thread. I thought that using a foam core, flexible backing place would skew my experience.

I do have some feedback for improvements that I'll pass on to Eric Dunn


:)
 
Back
Top