DFB's Garage

Can you help Bill so I don't have to go down to Florida? Not that I'll get another chance to work in a garage as nice as his, plus maybe he'll put me up and feed me Floridese food.

I'll happily share repair info with anyone who PM's.

As far as popping by to lend a wrench, unfortunately FL's a bit of a hike from MN, and I'm short on vacation time...
 
Fortunately with my current cars,doing an oil change is no problem. Don't have to worry about a new car for some time yet.
 
Something that I have had done a few times now, but never done by me, replacing the drive gears and pawls on my beloved Rover ProCut 560.

These are a wear item that need to be maintained, either by periodic cleaning and lubrication or via total replacement. The symptoms that something is not right include one wheel driving rather than two, excessive noise and the wheels locking up in forward or reverse. All present on my unit.

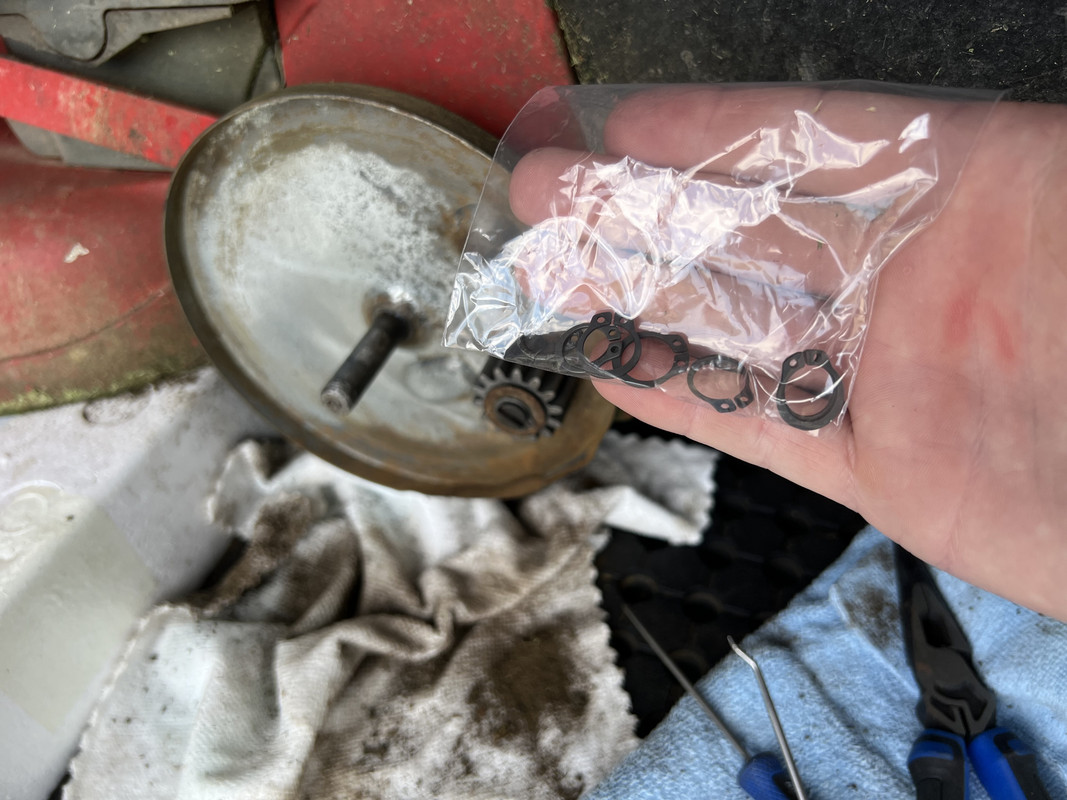
With nearly all Rover spare parts gone for the ProCut models, I was lucky to score two sets of cogs and pawls from an online retailer. Mine arrived loose rather than in the Rover packaging.

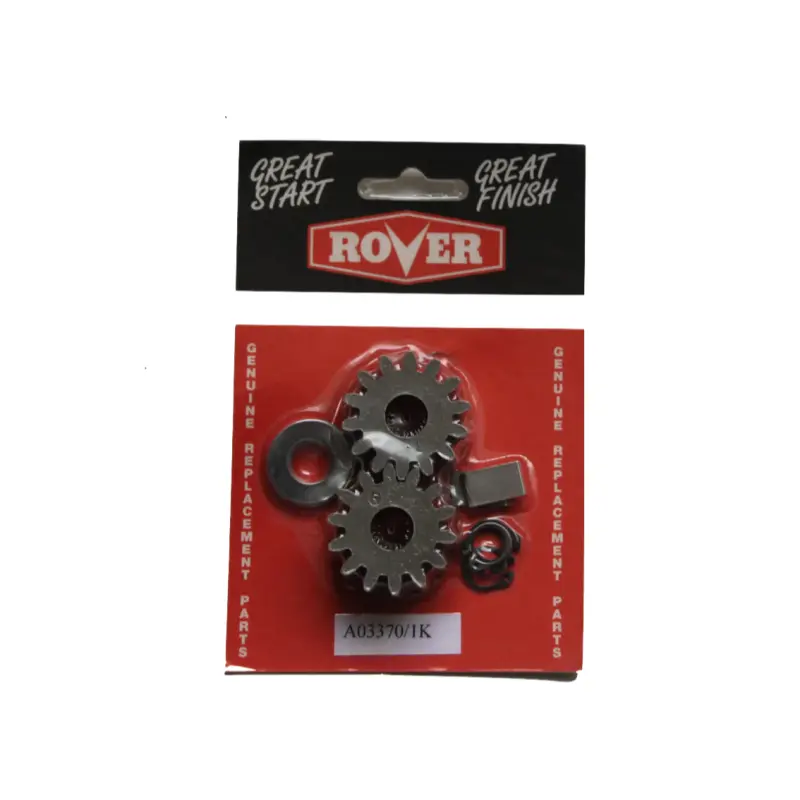
Rover Self-Propelled Pinion Gear Kit A03370/1K
– Power Mowers


The process for replacement is not all that hard, especially after you watch a video of someone else doing it, apparently in in under 3 minutes...............


I say "apparently" because I broke the tiny circlip that retains the cog assembly on the driveshaft. :doh: I should say, it came off easy enough, but putting it back on without the correct tool meant I snapped the 10 year old circlip. A trip down to the local bearing store had me sorted in no time, along with the CORRECT circlip pliers to get the job done properly.


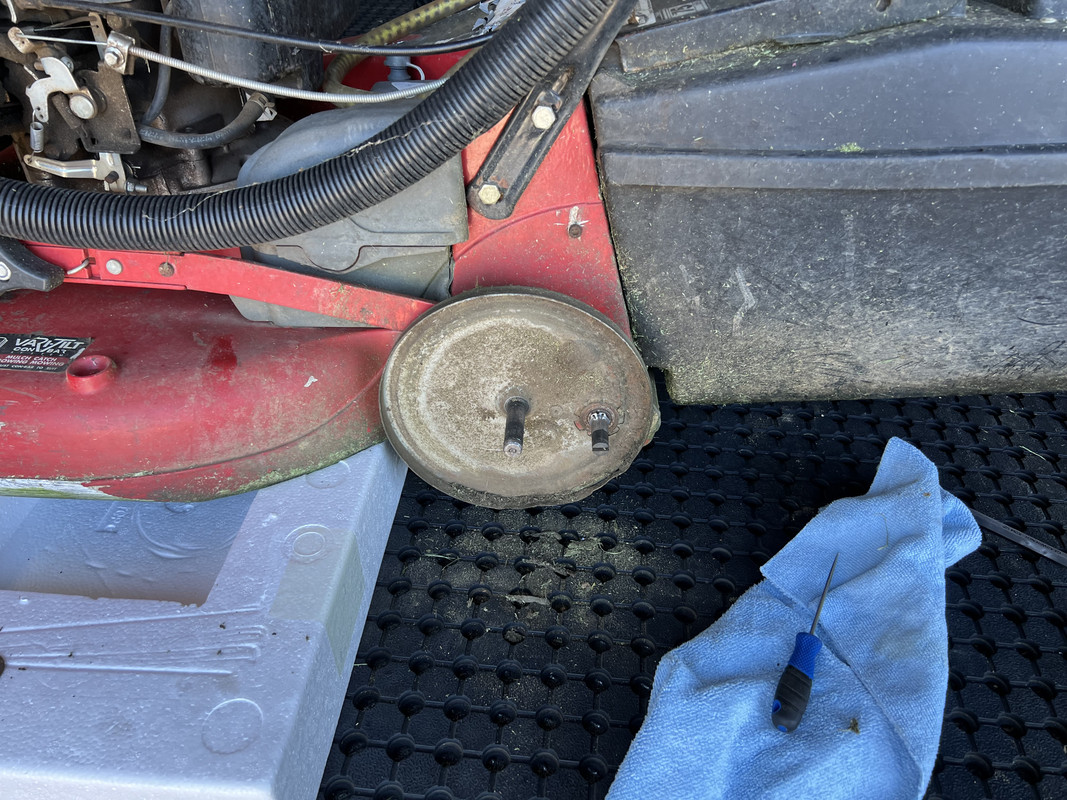
Anyway, first you must remove the hub cap, then remove the press fit wheel retaining washer. The wheel then slides away from the axle.


You then remove that bloody circlip, slide the washer, cog and pawl away from the driveshaft. Each side has it's own cog, with L or R stamped on the reverse side.


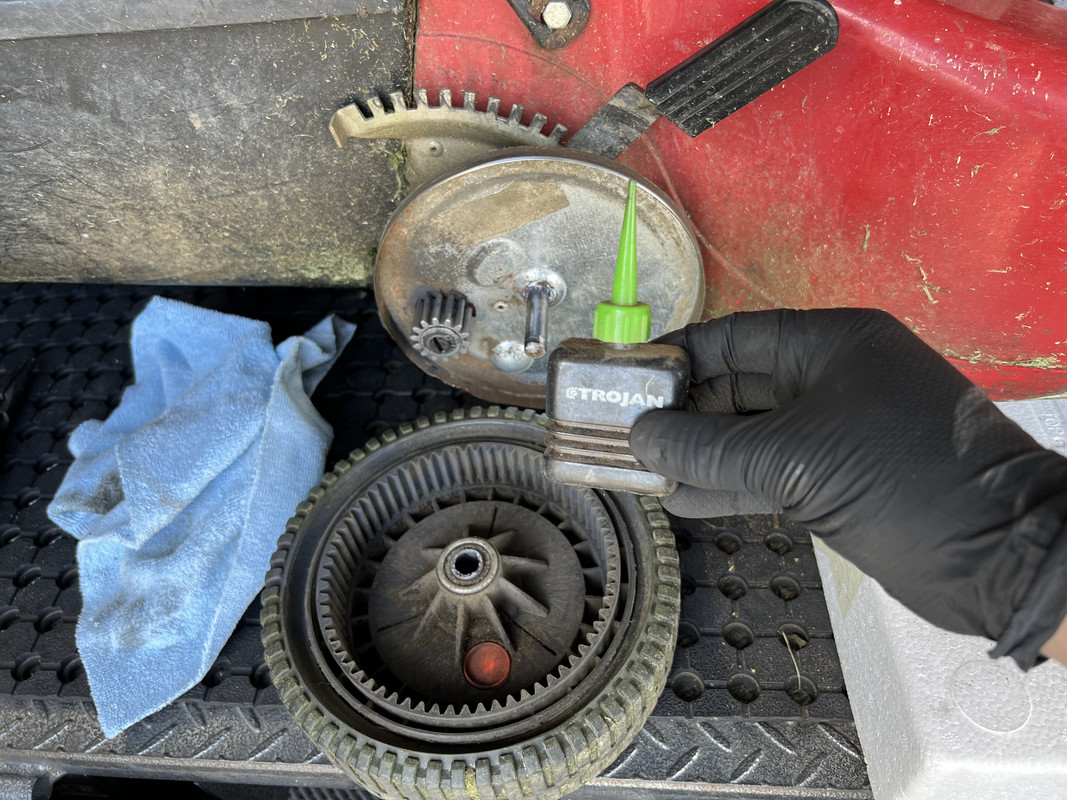
After cleaning each component, in particular the groves on the wheel, I put a small amount of marine grade grease on the axle and driveshaft. The cog then slides back on, the pawl inserted in the driveshaft slot, washer and circlip reinstalled.

Before sliding the wheel back in place and securing with a new press fit washer, I applied graphite powder to the wheel and cog. You aren't supposed to use a liquid lubricant on these, over time the oil mixes with dust and debris and thus turns into liquid sandpaper. The graphite is the dry substitute.


Only the left-hand side was not driving, which is no wonder considering how much grass and dirt was in there, but I also replaced the right-hand side parts too.

With both sides done, a quick test revealed a successful result, no more single pegger! An oil change, and the Rover is back in action.

But, I have a problem. After 10 years of hard use, the pressed steel cover that limits the amount of debris entering the wheel assembly has worn through and is letting dust and grass to enter the drive cogs and wheel.


And of course, the part is NLA in Australia. I have found it in the UK as a POA part. Now waiting to see if I can get two replacements. Naturally, these parts don't affect the operation of the drive system, but they do prolong the working life of the parts in question.

https://www.powertoolspares.com/rover/pro-cut-560.m/rov00030/spares


Here's hoping I get lucky and score another set of covers. It does mean removing the wheel and drive cogs again though.
 
Nice job!

Thanks for sharing, I learned a bit.

Good luck with the covers.
 
Wash day for both the Jaguar and Ranger.

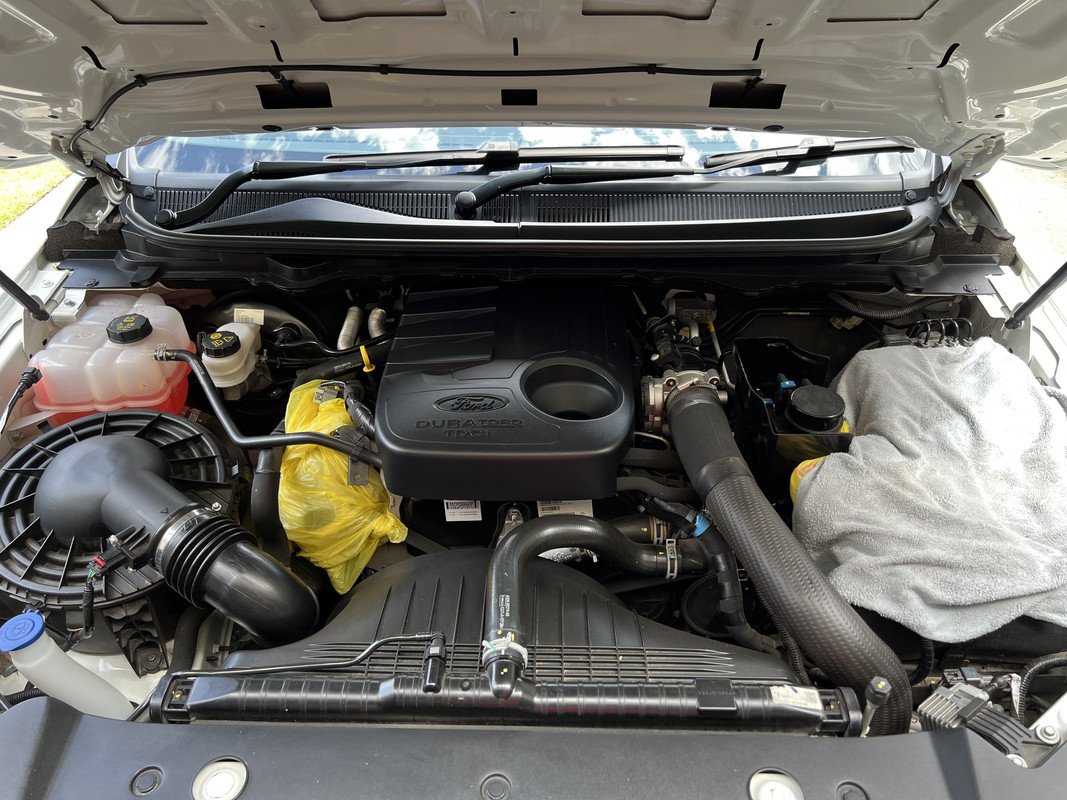
The Ranger was first, and finally following up with my intention of doing an engine bay clean. I had a few people ask me how to do this, so here goes.........

You probably don't need to, but where possible I like to cover the battery, fuse box and alternator with a plastic bag. I find a saturated towel helps weigh down the bag and prevent it from being blasted off with the pressure washer.


My engine bay was not terrible, but I needed the assistance of running water and chemical to get into places a towel and detail spray couldn't access. After an initial rinse, I applied APC to the whole engine bay. If the underside of the hood is dirty, apply it here too.


Then with a couple of different brushes, scrub and agitate wherever you can reach.


After that, rinse thoroughly. The main thing to be mindful of with this is to keep the nozzle or hose moving. After the rinse, I liberally applied Meguiar's Hyper Dressing at 5:1. I have access to an undiluted bottle of Hyper Dressing, but if you have the RTU bottle, you will need to dilute that further as the 1:1 ratio is too rich for this job.


At this point, you can close the hood and walk away. In my case, I hit the engine bay with my blower to further distribute the Hyper Dressing and speed up the drying. However, because Hyper Dressing is self-leveling, this step is not always required. I should also point out that you want to do this process BEFORE washing the rest of the car, you will manage to get some APC and dressing residue onto the surrounding paint, which the wash will sort out.

After that, the wheels and tyres were cleaned with Brake Buster, the paint with the delightful Opti-Coat M-Wash, the drying aid a throw back to my past, Meguiar's Last Touch. Interior was vacuumed and given a wipe down with KCx ASC, tyres dressed with NV Onyx..........still love that stuff.

With the Jaguar sitting in storage uncovered for a while now, it swapped places with the XR6 and was in desperate need for a wash. In this case, the wheels and tyres again sorted with Brake Buster, the exterior washed with the Halloween Edition of NV Snow..........which is exactly the same as the normal version in every way, including scent. :rolleyes: Drying aid here was P&S Paint Gloss, tyres dressed with Angelwax Elixir.

During the drying process, I noticed the front number plate protector was shattered. I had a replacement in stock, so got it swapped out, in the process ridding the car of the dealer propaganda version. What I initially thought was a rock strike, removal revealed that the plate was dinted underneath, so I suspect someone nudged into it while parked down town. :(
 
I hadn't thought of using a wet towel to hold the plastic bag on the fuse box and alternator, makes sense though, but the last couple of times I cleaned the FJs engine bay I didn't cover them at all. I figure the way water gets everywhere when I go off roading without any effect, they must be protected reasonably well.

Annoying about the number plate and cover, but it could have been a lot worse. When I had my blue Commodore I had a fist sized rock smack into the front bumper at speed on a freeway. I watched it fall off the coupling between a tipper truck and the dog, I tried to dodge it but couldn't. If only I'd driven straight, it would have hit the number plate, no way to guess that though. I caught up to the truck and got the name on the side, and got the drivers attention, blasted the horn and waved, but he wasn't stopping. They actually paid to fix it, it does help to be polite, sometimes.


Sent from my motorola edge 20 fusion using Tapatalk
 
I hadn't thought of using a wet towel to hold the plastic bag on the fuse box and alternator, makes sense though, but the last couple of times I cleaned the FJs engine bay I didn't cover them at all. I figure the way water gets everywhere when I go off roading without any effect, they must be protected reasonably well.

Sent from my motorola edge 20 fusion using Tapatalk

I find a lot of people tend to forget that aspect when shouting at me about pointing a hose at an engine bay, completely forgetting the engine bays on most cars are not completely sealed from the environment, be that from underneath or through the grill openings. Granted, water from a wet road or rain filtering through the grill is different to pointing a hose directly at an engine bay, hence covering certain components and keeping the stream of water moving.

It's also very engine bay dependent. Some are completely exposed, in particular my XR6 (the black plastic coil cover is particularly prone to moisture intrusion on this engine) or Ranger, some have large engine covers that generally shield most of the engine bay, Jaguar and Range Rover.


I swear sometimes the FJs engine bay looks like I've sprayed it with a foam cannon filled with muddy water, even on the underside of the hood, I guess that's why they didn't bother with an under hood insulation pad.

I don't even drive crazy in mud puddles, I'm too worried about hidden rocks or holes under the water. Slow and steady gets you to the other side, and home again. The below shot is from May last year.
07da412f48c27c79ae1b1c2ef4b459e5.jpg


Sent from my motorola edge 20 fusion using Tapatalk
 
After hours of trawling, I'm not sure what to do with these. The only vendor listing these for "possible" sale advised me they are NLA, and I bet they wont even bother changing the part listing to reflect that.


I have also sent emails to a couple of places selling used parts, but of course, no one has responded. How, in this day and age, can a business attempting to sell products NOT answer emails despite advertising an email address or having an enquiry portal on their own website. I just don't get it. I guess I could call, but frankly, I can type my question quicker and with more clarity than playing that game. It's not 1985 anymore! :dunno:

Anyway, I'm wondering if I can hammer them back as best I can and use some sort of filler or have them brazed. Or keep an eye out for a donor unit to steal parts from.
 
Saran wrap, masking tape, and aluminum foil is an alternative to a plastic bag, as mentioned in some long ago threads here and maybe elsewhere.
 
For something like that part, without looking at the OPE machine in question, which may be NOS sort of situation...
Sometimes u might need to be a like-kind machine to use a a parts donor
 
After hours of trawling, I'm not sure what to do with these. The only vendor listing these for "possible" sale advised me they are NLA, and I bet they wont even bother changing the part listing to reflect that.


I have also sent emails to a couple of places selling used parts, but of course, no one has responded. How, in this day and age, can a business attempting to sell products NOT answer emails despite advertising an email address or having an enquiry portal on their own website. I just don't get it. I guess I could call, but frankly, I can type my question quicker and with more clarity than playing that game. It's not 1985 anymore! :dunno:

Anyway, I'm wondering if I can hammer them back as best I can and use some sort of filler or have them brazed. Or keep an eye out for a donor unit to steal parts from.

Looks like I found a set of these!! Im the MAN
 
Holiday Project 1 – Project Outback

Yes, its that time of the year again, my annual staycation! Now, it's questionable if this project constitutes being on holidays, but trust me, it's a long and political story, let's leave it at that.

This Subaru Outback with just over 30,000 km (19,000 miles) on the clock arrived today for the DFB treatment. Finished in Twilight Blue, this is the third flat-6 Outback for the new owners. The goal was to hit the reset button and get it protected.

Sadly, Subaru no longer make this engine, which was replaced with the characterless 2.4-liter turbocharged flat-4 at the last update. Unlike the previous flat-6 Outback's, which were teamed with 5-speed automatic transmission, the last 3.6 engines were paired with a CVT. I didn't get a chance to drive this car, but it sounded suitably throaty with a few revs.


The car presented well initially, but certainly had some love marks and dings owing to it being an ex-federal police vehicle. It was an early 7.30 am start and there was a lot to do.

Engine Bay Detail –

Having taken delivery last week, the engine bay was not at all bad, even so I decided to give it a quick once over.


My usual process, liberal amounts of APC teamed with some EZ-Detail brushes, a rinse and the application of a dressing. Today, I chose KCx Motorplast. I've tried to like this stuff, but it smells weird and simply doesn't produce the same look that Megs Hyper Dressing achieves.


Wheels and Tyres -

Thankfully, these wheels cleaned up very nicely with minimal working. Today, I started by pretreating the wheels with NV Purge, I then scrubbed the tyres and arches with Shine Supply Wise Guy. After a rinse, I reapplied both chemicals, re-scrubbed the tyres and contact washed the wheels. An application of Gyeon Wet Coat and the wheels were done.


Dare say the tyres have never been cleaned...........


Washing and Decontamination -

Having done this numerous times now, I have an effective process in place to get the paint squeaky clean and ready for polishing and coating.

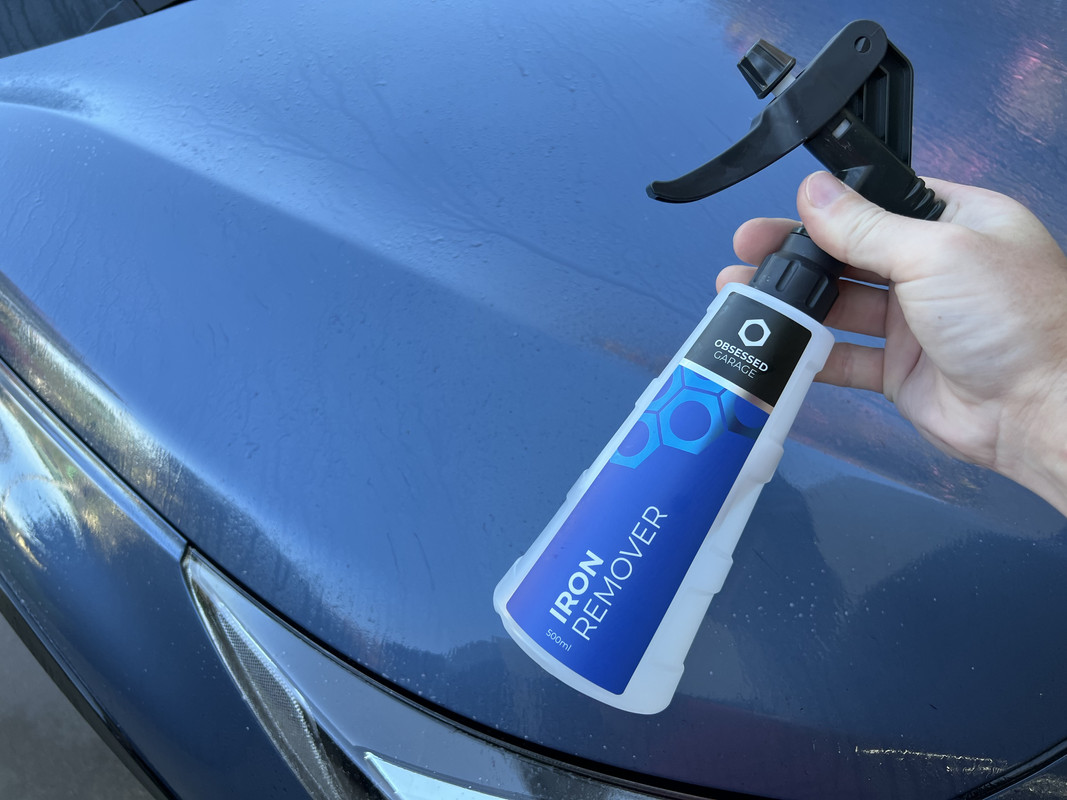
1. Iron remover application, to dry paint and allowed to dwell for as long as possible.


2. Foamed with Carpro Lift.


3. Thorough rinse.

4. Foamed with Carpro Descale, contact wash.

5. Rinse.

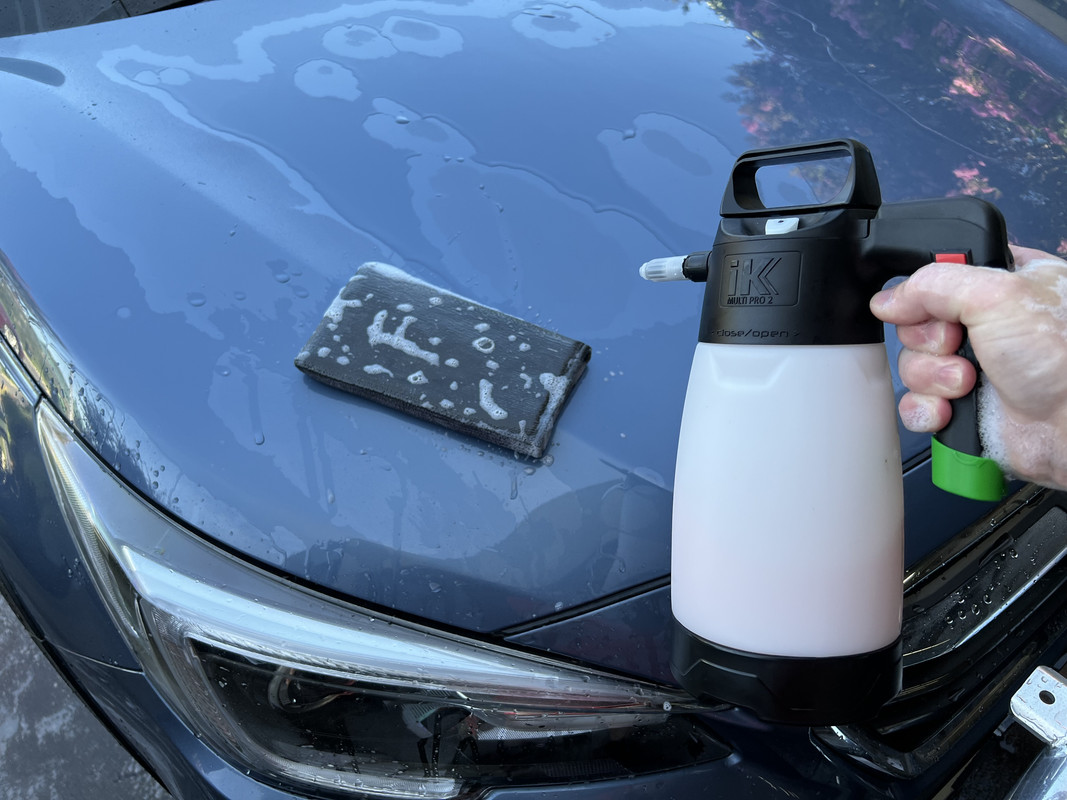
6. Paint inspection, contamination still felt, clay treatment followed using a clay mitt and Megs Final Inspection (using an iK sprayer is the way to apply clay lube, you will blow through lots of product but is vastly more effective).


7. Rinse.

8. Dry the car.

Prep and Polishing -

With the car clean, it was then inspected for condition. During the wash, it became clear this car would definitely need to be polished prior to coating. The hood was the worst, clearly washed with a pay-n-spray brush, and there were numerous random scratches to varying severity.

In this case, I initially trialed Carpro Reflect on a blue Shine Mate pad and was left wanting. Considering this is Japanese paint, I thought maybe that would be enough. I then switched to Rupes DA Fine and the yellow Shine Mate pad and while better, I needed more. I then tried the Rupes yellow wool, teamed with the same DA Fine and that became the winning combination. That pad is my new favorite by the way! For this car, I used the 3- and 5-inch Shine Mate machines, the iBrid Nano the support act.


After finishing the paint, I then went over the chrome nudge bar with Mother's metal polish.

While I successfully chased a couple of deeper scratches, some were through the clear. Sometimes you need to know when to call it good, and considering the gloss and level of correction I achieved, I'm happy with the result.

After polishing, I attended to some polish staining on the roof rails and black trim, likely inflicted by the dealer in preparation for sale. For this, I used a small nylon brush and the now discontinued Meguiar's M39.

After a generous wipe down with Carpro Eraser, I followed up with a final wipe using Rupes Reveal Strong, which is extremely effective for this final moment before coating. Just don't apply Reveal Strong to the paint directly, it's too potent for that.

Paint and Glass Protection –

Once again, I'm using Gyeon Can Coat EVO, and a fresh bottle no less. The paint and lights were treated with Can Coat, as was the sunroof and roof rails. While I know Can Coat works well on black plastic, I have moved away from ceramic coating those surfaces. Instead, they were treated, along with the rest of the paint, with Gyeon Cure. With rain due tomorrow, the Gyeon Cure helps protect the coating in its first 12 hours from moisture, along with a variety of contaminants as the coating fully cures in the following 14-days.

While Can Coat works on glass too, I really like Gyeon Quick View for that role.


Interior Cleaning and Protection –

The interior was in excellent shape and only required a quick vacuum, a wipe down with Carpro InnerQD and glass cleaned. While the leather looked fine, it was oily to the touch, so it was cleaned with KCx Pol Star and then treated with NV Nourish. A few spritzes with Angelwax Bliss and the interior was done.

Finishing Touches –

The last steps in a detail like this are about quality control and the finishing touches. The tyres were treated with Carpro Perl, the engine bay given a final wipe over, the door jambs touched up. I noted and attended to a couple of smudges on the glass, along with three isolated high spots. With Can Coat, you simply wipe the high spot with some additional product, then wipe to level it down, problem sorted.

Final Result -

The transformation on this car was not dramatic, rather a finessed enhancement. While it looks great in the images, the colour tone and subtle metallic of Twilight Blue means this is not a rewarding colour to detail. It just doesn't POP. And I guess that's a Subaru thing, they are practical cars for practical people. Flashy styling and vibrant colours don't really fit that theme.


Hopefully the owner appreciates all the "extras" that went into this detail, looks great Deyon

Sent from my SM-G991U using Tapatalk
 
Hopefully the owner appreciates all the "extras" that went into this detail, looks great Deyon

Sent from my SM-G991U using Tapatalk

I do too, they are serial criticizers.
 
Holiday Project 2 – Project Outback Take Two

The follow up to yesterday's job, this 2012 Subaru Outback arrives for a pre-sale detail. I washed this vehicle a few years ago, which was about giving it a refresh, today, I’m preparing it for sale. This Outback also features the 3.6 flat-6 engine and has over 275,000 km (170,000 miles) on the clock. The plan was for a full exterior decontamination, paint enhancement and an interior cleanup.
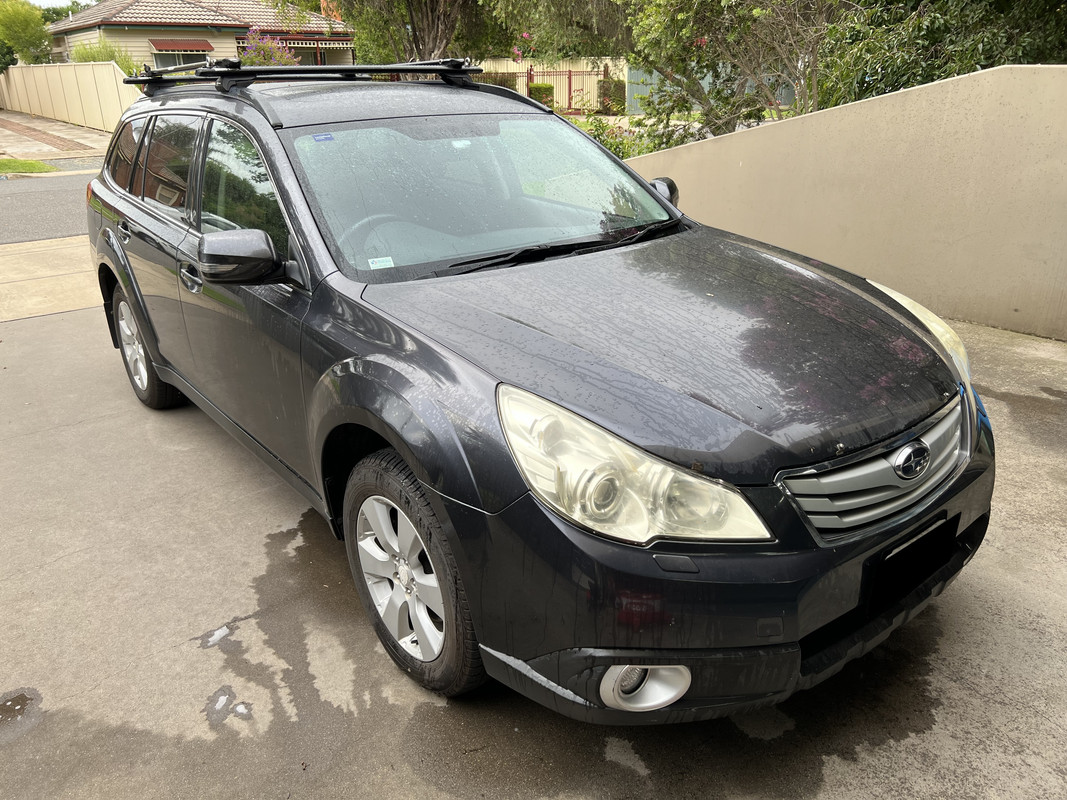


The headlights were appallingly bad, heavily oxidized and crazed. This model of Subaru seems particularly prone to this.


Exterior Cleaning and Decontamination –

As I did yesterday, the first step was an engine bay clean and dressing with Motorplast.

Wheels were next, tackled with the assistance of NV Purge, Turtle Wax Alphabet Soup Wheel and Tyre cleaner, and treated with Gyeon Wet Coat.


While I'm harsh on the Turtle Wax, this product is supremely capable. With how potent it is, I'm surprised they sell this as a retail product to be honest. I still hate the smell though!

Iron remover, Carpro Lift, Carpro Descale and a clay treatment addressed the decontamination. The door jambs were also sprayed out to remove a build up of dust. I then used the blower and a towel to dry the paint, ready for the next steps.


I had to look this up from last time, but as suspected, I didn't use an iron remover. I doubt this car has ever been treated with such a product, if the car was a lighter colour, it would have made for a stunning photo.


I also want to highlight how magical the feel of a clay towel is in transforming paint from rough to smooth. It's such a tactile thing, you start off feeling the paint resist your efforts, as you work through it, the paint suddenly becomes smooth and slick underneath the towel. You may not feel this on a well-maintained car, but on a vehicle like this, it's a night and day transformation.

Paint Enhancement and Protection –

The first step here was the headlights, I couldn't bear to look at them like that any longer, you can actually see the yellow showing through under all that foamy soap!

As you can see, the headlights on this vehicle are trashed. They were last time too, but an extra three years on the road have taken its toll. These lamps need wet sanding and re-coating, but I didn’t want to go that deep. Instead, I used Sonax Cutmax and the Rupes blue wool on my 3-inch machine, two sets of passes. That's about as far as I can go without the above-mentioned wet sanding.

They are far from perfect, but they look better and more presentable to buyers.


On a car of this age and milage, the potential sale price doesn’t warrant spending hours and hours polishing the paint to perfection. As such, the goal is to add a tonne of gloss and slickness rather than attempting a high-end paint correction, something a potential buyer would unlikely appreciate or notice. For this car, I wanted to try something that has been on my radar for a while.

Rupes UNO Protect is considered an All-In-One product that polishes and protects in one single step. These products have existed for decades, and UNO Protect has been on the market for a while now. There are actually two versions of UNO Protect, the original that offers about 3 months protection, and the newer UNO Advanced with up to 12 months protection. The original contains a synthetic polymer sealant, the latest replacing that with an Si02 protectant. Both have the ability to provide correction (pad dependent) and minor filling abilities. For this project I have decided on the original, which I will explain shortly.

https://www.autogeek.net/rupes-uno-protect.html
https://www.autogeek.net/rupes-uno-advance.html

UNO Protect can be used on both rotary and dual action machines, and teamed with variety of different pad choices, meaning you can tailor the cutting ability to suit your requirements. Today, I am again using the Rupes yellow wool, which will provide some additional cutting performance while also finishing down nicely.


UNO Protect is used a bit differently than traditional polishes and compounds in that you polish the entire car at once without wiping off the residue as you finish each section. This is to allow the sealant within the compound to set up and cure. By the time you have worked your way around the car, its then time to buff the residue. Important to note that I did all of that with a 5-inch machine, with UNO Protect not staining plastic and rubber trim, you don't need to be as precious with pad sizes and taping. As you can see, I also went over the glass.


And this is where using the original version of UNO Protect comes into the story……………..

Instead of simply wiping the residue, the trick is to use P&S Bead Maker as a wiping aid. For whatever reason, this combination of UNO Protect and Bead Maker works extremely well together, the Bead Maker bonding to the UNO Protect polymers to create an ultra-slick and ultra glossy finish. Working panel by panel, spray a generous amount of Bead Maker over the top of UNO Protect, and then begin wiping. The Bead Maker aids the removal of UNO Protect, but also enhances it in the process.


The above is a proven winner for detailers looking to maximize their efficiency while delivering a marked enhancement to the paint. And so that proved here!

Is the paint perfect. Absolutely not! There paint on this car is trashed, with a mirid of hard water spots, etchings, the beginnings of clear coat failure and full of scratches, some through the clear. Could I have gone harder, perhaps Cutmax on the same wool pad? Absolutely, but at what cost? That clearcoat was thin and I could have very well blown through it in multiple locations and made the situation worse. At least I glossed it up and made it look presentable.

Interior Detailing –

Once again, its all about vacuuming, annoyingly Subaru carpet is one of the worst on the market. Thankfully, the investment I made in vacuum attachments proved valuable today, especially the turbo-head carpet tool.

Following that hour-long ordeal, the interior was wiped down with either P&S Swift or Express, I then used Leather Love teamed with a VLB brush, glass was attended to with P&S True Vue. That might sound simplistic, but with this car not maintained outside of the occasional vac, every little nook and cranny needed attention. That adds up.

Again, no interior shots today, except for leather cleaning and protecting, I hate doing interiors. I wanted it done!

Exterior Finishing Touches –

Thankfully, this model of Outback didn’t have as much black plastic cladding, meaning I had less to revive with Mothers Back to Black.

Once again, Carpro Perl went on the tyres, and the wheel arches were sprayed with P&S Shape Up to freshen them up.

After giving the car a final wipe down with Clean Maker, I went to reattach the bloody bonnet protector. (I used to believe in these stupid things but the longer they are on the car, the more damage they inflict than the occasional rock chip they are apparently there to prevent. The adhesive tape they use to protect the paint during installation ALWAYS breaks down and leaves the attachment clips to wear down the paint. That means you simply can't take them off and leave them off, unless you want to look at rusty bare patches on your bonnet.) With how degraded the bonnet protector looked against the shiny paint, I whipped out the Perfect Finish on the Nano and gave it a very quick polish. Again, not a concourse restoration, but at least it didn't stick out so much.

Final Result -


A final inspection of the engine bay revealed the intake manifold breather hose was not connected! I was actually concerned that I had dislodged it while cleaning, but I zoomed in on the before shot and it was missing then too. Clearly this didn't prevent the car from running, but I pushed it back in place nonetheless. Very odd. I also note this car is missing the engine cover too.


A roadworthy and the car will be sale shortly.

I can say that my actual holidays can start now! :props: Although I'm buggered from the last two days. :( I had plans to start ceramic coating and installing the new wheels on the Ranger, but I think I'll delay that till next week. Or maybe not............................

I also REALLY want to drive my cars! All have been hiding under covers and for far too long. :doh:
 
Surely will command top price at its sale now

Sent from my SM-G991U using Tapatalk
 
Wow, you Aussies sure are heavy into solar, seems 100% of Australian AGO members have solar.
 
No energy today, even the run into town was an exercise in frustration.

The day before a public holiday everyone seems to be in a rush to get everywhere. Well, apart from the moron in a Tarago who decided to stop in the middle of town with one wheel in a park...........for no reason whatsoever, they just blocked the flow of traffic, then pulled back out and did the same thing two parks ahead.

I then went to Officeworks to get some overpriced ink stored in a black plastic case, you know, printer ink. Big mistake, the place was packed with desperate parents stocking up for the back to school rush next week. And another display of people's inability to move into and out of a parking spot.

I then spent 5 minutes trying to get onto the street that my bank is on. I know that is nothing compared to what people living in cities have to deal with, but in the country, NOT ACCEPTABLE! In a stroke of luck, I got a park right in front of the bank...........then stood waiting while George tried to remember his banking passwords, and Hooty-McBoob withdrew $100 in $5 notes.

The last stop was to the toy store, sorry, tool store to spend some Christmas Gift Vouchers. I wanted to treat myself to the Milwaukee M18 Surge Impact Driver, but they had none on the shelf. In fact, they only had 2 of any sort available. How is that a thing? Small country town problems. Anyway, I settled on a M18 Inflator Skin instead..............


Milwaukee make both M12 and M18 inflators, but I went with the bigger unit. What pleases me most is how nicely its designed, with three additional inflator attachments, including a Presta bike adaptor. The hose also winds up on the back of the unit, with the valve snicking into place to keep it neat.

Once attached to the tyre valve, the unit reads the current pressure, you then select the desired pressure and press the inflate button. The only drawback is how noisy it is when in operation.


I like how portable and convenient this will be compared to firing up the compressor, winding out the hose and navigating it around the garage, then putting it all away again. This inflator solves all of that, just take it out of the cabinet, attach a battery, hook it up to the tyre and your off.
 
Holiday Project 1 – Project Outback

Yes, its that time of the year again, my annual staycation! Now, it's questionable if this project constitutes being on holidays, but trust me, it's a long and political story, let's leave it at that.

This Subaru Outback with just over 30,000 km (19,000 miles) on the clock arrived today for the DFB treatment. Finished in Twilight Blue, this is the third flat-6 Outback for the new owners. The goal was to hit the reset button and get it protected.

Sadly, Subaru no longer make this engine, which was replaced with the characterless 2.4-liter turbocharged flat-4 at the last update. Unlike the previous flat-6 Outback's, which were teamed with 5-speed automatic transmission, the last 3.6 engines were paired with a CVT. I didn't get a chance to drive this car, but it sounded suitably throaty with a few revs.


The car presented well initially, but certainly had some love marks and dings owing to it being an ex-federal police vehicle. It was an early 7.30 am start and there was a lot to do.

Engine Bay Detail –

Having taken delivery last week, the engine bay was not at all bad, even so I decided to give it a quick once over.


My usual process, liberal amounts of APC teamed with some EZ-Detail brushes, a rinse and the application of a dressing. Today, I chose KCx Motorplast. I've tried to like this stuff, but it smells weird and simply doesn't produce the same look that Megs Hyper Dressing achieves.


Wheels and Tyres -

Thankfully, these wheels cleaned up very nicely with minimal working. Today, I started by pretreating the wheels with NV Purge, I then scrubbed the tyres and arches with Shine Supply Wise Guy. After a rinse, I reapplied both chemicals, re-scrubbed the tyres and contact washed the wheels. An application of Gyeon Wet Coat and the wheels were done.


Dare say the tyres have never been cleaned...........


Washing and Decontamination -

Having done this numerous times now, I have an effective process in place to get the paint squeaky clean and ready for polishing and coating.

1. Iron remover application, to dry paint and allowed to dwell for as long as possible.


2. Foamed with Carpro Lift.


3. Thorough rinse.

4. Foamed with Carpro Descale, contact wash.

5. Rinse.

6. Paint inspection, contamination still felt, clay treatment followed using a clay mitt and Megs Final Inspection (using an iK sprayer is the way to apply clay lube, you will blow through lots of product but is vastly more effective).


7. Rinse.

8. Dry the car.

Prep and Polishing -

With the car clean, it was then inspected for condition. During the wash, it became clear this car would definitely need to be polished prior to coating. The hood was the worst, clearly washed with a pay-n-spray brush, and there were numerous random scratches to varying severity.

In this case, I initially trialed Carpro Reflect on a blue Shine Mate pad and was left wanting. Considering this is Japanese paint, I thought maybe that would be enough. I then switched to Rupes DA Fine and the yellow Shine Mate pad and while better, I needed more. I then tried the Rupes yellow wool, teamed with the same DA Fine and that became the winning combination. That pad is my new favorite by the way! For this car, I used the 3- and 5-inch Shine Mate machines, the iBrid Nano the support act.


After finishing the paint, I then went over the chrome nudge bar with Mother's metal polish.

While I successfully chased a couple of deeper scratches, some were through the clear. Sometimes you need to know when to call it good, and considering the gloss and level of correction I achieved, I'm happy with the result.

After polishing, I attended to some polish staining on the roof rails and black trim, likely inflicted by the dealer in preparation for sale. For this, I used a small nylon brush and the now discontinued Meguiar's M39.

After a generous wipe down with Carpro Eraser, I followed up with a final wipe using Rupes Reveal Strong, which is extremely effective for this final moment before coating. Just don't apply Reveal Strong to the paint directly, it's too potent for that.

Paint and Glass Protection –

Once again, I'm using Gyeon Can Coat EVO, and a fresh bottle no less. The paint and lights were treated with Can Coat, as was the sunroof and roof rails. While I know Can Coat works well on black plastic, I have moved away from ceramic coating those surfaces. Instead, they were treated, along with the rest of the paint, with Gyeon Cure. With rain due tomorrow, the Gyeon Cure helps protect the coating in its first 12 hours from moisture, along with a variety of contaminants as the coating fully cures in the following 14-days.

While Can Coat works on glass too, I really like Gyeon Quick View for that role.


Interior Cleaning and Protection –

The interior was in excellent shape and only required a quick vacuum, a wipe down with Carpro InnerQD and glass cleaned. While the leather looked fine, it was oily to the touch, so it was cleaned with KCx Pol Star and then treated with NV Nourish. A few spritzes with Angelwax Bliss and the interior was done.

Finishing Touches –

The last steps in a detail like this are about quality control and the finishing touches. The tyres were treated with Carpro Perl, the engine bay given a final wipe over, the door jambs touched up. I noted and attended to a couple of smudges on the glass, along with three isolated high spots. With Can Coat, you simply wipe the high spot with some additional product, then wipe to level it down, problem sorted.

Final Result -

The transformation on this car was not dramatic, rather a finessed enhancement. While it looks great in the images, the colour tone and subtle metallic of Twilight Blue means this is not a rewarding colour to detail. It just doesn't POP. And I guess that's a Subaru thing, they are practical cars for practical people. Flashy styling and vibrant colours don't really fit that theme.


Just bought same cart! Mine is still in box. Was it difficult to put together??
 
Back
Top